Welcome to NUWA-HP60C Depth Camera repository
6. ORB_SLAM2 PCL Mapping
6. ORB_SLAM2 PCL Mapping
Note: This example is implemented on Orin NX, and cannot be implemented on a virtual machine. It only explains how the process is implemented. If you want to implement this function on your own motherboard, you need to compile the entire function package and connect related peripherals and debug.
6. ORB_SLAM2 PCL Mapping6.1, Introduction6.2, Use6.3, Node analysis6.3.1, Display calculation graph6.3.2, pointcloud_mapping node details6.3.3, TF transformation
pcl official website address: http://pointclouds.org
pcl_ros wiki: https://wiki.ros.org/pcl_ros
pcl_ros github: https://github.com/ros-perception/perception_pcl
The operating environment and reference configuration of software and hardware are as follows:
- Reference vehicle: ROSMASTER X3
- Robot hardware configuration: Arm series master control, Silan A1 laser radar, depth camera
- Robot system: Ubuntu 20.04
- PC virtual machine: Ubuntu (20.04) + ROS2 (Foxy)
- Usage scenario: Use on a relatively clean 2D plane
6.1, Introduction
PCL (The Point Cloud Library) is a large open source project for 2D/3D image and point cloud processing. The PCL framework consists of many advanced algorithms, including filtering, feature estimation, surface reconstruction, registration, model stitching and segmentation. These algorithms have many applications, such as filtering outliers from noisy data, merging multiple sets of 3D point clouds, segmenting related parts of a scene, extracting key points and calculating geometric descriptors for object recognition, creating and visualizing object surfaces using point clouds, and so on. PCL has been successfully compiled and configured on Linux, MacOS, Windows, and Android/iOS platforms. To simplify development, PCL is divided into a series of small code libraries that can be compiled separately.
Basic concepts of the point cloud library and the PCL interface of ROS:
Point cloud library: provides a set of data structures and algorithms for processing 3D data;
ROS PCL interface: provides a set of messages and conversion functions between messages and PCL data structures.
From a C++ perspective, PCL contains a very important data structure, which is the point cloud. This data structure is designed as a template class, which takes the type of point as a parameter of the template class. The point cloud class is actually a container that contains all the common information required by the point cloud, regardless of the type of point. The following are the most important public fields in the point cloud:
header: This field is of type pcl:PCLHeader. Specifies the time when the point cloud was acquired.
points: This field is of type std::vector<PointT…>, which is a container for all points. PointT in the vector definition corresponds to the template parameter of the class, i.e. the type of point.
width: This field specifies the width of the point cloud when it is organized into an image, otherwise it contains the number of points in the cloud.
height: This field specifies the height of the point cloud when it is organized into an image, otherwise it is always 1.
is_dense: This field specifies whether there are invalid values (infinite or NaN values) in the point cloud.
sensor origin: This field is of type Eigen::Vector4f, and defines the pose of the sensor according to the translation relative to the origin.
sensororientation: This field is of type Eigen::Ouaternionf, and defines the pose of the sensor when it is rotated.
6.2, Use
- Start the camera
#Camera startros2 launch astra_camera gemini.launch.xml
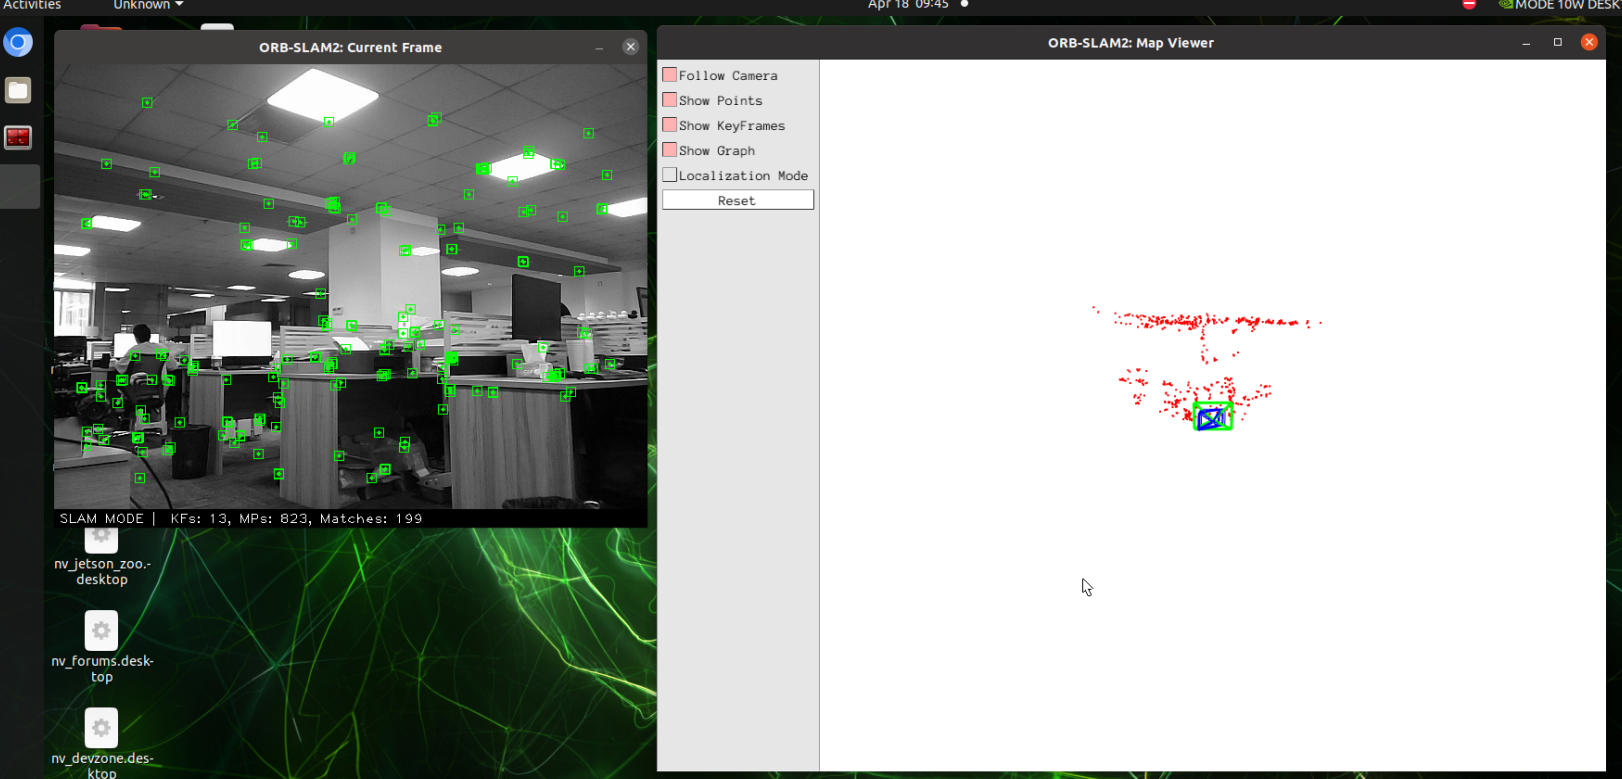
- Start orbslam to publish the camera pose, color image and depth image. Depending on the performance of different master controllers, the waiting time here is about 10 seconds
xxxxxxxxxxros2 launch yahboomcar_slam orbslam_base_launch.py
- Start point cloud mapping
xxxxxxxxxxros2 launch yahboomcar_slam orbslam_pcl_map_launch.py
After opening, the [viewer] window will pop up. Slowly move the camera. When a picture appears, as shown below:
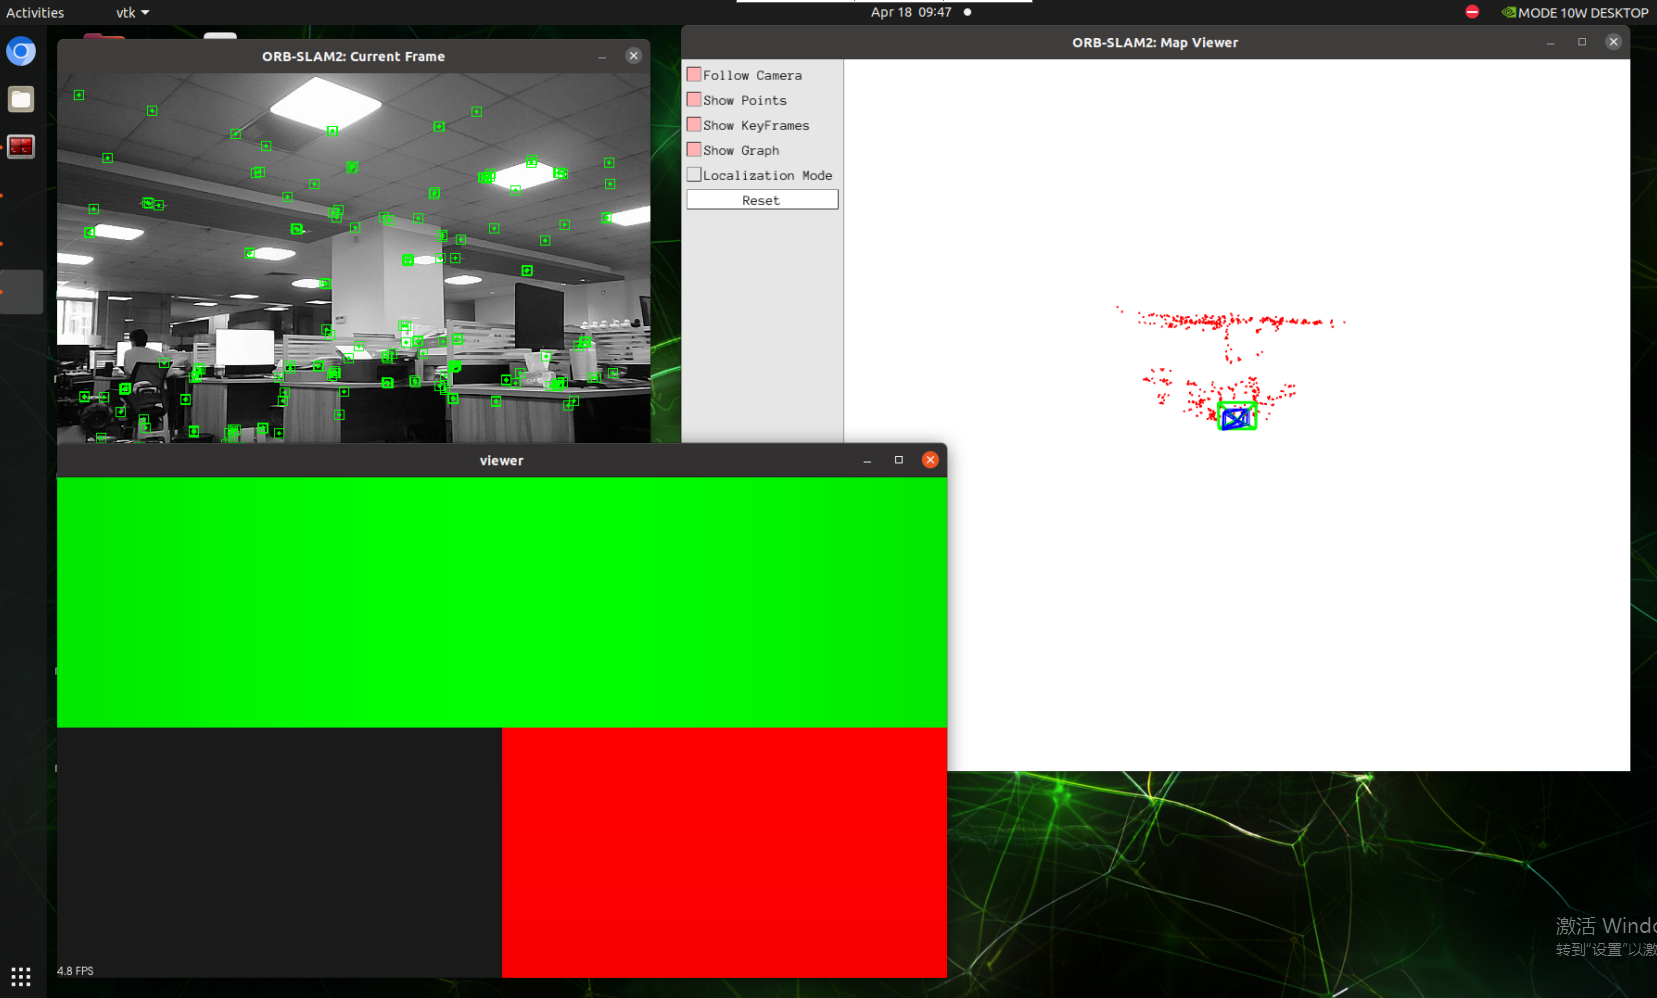
You need to scale and rotate the coordinate system until it is as shown below
Slide the wheel: zoom in and out
Press and hold the wheel: pan
Left mouse button: rotate
Right mouse button: zoom in and out
You can open rviz at the same time to view the real-time point cloud mapping effect. Considering the huge CPU and memory overhead during point cloud mapping, it is recommended to use the virtual machine to open rviz to view:
xxxxxxxxxxros2 launch yahboomcar_slam display_pcl_launch.py
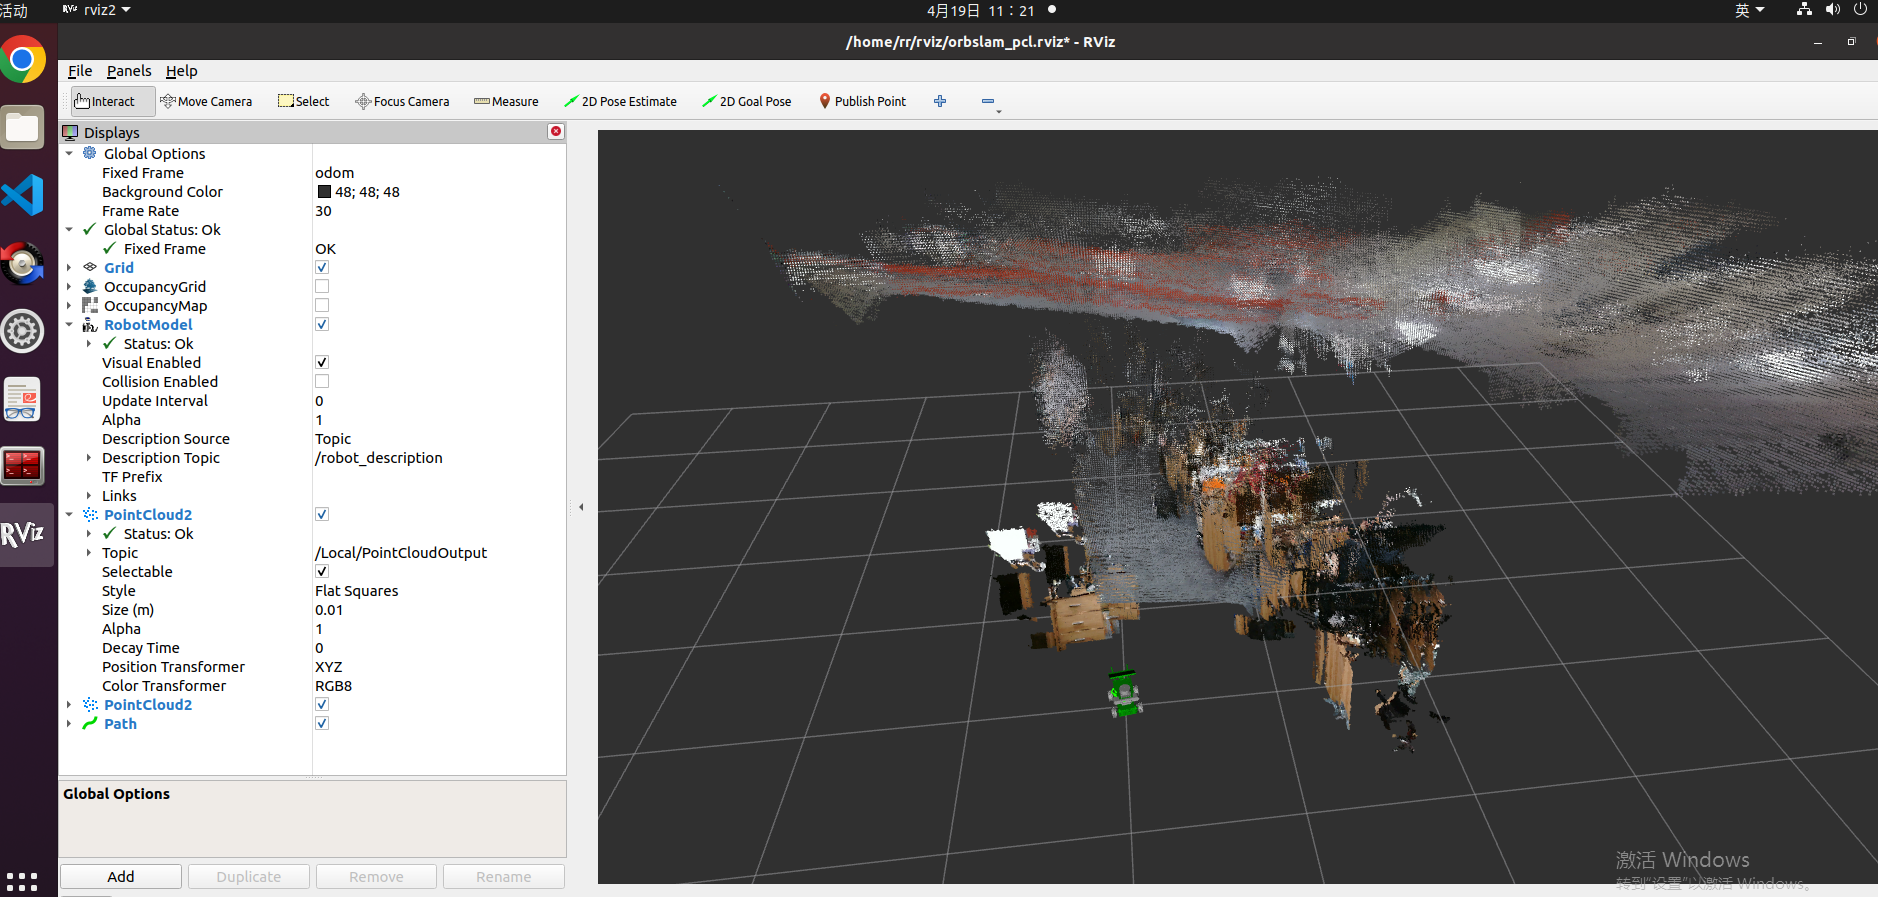
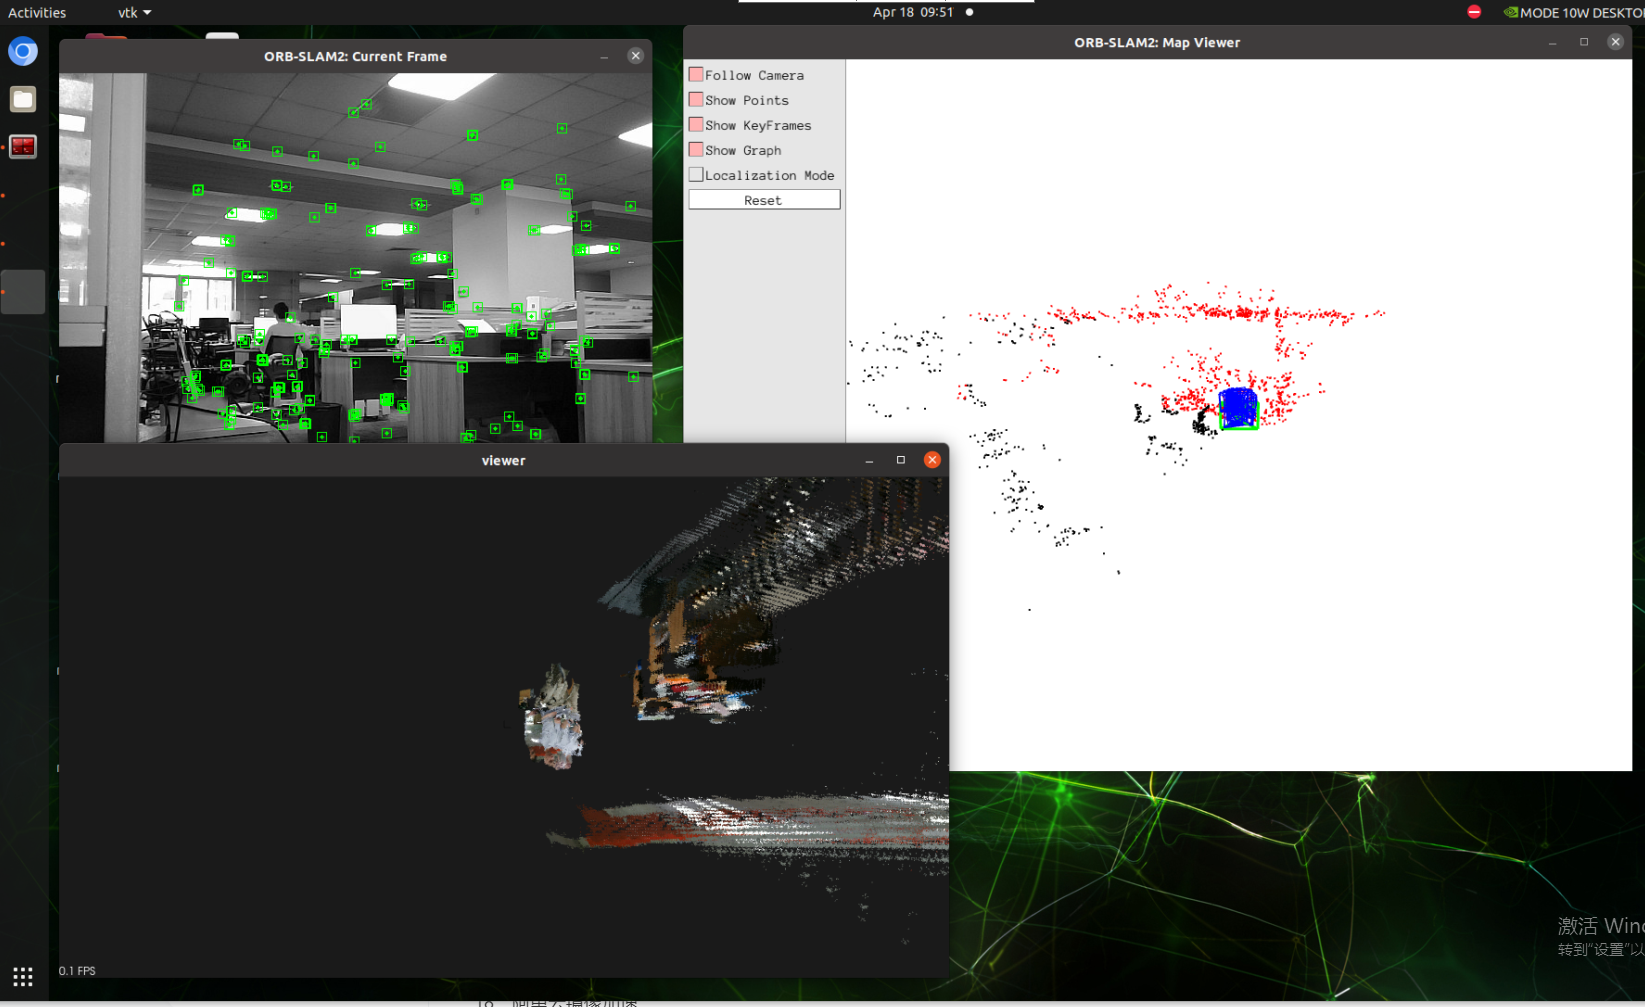
- Slowly move the camera to build the map as shown below. After building, press [Ctrl+c] to close and automatically save the pcd point cloud file. esultPointCloudFile.pcd, the path is as follows:
xxxxxxxxxx~/ascam_ros2_ws/src/yahboomcar_slam/pcl/resultPointCloudFile.pcd
- View the resultPointCloudFile.pcd file
(1) Method 1: Use the pcl_viewer tool
Install the pcl_viewer command:
xxxxxxxxxxsudo apt-get install pcl-tools
Enter the directory where the pcd file is located and enter the following command to view the pcd point cloud image
xxxxxxxxxxpcl_viewer resultPointCloudFile.pcd
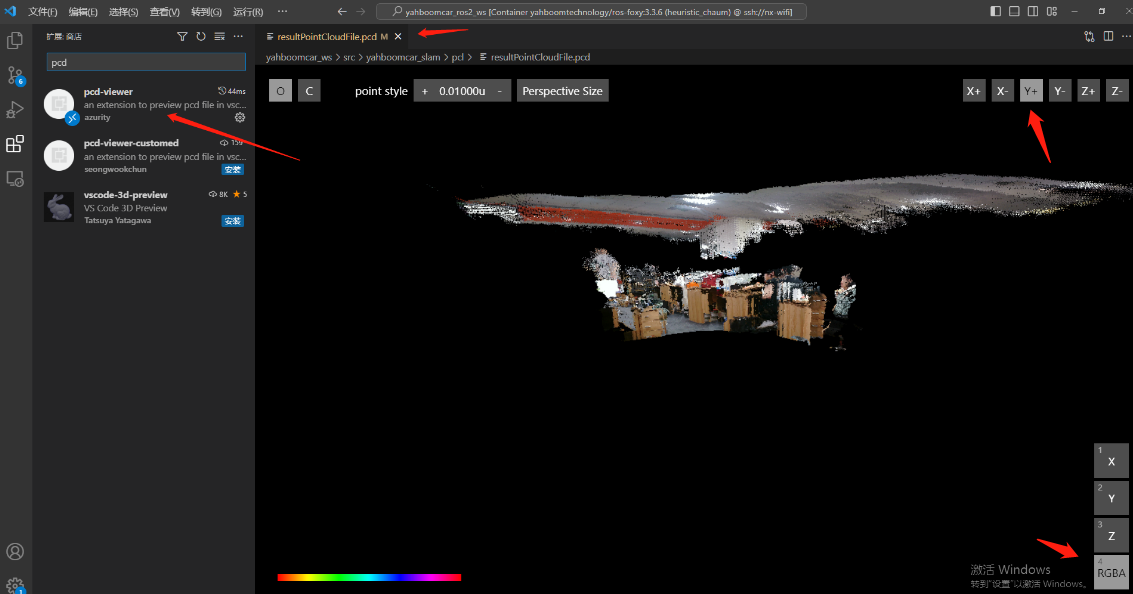
(2) Method 2: Use the pcd-viewer plug-in of vscode [Recommended]
First install the pcd-viewer plug-in in vscode, then open resultPointCloudFile.pcd to view the pcd point cloud image. Here, directly select the Y+ direction and the RGBA mode at the bottom to quickly rotate the image to the main view
6.3, Node analysis
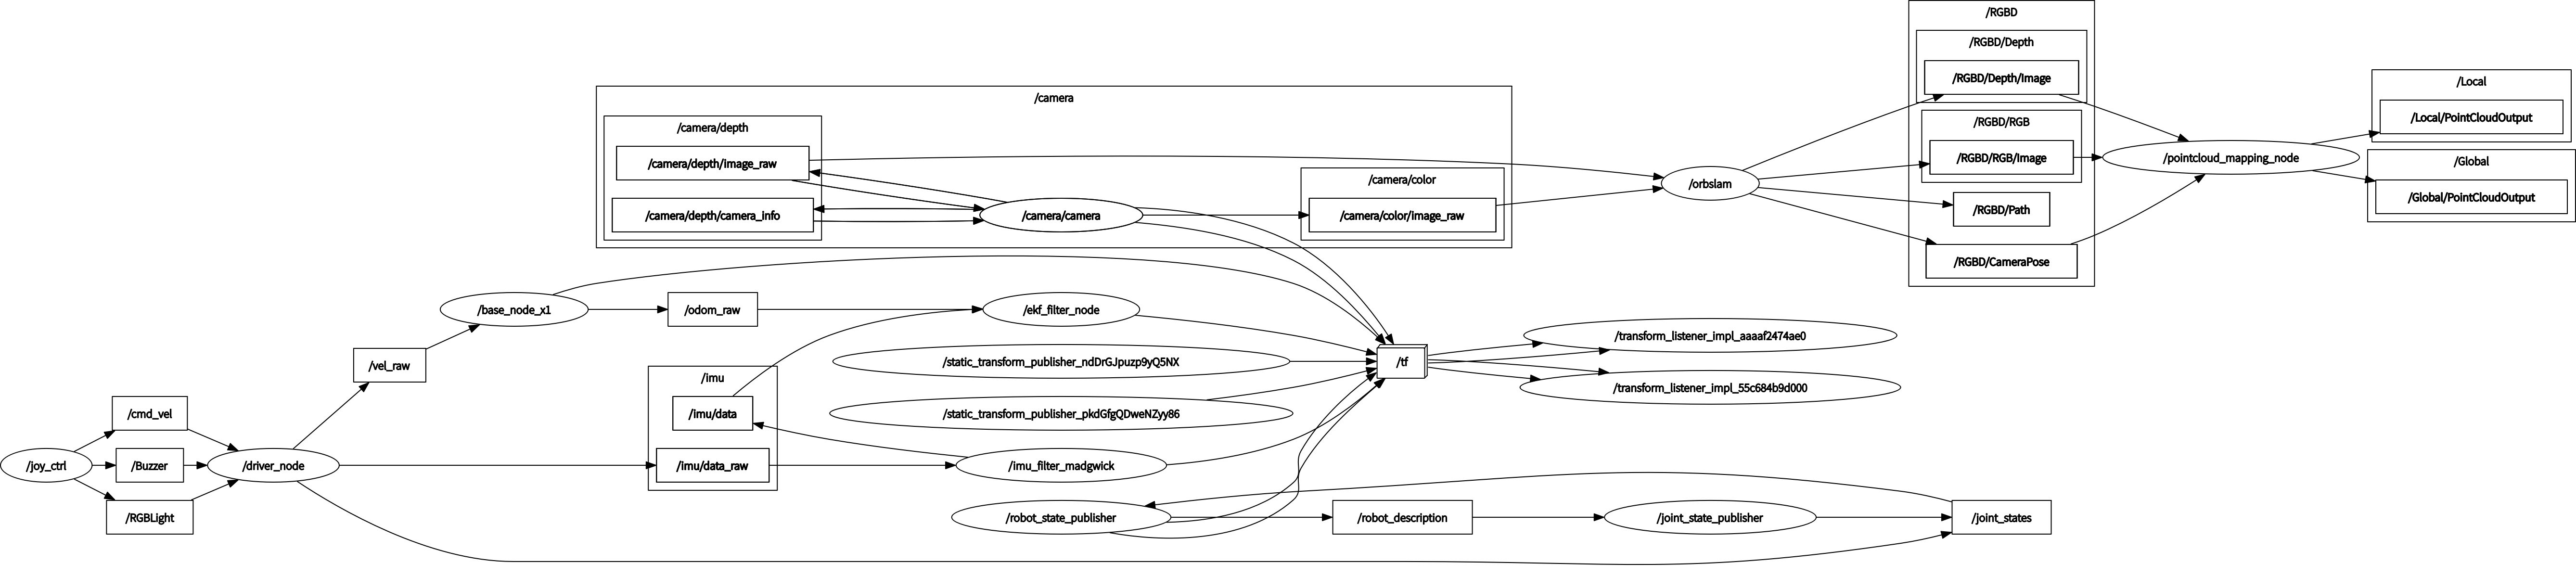
6.3.1, Display calculation graph
xxxxxxxxxxrqt_graph
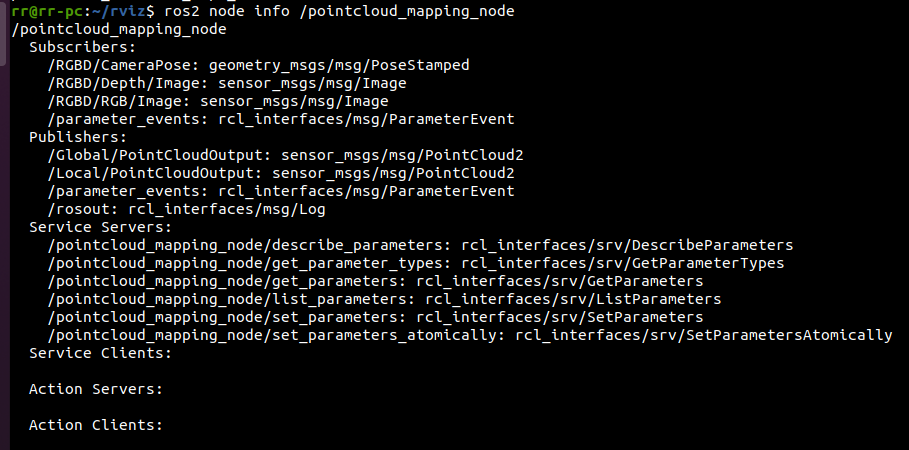
6.3.2, pointcloud_mapping node details
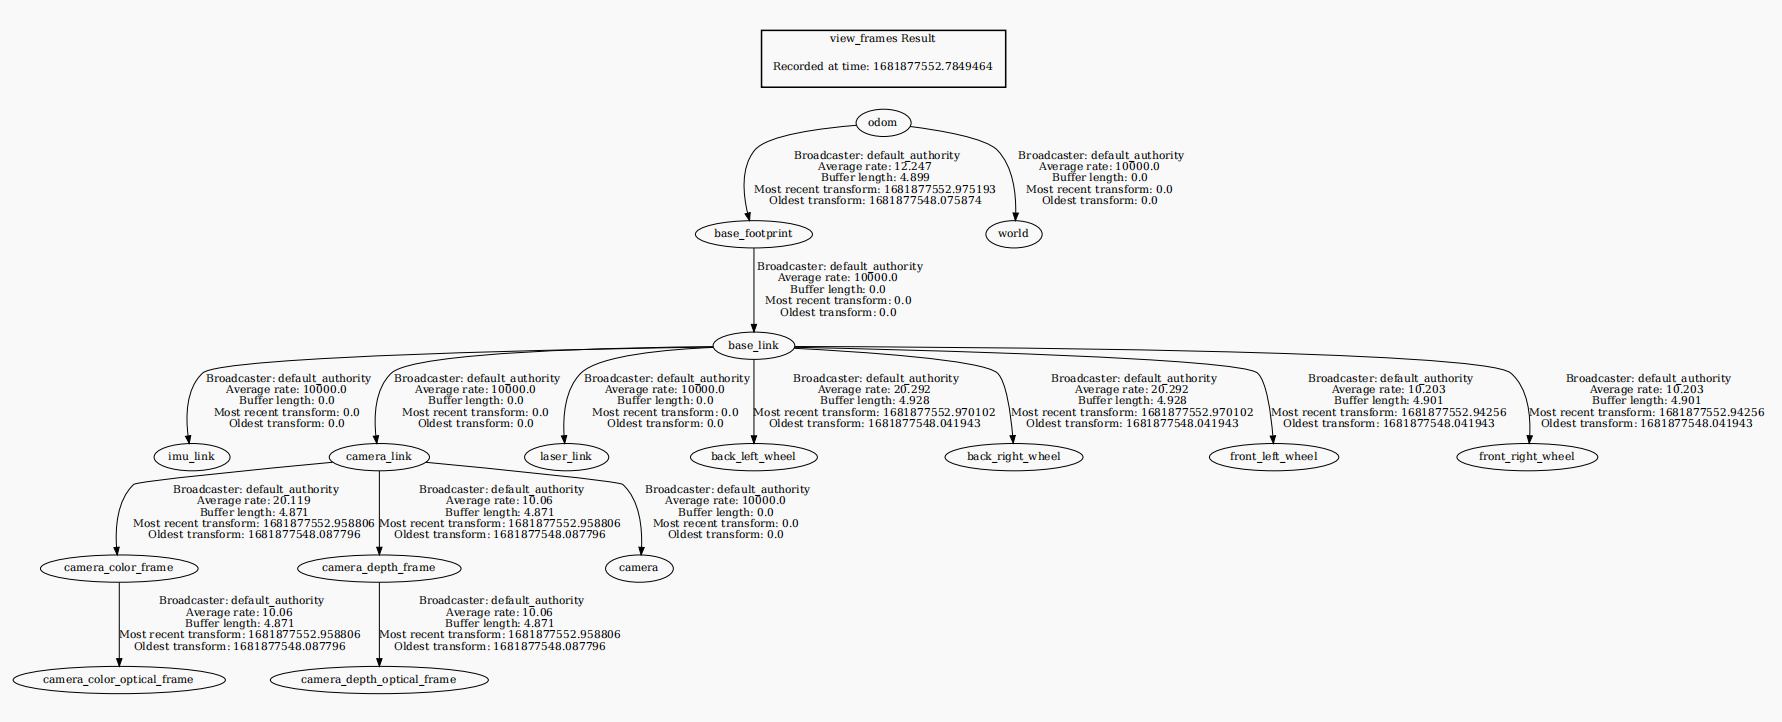
6.3.3, TF transformation
xxxxxxxxxxros2 run tf2_tools view_frames.py