Welcome to ROSMASTER A1 repository
8.Multimodal visual understand+SLAM navigation + visual line patroling
Multimodal visual understand+SLAM navigation + visual line patroling(Text Version)
Multimodal visual understand+SLAM navigation + visual line patroling(Text Version)1. Course Content2. Preparation2.1 Content Description3. Run Case3.1 Starting the Program3.1.1 Jetson Nano board Startup Steps:3.1.1 RDKX5, Raspberry Pi PI5 and ORIN board startup steps:3.2 Test Case3.2.1 Case 14. Source Code Analysis
1. Course Content
- Learn to use the robot's visual understanding, line following, SLAM navigation, and other complex functional cases.
- Study the key source code newly introduced in the tutorial.
- Note: This section requires you to complete the map file configuration as described in the previous section [7. Multimodal Visual Understand + SLAM Navigation].
2. Preparation
2.1 Content Description
This section uses the Raspberry Pi 5 as an example. For Raspberry Pi and Jetson Nano boards, you need to open a terminal on the host computer and enter the command to enter the Docker container. Once inside the Docker container, enter the commands mentioned in this section in the terminal. For instructions on entering the Docker container from the host computer, refer to [01. Robot Configuration and Operation Guide] -- [5.Enter Docker (For JETSON Nano and RPi 5)]. For RDKX5 and Orin boards, simply open a terminal and enter the commands mentioned in this course.
📝 This example uses model:"qwen/qwen2.5-vl-72b-instruct:free","qwen-vl-latest"
⚠️ The responses from the big model for the same test command may not be exactly the same and may differ slightly from the screenshots in the tutorial. To increase or decrease the diversity of the big model's responses, refer to the section on configuring the decision-making big model parameters in [04.AI Large Model Development] -- [5.Deploy the RAG knowledge base] .
3. Run Case
3.1 Starting the Program
3.1.1 Jetson Nano board Startup Steps:
Due to Nano performance issues, navigation-related nodes must be run on a virtual machine. Therefore, navigation performance is highly dependent on the network. We recommend running in an indoor environment with a good network connection. You must first configure the following:
- Board Side (Requires Docker)
Open a terminal and enter
sudo vi /etc/chrony/chrony.conf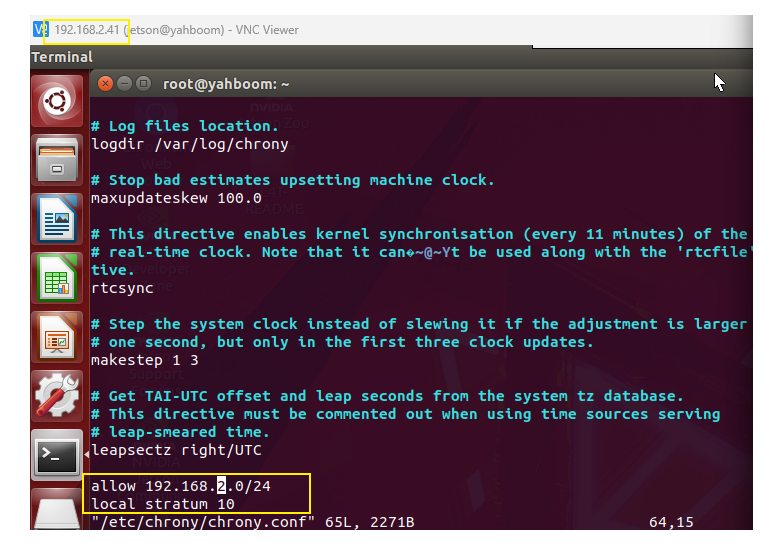
Add the following two lines to the end of the file: (Fill in 192.168.2.0/24 based on the actual network segment; this example uses the current board IP address of 192.168.2.41.)
xxxxxxxxxxallow 192.168.x.0/24 #x indicates the corresponding network segmentlocal stratum 10After saving and exiting, enter the following command to take effect:
xxxxxxxxxxsudo service chrony restart
- Virtual Machine
Open a terminal and enter
xxxxxxxxxxecho "server 192.168.2.41 iburst" | sudo tee /etc/chrony/sources.d/jetson.sourcesThe 192.168.2.41 entry above is the board's IP address.
Enter the following command to take effect.
xxxxxxxxxxsudo chronyc reload sourcesEnter the following command again to check the latency. If the IP address appears, it's normal.
xxxxxxxxxxchronyc sources -v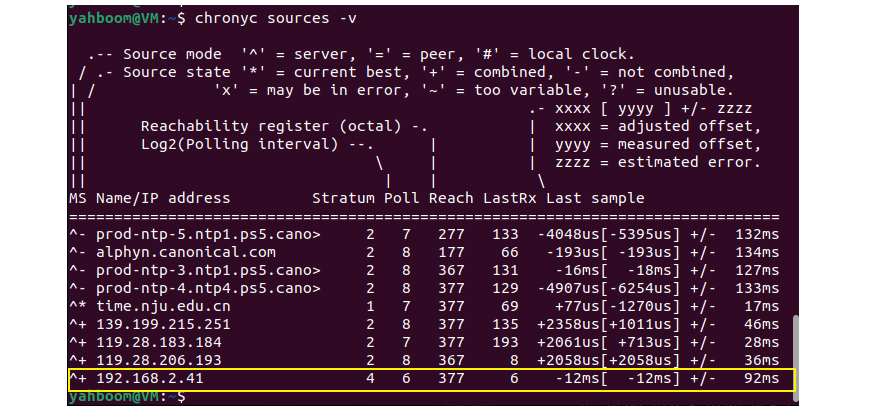
- Start the Program
Open the host machine terminal and start the Dify environment:
xxxxxxxxxxsh ~/bringup_dify.sh
Open the terminal in Docker and enter the following command:
xxxxxxxxxxros2 launch multi_brains llm_agent_control.launch.py
After initialization, the following content will be displayed:
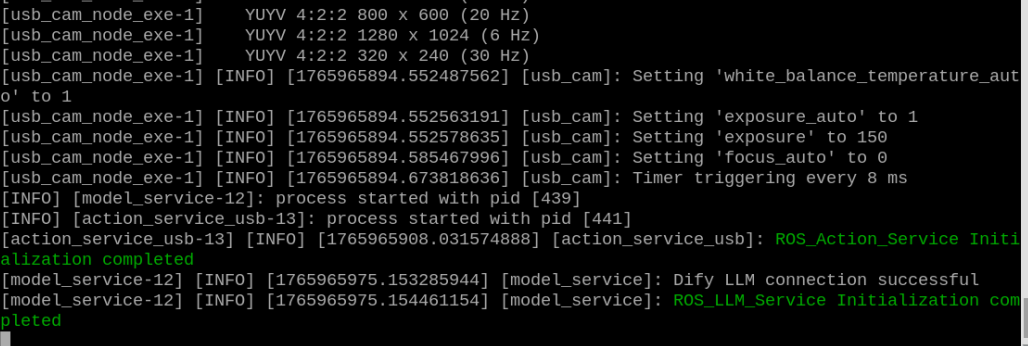
On the virtual machine, create a new terminal and start.
xxxxxxxxxxros2 launch yahboomcar_nav display_nav_launch.pyWait for the navigation algorithm to start before displaying the map. Then open a VM terminal and enter:
xxxxxxxxxxros2 launch yahboomcar_nav navigation_teb_launch.pyNote: When running the car's mapping function, you must enter the save map command on the VM to save the navigation map.
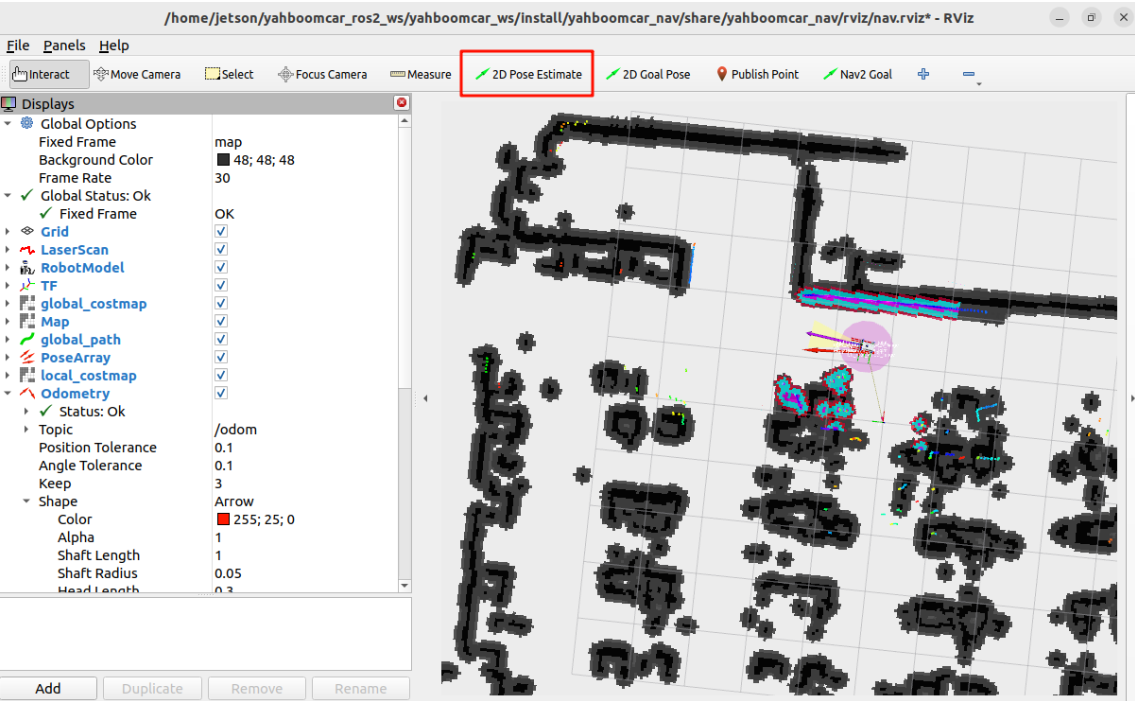
After that, follow the navigation function startup process to initialize positioning. The rviz2 visualization interface will open. Click 2D Pose Estimate in the upper toolbar to select it. Roughly mark the robot's position and orientation on the map. After initializing positioning, preparations are complete.
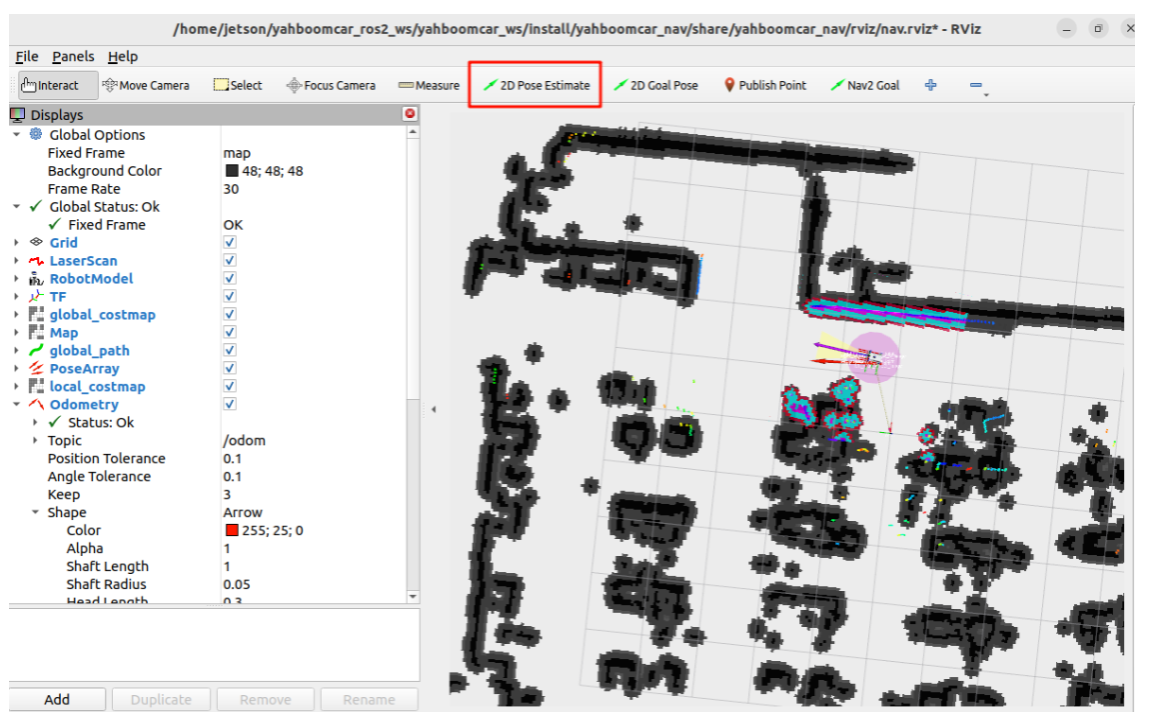
3.1.1 RDKX5, Raspberry Pi PI5 and ORIN board startup steps:
Open the host terminal and start the Dify environment.
xxxxxxxxxxsh ~/bringup_dify.sh
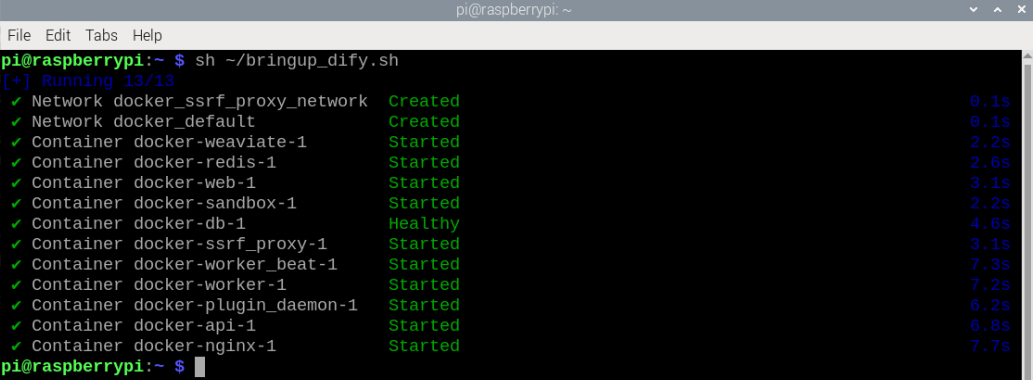
For Raspberry Pi 5, you need to first enter the Docker container. For RDKX5 and Orin board, this is not necessary.
Open a terminal in Docker and enter the following command:
x
ros2 launch multi_brains llm_agent_control.launch.py text_chat_mode:=TrueAfter initialization is complete, the following will be displayed:
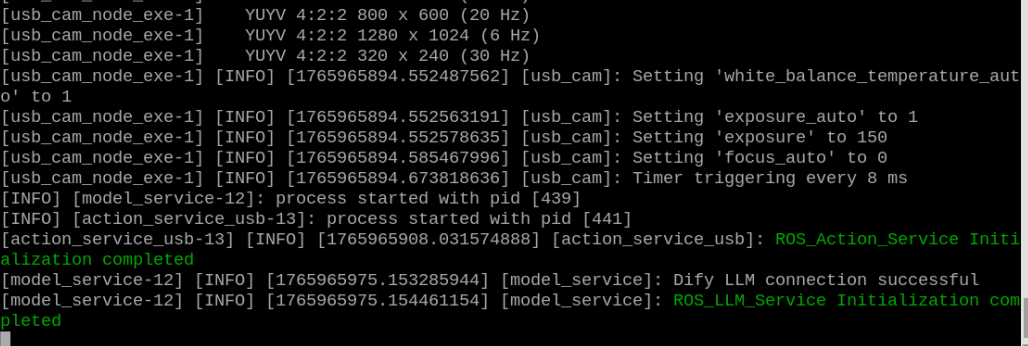
Create a new terminal on the virtual machine and start the command.(For RDKX5, Raspberry Pi and Jetson Nano, it is recommended to run visualization in the virtual machine)
xxxxxxxxxxros2 launch yahboomcar_nav display_nav_launch.pyWait for the navigation algorithm to start and the image will be displayed. Then open the Docker terminal and enter the following command:
x
#Choose one of the two navigation algorithms#Normal navigationros2 launch yahboomcar_nav navigation_teb_launch.py#Fast Relocation Navigation (Not supported on RDKX5, Raspberry Pi 5, and Jetson Nano main controllers)ros2 launch yahboomcar_nav localization_imu_odom.launch.py use_rviz:=trueload_state_filename:=/home/jetson/yahboomcar_ros2_ws/yahboomcar_ws/src/yahboomcar_nav/maps/yahboomcar.pbstreamros2 launch yahboomcar_nav navigation_cartodwb_launch.py maps:=/home/jetson/yahboomcar_ros2_ws/yahboomcar_ws/src/yahboomcar_nav/maps/yahboomcar.yamlNote: yahboomcar.yaml and yahboomcar.pbstream must be mapped simultaneously, meaning they are the same map. Refer to the cartograph mapping algorithm for saving maps.
After that, follow the navigation function startup process to initialize positioning. The rviz2 visualization interface will open. Click 2D Pose Estimate in the upper toolbar to enter the selection state. Roughly mark the robot's position and orientation on the map. After initial positioning, preparations are complete.
Open the same docker in multiple terminals and start it.
xxxxxxxxxxros2 run text_chat text_chat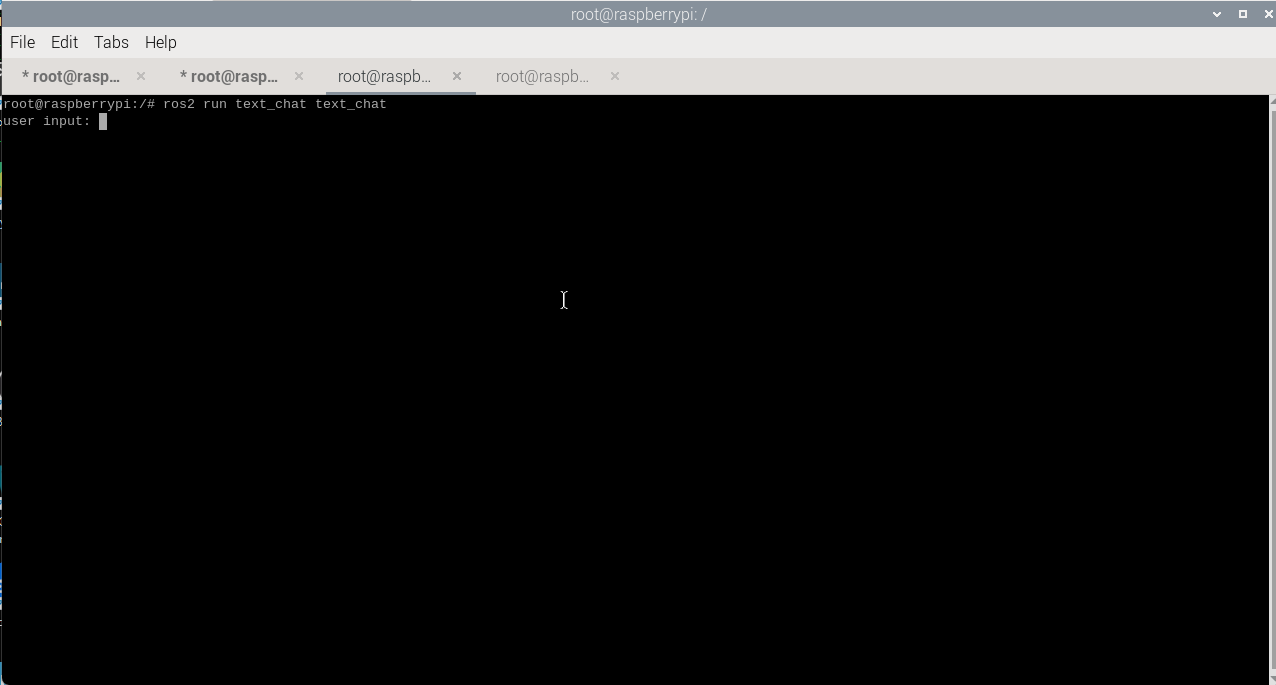
3.2 Test Case
Here are some reference test cases; users can create their own dialogue commands.
- Move forward 0.5 meters and back 0.5 meters, record the current location, navigate to the tea room, and observe if there's a green line on the floor. If there is, automatically patrol the green line. After patrolling, return to the starting point.
3.2.1 Case 1
In the terminal, enter "Move forward 0.5 meters and back 0.5 meters, record the current location, navigate to the tea room, and observe if there's a green line on the floor. If there is, automatically patrol the green line. After patrolling, return to the starting point." The terminal prints the following information.
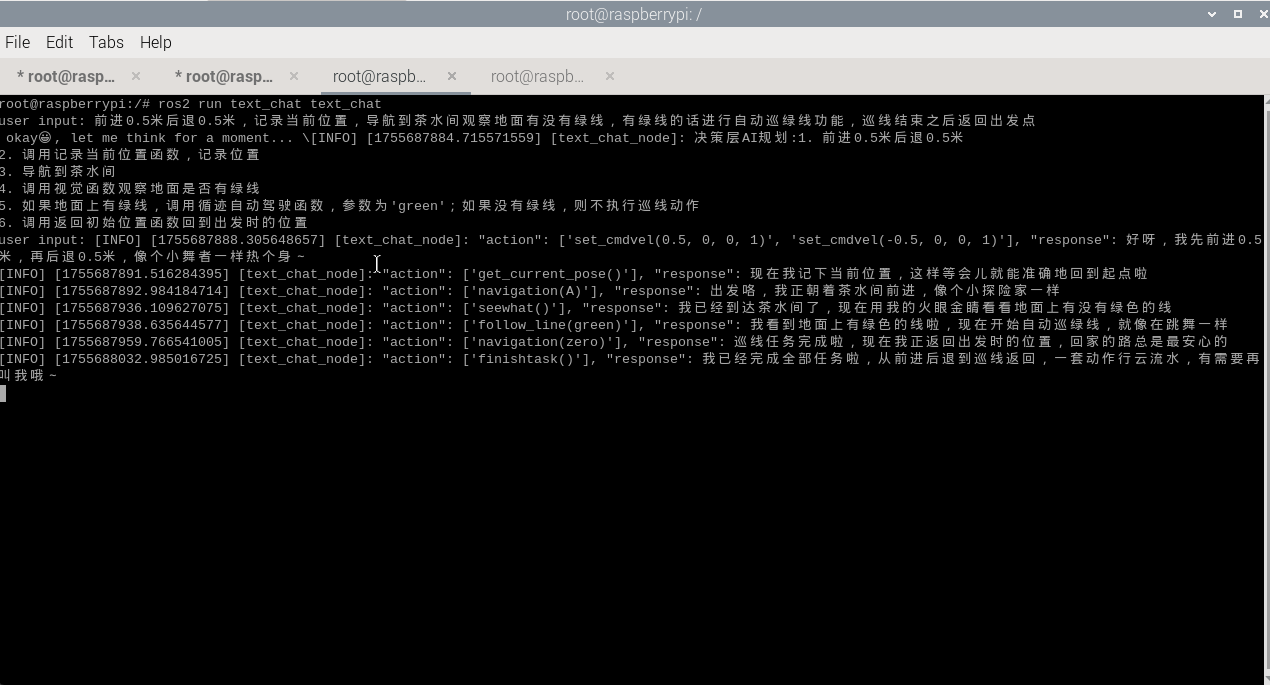
The decision-making layer model outputs the planned task steps:

The execution layer model will then execute the task steps:

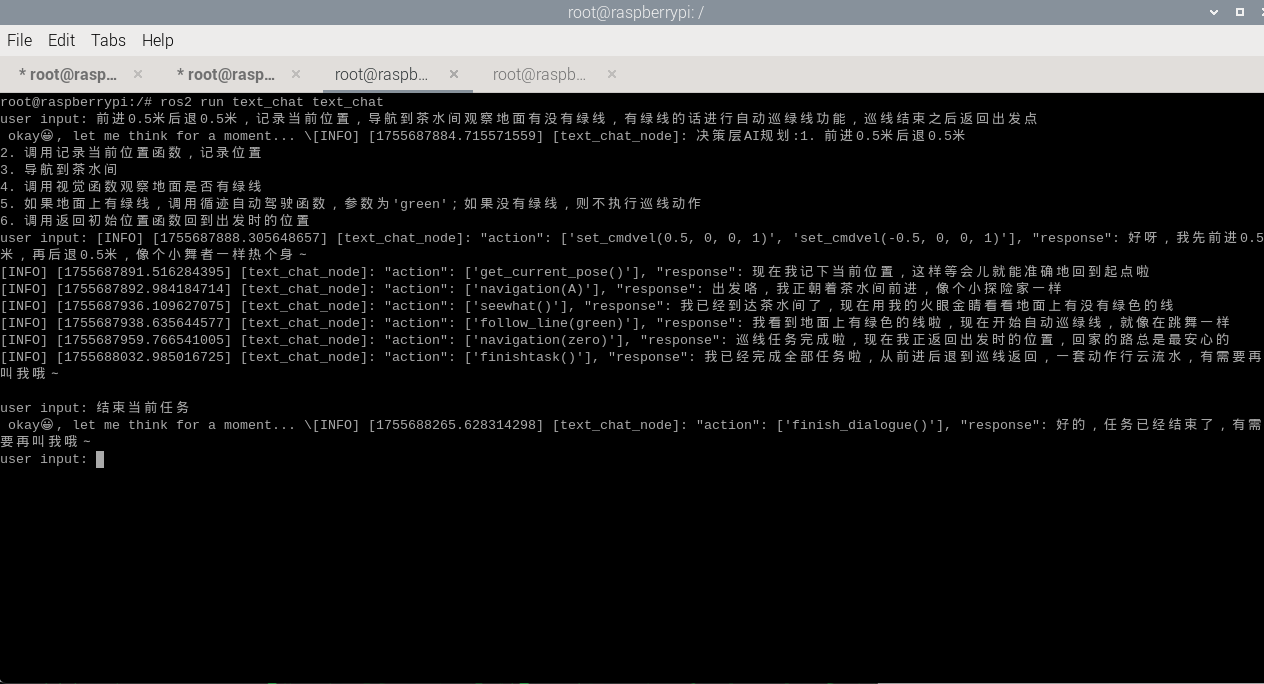
After completing the task, the robot will enter a waiting state. During this time, commands are directly passed to the execution layer model, and all conversation history is retained. You can press the ENTER key in the terminal to continue the conversation and enter the "End current task" command to terminate the current task cycle and start a new one.
4. Source Code Analysis
Source code location:
Jetson Orin Nano:
xxxxxxxxxx#NUWA camera user/home/jetson/yahboomcar_ros2_ws/yahboomcar_ws/src/largemodel/largemodel/action_service_nuwa.py#USB camera user/home/jetson/yahboomcar_ros2_ws/yahboomcar_ws/src/largemodel/largemodel/action_service_usb.pyJetson Nano, Raspberry Pi:
You need to first enter Docker.
x
#NUWA Camera User/root/yahboomcar_ros2_ws/yahboomcar_ws/src/largemodel/largemodel/action_service_nuwa.py#USB Camera User/root/yahboomcar_ros2_ws/yahboomcar_ws/src/largemodel/largemodel/action_service_usb.pyRDKX5:
x
#NUWA Camera User/home/sunrise/yahboomcar_ros2_ws/yahboomcar_ws/src/multi_brains/multi_brains/action_service_nuwa.py#USB Camera User/home/sunrise/yahboomcar_ros2_ws/yahboomcar_ws/src/multi_brains/multi_brains/action_service_usb.pyThis example uses the seewhat, navigation, load_target_points, get_current_pose, and follow_line(self, color) methods from the CustomActionServer class. Most of these methods have been explained in the Multimodal Visual Understanding + SLAM Navigation section. For a detailed explanation of the follow_line(self, color) function, refer to the Multimodal Visual Understanding + Visual Line Patrolling section.