Welcome to Building:bit Superkit repository
1.Colorful windmill
Colorful windmill
Colorful windmill1. Learning Objectives2. Building Blocks3. Motor Wiring4. Code Analysis5. Write and download the program6. Experimental phenomenon
1. Learning Objectives
In this course, we mainly learn how to use Python programming to make the oscillating fan rotate at different speeds and switch the RGB light to different colors.
2. Building Blocks
For the building block steps, please refer to the installation drawings of [Assembly course]-[Oscillating fan] in the materials or the building block installation album.
3. Motor Wiring
Insert the building block motor wiring into the M1 interface of the Super:bit expansion board, and the black wiring into the side close to the battery.
Insert the building block servo wiring into the S1 interface of the Super:bit expansion board, and the orange servo wiring into the yellow pin of S1.
As shown in the figure below:

4. Code Analysis
For the program of this course, please see the Colorful windmill.py file.
from microbit import *import musicimport superbitimport microbitimport neopixelFirst, import the libraries needed for this lesson from microbit: the superbit library is dedicated to the superbit expansion board; the music library is used to play music; and the neopixel is used to control the RGB light.
xxxxxxxxxxdisplay.show(Image.HAPPY)np = neopixel.NeoPixel(pin12, 4)display.show(Image.HAPPY): Display a smiley face pattern on the microbit dot matrix;
np = neopixel.NeoPixel(pin12, 4): Initialize the RGB light settings. There are 4 RGB lights in total, connected to the P12 pin of the microbit motherboard (you can check the hardware interface manual);
xxxxxxxxxxwhile True:music.play('E4:4')superbit.motor_control(superbit.M1, -255, 0)np[0] = (255, 0, 0)np.show()...while True: infinite loop
music.play('E4:4'): The buzzer plays a tone. Parameter 1 E4 represents the tone, and parameter 2 4 represents the beat.
superbit.motor_control(superbit.M1, 255, 0): The motor connected to the M1 interface rotates forward at a speed of 255;
np[0] = (255, 0, 0)
np.show(): The first RGB light turns red
5. Write and download the program
- Open the Mu software and enter the code in the editing window. Note! All English and symbols should be entered in English mode, use the Tab key for indentation, and the last line ends with a blank program.
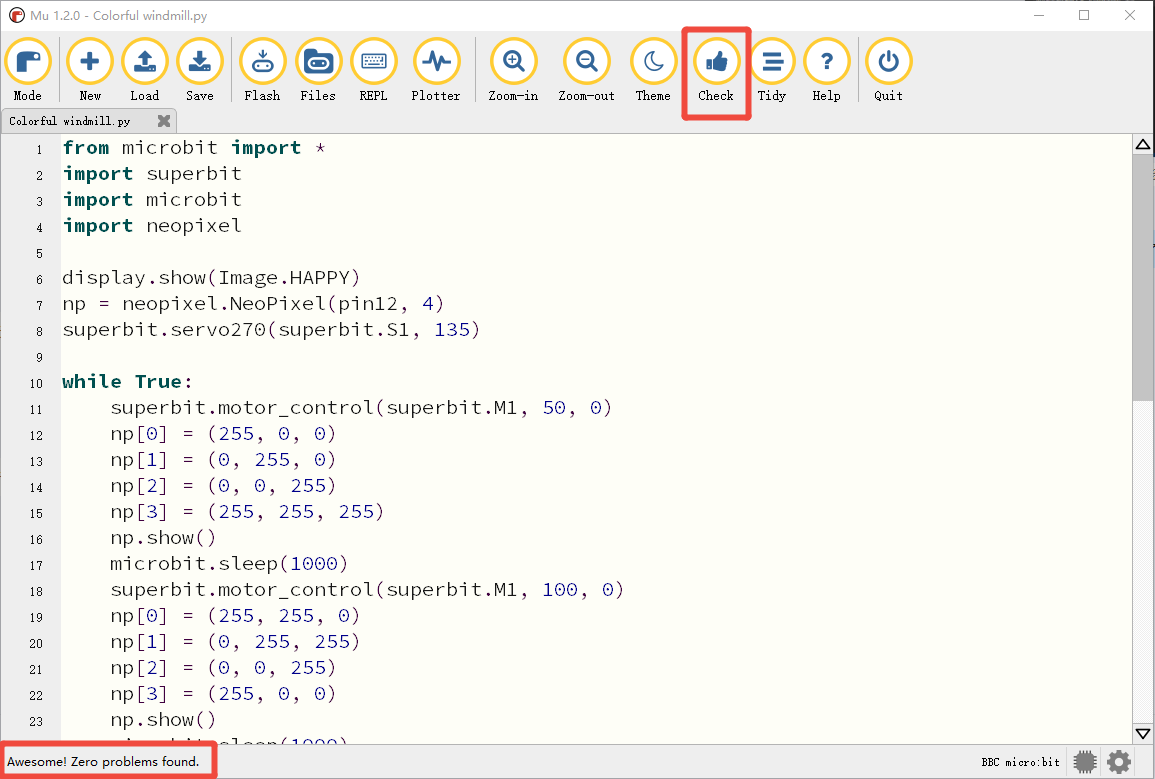
- Click the thumb 'Check' button to check whether our code has any errors. If a cursor or underline appears in a line, it means a syntax error. Please check and modify it. If there is no error, the lower left corner will prompt that there is no problem with the detection.
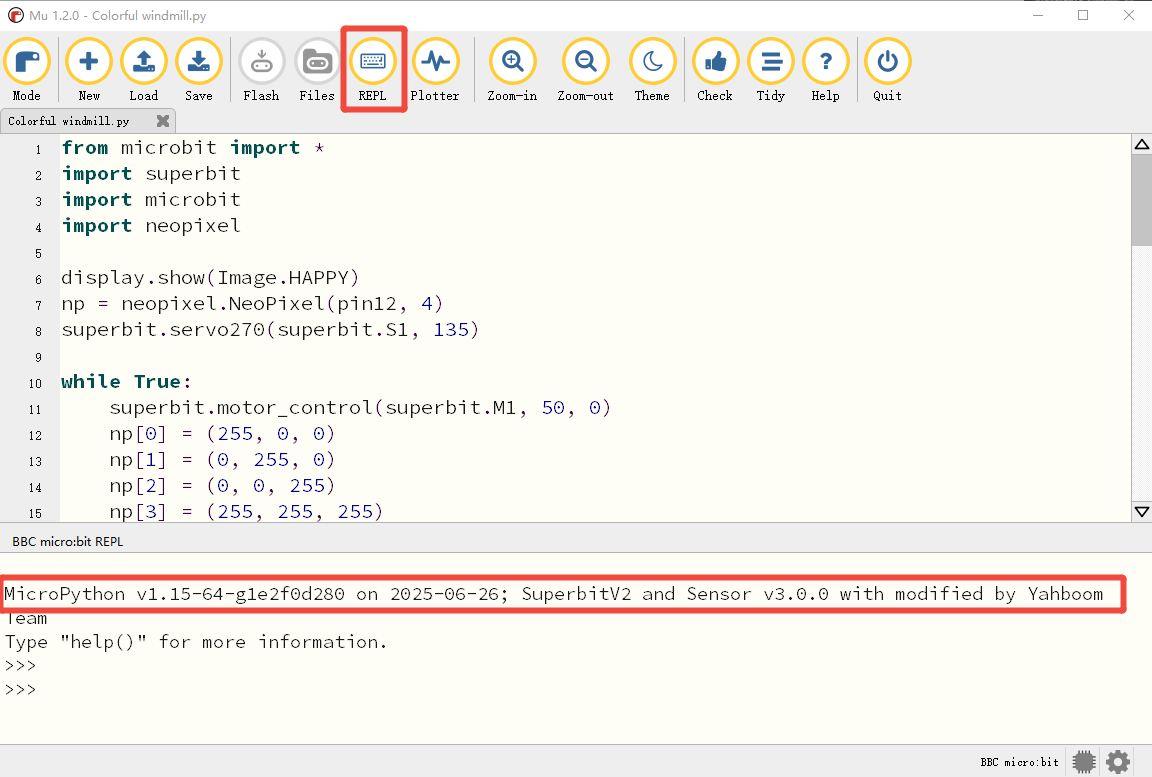
- Click the ‘REPL’ button to check whether the Superbit library has been downloaded. If not, please refer to [Preparation before class] --> [2.4 Python Programming Guide].
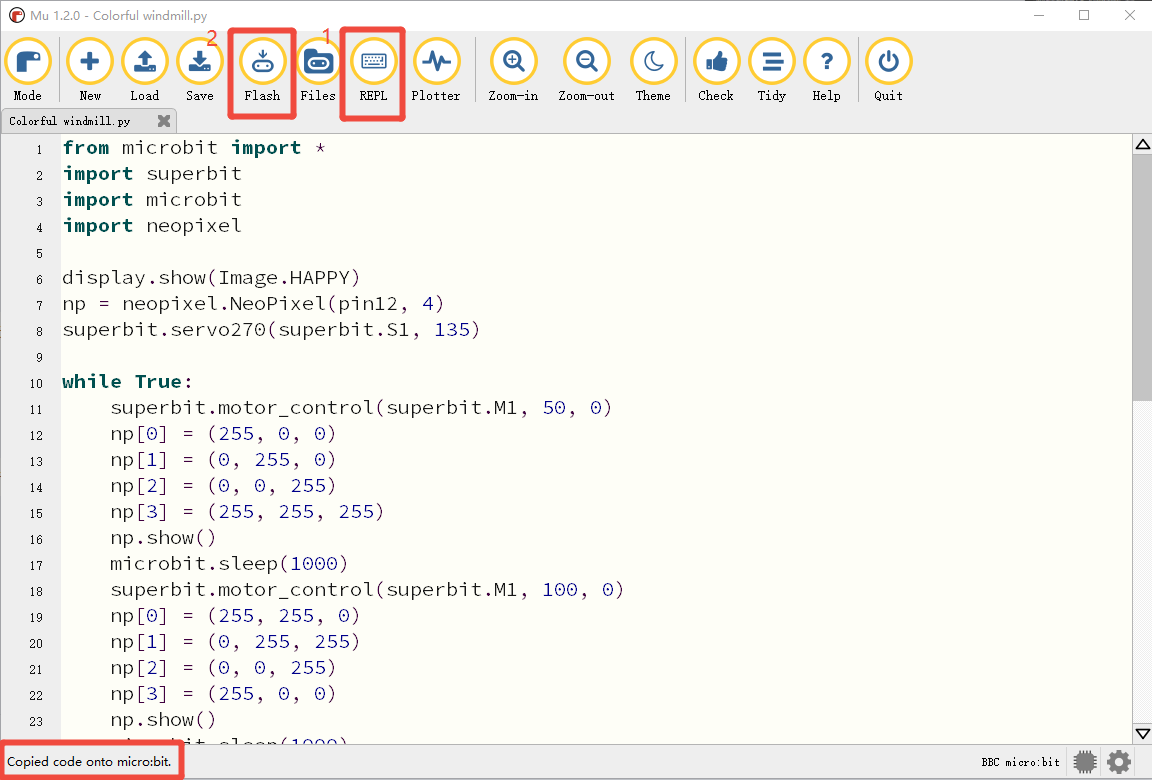
- After the program is written, connect the computer and the microbit mainboard with a microUSB data cable, and click the ‘Flash’ button to download the program to the micro:bit mainboard. (You need to click the ‘REPL’ button again to turn off the import library file function before you can download the program normally).
- If the download fails, please confirm whether the microbit is connected to the computer normally via the microUSB data cable and the Superbit Python library has been imported.
6. Experimental phenomenon
After the program is successfully downloaded, turn on the power switch. When the power switch is turned on, a smiley face pattern will be displayed on the micro:bit dot matrix. Then the oscillating fan starts to rotate at different speeds, 50 speed for 1 second -> 100 speed for 1 second -> 150 speed for 1 second -> 200 speed for 1 second -> 255 speed for 2 seconds. RGB will also switch different colors and keep looping in this state.
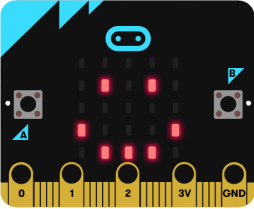
If you need to restart, press the reset button on the back of the micro:bit motherboard.