Welcome to Building:bit Superkit repository
2.Micro:bit handle control
Microbit handle control
Microbit handle control1. Learning objectives2. Building blocks3. Motor wiring4. Code analysis4.1 Dragon Knight4.2 Handle5. Write and download the program6. Experimental phenomenon
1. Learning objectives
In this course, we mainly learn how to use Python programming to realize the microbit handle to control the Dragon Knight.
2. Building blocks
For the building blocks steps, please refer to the installation drawings of [Assembly course]-[Dragon knight] in the materials or the building blocks installation album.
3. Motor wiring
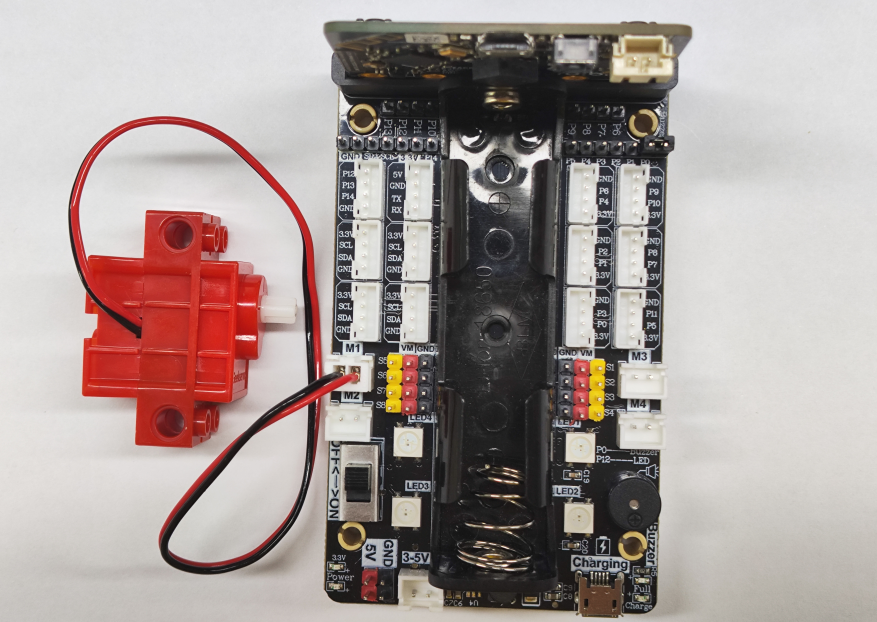
Insert the motor wiring on the left side of the car into the M1 interface of the Super:bit expansion board, and the black line is close to the battery side;
As shown in the figure below:
4. Code analysis
4.1 Dragon Knight
For the program, please refer to the Dragon knight code.py file.
from microbit import *import superbitimport radioimport neopixelimport microbitFirst, import the libraries needed for this lesson from microbit: the superbit library is dedicated to the superbit expansion board; neopixel is used to control the RGB light; radio is used for the wireless communication function of micro:bit.
xnp = neopixel.NeoPixel(pin12, 4)display.show(Image.HEART)microbit.sleep(1000)radio.on()radio.config(group=1)mode = 1np = neopixel.NeoPixel(pin12, 4): Initialize the RGB light settings. There are 4 RGB lights in total, connected to the P12 pin of the microbit motherboard (you can check the hardware interface manual for details);
display.show(Image.HEART): Display a heart pattern on the microbit dot matrix;
microbit.sleep(1000): Delay for 1 second;
radio.on(): Turn on the wireless function. Because the wireless function consumes more power and occupies more memory, it is turned off by default. You can also use radio.off() to turn off the wireless function;
radio.config(group=1): Configure wireless group=1, so that other microbit devices with wireless group=1 can communicate with each other. The default is 0, and the selectable group is 0~255. The set group value needs to be consistent with the handle setting, otherwise normal communication will not be possible;
mode = 1: Initialize the variable mode to 1.
xxxxxxxxxxwhile True:display.show(mode)incoming = radio.receive()if incoming == 'up':superbit.motor_control(superbit.M1, 255, 0)...In the main loop, determine the command sent by the handle to control the wings of the dragon knight and the color of the RGB light.
incoming = radio.receive(): Receive the data transmitted wirelessly and save it to the incoming variable; if incoming is 'up', the motor will rotate, and if it is 'stop' and mode = 1, the motor will stop rotating;
If incoming is 'R', the body RGB will light up red, 'G' will light up green, 'B' will light up blue, and 'Y' will light up yellow.
xxxxxxxxxxif incoming == 'turn_off':np.clear()np.show()if mode == 1:mode = 2else:mode = 1Switch the current mode.
! Note:
The incoming value must correspond to the value sent by the handle. Only the same value can receive and execute commands.
4.2 Handle
Please refer to the Handle code.py file for the program.
xxxxxxxxxxfrom microbit import display, Imageimport ghandleimport radioFirst, import the libraries needed for this lesson from microbit: the ghandle library is dedicated to the micro:bit hand; radio is used for the wireless communication function of micro:bit.
xxxxxxxxxxdisplay.show(Image.HEART)radio.on()radio.config(group=1)display.show(Image.HEART): Display a heart pattern on the microbit dot matrix;
radio.on(): Turn on the wireless function. Because the wireless function consumes more power and occupies more memory, it is turned off by default. You can also use radio.off() to turn off the wireless function;
radio.config(group=1): Configure wireless group=1, so that other microbit devices with wireless group=1 can communicate with each other. The default is 0, and the selectable group is 0~255. The set group value needs to be consistent with the handle setting, otherwise it will not communicate normally;
xxxxxxxxxxwhile True:if ghandle.rocker(ghandle.up):radio.send('up')display.show(Image.ARROW_N)elif ghandle.rocker(ghandle.down):radio.send('down') display.show(Image.ARROW_S) elif ghandle.rocker(ghandle.left): radio.send('left') display.show(Image.ARROW_W) elif ghandle.rocker(ghandle.right): radio.send('right') display.show(Image.ARROW_E) elif ghandle.rocker(ghandle.pressed): radio.send('turn_off') display.show(Image.NO) else: radio.send('stop') display.clear()If ghandle.rocker(ghandle.up) is True, it means that the joystick of the handle is pushed up, so that the wireless sends the 'up' command and displays an upward icon;
If ghandle.rocker(ghandle.down) is True, it means that the joystick of the handle is pushed down, so that the wireless sends the 'down' command and displays a downward icon;
If ghandle.rocker(ghandle.left) is True, it means that the joystick of the handle is pushed to the left, so that the wireless sends the 'left' command and displays a left icon;
If ghandle.rocker(ghandle.right) is True, it means that the joystick of the handle is pushed to the right, so that the wireless sends the 'right' command and displays a right icon;
If ghandle.rocker(ghandle. pressed) is True, it means that the joystick of the handle is pressed, so the wireless sends the 'pressed' command and displays the 'X' icon;
If the remote control has no operation, send 'stop' and clear the display;
Special processing:
xxxxxxxxxxif ghandle.rocker(ghandle.pressed):if rocker_key == 0:rocker_key = 1radio.send('turn_off')display.show(Image.NO)else:rocker_key = 0When the joystick is pressed, we use a variable rocker_key to ensure that only one turn_off command is sent. Corresponding to the program of the bipedal robot, change the value of mode once.
xxxxxxxxxxif ghandle.B1_is_pressed():radio.send('R')display.show("R")if ghandle.B2_is_pressed():radio.send('G')display.show("G")if ghandle.B3_is_pressed():radio.send('B')display.show("B")if ghandle.B4_is_pressed():radio.send('Y')display.show("Y")Next, detect the buttons and send R', 'G', 'B', 'Y' commands to B1 (red), B2 (green), B3 (blue), and B4 (yellow).
5. Write and download the program
- Open the Mu software and enter the code in the editing window. Note! All English and symbols should be entered in English, use the Tab key for indentation, and the last line ends with a blank program.
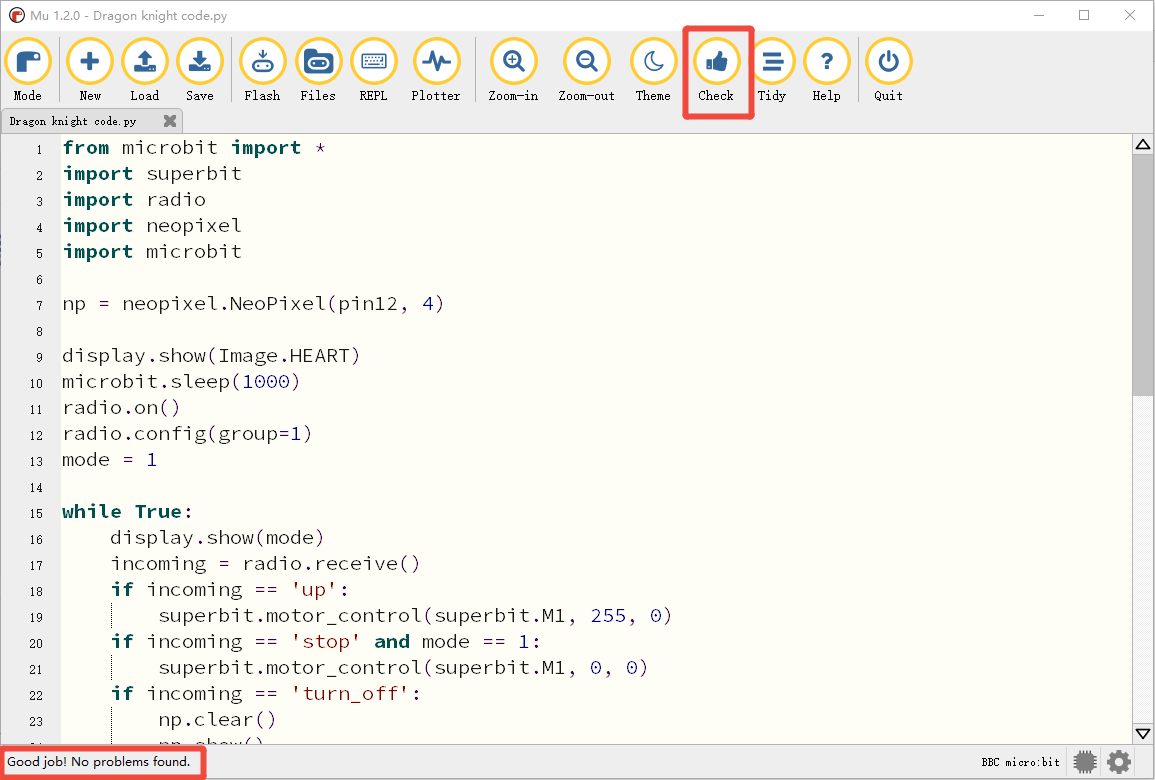
- Click the thumb 'Check' button to check if there are any errors in our code. If a cursor or underline appears in a line, it means a syntax error. Please check and modify it. If there is no error, the lower left corner will prompt that there is no problem with the detection.
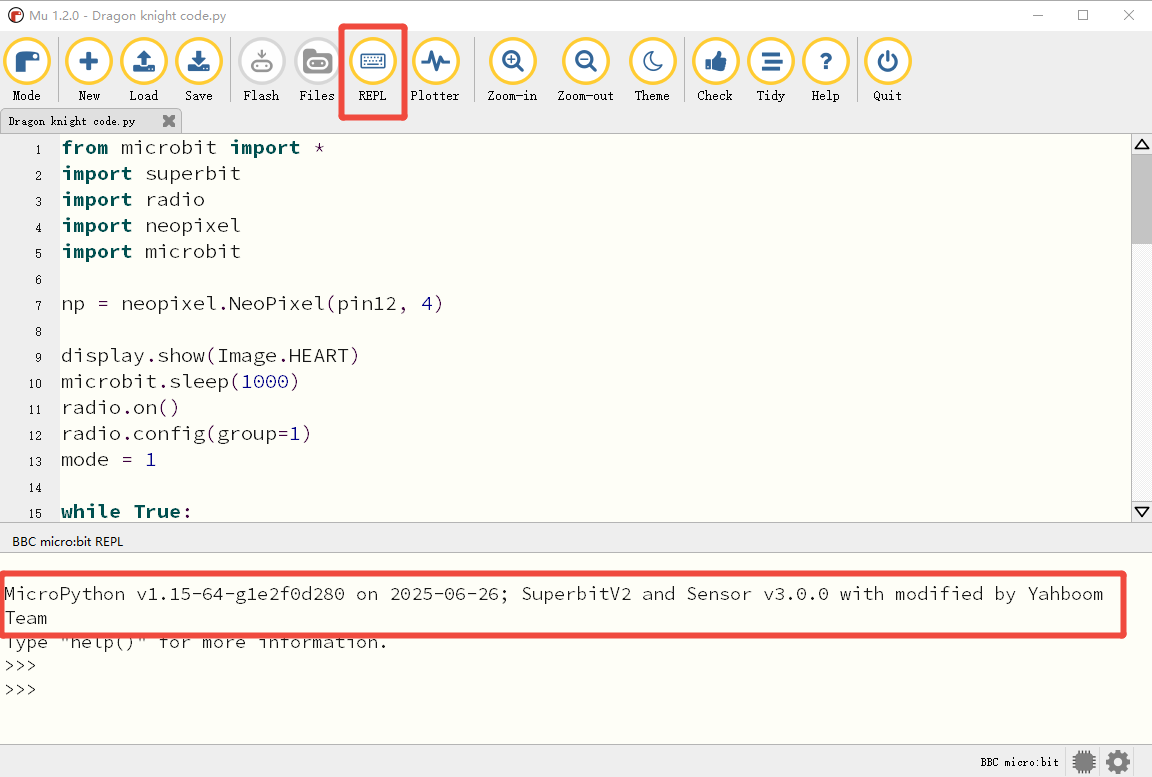
- Click the 'REPL' button to check whether the Superbit library has been downloaded. If not, please refer to [Preparation before class] --> [2.4 Python Programming Guide] .
- After the program is written, connect the computer and microbit mainboard with a microUSB data cable, please click the 'Flash' button to download the program to the micro:bit mainboard. (You need to click the 'REPL' button again to turn off the import library file function before you can download the program normally).
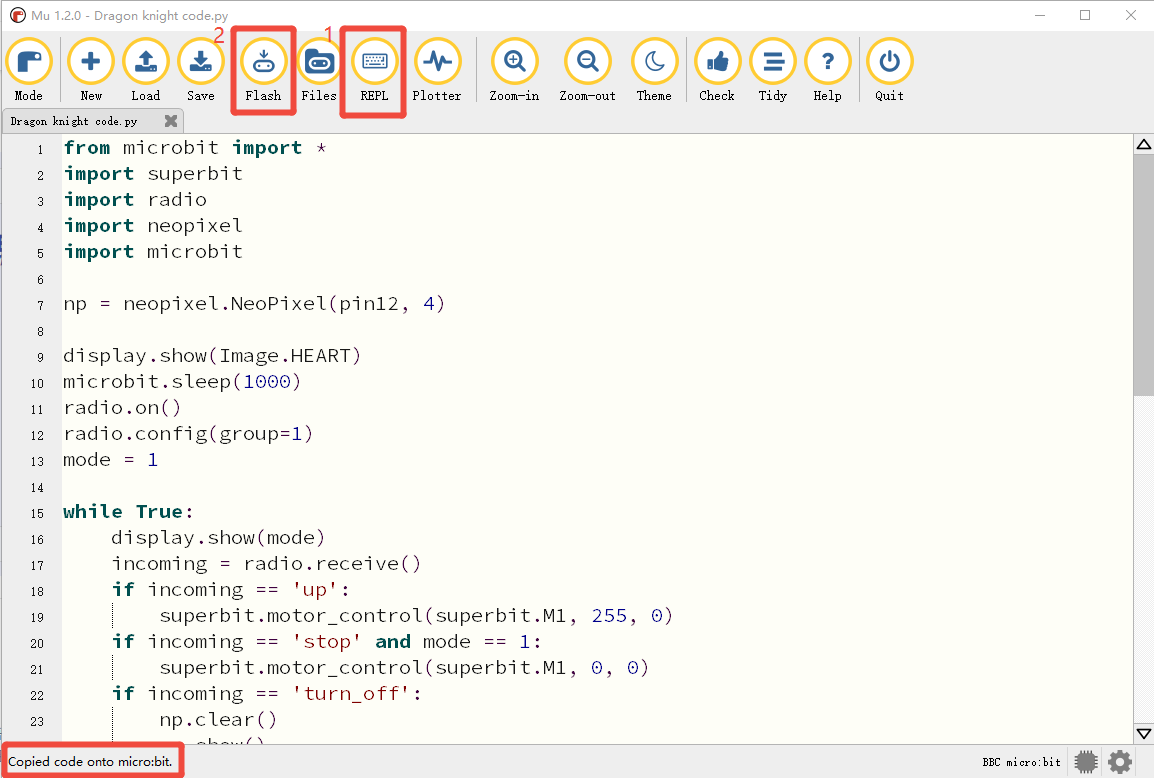
- If the download fails, please confirm whether the microbit is connected to the computer normally via the microUSB data cable and the Superbit Python library has been imported.
6. Experimental phenomenon
We need to download the Dragon knight code.py file to the micro:bit mainboard of the Dragon Knight, turn on the power switch of the Dragon Knight, and we can see a smiley face pattern displayed on the micro:bit dot matrix;
Download the Handle code.py file to the micro:bit mainboard of the handle, turn on the power switch of the handle, and we can see that the micro:bit dot matrix will be initialized to display a heart pattern, and then an "X" pattern will be displayed, indicating that the handle is in the default state and no data is sent.
The two will automatically complete the pairing, and then we can start remote control of the Dragon Knight.
The handle function is as follows.
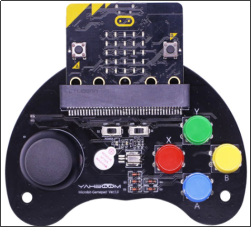
Handle joystick control:
After the handle and the Dragon Knight are successfully paired, we can see that the number 1 is displayed on the micro:bit dot matrix of the Dragon Knight, indicating that it is in mode 1 at this time.
In mode 1:
- Push the joystick forward to control the dragon knight's wings to flap, and release the hand to stop;
- Press the red button to light up the red RGB light;
- Press the green button to light up the green RGB light;
- Press the yellow button to light up the yellow RGB light;
- Press the blue button to light up the blue RGB light.
We can press the joystick to switch to mode 2. At this time, we can see the number 2 displayed on the micro:bit dot matrix of the dragon knight, indicating that it is in mode 2.
In mode 2:
- Push the joystick forward to control the dragon knight's wings to flap, and the wings will still flap when you release your hand;
- Press the red button to light up the red RGB light and stop the moving dragon knight;
- Press the green button to light up the green RGB light;
- Press the yellow button to light up the yellow RGB light;
- Press the blue button to light up the blue RGB light.
Every time you press the joystick, it will switch back and forth between mode 1 and mode 2, and the RGB light will go out.