Welcome to MicroROS-Pi5 repository
当製品の日本語版マニュアル資料は、こちらからご取得ください。
1. Self start handle control
Self start handle control
1. Wiring
Install the car according to the tutorial, and connect the Type-C data cable, handle receiver and USB camera, as shown below:
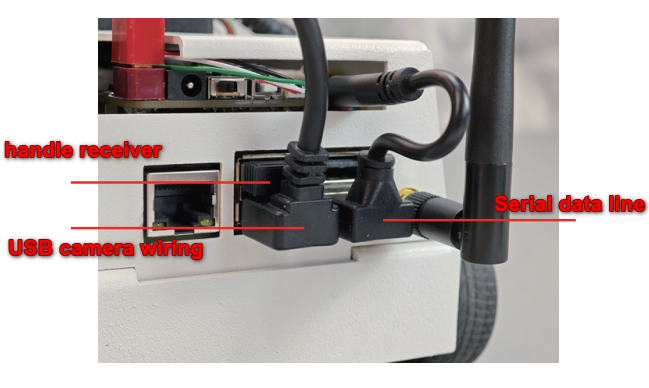
Turn on the power switch and we can quickly experience handle control!
2. Start
It takes about 30 seconds to start the car. You can press the START button on the handle. If the buzzer of the car makes a beep sound, it means that the handle can be used to control it.
NOTE:If there is no buzzer sound, it may be that the ROS control board firmware is incorrect or the agent is not connected successfully! It is common that the agent fails to connect successfully. You can press the RESET button on the MicroROS control panel and wait for about 30 seconds. The most accurate solution: You can refer to the remote control tutorial below and directly enter the Raspberry Pi system to view
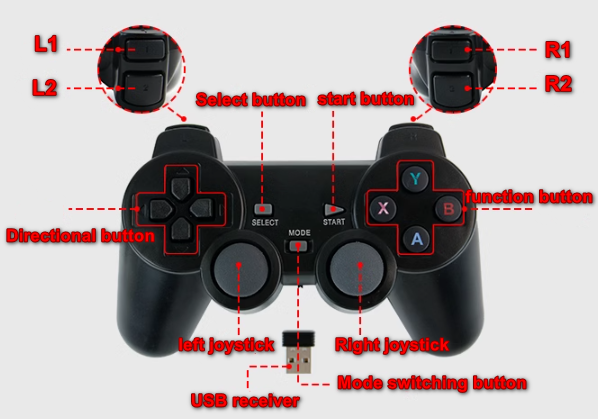
Before officially using the USB handle control, you need to press the R1 button.
| button | Function |
|---|---|
| Left joystick up | Car moves forward |
| Left joystick down | Car backs up |
| Right rocker right | Car turns right |
| Right rocker left | Car turns left |
| X | Steering gear turns left |
| B | Steering gear turns right |
| A | Turn the steering gear down |
| Y | Turn the steering gear up |
3. Self-starting problem in your own environment
3.1 Enter the car docker
Open another terminal and enter the following command to enter docker:
xxxxxxxxxxsh ros2_humble.sh
When the following interface appears, you have successfully entered docker. You can now control the car through commands.

Enter the following command in the terminal to check whether the controller is mounted normally.
xxxxxxxxxxls /dev/input*
When this interface appears, it means it was successfully mounted.

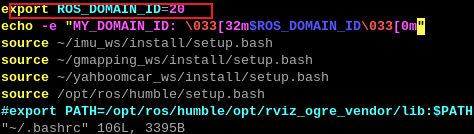
If the microros parameter is configured with another ID (the default is 20), the program needs to be modified to the corresponding ID to automatically start the controller control.
3.2Modify the ID of the .bashrc file to your own ID
Terminal input, here takes 20 as an example
xxxxxxxxxxvi ~/.bashrc
3.3Modify self-starting service
Terminal input, here takes 20 as an example
xvi /usr/lib/systemd/system/supervisor.service
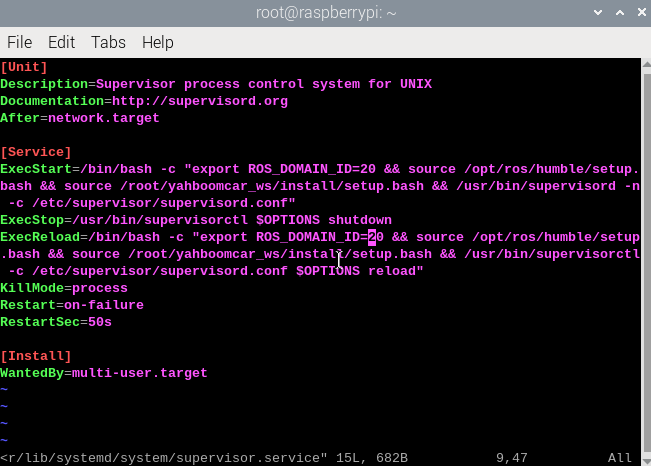
Just save and exit.
3.4 Submit docker with a new ID set.
Open a new terminal and enter
xxxxxxxxxxdocker ps -a
As you can see from the picture, the id of the docker just modified is bfe7cdaccb2d.

Continue to enter the following commands in the terminal to submit a new docker:
xxxxxxxxxxdocker commit bfe7cdaccb2d 192.168.2.51:5000/ros-humble:10.8
The parameters are as follows
Need to submit docker id:bfe7cdaccb2d
And the new docker name after submission:192.168.2.51:5000/ros-humble:10.8
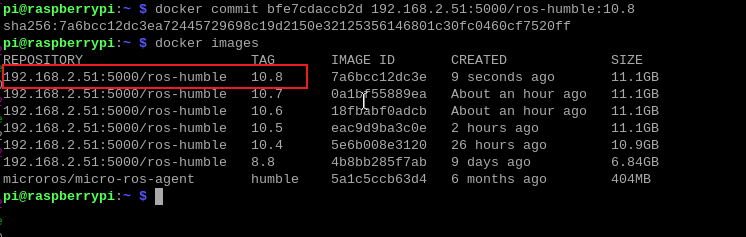
Enter the command and check whether the submission is successful
xxxxxxxxxxdocker images
When this 10.8 appears, the submission is successful.
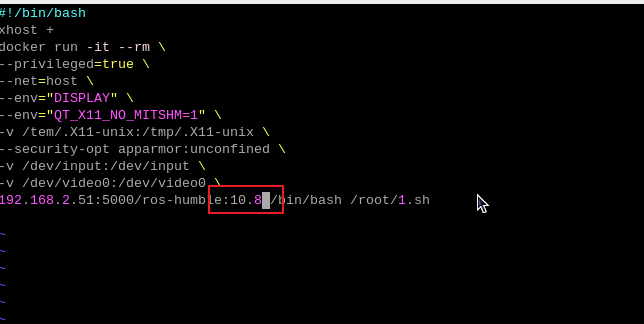
3.5 Modify the docker version in the self-starting script
After the modification is successful, you can use your own do_main_id version of docker to start the controller automatically.
Terminal input command
xxxxxxxxxxvi ros2_humble.sh
You can see that you have modified it to the docker version you submitted, save and exit. Restart the computer and you can use the handle to start automatically.