yahboom
HomeLearn
Solution
Blog
Online Store
About Us
EN/中文
MicroROS-Pi5📖
01. Introduction
  • 0.Unpacking and reviewing video
  • 1. ReadMe - learning route
  • 2. Introduction to lidar
  • 3. Introduction to microROS control board
  • 4. FAQ
  • 5. About charging
02. Assembly course
  • Assembly steps
03. Preparation
  • First Trial
  • 1. Write firmware
  • 2. MicroROS control board parameter configuration
  • 3. Connect to MicroROS agent
  • 4. Connect to WIFI in hotspot mode
04. Quick start control course
  • 1. Self start handle control
  • 2. Close the self-starting handle control process
  • 3. Quick start keyboard control
  • 4. Map navigation and APP control
05. Robot basic course
  • 1. Robot information release
  • 2. Robot keyboard control
  • 3. Robot handle control
  • 4. Robot state estimation
  • 5. Linear speed calibration
  • 6. Angular velocity calibration
  • 7. Robot URDF model
06. ROS+OpenCV course
  • 1. Getting started with Opencv CV
  • 2. Geometric transformation
  • 3. Image processing and drawing
  • 4. Open Source CV image beautification
  • 5. QR code creation and recognition
  • 6. AR vision
  • 7. ROS+Opencv application
07. Mediapipe course
  • 1. Hand detection
  • 2. Posture detection
  • 3. Overall detection
  • 4. Face detection
  • 5. Face recognition
  • 6. Face effects
  • 7. 3D object recognition
  • 8. Brush
  • 9. Finger control
  • 10 .Gesture recognition
08. Robot visual interaction
  • 1. Monocular camera calibration
  • 2. Color tracking
  • 3. Object recognition and tracking
  • 4. Face recognition tracking
  • 5. Autonomous driving line patrol
  • 6. QR code motion control
  • 7. Gesture control of basic movement of the car
  • 8. Control the car movement with your palm
  • 9. Gesture control car action group
  • 10. Palm control of the two-dimensional gimbal servo
09. Lidar course
  • 1. Lidar avoid
  • 2. Lidar following
  • 3. Lidar guard
  • 4. Lidar patrol
  • 5. Gmapping mapping
  • 6. Cartographer mapping
  • 7. Navigation2 navigation avoid
  • 8. ROS Robot APP mapping
  • 9. ROS Robot APP navigation
10. Multi-machine course
  • 1. Multi-machine handle control
  • 2. Multi-machine keyboard control
  • 3. Multi-machine navigation
11. Linux basic course
  • 1. Introduction to Linux system
  • 2. Ubuntu file system
  • 3. Ubuntu common commands
  • 4. Ubuntu common editors
  • 5. Ubuntu software operation commands
  • 6. Virtual machine installation
  • 7. SSH remote control
  • 8. VNC remote control
  • 9. Transfer files remotely
  • 10. Driver library and communication
  • 11. Static IP and hotspot mode
  • 12. Bind device ID
  • 13. Capacity expansion and resource allocation
  • 14. Update system software sources
  • 15. Set root user password
  • 16. sudo free password
  • 17. Connect to WiFi network
  • 18. View system version
  • 19. Customized service management
  • 20. Back up system image
12. RPi basic setting course
  • 1. Update and upgrade operating system
  • 2. Introduction to raspi-config tool
  • 3. config.txt file description
  • 4. Network Configuration
  • 5. remote access
  • 6. Transfer files remotely
  • 7. Set display resolution and rotation
  • 8. Set screen to sleep
  • 9. Get real-time temperature of Raspberry Pi
  • 10. Play audio and video
  • 11. Using USB camera
  • 12. Using MIPI camera
13. Docker course
  • 1. Overview and installation
  • 2. Common commands
  • 3. Docker images deeply understand and publish images
  • 4. Docker hardware interaction and data processing
  • 5. Enter the robot's docker container
14. ROS2 basic course
  • 1. Introduction to ROS2
  • 2. ROS2 install Humble
  • 3. ROS2 development environment
  • 4. ROS2 workspace
  • 5. ROS2 function package
  • 6. ROS2 node
  • 7.ROS2 topic communication
  • 8.ROS2 service communication
  • 9.ROS2 action communication
  • 10.ROS2 custom interface message
  • 11.ROS2 parameter service case
  • 12.ROS2 meta-function package
  • 13.ROS2 distributed communication
  • 14.ROS2 DDS
  • 15.ROS2 time related API
  • 16.ROS2 common command tools
  • 17.ROS2 rviz2 use
  • 18.ROS2 rqt toolbox
  • 19.ROS2 Launch startup file configuration
  • 20.ROS2 recording and playback tool
  • 21.ROS2 URDF model
  • 22.ROS2 Gazebo simulation platform
  • 23.ROS2 TF2 coordinate transformation
15. microROS control board development environment
  • 1. Introduction to microROS control board
  • 2. Set up ESP32-IDF development environment
  • 3. ESP32-IDF configuration tool
  • 4. Install ESP32-microros components
  • 5. Install and start microROS agent
  • 6. Flash-tool burning firmware
16. ESP32 basic course
  • 1. Turn on the LED light
  • 2. Button function
  • 3. Drive the buzzer
  • 4. Serial communication
  • 5. Battery voltage detection
  • 6. Drive PWM servo
  • 7. Drive motor
  • 8. Read motor encoder data
  • 9. PID controls car speed
  • 10. Read IMU data
  • 11. Read radar data
  • 12. Flash access data
  • 13. Partition table and memory
  • 14. Bluetooth communication
  • 15. WiFi networking
  • 16. Robot kinematics analysis
  • 17.ROS-WiFi camera module
17. microROS basic course
  • 1. Publish topic
  • 2. Subscribe topic
  • 3. Multi-topic subscribe and publish
  • 4. Subscribe buzzer topics
  • 5. Subscribe PWM servo topics
  • 6. Subscribe speed control topics
  • 7. Release speed topic
  • 8. Release IMU data topic
  • 9. Publish lidar data topics
  • 10. Customized transmission method
Download
  • Mapping_APP(iOS_Android)
  • Source code
  • Hardware information
  • VM image file
  • RPi5 imgae file
  • Instruction Manual
  • 3D Model File
  • ROS2_Basic_VM
Download ZIP
FAQ
  • 1、1.USB camera abnormal termination

Welcome to MicroROS-Pi5 repository

当製品の日本語版マニュアル資料は、こちらからご取得ください。

1. Getting started with Opencv CV

Getting started with Opencv CV

1.Introduction to Open Source CV
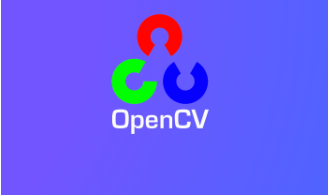
image-20220217202241894

What is OpenCV? Its full name is Open source Computer Vision Library, open source computer vision library.As shown in the picture above, what we see is the OpenCV logo. We can see that it consists of three small rings in the three distinct primary colors of R, G, and B.In other words, it is a set of open source API function libraries about computer vision. This also means,

(1) Whether it is scientific research or commercial application, it can be used for development;

(2) The source code of all API functions is public, and you can see the program steps of its internal implementation;

(3) You can modify the source code of OpenCV and compile and generate the specific API functions you need.

Image processing on ROSMASTER uses certain functions of the OpenCV function library, or it can be said that it is inseparable from its existence in most image processing design fields.As early as many years ago, OpenCV has been showing its talents in the fields of intrusion detection, specific target tracking, target detection, face detection, face recognition, face tracking, etc., and these are just the tip of the iceberg of its applications. Since we realize that OpenCV is so versatile, in this chapter we will introduce you to some very basic image processing functions that we use in our courses, as well as some universal functions.Here we first have a general understanding of this knowledge, and then there are two practical projects on color recognition and tracking, and face recognition and tracking to teach you how to get started. However, the powerful application functions provided by OpenCV are far more than this.If you are interested in Opencv computer vision library development and want to learn more about it, here are several websites for your reference and study:

OpenCV Official homepage :https://www.opencv.org

OpenCV Chinese forum:http://www.opencv.org.cn

OpenCV CSDN forum :https://bbs.csdn.net/forums/OpenCV

2.Image reading and display

2.1. Reading of images:

img = cv2.imread('yahboom.jpg', 0) The first parameter is the path of the image, and the second parameter is how to read the image.

cv2.IMREAD_UNCHANGED:Keep the original format unchanged,-1;

cv2.IMREAD_GRAYSCALE:Read the image in grayscale mode, which can be represented by 0;

cv2.IMREAD_COLOR:,read a color picture, which can be represented by 1; default value

cv2.IMREAD_UNCHANGED:Read in an image and include its alpha channel, which can be represented by 2.

2.2. Image display

cv.imshow('frame', frame):Open a window named frame and display frame data (image/video data)

Parameter meaning:

The first parameter represents the name of the window that is created and opened.

The second parameter represents the image to be displayed

2.3、Code and actual effect display

run code

cd ~/yahboomcar_ws/src/yahboomcar_astra/scripts/opencv/
python3 1_1.py
xxxxxxxxxx
import cv2 as cv
•
if __name__ == '__main__':
    img = cv.imread('yahboom.jpg')
    while True :
        cv.imshow("frame",img)
        action = cv.waitKey(10) & 0xFF
        if action == ord('q') or action == 113:
            break
    img.release()
    cv.destroyAllWindows()

Rendering after running the program:

image-20240123155730268

3、OpenCV image writing

3.1、Function method:cv2.imwrite('new_img_name', img)

Parameter meaning:

The first parameter is the saved file name

The second parameter is the saved image

3.2、Code and actual effect display

Run program

xxxxxxxxxx
cd ~/yahboomcar_ws/src/yahboomcar_astra/scripts/opencv/
python3 1_2.py
x
import cv2 as cv
•
if __name__ == '__main__':
    img = cv.imread('yahboom.jpg')
    cv.imwrite("yahboom_new.jpg",img)   #Create a new file yahboom_new.jpg and write yahboom.jpg into it
    new_img = cv.imread('yahboom_new.jpg') #Read newly written pictures
    while True :
        cv.imshow("frame",img)
        cv.imshow("new_frame",new_img)
        action = cv.waitKey(10) & 0xFF
        if action == ord('q') or action == 113:
            break
    img.release()
    cv.destroyAllWindows()

Effect picture after running the program
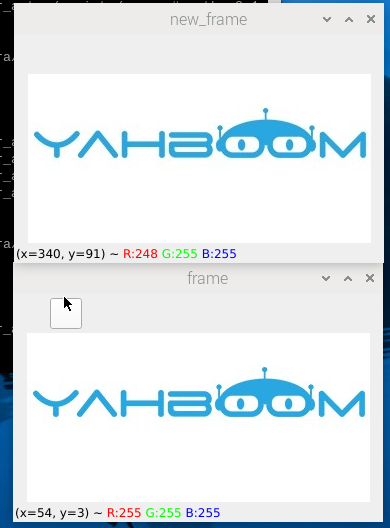
image-20240123155924108

4、OpenCV camera reading and displaying video

4.1、Camera reading

capture=cv.VideoCapture(0)

Parameter meaning:

The parameter in VideoCapture() is 0, which means opening the laptop's built-in camera. If the parameter is the video file path, the video will be opened, such as cap = cv2.VideoCapture("../test.avi")

4.2、Show camera video

ret,img = frame.read()

Return value meaning:

ret:ret is a bool value to determine whether the correct frame is read back.

img:Image data for each frame

4.3、Code and actual effect display

Run program

xxxxxxxxxx
cd ~/yahboomcar_ws/src/yahboomcar_astra/scripts/opencv/
python3 1_3.py
xxxxxxxxxx
import cv2 as cv
if __name__ == '__main__':
    frame = cv.VideoCapture(0)
    while frame.isOpened():
        ret,img = frame.read()
        cv.imshow('frame',img)
        action = cv.waitKey(10) & 0xFF
        if action == ord('q') or action == 113:
            break
    frame.release()
    cv.destroyAllWindows()

After the program is run, the camera image is displayed.
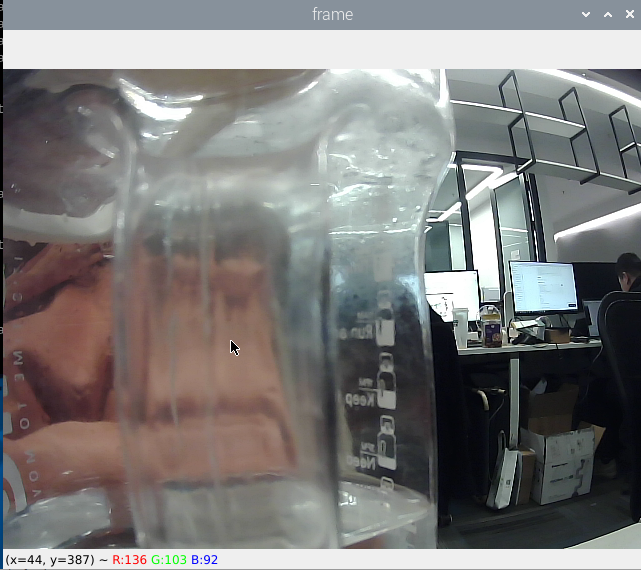
image-20240123160115576

5、OpenCV pixel operations

5.1、Pixel operation, we can change any position to a new pixel color.

First, we need to read the image, then modify the value of bgr and assign an area to black.

5.2、Code and actual effect display

Run program in terminal

xxxxxxxxxx
cd ~/yahboomcar_ws/src/yahboomcar_astra/scripts/opencv/
python3 1_4.py
xxxxxxxxxx
import cv2
if __name__ == '__main__':
    img = cv2.imread('yahboom.jpg')
    (b,g,r) = img[100,100]
    print(b,g,r)
    i=j=0
    for j in range(1,255):
        img[i,j] = (0,0,0)
        for j in range(1,255):
            img[i,j] = (0,0,0)
    while True :
        cv2.imshow("frame",img)
        action = cv2.waitKey(10) & 0xFF
        if action == ord('q') or action == 113:
            break
    img.release()
    cv2.destroyAllWindows()

Effect picture after running the program.
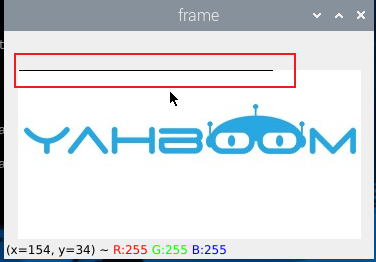
image-20240123160253808

The red box part is the modified pigment value.


Robot URDF model
Geometric transformation

COMPANY

  • About us
  • Team Style
  • Blog

LEARNING & EXPLORATION

  • Tutorials
  • Edge AI hardware
  • Educational robots
  • Embedded intelligent hardware

WHERE TO BUY

  • Yahboom Online Store
  • Amazon
  • Alibaba
  • AliExpress
  • Mercado

TECHNOLOGY SUPPORT

  • Email: support@yahboom.com

BE A DISTRIBUTOR

  • Email: sales@yahboom.com
QR Code

Copyright © 2017-2026 Yahboom. All Rights Reserved.

EN/中文