Welcome to MicroROS-Pi5 repository
当製品の日本語版マニュアル資料は、こちらからご取得ください。
7. Navigation2 navigation avoid
Navigation2 navigation avoid
Note: The ROS_DOMAIN_ID of the Raspberry Pi and the microROS control board need to be consistent. You can check [MicroROS Control Board Parameter Configuration] to set the microROS control board ROS_DOMAIN_ID. Check the tutorial [Connect MicroROS Agent] to determine whether the IDs are consistent.
1、Introduction to Navigation2
Navigation2 overall architecture diagram
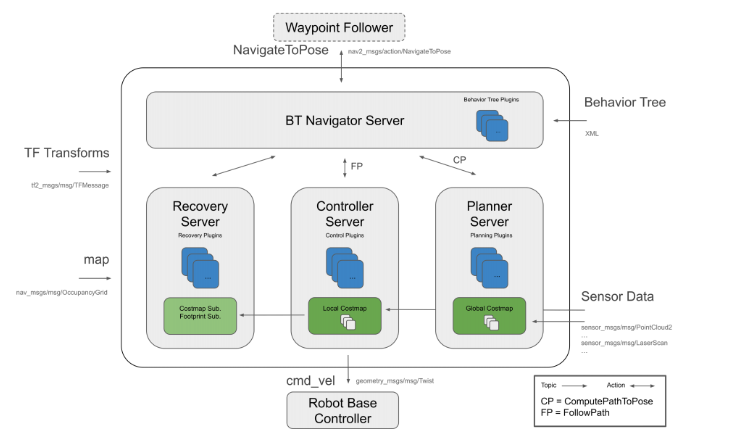
Navigation2 has the following tools:
● Tools for loading, serving, and storing maps (Map Server)
● Tool to locate the robot on the map (AMCL)
● Navigate from point A to point B with Nav2 Planner
● Tool to control the robot during the following path (Nav2 Controller)
● Tools for converting sensor data into cost map representations in the world of robotics (Nav2 Costmap 2D)
● Tools for building complex robot behaviors using behavior trees (Nav2 Behavior Trees and BT Navigator)
● Tool to calculate recovery behavior in the event of a failure (Nav2 Recoveries)
● Nav2 Waypoint Follower
● Tools and watchdog for managing server lifecycles (Nav2 Lifecycle Manager)
● Plugins that enable user-defined algorithms and behaviors (Nav2 Core)
Navigation 2 (Nav 2) is the navigation framework that comes with ROS 2 and aims to move mobile robots from point A to point B in a safe way. As a result, Nav 2 can perform dynamic path planning, calculate motor speed, avoid obstacles, and restore structures.
Nav 2 uses Behavior Trees (BT) to call modular servers to complete an action. Actions can be calculated paths, control efforts, recovery, or other navigation-related actions. These actions are independent nodes that communicate with the Behavior Tree (BT) through the Action Server.
Information reference website:
Navigation2 Documentation:https://navigation.ros.org/index.html
Navigation2 github:https://github.com/ros-planning/navigation2
Papers corresponding to Navigation2:https://arxiv.org/pdf/2003.00368.pdf
Plug-ins provided by Navigation2:https://navigation.ros.org/plugins/index.html#plugins
2、Program function description
The car connects to the agent, runs the program, and the map will be loaded in rviz. In the rviz interface, use the [2D Pose Estimate] tool to give the initial pose of the car, and then use the [2D Goal Pose] tool to give the car a target point. The car will plan a path based on its own environment and move to the destination according to the planned path. If it encounters an obstacle during the process, it will avoid the obstacle by itself and stop when it reaches the destination.
3、Query car information
3.1、Start and connect to the agent
After the Raspberry Pi is successfully powered on, open the terminal and enter the following command to open the agent.
sh ~/start_agent_rpi5.sh

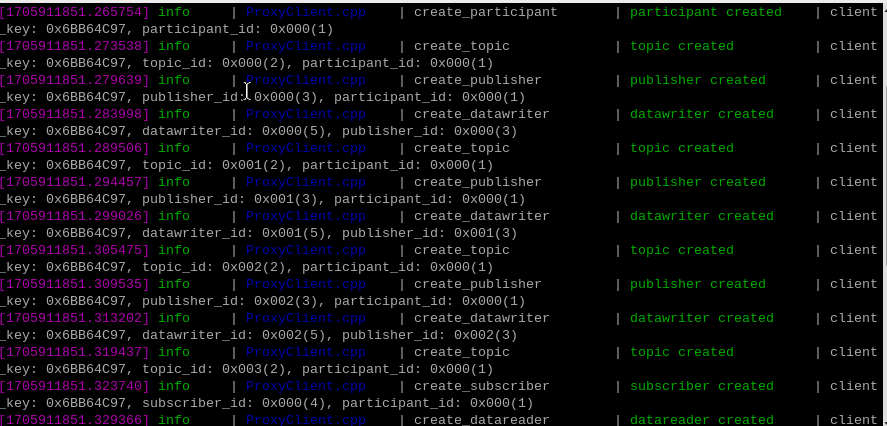
Press the reset button on the microROS control board and wait for the car to connect to the agent. The connection is successful as shown in the figure below.
3.2、Enter the car docker
Open another terminal and enter the following command to enter docker.
xxxxxxxxxxsh ros2_humble.sh
When the following interface appears, you have successfully entered docker. Now you can control the car through commands.

4、starting program
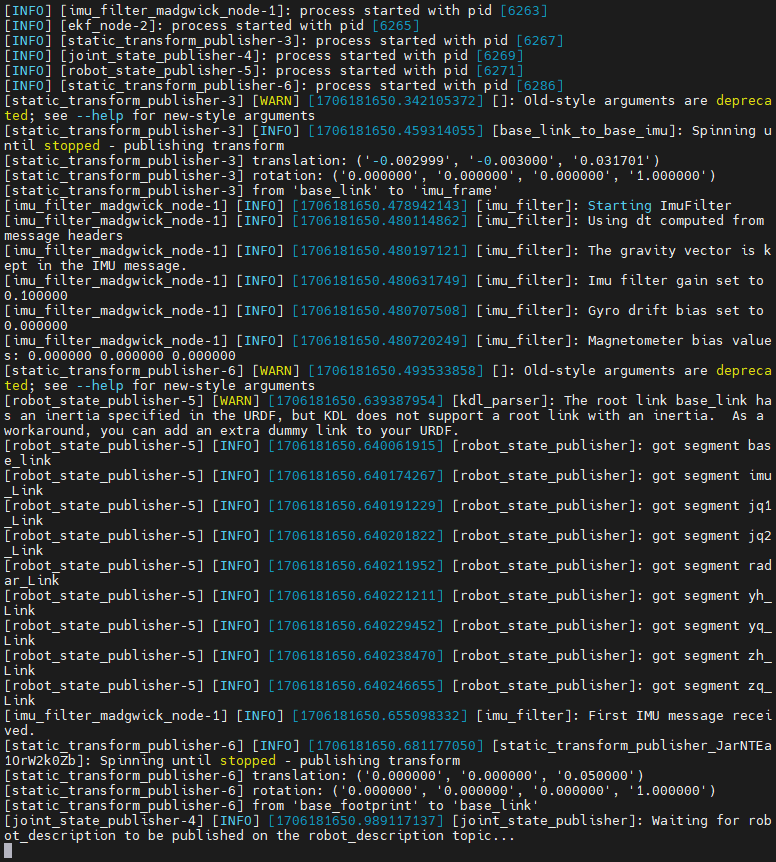
First, start the car to process the underlying data program, and enter the following command in the terminal
xxxxxxxxxxros2 launch yahboomcar_bringup yahboomcar_bringup_launch.py
Then enter the command in the terminal to start rviz for visual navigation.
xxxxxxxxxxros2 launch yahboomcar_nav display_launch.py
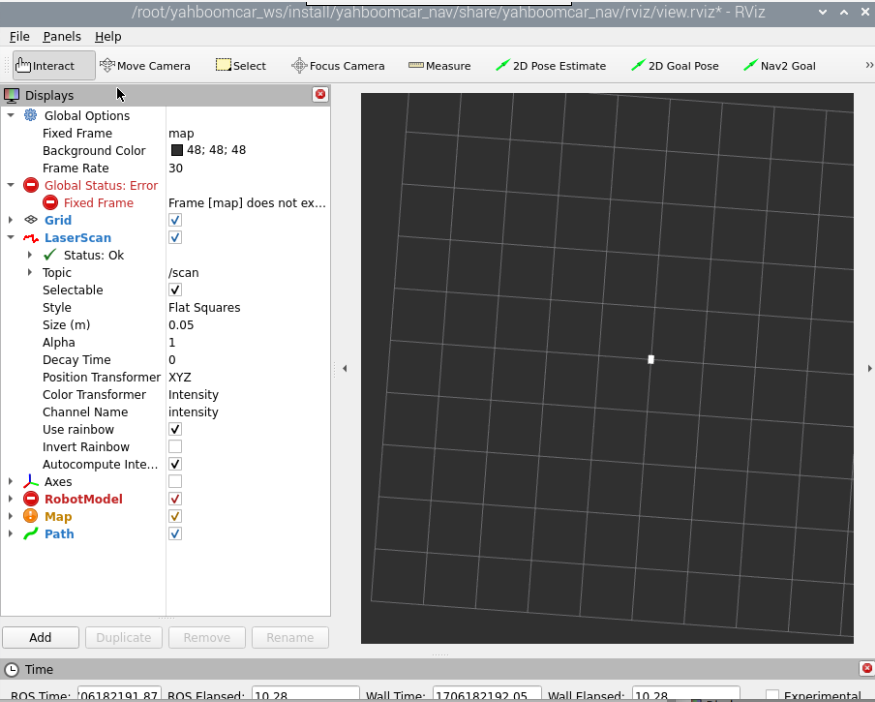
At this time, the map loading is not displayed because the navigation program has not been started yet, so there is no map loading. Next, run the navigation node and enter the following command in the terminal.
xxxxxxxxxxros2 launch yahboomcar_nav navigation_dwb_launch.py
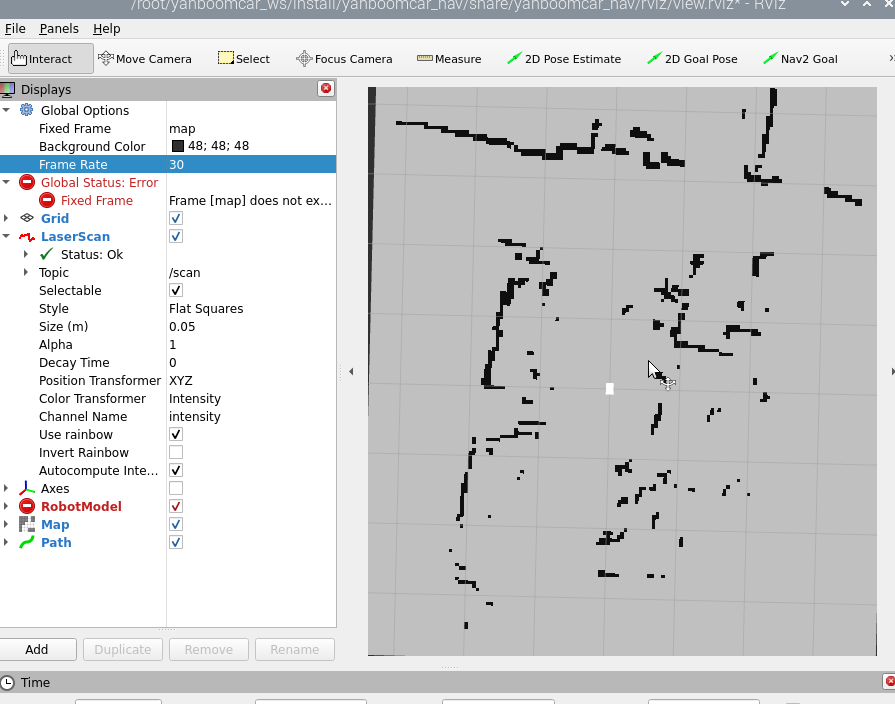
At this point you can see that the map is loaded, and then we click [2D Pose Estimate] to set the initial pose for the car. According to the position of the car in the actual environment, click and drag with the mouse in rviz, and the car model moves according to the position we set Location. As shown in the figure below, if the area scanned by the radar roughly coincides with the actual obstacle, it means the pose is accurate.
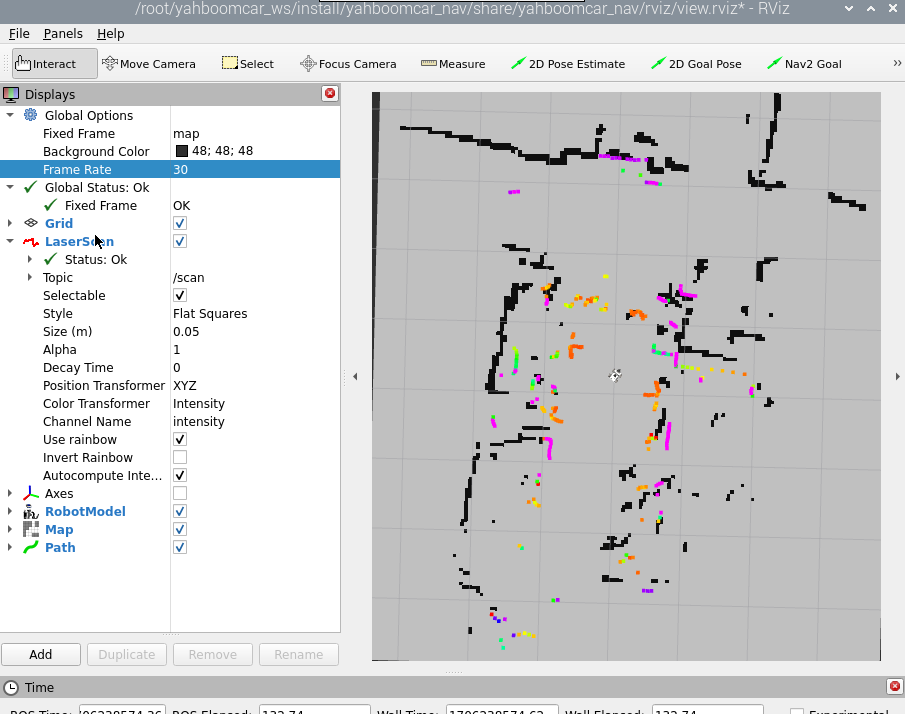
For single-point navigation, click the [2D Goal Pose] tool, and then select a target point in rviz. The car will plan a path based on the surrounding situation and move along the path to the target point.
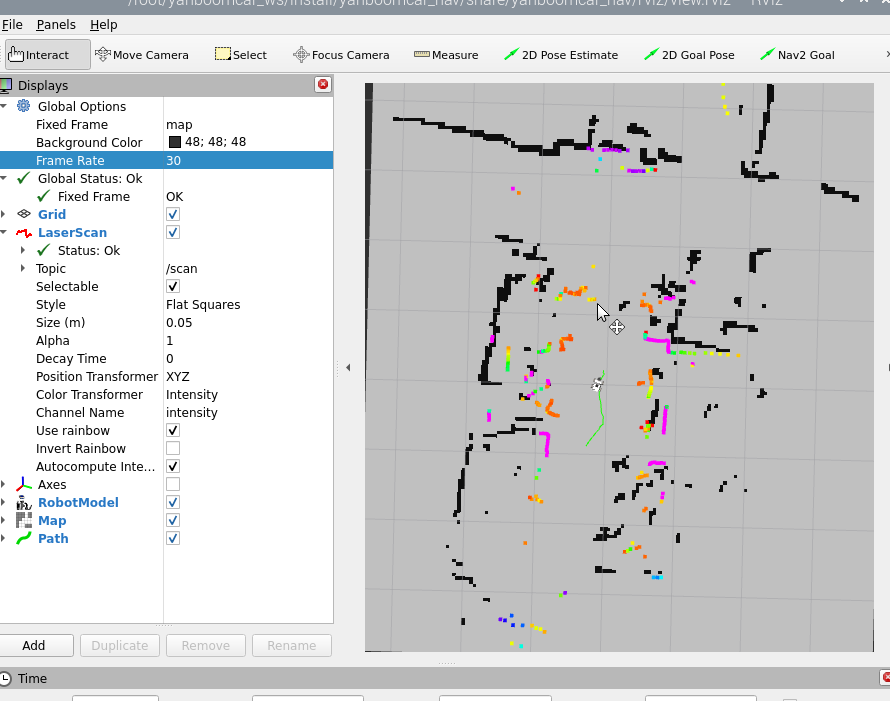
For multi-point navigation, you need to add the nav2 plug-in.
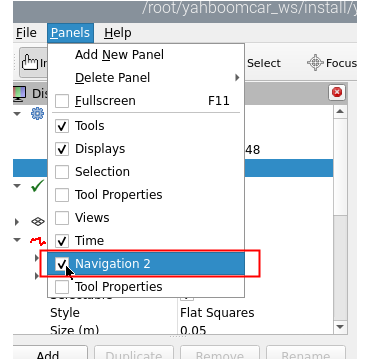
After adding, rviz displays as follows.
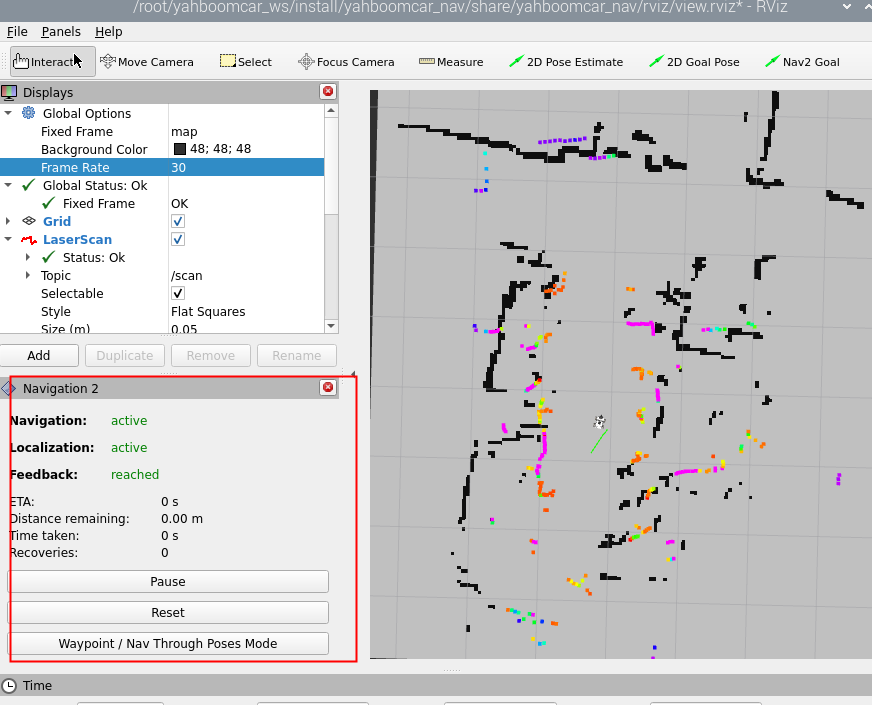
Then click [Waypoint/Nav Through Poses Mode].
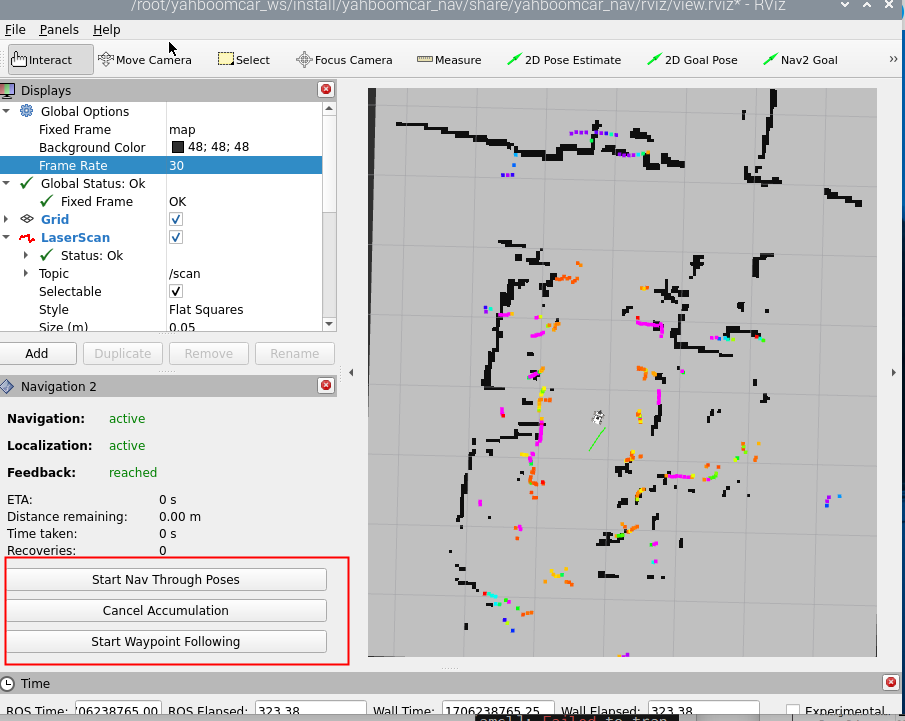
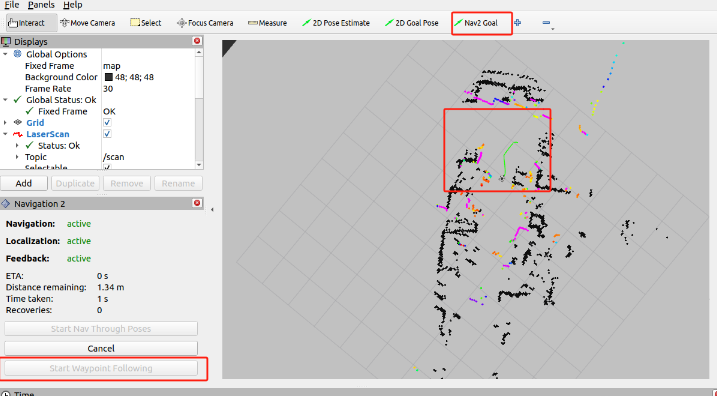
Use [Nav2 Goal] in the rivz toolbar to specify any target point, and then click [Start Waypoint Following] to start planning path navigation. The car will automatically go to the next point according to the order of the selected points, and no operation is required after reaching the target point. After reaching the last point, the car stops and waits for the next instruction.
5、View node communication diagram
Terminal input command
xxxxxxxxxxros2 run rqt_graph rqt_graphIf it is not displayed at first, select [Nodes/Topics(all)], and then click the refresh button in the upper left corner.
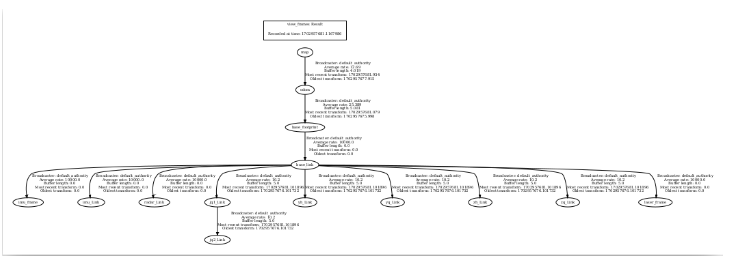
6、View TF tree
Terminal input command
xxxxxxxxxxros2 run tf2_tools view_frames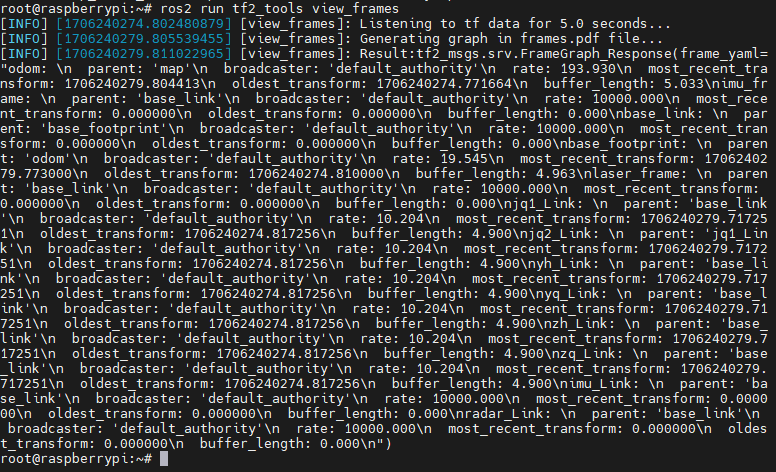
After the operation is completed, two files will be generated in the terminal directory, namely .gv and .pdf files. The pdf file is the TF tree.
7、Code analysis
Here we only describe the navigation_dwb_launch.py of navigation. The path of this file is as follows.
xxxxxxxxxx/root/yahboomcar_ws/src/yahboomcar_nav/launchnavigation_dwb_launch.py,
ximport osfrom ament_index_python.packages import get_package_share_directoryfrom launch import LaunchDescriptionfrom launch.actions import DeclareLaunchArgumentfrom launch.actions import IncludeLaunchDescriptionfrom launch.launch_description_sources import PythonLaunchDescriptionSourcefrom launch.substitutions import LaunchConfigurationfrom launch_ros.actions import Node
def generate_launch_description(): package_path = get_package_share_directory('yahboomcar_nav') nav2_bringup_dir = get_package_share_directory('nav2_bringup')
use_sim_time = LaunchConfiguration('use_sim_time', default='false') map_yaml_path = LaunchConfiguration( 'maps', default=os.path.join(package_path, 'maps', 'yahboom_map.yaml')) nav2_param_path = LaunchConfiguration('params_file', default=os.path.join( package_path, 'params', 'dwb_nav_params.yaml'))
return LaunchDescription([ DeclareLaunchArgument('use_sim_time', default_value=use_sim_time, description='Use simulation (Gazebo) clock if true'), DeclareLaunchArgument('maps', default_value=map_yaml_path, description='Full path to map file to load'), DeclareLaunchArgument('params_file', default_value=nav2_param_path, description='Full path to param file to load'),
IncludeLaunchDescription( PythonLaunchDescriptionSource( [nav2_bringup_dir, '/launch', '/bringup_launch.py']), launch_arguments={ 'map': map_yaml_path, 'use_sim_time': use_sim_time, 'params_file': nav2_param_path}.items(), ), Node( package='tf2_ros', executable='static_transform_publisher', name='base_link_to_base_laser', arguments=['-0.0046412', '0' , '0.094079','0','0','0','base_link','laser_frame'] ), Node( package='yahboomcar_nav', executable='stop_car' ) ])The following nodes are started here
base_link_to_base_laser:Publish static TF transformation;
stop_car:For the parking node, after ctrl c exits the program, the parking speed will be announced to the car;
bringup_launch.py:Launch navigation launch file, the file is located at,
/opt/ros/humble/share/nav2_bringup/launch
In addition, a navigation parameter configuration file dwb_nav_params.yaml and a map file yahboom_map.yaml are also loaded. The path to the navigation parameter table is as follows.
xxxxxxxxxx/root/yahboomcar_ws/src/yahboomcar_nav/paramsThe map file is as follows.
xxxxxxxxxx/root/yahboomcar_ws/src/yahboomcar_nav/mapsdwb_nav_params.yaml,
xxxxxxxxxxamcl ros__parameters use_sim_timeFalse alpha10.2 alpha20.2 alpha30.2 alpha40.2 alpha50.2 base_frame_id"base_footprint" beam_skip_distance0.5 beam_skip_error_threshold0.9 beam_skip_threshold0.3 do_beamskipfalse global_frame_id"map" lambda_short0.1 laser_likelihood_max_dist2.0 laser_max_range100.0 laser_min_range-1.0 laser_model_type"likelihood_field" max_beams60 max_particles2000 min_particles500 odom_frame_id"odom" pf_err0.05 pf_z0.99 recovery_alpha_fast0.0 recovery_alpha_slow0.0 resample_interval1 robot_model_type"nav2_amcl::DifferentialMotionModel" save_pose_rate0.5 sigma_hit0.2 tf_broadcasttrue transform_tolerance1.0 update_min_a0.2 update_min_d0.25 z_hit0.5 z_max0.05 z_rand0.5 z_short0.05 scan_topicscan
bt_navigator ros__parameters use_sim_timeFalse global_framemap robot_base_framebase_link odom_topic/odom bt_loop_duration10 default_server_timeout20 default_bt_xml_filename"navigate_to_pose_w_replanning_and_recovery.xml" # 'default_nav_through_poses_bt_xml' and 'default_nav_to_pose_bt_xml' are use defaults: # nav2_bt_navigator/navigate_to_pose_w_replanning_and_recovery.xml # nav2_bt_navigator/navigate_through_poses_w_replanning_and_recovery.xml # They can be set here or via a RewrittenYaml remap from a parent launch file to Nav2. plugin_lib_namesnav2_compute_path_to_pose_action_bt_nodenav2_compute_path_through_poses_action_bt_nodenav2_smooth_path_action_bt_nodenav2_follow_path_action_bt_nodenav2_spin_action_bt_nodenav2_wait_action_bt_nodenav2_assisted_teleop_action_bt_nodenav2_back_up_action_bt_nodenav2_drive_on_heading_bt_nodenav2_clear_costmap_service_bt_nodenav2_is_stuck_condition_bt_nodenav2_goal_reached_condition_bt_nodenav2_goal_updated_condition_bt_nodenav2_globally_updated_goal_condition_bt_nodenav2_is_path_valid_condition_bt_nodenav2_initial_pose_received_condition_bt_nodenav2_reinitialize_global_localization_service_bt_nodenav2_rate_controller_bt_nodenav2_distance_controller_bt_nodenav2_speed_controller_bt_nodenav2_truncate_path_action_bt_nodenav2_truncate_path_local_action_bt_nodenav2_goal_updater_node_bt_nodenav2_recovery_node_bt_nodenav2_pipeline_sequence_bt_nodenav2_round_robin_node_bt_nodenav2_transform_available_condition_bt_nodenav2_time_expired_condition_bt_nodenav2_path_expiring_timer_conditionnav2_distance_traveled_condition_bt_nodenav2_single_trigger_bt_nodenav2_goal_updated_controller_bt_nodenav2_is_battery_low_condition_bt_nodenav2_navigate_through_poses_action_bt_nodenav2_navigate_to_pose_action_bt_nodenav2_remove_passed_goals_action_bt_nodenav2_planner_selector_bt_nodenav2_controller_selector_bt_nodenav2_goal_checker_selector_bt_nodenav2_controller_cancel_bt_nodenav2_path_longer_on_approach_bt_nodenav2_wait_cancel_bt_nodenav2_spin_cancel_bt_nodenav2_back_up_cancel_bt_nodenav2_assisted_teleop_cancel_bt_nodenav2_drive_on_heading_cancel_bt_nodenav2_is_battery_charging_condition_bt_node
bt_navigator_navigate_through_poses_rclcpp_node ros__parameters use_sim_timeFalse
bt_navigator_navigate_to_pose_rclcpp_node ros__parameters use_sim_timeFalse
controller_server ros__parameters use_sim_timeFalse controller_frequency20.0 min_x_velocity_threshold0.001 min_y_velocity_threshold0.5 min_theta_velocity_threshold0.001 failure_tolerance0.3 progress_checker_plugin"progress_checker" goal_checker_plugins"general_goal_checker" # "precise_goal_checker" controller_plugins"FollowPath"
# Progress checker parameters progress_checker plugin"nav2_controller::SimpleProgressChecker" required_movement_radius0.5 movement_time_allowance10.0 # Goal checker parameters #precise_goal_checker: # plugin: "nav2_controller::SimpleGoalChecker" # xy_goal_tolerance: 0.25 # yaw_goal_tolerance: 0.25 # stateful: True general_goal_checker statefulTrue plugin"nav2_controller::SimpleGoalChecker" xy_goal_tolerance0.25 yaw_goal_tolerance0.25 # DWB parameters FollowPath plugin"dwb_core::DWBLocalPlanner" debug_trajectory_detailsTrue min_vel_x-0.20 min_vel_y0.0 max_vel_x0.30 max_vel_y0.0 max_vel_theta1.0 min_speed_xy-0.20 max_speed_xy0.30 min_speed_theta-0.5 # Add high threshold velocity for turtlebot 3 issue. # https://github.com/ROBOTIS-GIT/turtlebot3_simulations/issues/75 acc_lim_x2.5 acc_lim_y0.0 acc_lim_theta3.2 decel_lim_x-2.5 decel_lim_y0.0 decel_lim_theta-3.2 vx_samples20 vy_samples5 vtheta_samples20 sim_time1.7 linear_granularity0.05 angular_granularity0.025 transform_tolerance0.2 xy_goal_tolerance0.25 trans_stopped_velocity0.25 short_circuit_trajectory_evaluationTrue statefulTrue critics"RotateToGoal" "Oscillation" "BaseObstacle" "GoalAlign" "PathAlign" "PathDist" "GoalDist" BaseObstacle.scale0.02 PathAlign.scale32.0 PathAlign.forward_point_distance0.1 GoalAlign.scale24.0 GoalAlign.forward_point_distance0.1 PathDist.scale32.0 GoalDist.scale24.0 RotateToGoal.scale32.0 RotateToGoal.slowing_factor5.0 RotateToGoal.lookahead_time-1.0
local_costmap local_costmap ros__parameters update_frequency5.0 publish_frequency2.0 global_frameodom robot_base_framebase_link use_sim_timeFalse rolling_windowtrue width3 height3 resolution0.05 robot_radius0.22 plugins"voxel_layer" "inflation_layer" inflation_layer plugin"nav2_costmap_2d::InflationLayer" cost_scaling_factor3.0 inflation_radius0.55 voxel_layer plugin"nav2_costmap_2d::VoxelLayer" enabledTrue publish_voxel_mapTrue origin_z0.0 z_resolution0.05 z_voxels16 max_obstacle_height2.0 mark_threshold0 observation_sourcesscan scan topic/scan max_obstacle_height2.0 clearingTrue markingTrue data_type"LaserScan" raytrace_max_range3.0 raytrace_min_range0.0 obstacle_max_range2.5 obstacle_min_range0.0 static_layer plugin"nav2_costmap_2d::StaticLayer" map_subscribe_transient_localTrue always_send_full_costmapTrue
global_costmap global_costmap ros__parameters update_frequency1.0 publish_frequency1.0 global_framemap robot_base_framebase_link use_sim_timeFalse robot_radius0.22 resolution0.05 track_unknown_spacetrue plugins"static_layer" "obstacle_layer" "inflation_layer" obstacle_layer plugin"nav2_costmap_2d::ObstacleLayer" enabledTrue observation_sourcesscan scan topic/scan max_obstacle_height2.0 clearingTrue markingTrue data_type"LaserScan" raytrace_max_range3.0 raytrace_min_range0.0 obstacle_max_range2.5 obstacle_min_range0.0 static_layer plugin"nav2_costmap_2d::StaticLayer" map_subscribe_transient_localTrue inflation_layer plugin"nav2_costmap_2d::InflationLayer" cost_scaling_factor3.0 inflation_radius0.55 always_send_full_costmapTrue
map_server ros__parameters use_sim_timeFalse # Overridden in launch by the "map" launch configuration or provided default value. # To use in yaml, remove the default "map" value in the tb3_simulation_launch.py file & provide full path to map below. yaml_filename""
map_saver ros__parameters use_sim_timeFalse save_map_timeout5.0 free_thresh_default0.25 occupied_thresh_default0.65 map_subscribe_transient_localTrue
planner_server ros__parameters expected_planner_frequency20.0 use_sim_timeFalse planner_plugins"GridBased" GridBased plugin"nav2_navfn_planner/NavfnPlanner" tolerance0.5 use_astarfalse allow_unknowntrue
smoother_server ros__parameters use_sim_timeFalse smoother_plugins"simple_smoother" simple_smoother plugin"nav2_smoother::SimpleSmoother" tolerance1.0e-10 max_its1000 do_refinementFalse
behavior_server ros__parameters costmap_topiclocal_costmap/costmap_raw footprint_topiclocal_costmap/published_footprint cycle_frequency10.0 behavior_plugins"spin" "backup" "drive_on_heading" "assisted_teleop" "wait" spin plugin"nav2_behaviors/Spin" backup plugin"nav2_behaviors/BackUp" drive_on_heading plugin"nav2_behaviors/DriveOnHeading" wait plugin"nav2_behaviors/Wait" assisted_teleop plugin"nav2_behaviors/AssistedTeleop" global_frameodom robot_base_framebase_link transform_tolerance0.1 use_sim_timeFalse simulate_ahead_time2.0 max_rotational_vel1.0 min_rotational_vel0.4 rotational_acc_lim3.2
robot_state_publisher ros__parameters use_sim_timeFalse
waypoint_follower ros__parameters use_sim_timeFalse loop_rate20 stop_on_failurefalse waypoint_task_executor_plugin"wait_at_waypoint" wait_at_waypoint plugin"nav2_waypoint_follower::WaitAtWaypoint" enabledTrue waypoint_pause_duration200
velocity_smoother ros__parameters use_sim_timeFalse smoothing_frequency20.0 scale_velocitiesFalse feedback"OPEN_LOOP" max_velocity0.26 0.0 1.0 min_velocity-0.26 0.0 -1.0 max_accel2.5 0.0 3.2 max_decel-2.5 0.0 -3.2 odom_topic"odom" odom_duration0.1 deadband_velocity0.0 0.0 0.0 velocity_timeout1.0This parameter table configures the parameters required for each node launched in the navigation launch file.