Welcome to MicroROS-Pi5 repository
当製品の日本語版マニュアル資料は、こちらからご取得ください。
5. Install and start microROS agent
Install and start microros agent
Install and start microros agent1、1. Docker starts the microros agentDocker starts WIFI proxyDocker starts serial port agentAgent startup failure2、Source code to start microros agentInstall tinyxml2 dependenciesInstall python3-rosdep toolCompile micro_ros_setup environmentCompile micro_ros_agent environmentSource code to start microros agentROS2 source code starts WIFI agentROS2 source code starts serial port agent
Note: Docker startup mode and source code startup mode can be installed on the same system at the same time, but only one of the startup modes can be selected at startup. Under normal circumstances, it is simple and convenient to use the docker startup method. It is recommended to use the Docker startup method.
1、1. Docker starts the microros agent
This time, the microros agent is started through docker, so the system docker needs to be set up first. The relevant docker environment has been set up in the factory system and can be run directly.
Docker starts WIFI proxy
docker run -it --rm -v /dev:/dev -v /dev/shm:/dev/shm --privileged --net=host microros/micro-ros-agent:humble udp4 --port 8090 -v4

Among them, --port 8090 is the network port number, and -v4 is the LOG printing level. The higher the value, the more printing will be done. Modifications can be made according to actual conditions.
If you need to end the proxy, press Ctrl+C in the terminal to exit the proxy.
Note that you cannot close the terminal directly, otherwise docker will continue to run in the background.
If the microcontroller starts the reconnection agent multiple times, causing ROS2 to search for multiple identical nodes, it does not actually affect the use. Press Ctrl+C to end the agent, then reset the microcontroller and reconnect to the agent.
Docker starts serial port agent
xxxxxxxxxxdocker run -it --rm -v /dev:/dev -v /dev/shm:/dev/shm --privileged --net=host microros/micro-ros-agent:humble serial --dev /dev/ttyUSB0 -b 921600 -v4

Among them, --dev /dev/ttyUSB0 is the serial port device number, and -b 921600 is the baud rate. Modifications can be made according to actual conditions.
If you need to end the proxy, press Ctrl+C in the terminal to exit the proxy.
Note that you cannot close the terminal directly, otherwise docker will continue to run in the background.
If the microcontroller starts the reconnection agent multiple times, causing ROS2 to search for multiple identical nodes, it does not actually affect the use. Press Ctrl+C to end the agent, then reset the microcontroller and reconnect to the agent.
Agent startup failure

The microROS agent can only be opened in one terminal. If a terminal has already opened the microROS agent in the background, an error will be reported when opening the agent again. Please press Ctrl+C on the original agent terminal to exit the agent and then run the agent.
If the agent fails to be started the next time because the terminal is closed directly, you can restart the virtual machine/computer or manually end docker to solve the problem.
How to manually end docker:
Please first query the current docker process number and end the current agent docker process.
xxxxxxxxxxdocker ps -a | grep microros/micro-ros-agentdocker stop xxxxxxxxxxdocker run -it --rm -v /dev:/dev -v /dev/shm:/dev/shm --privileged --net=host microros/micro-ros-agent:humble udp4 --port 8090 -v4
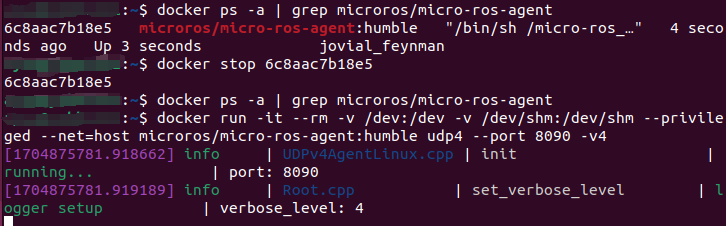
2、Source code to start microros agent
Install tinyxml2 dependencies
Enter the following command in the terminal to install tinyxml2
xxxxxxxxxxcd ~/git clone https://github.com/leethomason/tinyxml2.gitcd tinyxml2mkdir buildcd buildsudo cmake ..sudo makesudo make install
Install python3-rosdep tool
Enter the following command in the terminal to install the rosdep tool. You can skip it if you have already installed it.
xxxxxxxxxxsudo apt install python3-rosdep
Compile micro_ros_setup environment
Activate the ROS2 environment variable. Here we take the humble version as an example. If it is already activated, you can skip the activation step.
source /opt/ros/humble/setup.bash
Create and enter the workspace uros_ws in the user directory
xxxxxxxxxxmkdir ~/uros_ws && cd ~/uros_wsmkdir src
Download the micro_ros_setup file to the src folder
xxxxxxxxxxgit clone -b $ROS_DISTRO https://github.com/micro-ROS/micro_ros_setup.git src/micro_ros_setup
Initialize rosdep
xxxxxxxxxxsudo rosdep init
If there is a network problem, please add the -E parameter
xxxxxxxxxxsudo -E rosdep init
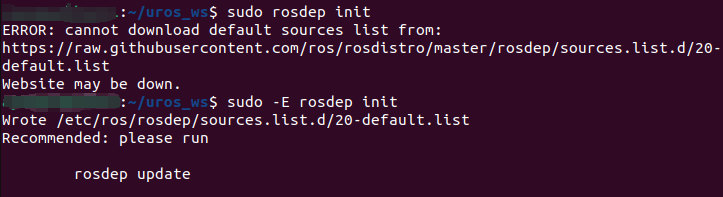
If errors are reported in the above steps and rosdep still cannot be initialized, you can create a new 20-default.list file in the /etc/ros/rosdep/sources.list.d/ directory, add the following content, and then proceed to the next step.
x# os-specific listings firstyaml https://raw.githubusercontent.com/ros/rosdistro/master/rosdep/osx-homebrew.yaml osx# genericyaml https://raw.githubusercontent.com/ros/rosdistro/master/rosdep/base.yamlyaml https://raw.githubusercontent.com/ros/rosdistro/master/rosdep/python.yamlyaml https://raw.githubusercontent.com/ros/rosdistro/master/rosdep/ruby.yamlgbpdistro https://raw.githubusercontent.com/ros/rosdistro/master/releases/fuerte.yaml fuerte# newer distributions (Groovy, Hydro, ...) must not be listed anymore, they are being fetched from the rosdistro index.yaml instead
Update rosdep and install related driver packages
xxxxxxxxxxrosdep update && rosdep install --from-paths src --ignore-src -y
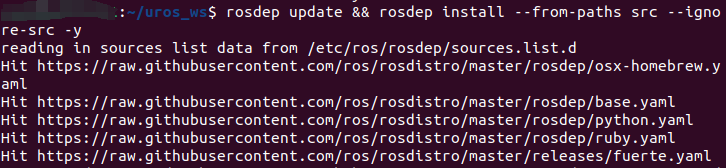
Compile workspace
xxxxxxxxxxcolcon build
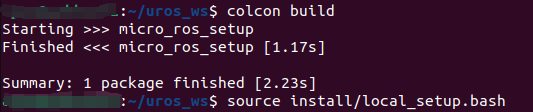
Activate micro_ros_setup environment
xxxxxxxxxxsource install/local_setup.bash
Compile micro_ros_agent environment
xxxxxxxxxxros2 run micro_ros_setup create_agent_ws.shros2 run micro_ros_setup build_agent.sh
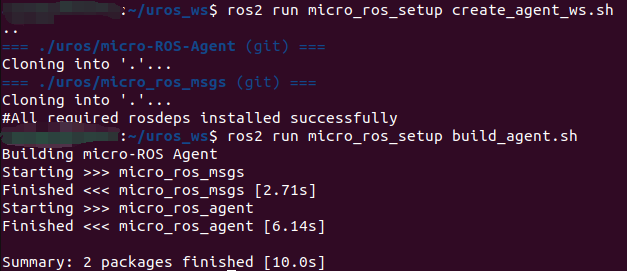
If an error occurs when compiling build_agent.sh, please compile again.
Source code to start microros agent
Activate micro_ros_agent agent environment
xxxxxxxxxxsource ~/uros_ws/install/local_setup.sh
ROS2 source code starts WIFI agent
xxxxxxxxxxros2 run micro_ros_agent micro_ros_agent udp4 --port 8090 -v4

Among them, --port 8090 is the network port number, and -v4 is the LOG printing level. The higher the value, the more printing will be done. Modifications can be made according to actual conditions.
If you need to end the proxy, press Ctrl+C in the terminal to exit the proxy.
ROS2 source code starts serial port agent
xxxxxxxxxxros2 run micro_ros_agent micro_ros_agent serial --dev /dev/ttyUSB0 -b 921600 -v4
Among them, --dev /dev/ttyUSB0 is the serial port device number, and -b 921600 is the baud rate. Modifications can be made according to actual conditions.
If you need to end the proxy, press Ctrl+C in the terminal to exit the proxy.