Welcome to RDK X5 Board repository
2.Write system file
Write system file
Write system file1.Preparation for FlashingPower SupplyStorageDisplayNetwork Connection2.Image Download3. Flashing the SystemSystem BootSet Login Mode
1.Preparation for Flashing
Power Supply
The RDK X5 development board is powered via a USB Type C interface. Use a power adapter that supports 5V/5A to power the board.
Storage
The RDK X5 development board uses a Micro SD card as the system boot medium. It is recommended to use at least an 8GB card to meet the storage needs of the Ubuntu system and application software.
Display
The RDK X5 development board supports HDMI output. Connect the board to a monitor via an HDMI cable to enable graphical desktop display.
Network Connection
The RDK X5 development board supports both Ethernet and Wi-Fi for network connections. You can use either interface to connect to a network.
2.Image Download
The RDK kit currently provides an Ubuntu 22.04 system image, supporting graphical interaction with the Desktop version.
Before using the RDK X5 development board, you need to write the system image file first. The system image we provide is modified based on the 3.0.0 version of the official RDK with desktop system.
- desktop: Ubuntu system with desktop, which can be operated by external screen and mouse
- server: Ubuntu system without desktop, which can be operated by serial port and network remote connection
Download the Ubuntu system with desktop we provide, the suffix is .img compressed package, and extract it, waiting for use.
3. Flashing the System
Before flashing the Ubuntu system image, prepare the following:
- A Micro SD card with at least 8GB capacity
- An SD card reader
- Download the image flashing tool, balenaEtcher (Download here)
balenaEtcher is a cross-platform tool for creating bootable SD cards, supporting Windows, macOS, and Linux. Follow these steps to create an SD boot card:
Open the balenaEtcher tool, click the
Flash from filebutton, and select the extractedubuntu-preinstalled-desktop-arm64.imgfile as the flashing image.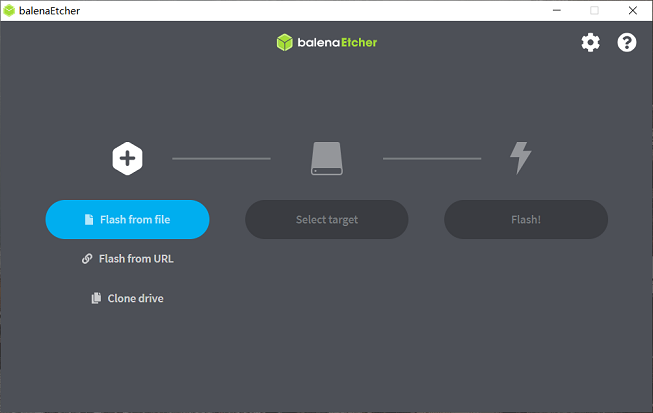
Click the
Select targetbutton and choose the Micro SD card as the target storage device.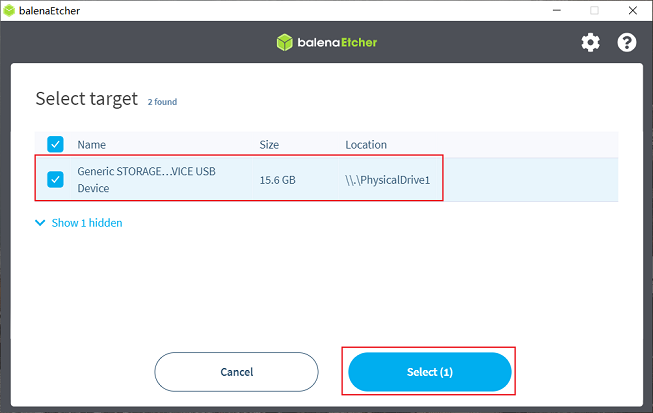
Click the
Flashbutton to start flashing. Once the tool displaysFlash Complete, the flashing process is complete. You can close balenaEtcher and remove the SD card.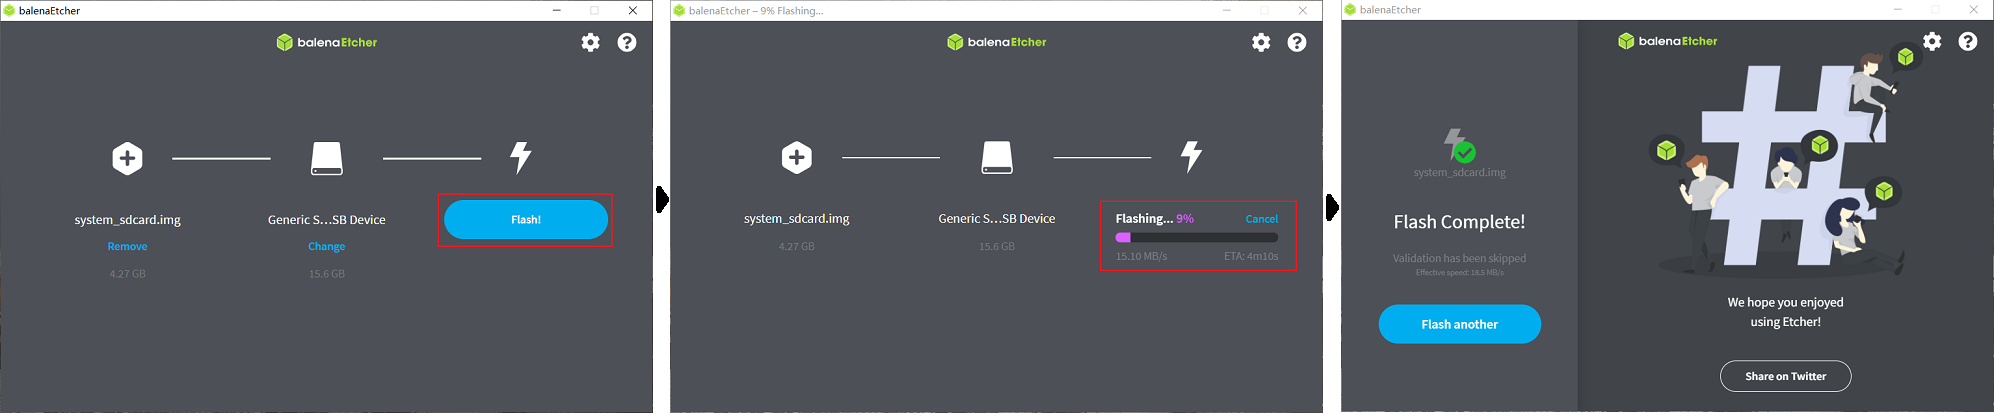
System Boot
First, ensure the board is powered off. Insert the prepared SD card into the Micro SD card slot on the board, connect the board to a monitor using an HDMI cable, and then power on the board.
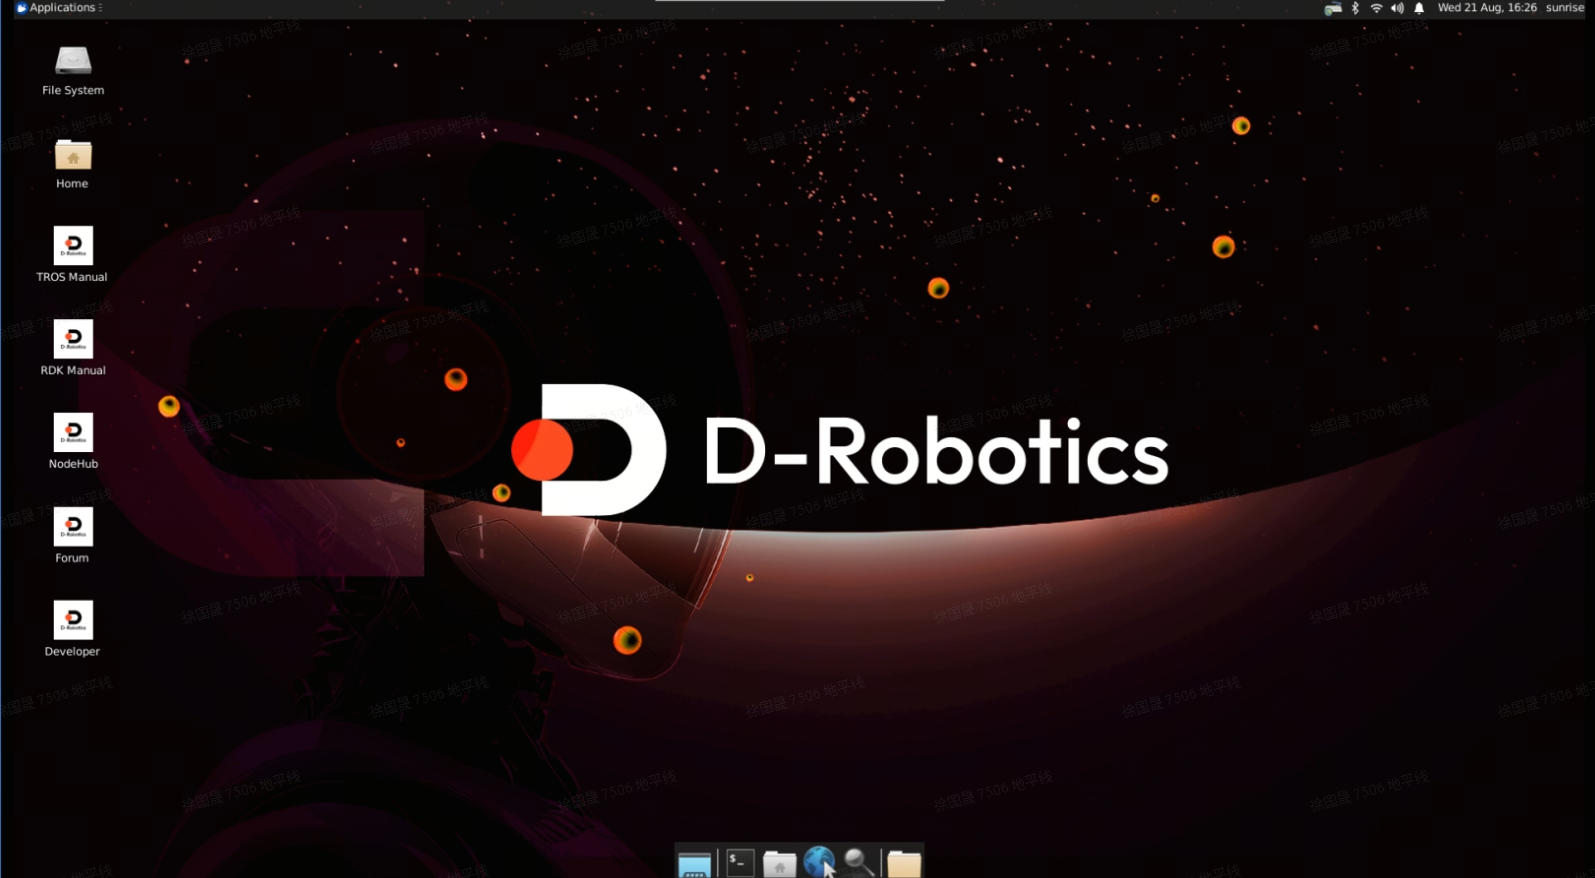
On the first boot, the system will perform default environment configuration, which takes approximately 45 seconds. After the configuration is complete, the Ubuntu system desktop will be displayed on the monitor.
Development Board Indicator Lights
- Green indicator: Lights up to indicate normal power status.
If the board does not display anything for an extended period after powering on (over 2 minutes), the board may not have booted properly. Debug via the serial port to check the board’s status.
Once the Ubuntu Desktop system boots, the system desktop will be displayed via the HDMI interface, as shown below:
Set Login Mode
The desktop graphical system supports four login modes:
- Start the graphical interface and automatically log in.
- Start the graphical interface and require manual login by the user.
- Character terminal, automatically log in.
- Character Terminal, User Manual Login
Open RDK Configuration through the menu bar. Select System Options -> Boot / Auto Login to enter the following configuration options. Select the corresponding options according to your needs.
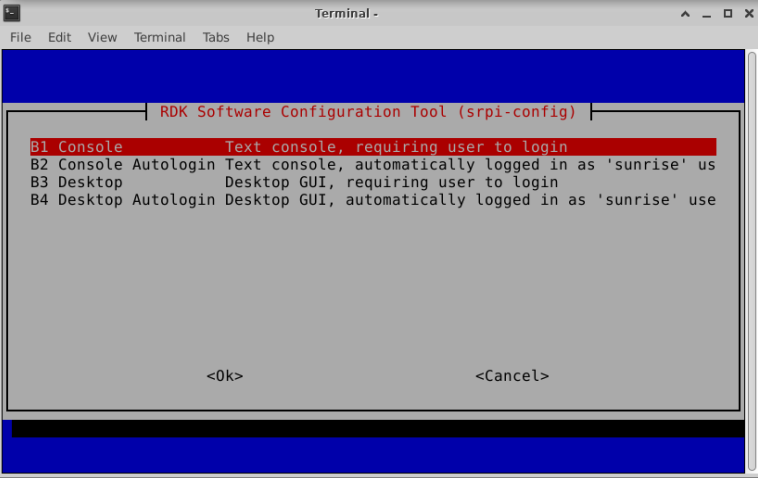
It will take effect after restarting.