Welcome to RDK X5 Robot repository
1.Mobile APP remote control
Mobile APP remote control tutorial
Mobile APP remote control tutorial1. Scan the QR code on your phone to install the APP2. Start RDK X5 ROBOT3. Connect RDK X5 ROBOT3.1 Select device3.2 Establish network connection4. APP function introduction4.1 Remote Control4.2 Mecanum4.3 Colorful car lights
1. Scan the QR code on your phone to install the APP
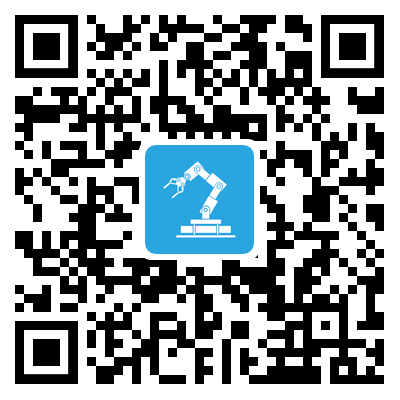
Android users, please open the Google Play app store and search for [MakerControl], or open the mobile browser, scan the QR code below, download and install the [MakerControl] APP.
IOS users, please open the App store application platform and search for [MakerControl], or open the barcode scanner, scan the QR code below, download and install the [MakerControl] APP.
If the latest version of the [MakerControl] APP is already installed on your phone, you do not need to install it again.
2. Start RDK X5 ROBOT
The TF card provided in the product already contains the image system by default. Install the TF card into the RDK X5 ROBOT to start it normally without reconfiguring the image.
Turn on the power switch of the RDK X5 ROBOT robot. You can hear the buzzer beep three times in about 1 minute, indicating that the system is started normally. At this time, you can see the information displayed on the OLED.
System username: root password: yahboom
3. Connect RDK X5 ROBOT
RDK X5 ROBOT comes with a hotspot signal [RDK-X5-ROBOT] when it leaves the factory. You can first use your mobile phone to connect to the hotspot signal of RDK-X5-ROBOT to form a local area network. The hotspot password is 12345678. Or connect RDK-X5-ROBOT and your mobile phone to the same router to form a local area network.
3.1 Select device
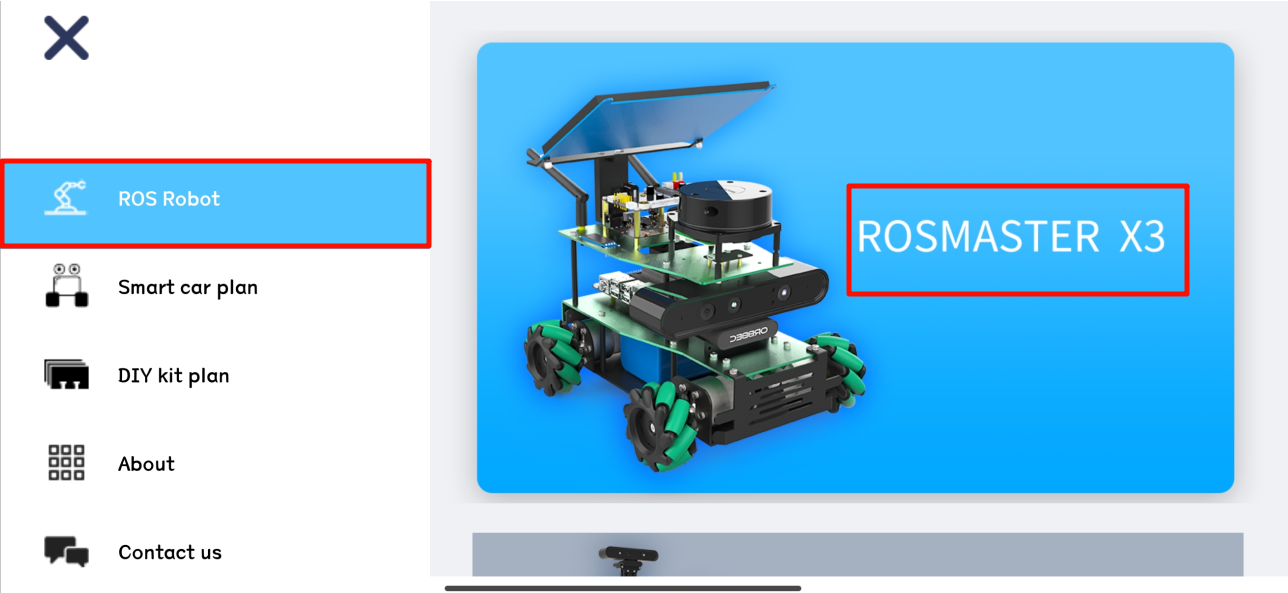
Note: RDK-X5-ROBOT and ROSMASTER X3 use the same APP, so select ROSMASTER X3 when selecting a robot.
When you open the [MakerControl] APP for the first time, you need to select the [ROSMASTER X3] device in the [ROS robot].
3.2 Establish network connection
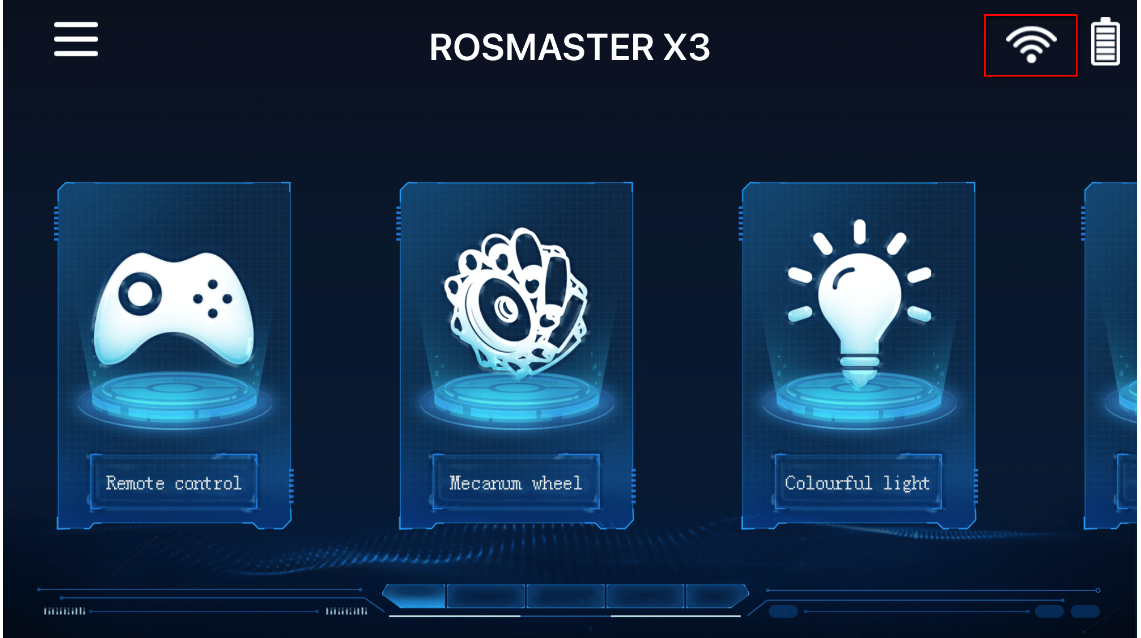
In the IP column, fill in the IP address displayed on the OLED of the RDK-X5-ROBOT robot. Use the default parameters for the Port and Video columns. Click [Connect]. After the connection is successful, it will automatically jump to the main control interface. At the same time, the WiFi icon in the upper right corner will no longer have a prohibition symbol.
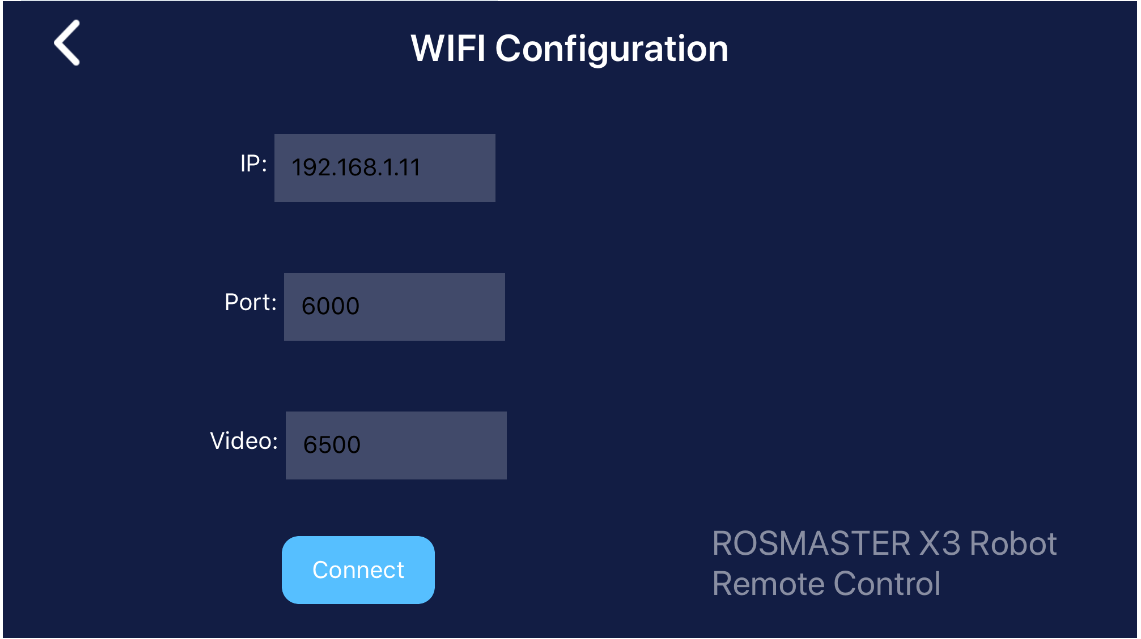
Note: Before connecting the device, please make sure that the phone is connected to the RDK-X5-ROBOT hotspot signal, or the phone and the RDK-X5-ROBOT robot are connected to the same router. And the app control program has been started (the factory system defaults to starting the app control program when it is turned on).
4. APP function introduction
The APP main interface is divided into three modules in total, each module corresponds to different functions.
4.1 Remote Control
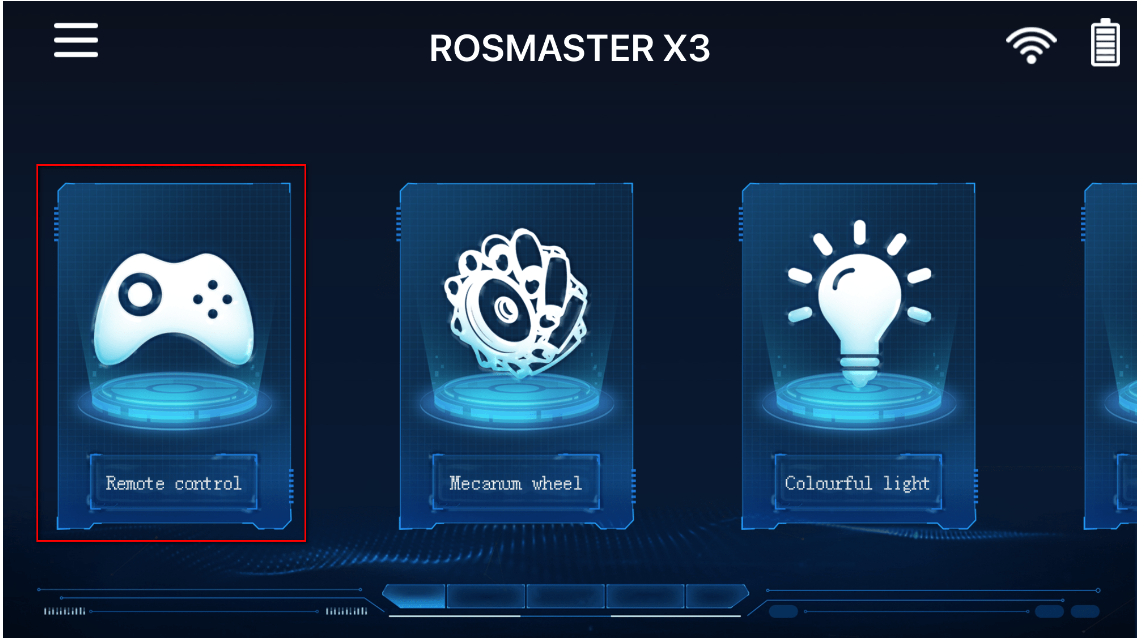
Click the [Remote Control] icon on the main interface, and the following interface will appear.
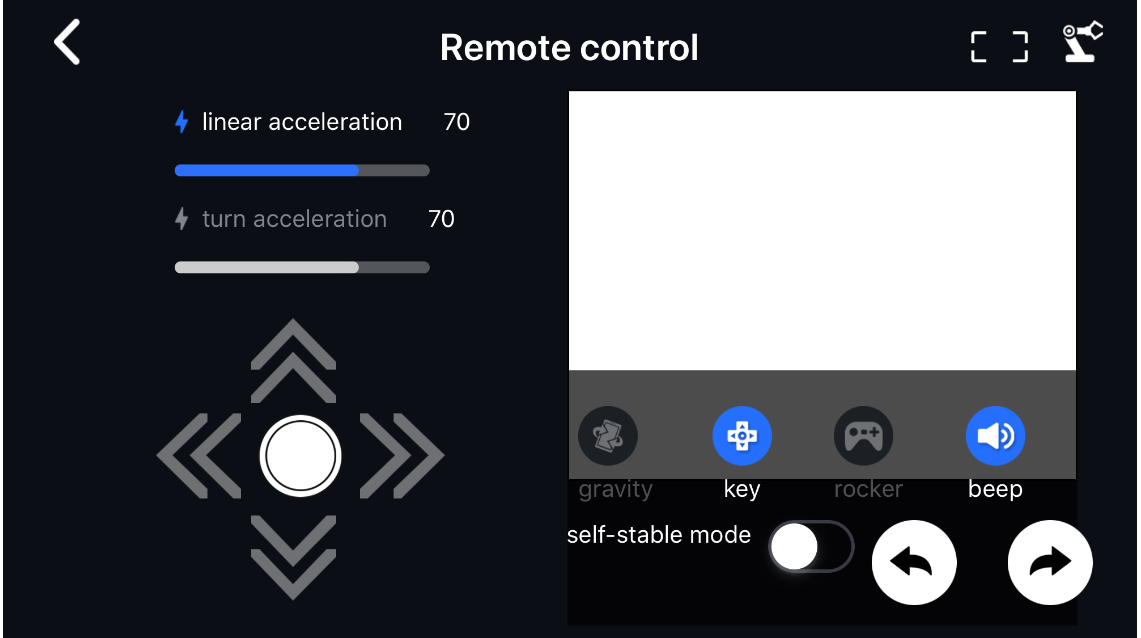
Part 1. Controls on the left: The top part can adjust the robot's linear speed and turning speed, and the bottom part can control the robot to move forward, backward, left, right, and stop.
Part 2. The camera display in the middle: You can see the front screen of RDK-X5-ROBOT, and the screen supports zooming in/out. The upper left corner of the screen shows the current camera frame rate.
Part 3. Control by the upper button on the right: You can choose three control methods, including gravity sensing, button control, and joystick control. Pressing the last button can control the buzzer to sound, and releasing the hand will turn off the buzzer. For the robotic arm version, you can click the robotic arm icon to open the robotic arm control interface.
Part 4. Self-stabilization mode: When the self-stabilization mode is turned on, the car will brake and stop immediately when it receives a stop command. When the self-stabilization mode is turned off, the car will slide freely and stop after receiving a stop command.
Part 5. The two buttons on the lower right control the robot to rotate left and right.
Part 6. Full-screen display: You can hide all controls and enter the full-screen display of the camera screen.
4.2 Mecanum
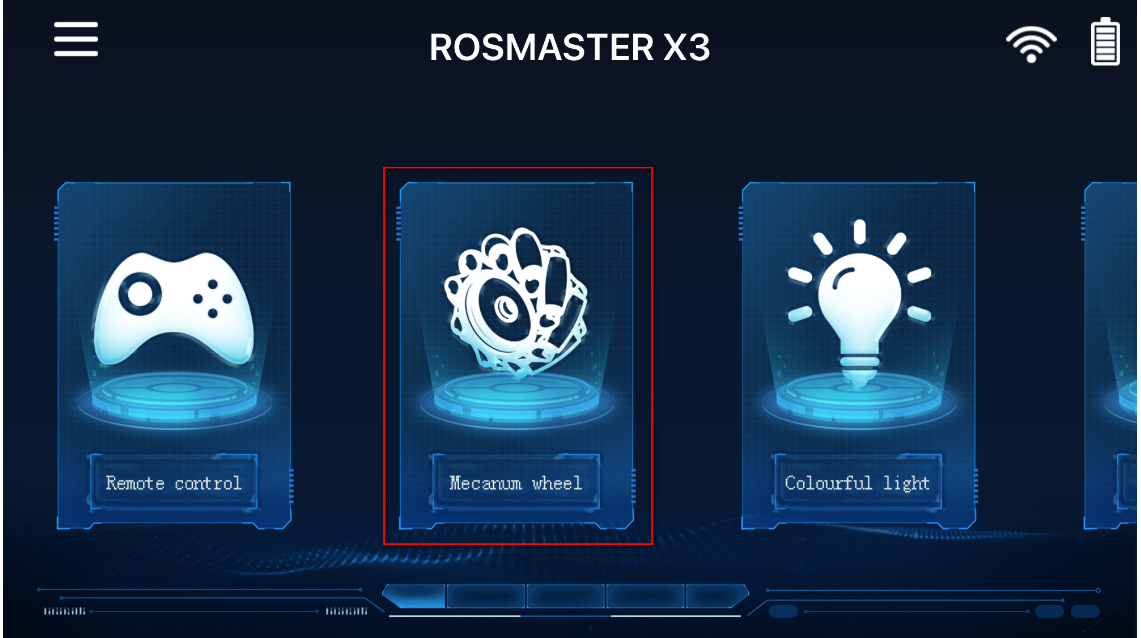
Click the [Mecanum] icon on the main interface, and the following interface will appear. (This part is a special function for Mecanum wheel models)
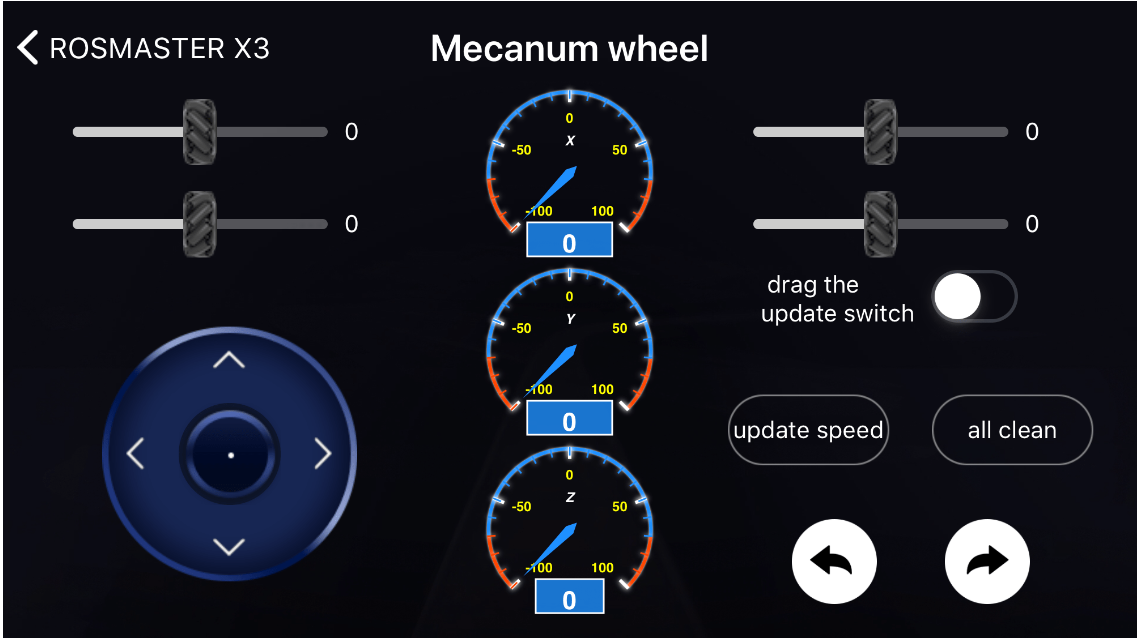
The four sliders represent the four wheels of the robot. The middle one is stop. Slide the wheel to the left to reverse, and slide the wheel to the right to rotate forward. After sliding, select [Update Speed], the robot will update the speed and the wheel will rotate. Turn on [Drag Update Switch], slide the slider to update the speed of the robot wheel immediately, click [All Reset], and the robot stops moving. It is recommended to pad the robot first during testing, and then put it on the ground to see if it is the movement you want. The two white buttons at the bottom are used to control the robot to rotate left and right.
Middle dial (from top to bottom):
1.X: speed in the X-axis direction; 2.Y: speed in the Y-axis direction; 3.Z: speed in the Z-axis direction
4.3 Colorful car lights
Note: This part of the function is not currently supported by RDK-X5-Robot.

Click the [Colorful Car Lights] icon on the main interface, and the following interface will appear.
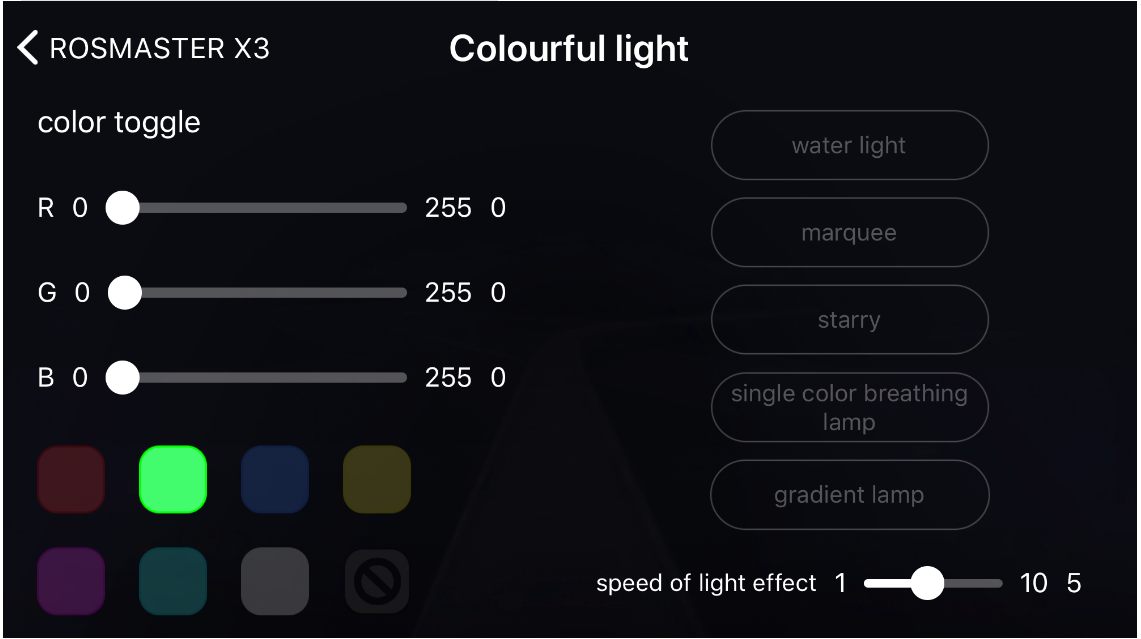
The colorful car lights are divided into three parts.
Part 1. The upper left part [Color Switch]: This function can modify the RGB color of the light bar in real time. Simply drag the drag bar of [R] [G] [B] to see the RGB light bar at the tail of Rosmaster change in real time with cool lighting effects.
Part 2. The lower left part [Fixed Color Switch]: This function can make the RGB light bar display red, green, blue, yellow, purple, cyan, white, and off. At the same time, you can also adjust the color of the single-color breathing light.
Part 3. The right side [Cool Special Effects]: Each time you click a button, a specific special effect will be displayed, including running lights, marquees, starlight, single-color breathing lights, and gradient lights. Click the button again to exit the special effect; the drag bar below can change the speed of the lighting special effect, the default is 5, the fastest is 1, and the slowest is 10.