Welcome to RDK X5 Robot repository
4. AR Vision
AR Vision
AR Vision4.1, AR Overview4.2, Program Function Description4.3, Program code reference path4.4, Program Startup4.4.1. Web page display4.4.2, rqt_image_view4.5, core source code analysis
4.1, AR Overview
Augmented Reality, referred to as "AR", is a technology that cleverly integrates virtual information with the real world. It widely uses a variety of technical means such as multimedia, three-dimensional modeling, real-time tracking and registration, intelligent interaction, and sensing. After simulating computer-generated text, images, three-dimensional models, music, videos and other virtual information, they are applied to the real world. The two types of information complement each other, thereby achieving "enhancement" of the real world.
The AR system has three outstanding characteristics: ① Information integration of the real world and the virtual world; ② Real-time interactivity; ③ Adding and positioning virtual objects in three-dimensional space.
Augmented reality technology includes new technologies and new means such as multimedia, three-dimensional modeling, real-time video display and control, multi-sensor fusion, real-time tracking and registration, and scene fusion.
4.2, Program Function Description
After the program is started, the Astra camera recognizes the chessboard and displays the AR effect, which can be visualized on the web page.
The operation of this function requires the camera's internal parameters, and the internal parameter file path is,
xxxxxxxxxx/home/sunrise/yahboomcar_ws/src/yahboomcar_visual/astra.yaml
Internal parameter calibration can be quickly calibrated using a checkerboard grid. For specific methods, see the content in [Camera Internal Parameter Calibration] in [Depth Camera Series Course]. ** (This step has been completed in the system image)**
After completing the calibration work on the virtual machine side, move the generated [calibrationdata.tar.gz] file to the current directory and decompress it, open the [ost.yaml] file in the folder, and find the camera internal parameter matrix and distortion coefficient.
After remotely connecting to the car in VSCode, open the [/home/sunrise/yahboomcar_ws/src/yahboomcar_visual/astra.yaml] file and modify the following two [data] contents (if you are familiar with Linux commands, you can also directly switch to the file directory after connecting to the car through SSH in the terminal and use the vim tool to modify the file content),
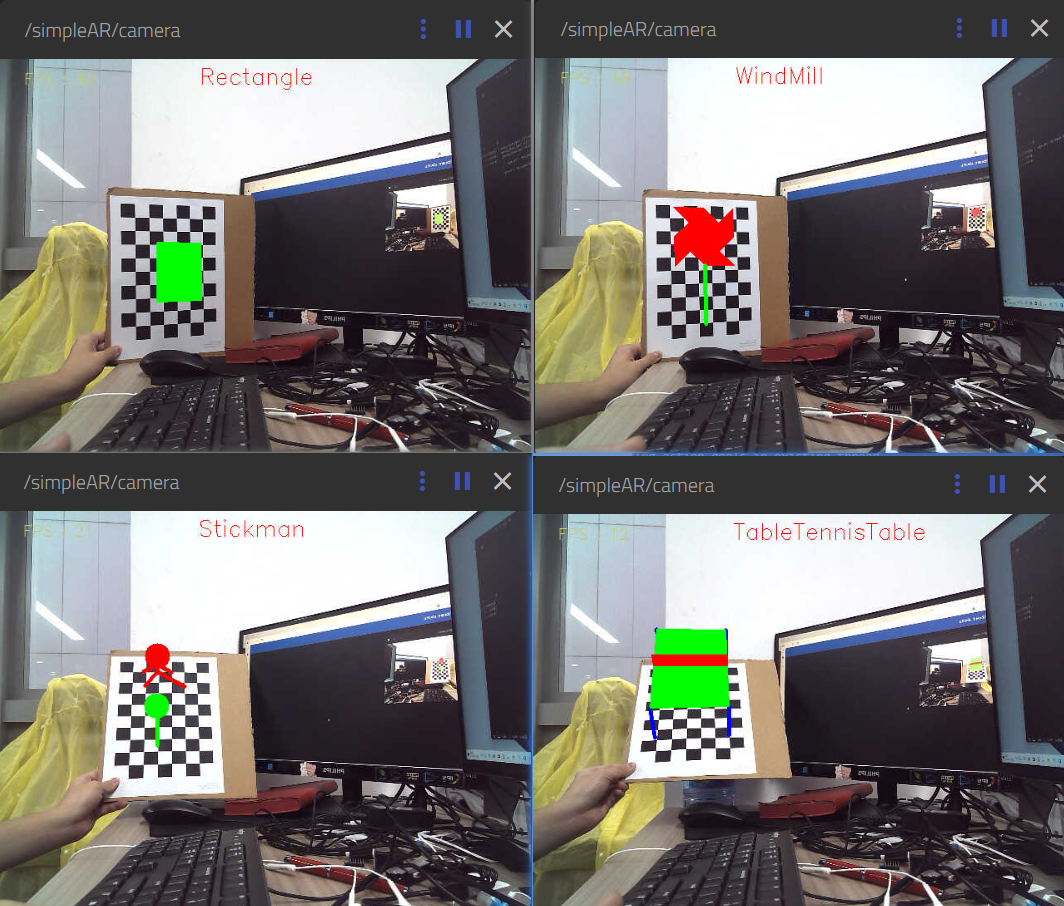
xxxxxxxxxxcamera_matrix!!opencv-matrixrows3cols3dtddata608.182089 0. 324.2554710. 607.855617 245.9710790. 0. 1. distortion_modelplumb_bobdistortion_coefficients!!opencv-matrixrows1cols5dtddata0.100236 -0.073376 0.004033 -0.001132 0.000000There are 12 effects in this section,
xxxxxxxxxx["Triangle", "Rectangle", "Parallelogram", "WindMill", "TableTennisTable", "Ball", "Arrow", "Knife", "Desk", "Bench", "Stickman", "ParallelBars"]4.3, Program code reference path
After SSH connects to the car, the source code of this function is located at,
xxxxxxxxxx#launch file/home/sunrise/yahboomcar_ws/src/yahboomcar_visual/launch/ar_launch.xmlThe node or launch file launched is explained as follows,
simple_AR: Generate AR effect, source code path is,
xxxxxxxxxx/home/sunrise/yahboomcar_ws/src/yahboomcar_visual/yahboomcar_visual/simple_AR.pyrosbridge_websocket_launch.xml: Start websocket to realize the interaction between ROS and Web
rosboard_node: Start ROSboard
This program uses opencv to read camera image data, so the ROS node of Astra camera is not started.
4.4, Program Startup
After SSH connects to the car, input in the terminal: If the camera image capture fails, you can re-plug the depth camera or use the ls /dev/video* command to check whether the video0 device is recognized
xxxxxxxxxxros2 launch yahboomcar_visual ar_launch.xml
Use the following command to view the ros topic, input in the virtual machine terminal,
xxxxxxxxxxros2 topic list
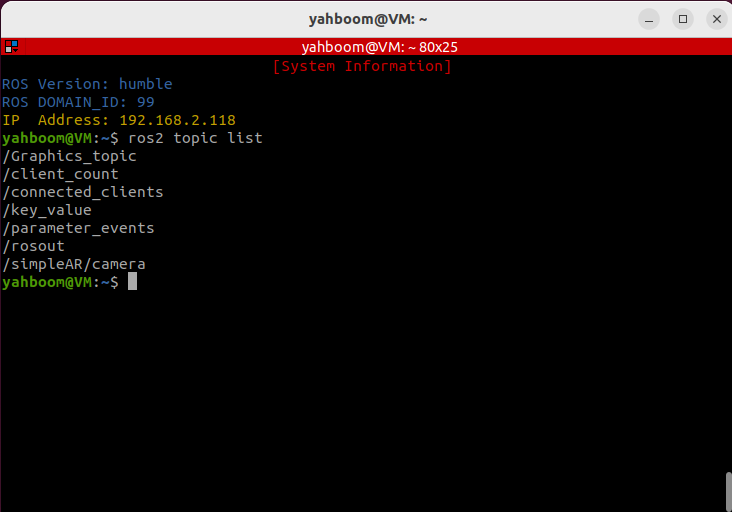
/Graphics_topic: The topic name of the effect, subscribe to the effect to be recognized.
/simpleAR/camera: The topic name of the image, publish the image.
4.4.1. Web page display
Open the browser on the PC (note that the computer and the Sunrise network must be in the same LAN), enter the URL: car IP:9999, for example, my car IP is 192.168.2.84, enter the URL in the browser on the virtual machine to open the ROSboard web page:
xxxxxxxxxx192.168.2.84:9999
Select the /simpleAR/camera topic,
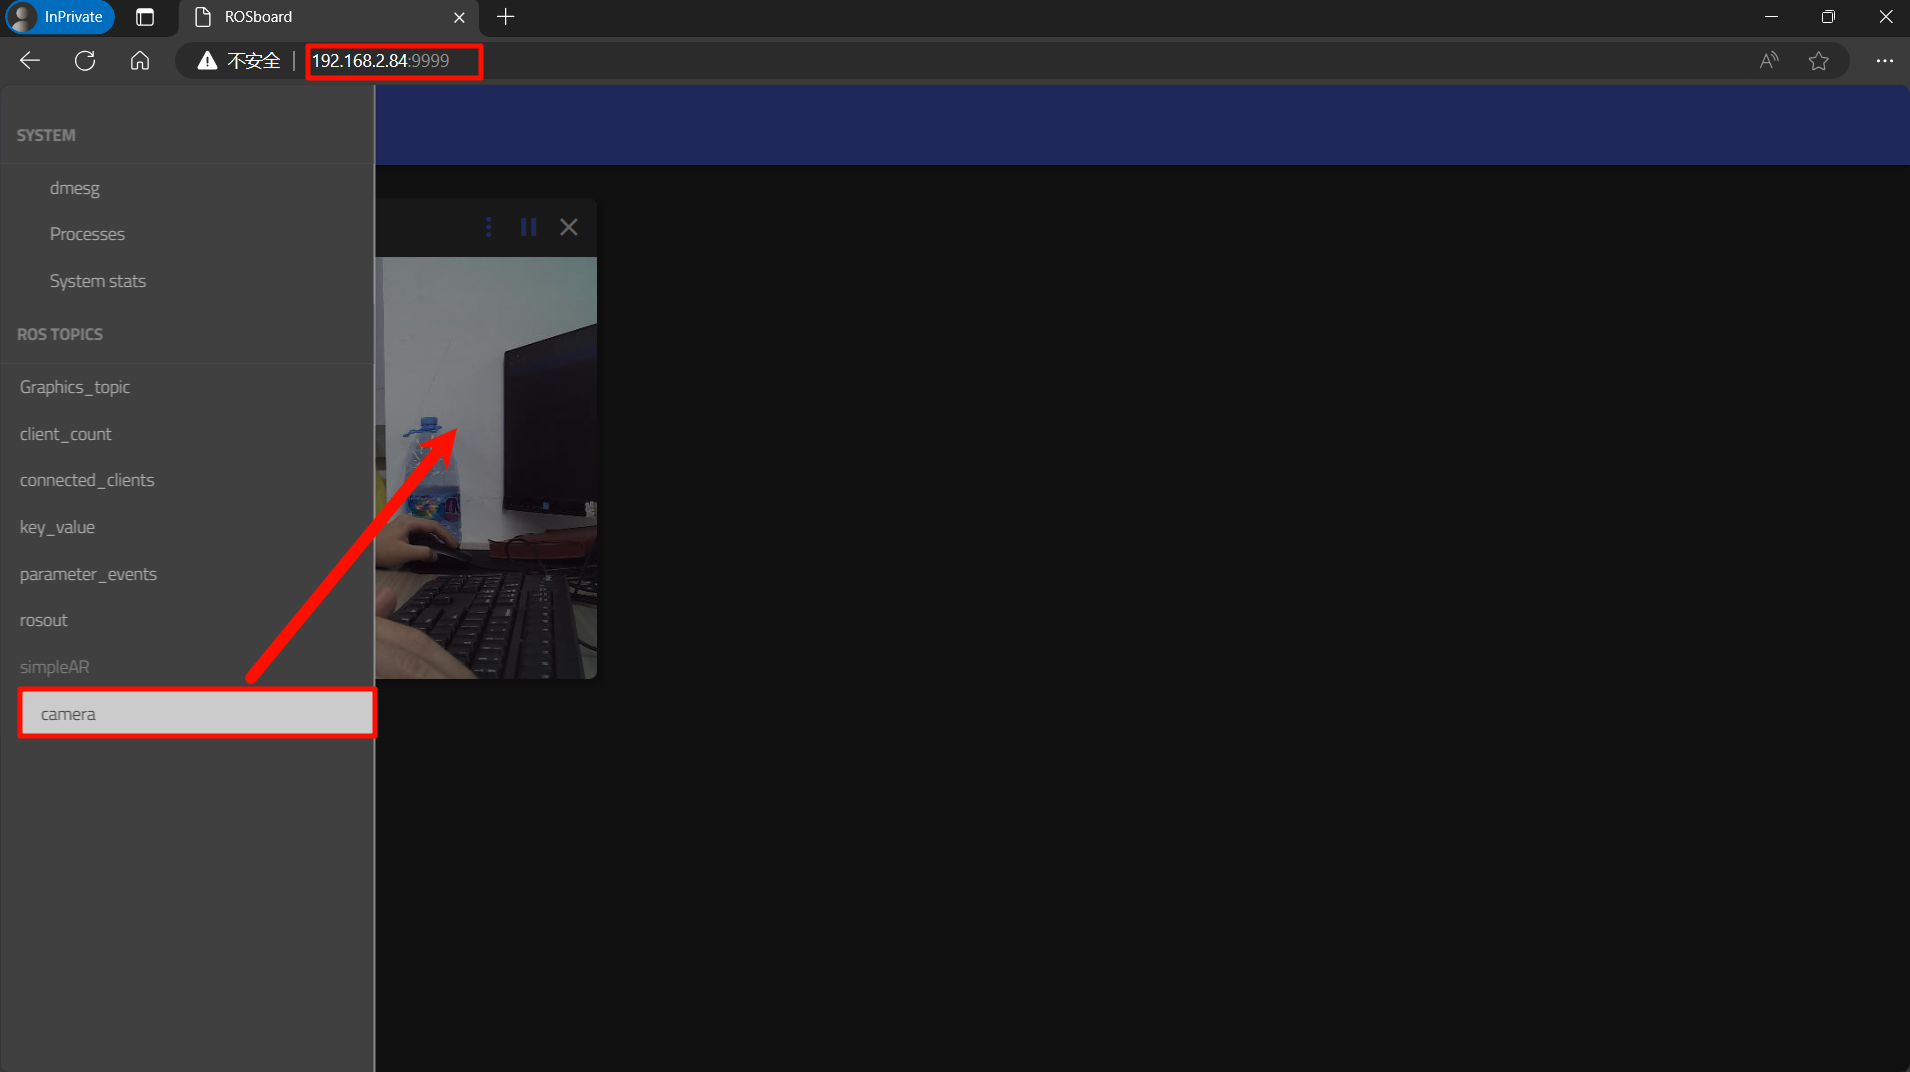
The AR effect can be displayed.
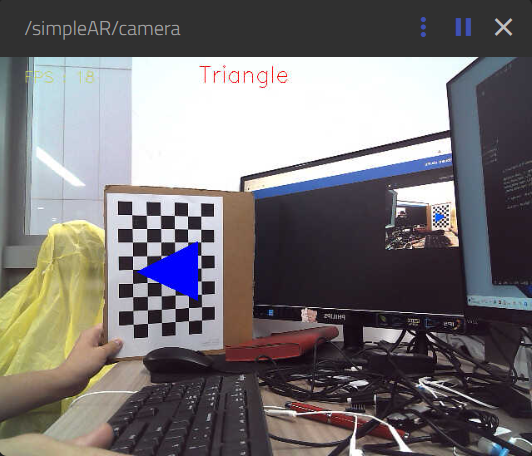
Press the [f] key on the page to switch between different effects.
4.4.2, rqt_image_view
You can also use rqt_image_view to view the published images. Enter in the virtual machine terminal,
xxxxxxxxxxros2 run rqt_image_view rqt_image_view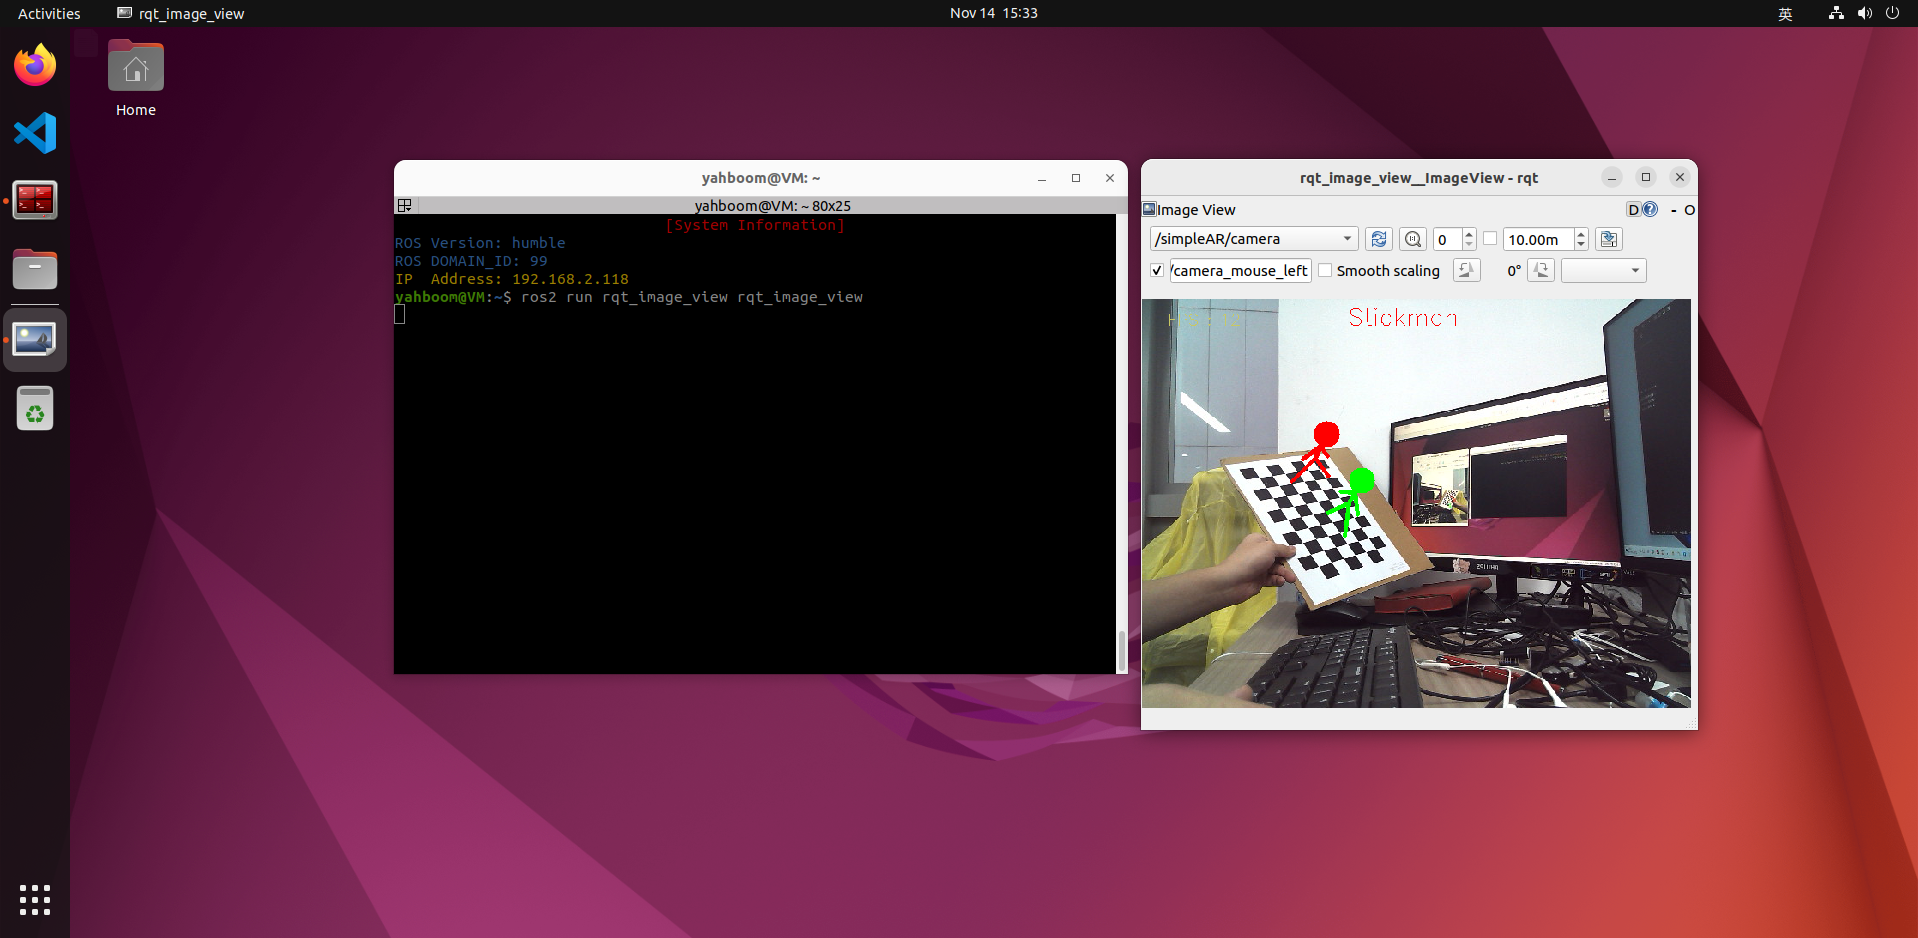
Select /simpleAR/camera in the upper left corner to view the image.
At this time, the effect cannot be switched by keyboard keys, but it can be modified by publishing topic data, for example, input in the virtual machine terminal,
xxxxxxxxxxros2 topic pub /Graphics_topic std_msgs/msg/String "data: Desk"
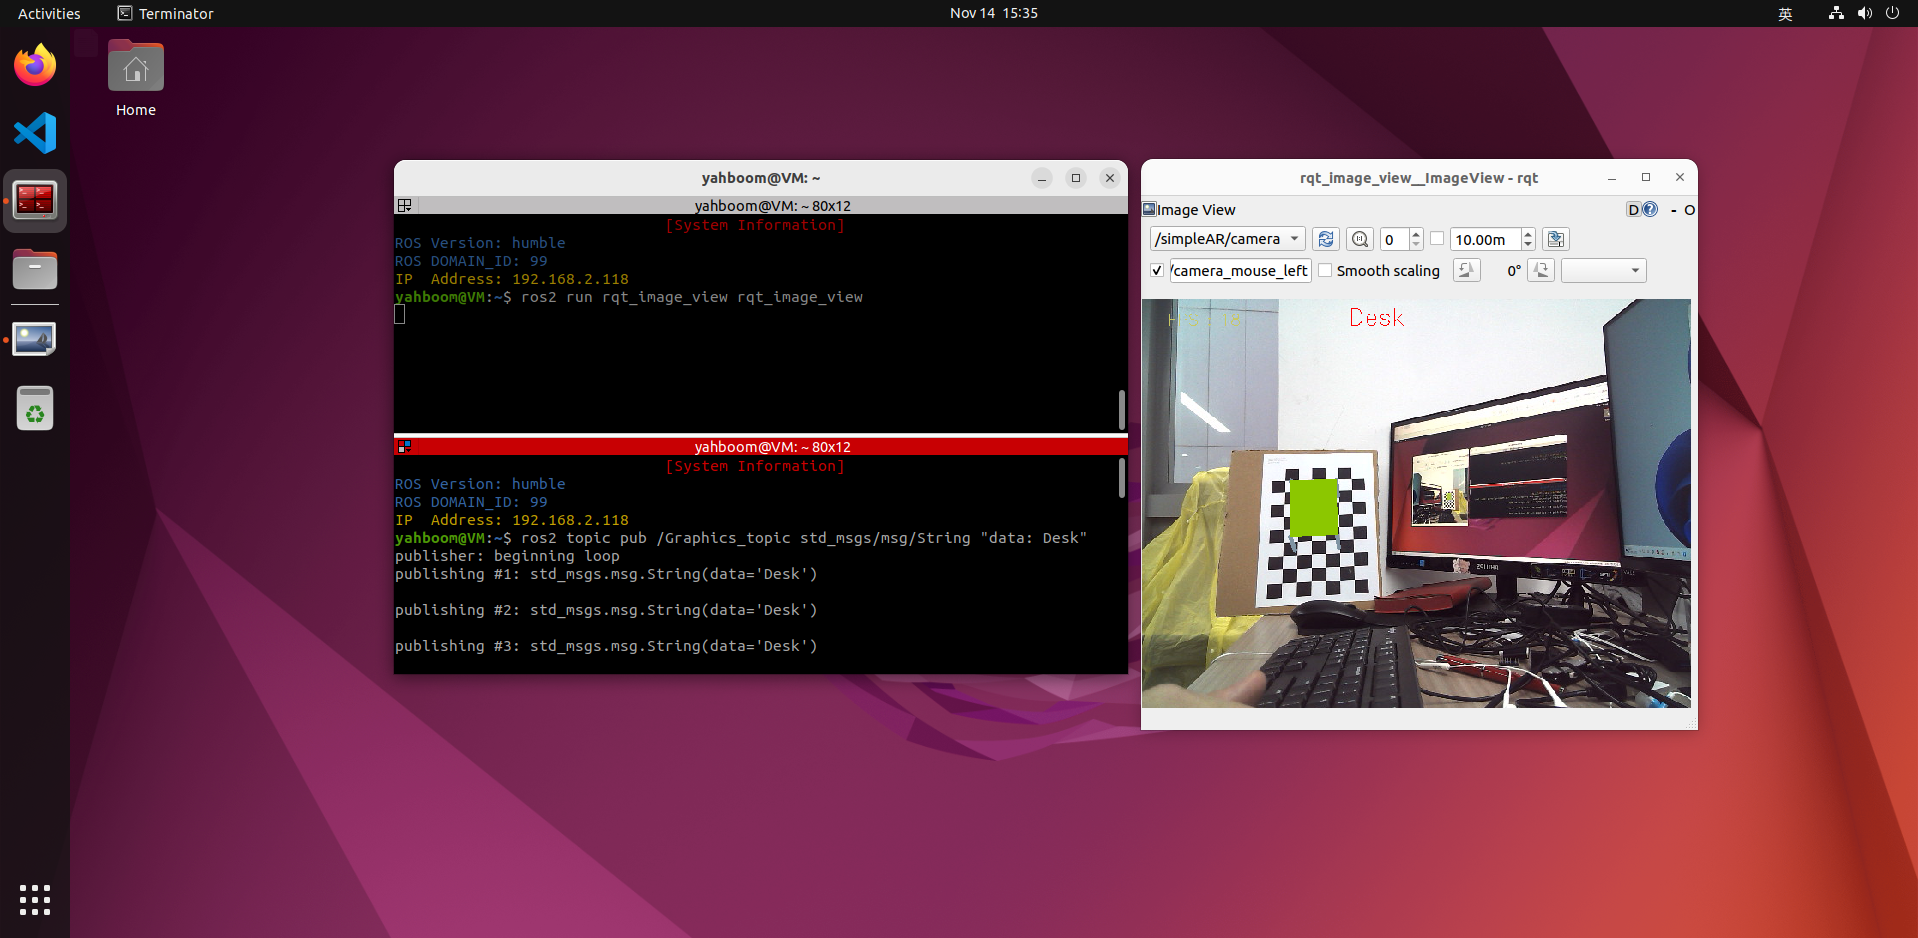
At this time, the AR effect is changed to Desk.
4.5, core source code analysis
Some codes in simple_AR.py are as follows,
x
# Find the corner of each image# Find the corner of each imageretval, corners = cv.findChessboardCorners(gray, self.patternSize, None,flags=cv.CALIB_CB_ADAPTIVE_THRESH + cv.CALIB_CB_NORMALIZE_IMAGE + cv.CALIB_CB_FAST_CHECK)# Find corner subpixels# Find corner subpixelsif retval:corners = cv.cornerSubPix(gray, corners, (11, 11), (-1, -1),(cv.TERM_CRITERIA_EPS + cv.TERM_CRITERIA_MAX_ITER, 30, 0.001))# Compute object poseretval, rvec, tvec, inliers = cv.solvePnPRansac(self.objectPoints, corners, self.cameraMatrix, self.distCoeffs)# Output image points and Jacobian matrix# Output image points and Jacobian matriximage_Points, jacobian = cv.projectPoints(self.axis, rvec, tvec, self.cameraMatrix, self.distCoeffs, )img = self.draw(img, corners, image_Points)# Publish image# Publish imageself.pub_img.publish(self.bridge.cv2_to_imgmsg(img, "bgr8"))