Welcome to Jetson AGX Thor repository
02.Use Jupyter Lab
Jupyter Lab Usage
Jupyter Lab Usage1. Jupyter Lab Installation1.1 Installing Dependencies1.2 Installing Jupyter Lab2. Jupyter Lab Configuration2.1. Creating the Configuration File2.2. Modifying the Configuration File2.3. Configuring the Access Password3. Launching Jupyter Lab3.1. Starting Jupyter Lab3.2. Host Access4. Service Autostart at Boot4.1. Editing the Service File4.2. Setting Up the Autostart Service4.3. Verify Automatic Startup5. Using JupyterLab5.1. Running Programs5.2. Kernel
1. Jupyter Lab Installation
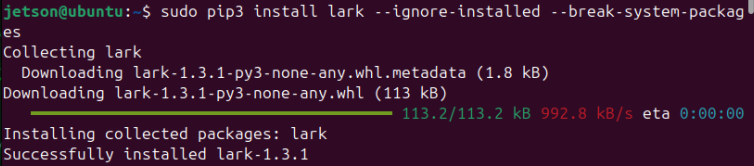
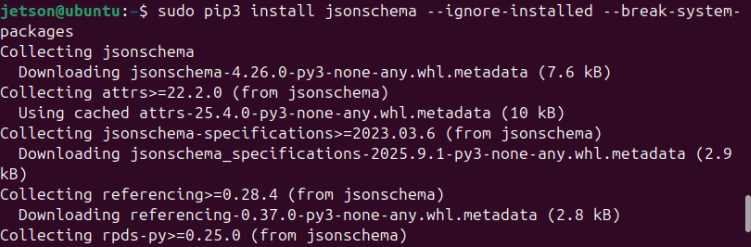
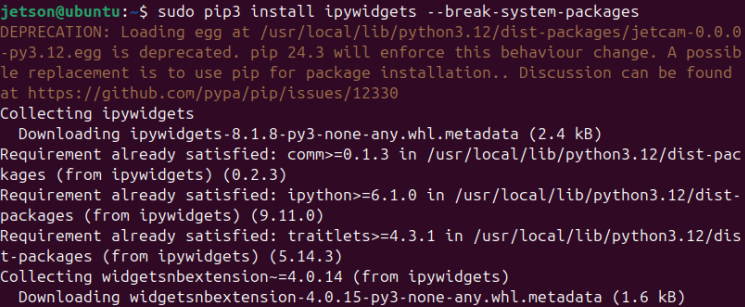
1.1 Installing Dependencies
xxxxxxxxxxsudo pip3 install lark --ignore-installed --break-system-packagessudo pip3 install jsonschema --ignore-installed --break-system-packagessudo pip3 install ipywidgets --break-system-packages
1.2 Installing Jupyter Lab
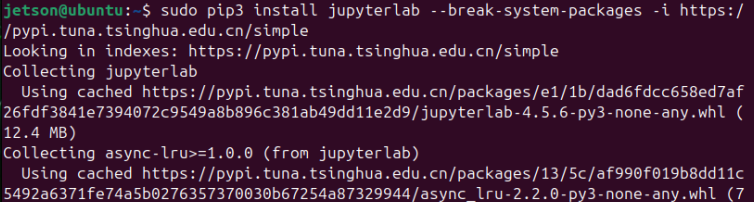
Use the following command to install Jupyter Lab: If the download speed of Jupyter Lab is slow, you can use a specified source for installation.
xxxxxxxxxxsudo pip3 install jupyterlab --break-system-packages
xxxxxxxxxx# Tsinghua University source: sudo pip3 install jupyterlab --break-system-packages -i https://pypi.tuna.tsinghua.edu.cn/simple# Alibaba Cloud mirror: sudo pip3 install jupyterlab --break-system-packages -i https://mirrors.aliyun.com/pypi/simple/
2. Jupyter Lab Configuration
Configure Jupyter Lab for local area network access, access password, and automatic startup.
Device on the same local area network can access it by entering IP:8888 in their browser!
Note: Accessing the local network (LAN) is often restricted on campus networks; you may need to switch to a laptop or mobile hotspot for testing purposes.
xxxxxxxxxxFor example, if the board's IP address is 192.168.2.114, you can access the board's Jupyter Lab interface by entering 192.168.2.114:8888 into a web browser while connected to the same local network.
2.1. Creating the Configuration File
xxxxxxxxxxjupyter lab --generate-config
The automatically generated configuration file is located at: /home/jetson/.jupyter/jupyter_lab_config.py
2.2. Modifying the Configuration File
xxxxxxxxxxgedit /home/jetson/.jupyter/jupyter_lab_config.py
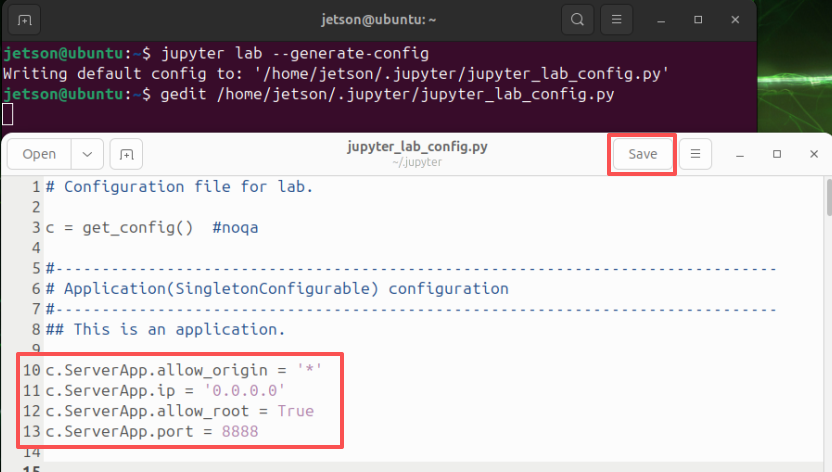
Add the following content to the file. After adding the content, click "Save" and close the file.
xxxxxxxxxx# Allow requests from any origin to access the Jupyter Lab serverc.ServerApp.allow_origin = '*'# 0.0.0.0 binds to all available network interfaces, allowing access from any addressc.ServerApp.ip = '0.0.0.0'# Allow the Jupyter Lab server to be launched as the root userc.ServerApp.allow_root = True# Change the default port to avoid conflictsc.ServerApp.port = 8888
2.3. Configuring the Access Password
Enter the password-setting command in the terminal. You will be prompted to enter the same password twice; for security reasons, the characters you type will not be displayed on the screen. Press the Enter key once you have finished typing!
Note: You must remember this password, as it will be required for future logins to Jupyter Lab. To make it easier to remember, the factory image has already been configured to use the same password as the host system: yahboom.
xxxxxxxxxxjupyter lab password
Location of the automatically generated configuration file: [JupyterPasswordApp] Wrote hashed password to /home/jetson/.jupyter/jupyter_server_config.json

3. Launching Jupyter Lab
3.1. Starting Jupyter Lab
xxxxxxxxxxjupyter lab# Launch without a browser: jupyter lab --no-browser# Launch as administrator: sudo jupyter lab --allow-root
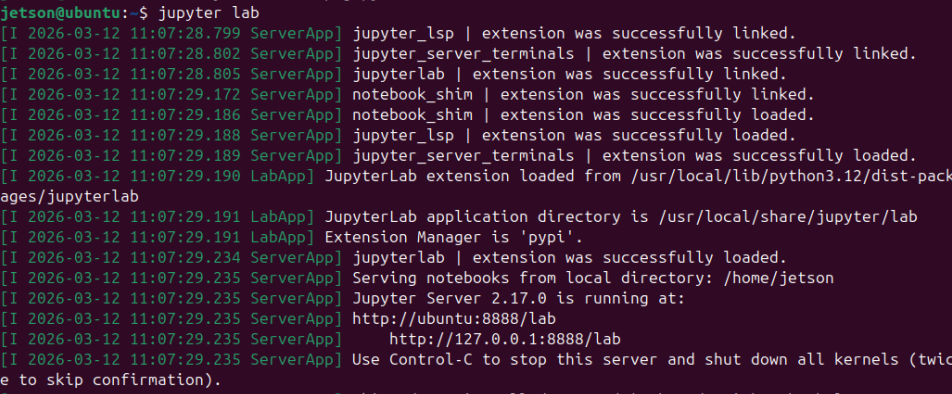
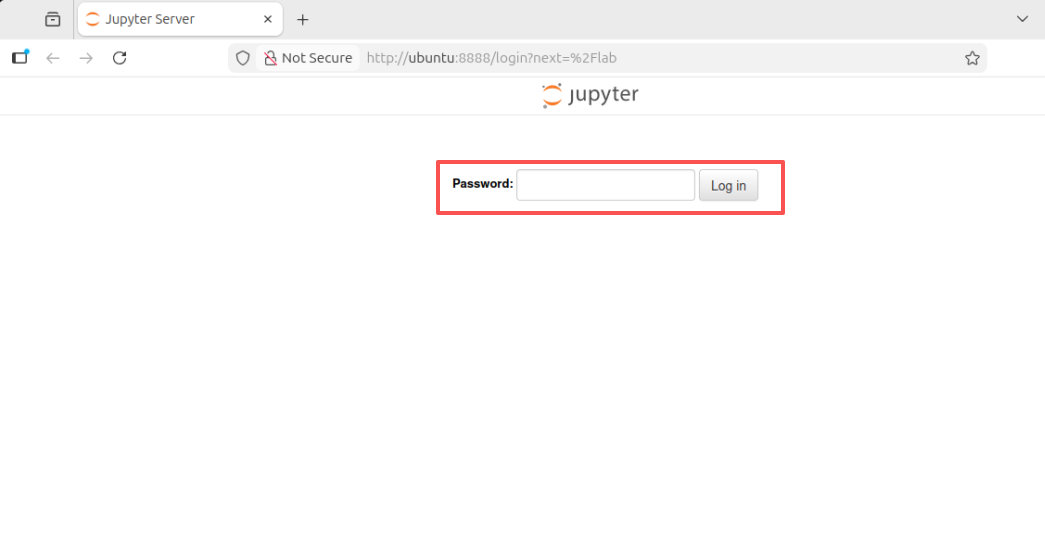
Upon first access, you will need to enter the password and then click [Log in] to proceed.
3.2. Host Access
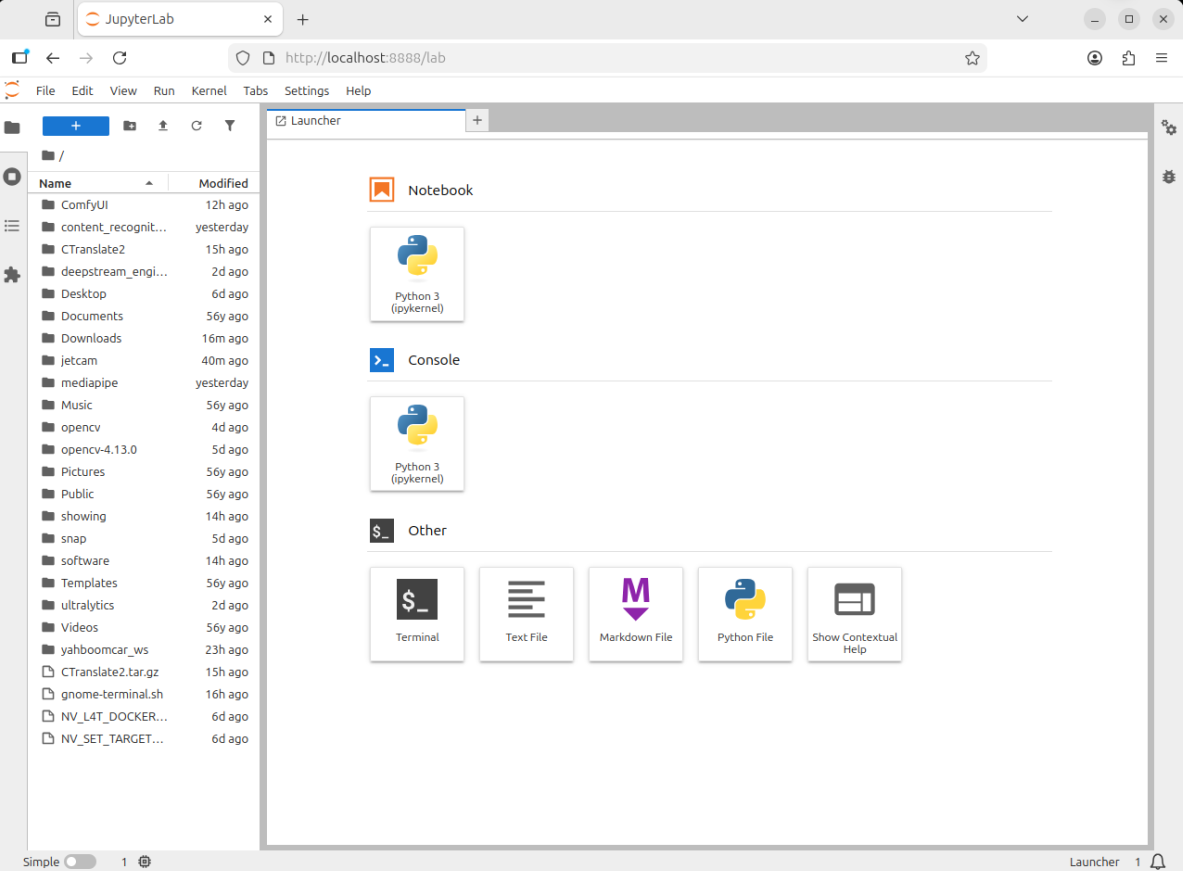
"Host access" refers to accessing the service directly from the Jetson board's operating system. Open a web browser and enter http://localhost:8888/ to access it:
xxxxxxxxxxhttp://localhost:8888/
4. Service Autostart at Boot
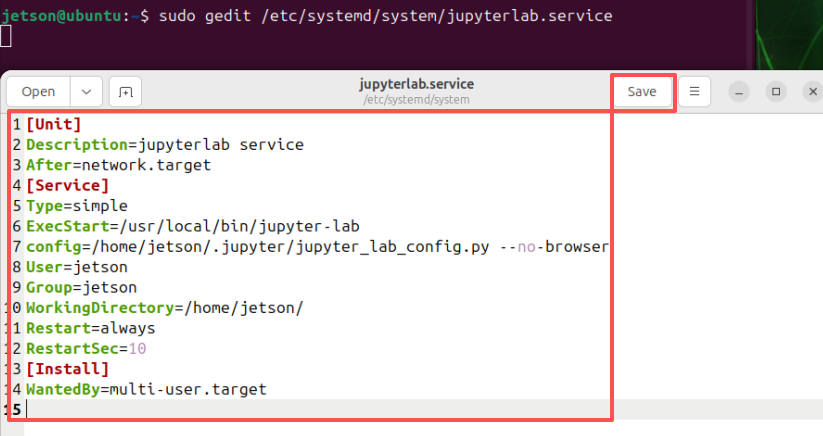
4.1. Editing the Service File
xxxxxxxxxxsudo gedit /etc/systemd/system/jupyterlab.service
Add the following content: After adding it, click "Save" and close the file.
xxxxxxxxxx[Unit]Description=jupyterlab serviceAfter=network.target[Service]Type=simpleExecStart=/usr/local/bin/jupyter-labconfig=/home/jetson/.jupyter/jupyter_lab_config.py --no-browserUser=jetsonGroup=jetsonWorkingDirectory=/home/jetson/Restart=alwaysRestartSec=10[Install]WantedBy=multi-user.target
jetson: The username.
ExecStart: The command used to launch JupyterLab; modify this to match the actual installation path of JupyterLab.
config: Modify this to match the path of the JupyterLab configuration file.
WorkingDirectory: The working directory that JupyterLab opens to upon startup; you may change this as you see fit (it is recommended to set this to the user's home directory).
xxxxxxxxxxTo check the JupyterLab installation path: which jupyter-labFor the configuration file path: Refer to the path generated in the section above.
4.2. Setting Up the Autostart Service
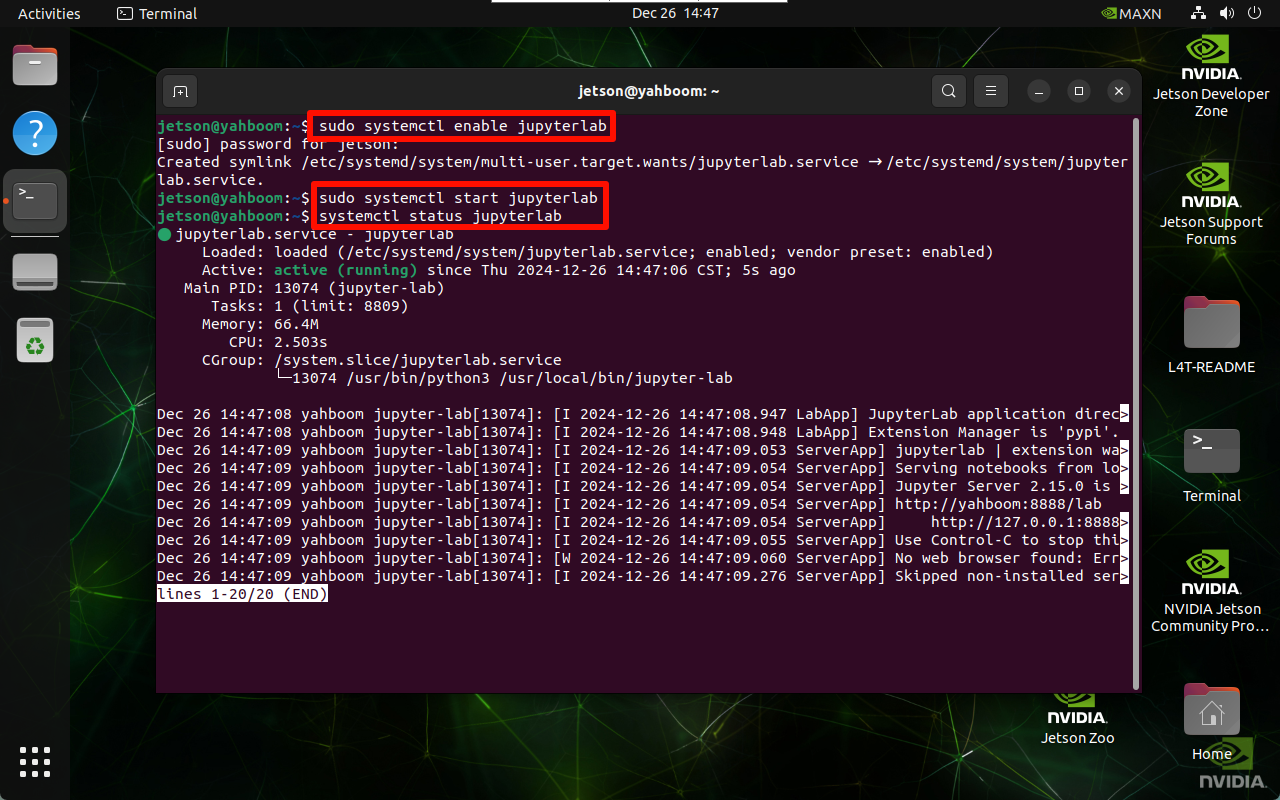
Enable the service to start automatically at boot:
xxxxxxxxxxsudo systemctl enable jupyterlab# To disable autostart: systemctl disable jupyterlab
Start the service:
xxxxxxxxxxsudo systemctl start jupyterlab# Stop the service: sudo systemctl stop jupyterlab
Check the service status:
xxxxxxxxxxsystemctl status jupyterlab
4.3. Verify Automatic Startup
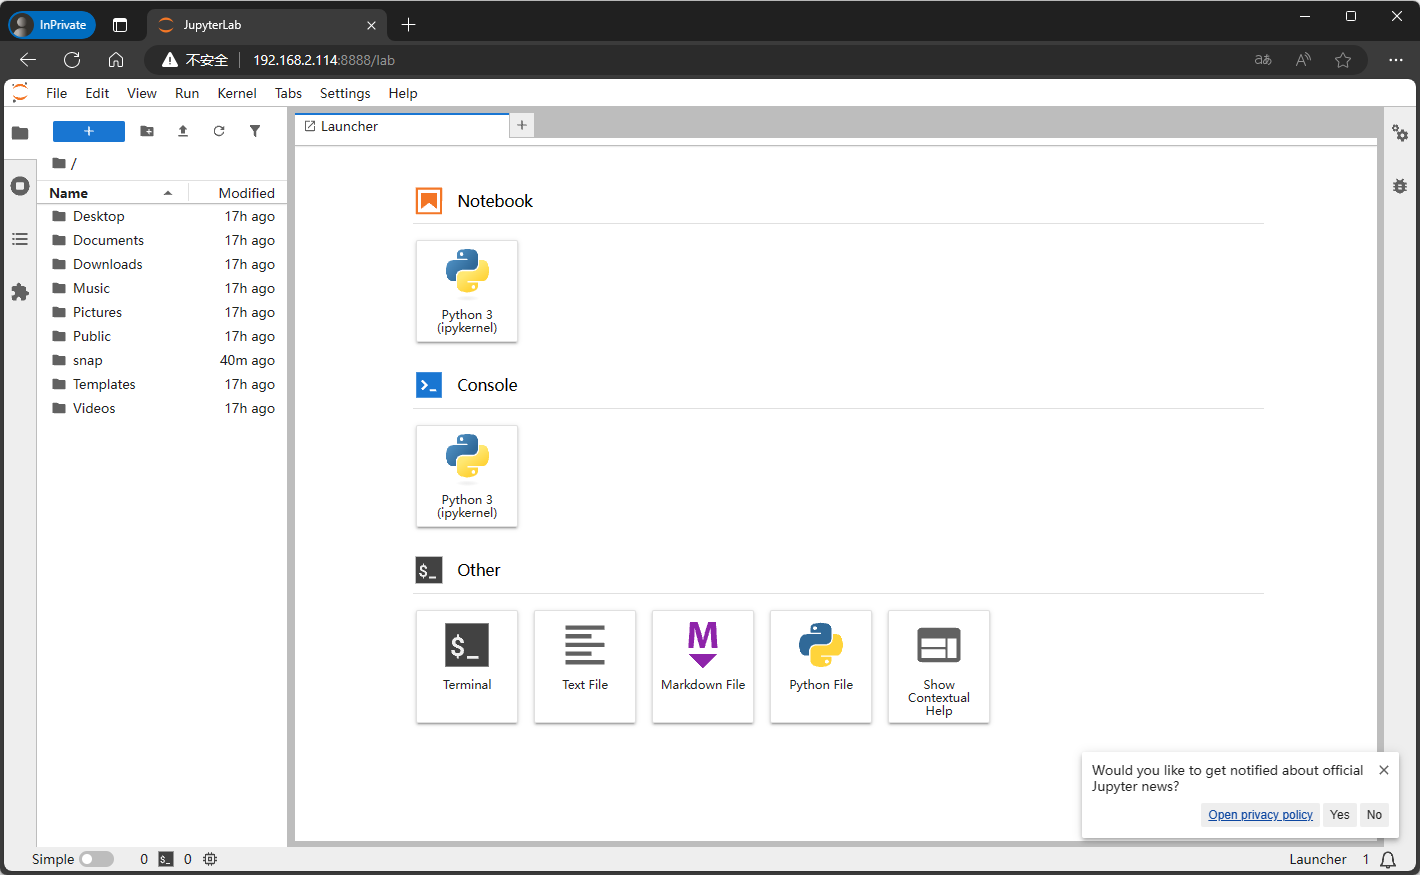
After restarting the system, use a device on the same local area network (LAN) to access the board's IP address followed by port 8888 (e.g., [Board_IP]:8888).
xxxxxxxxxxUpon the first access, you will be prompted to enter a password. This password corresponds to the credentials configured in the previous steps; for the factory default image, the default password is: yahboom.At the time these screenshots were taken, the board's IP address was 192.168.2.114; therefore, devices on the same LAN could access it via 192.168.2.114:8888.
5. Using JupyterLab
5.1. Running Programs
Use JupyterLab to open the program file you wish to execute.

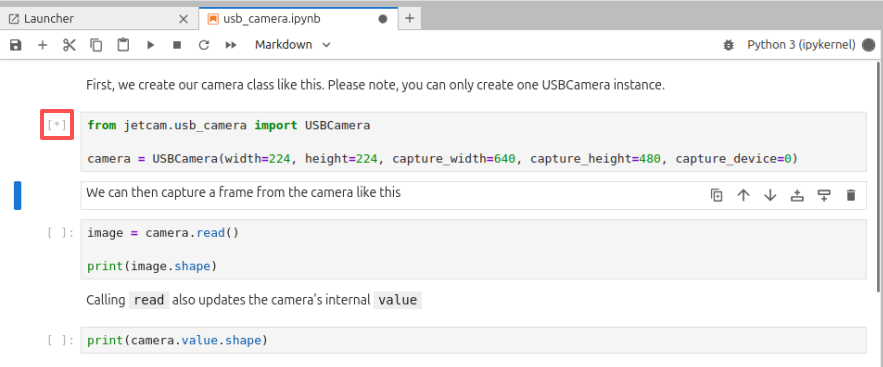
The JupyterLab toolbar is located above the program code. Hovering your mouse cursor over each menu item in the toolbar will display a tooltip describing its function; simply follow these prompts to perform the desired actions. From left to right, the toolbar functions are: 1. Save File; 2. Insert Cell Below; 3. Cut Selected Cells; 4. Copy Selected Cells; 5. Paste Cells; 6. Run Selected Cells; 7. Interrupt Kernel; 8. Restart Kernel; 9. Run All Cells; 10. Cell Type. An [*] displayed in the top-left corner of a cell block indicates that it is currently running:
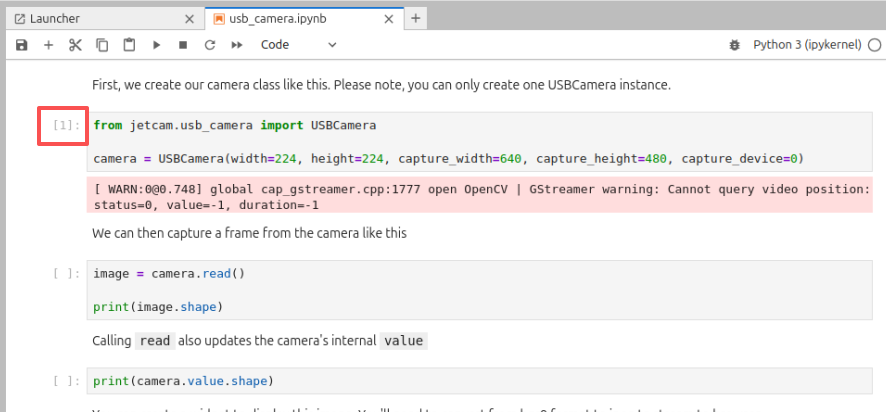
A [number] displayed in the top-left corner of a cell block indicates its sequential execution order; for example, [1] signifies that the program executed the code in this cell for the first time.
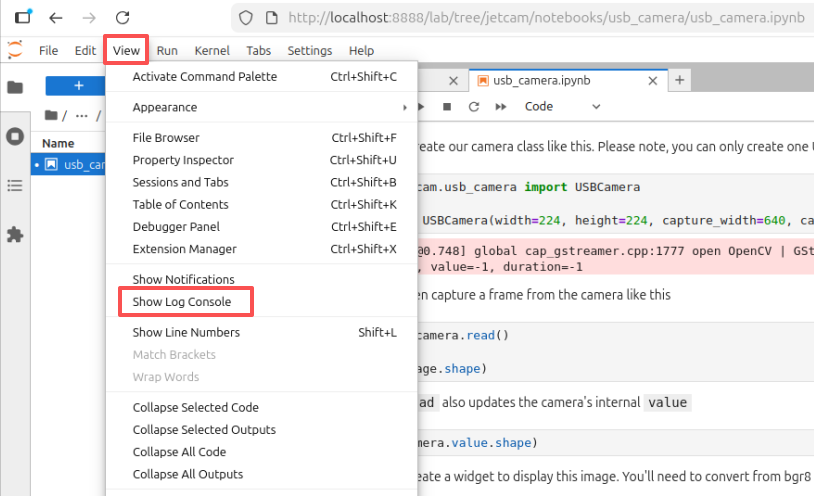
Click [View] -> [Show Log Console] to open the program debugging information panel.
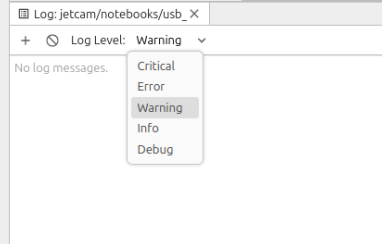
In the program debugging information window located at the bottom, you can adjust the message output level.
5.2. Kernel
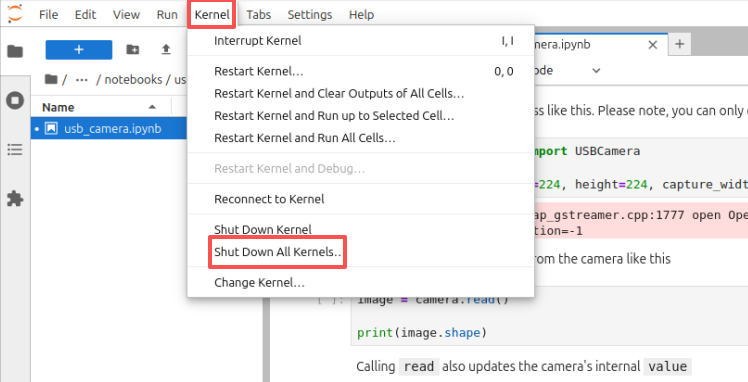
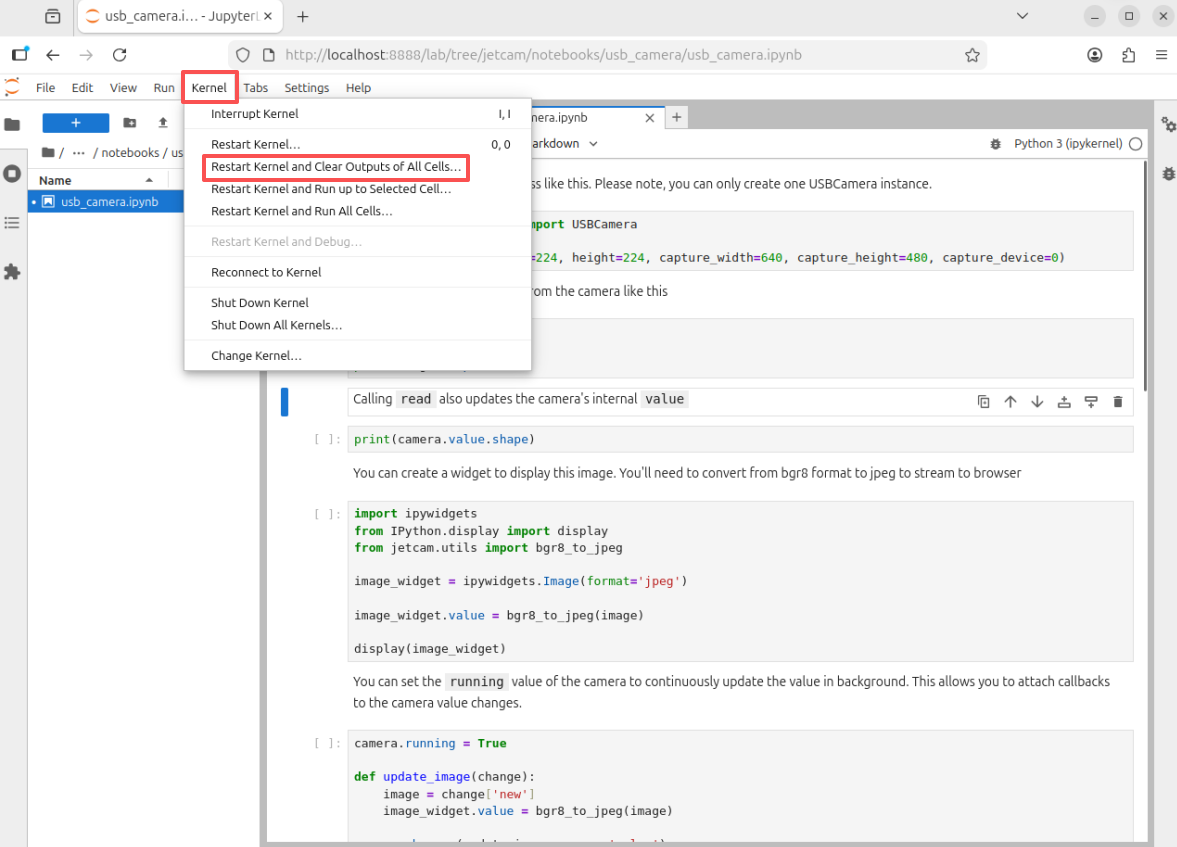
Restart Kernel: Click [Kernel] -> [Restart Kernel and Clear Outputs of All Cells]. It is recommended to restart the kernel and clear the output of all cells whenever you run the program or if the program encounters an error:
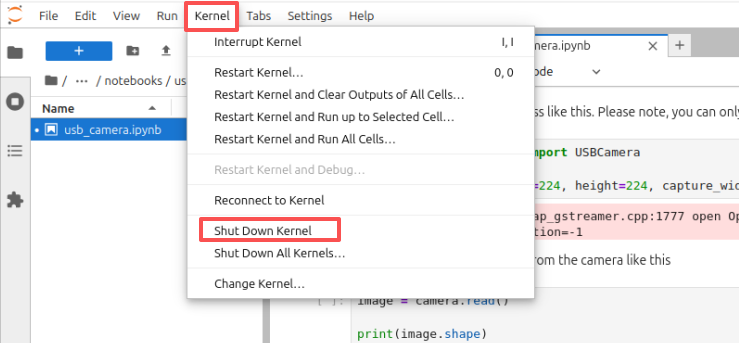
Shut Down Kernel: Click [Kernel] -> [Shut Down Kernel]. It is recommended to shut down the kernel promptly after you have finished using the program to prevent unnecessary resource consumption.
Shut Down All Kernels: Click [Kernel] -> [Shut Down All Kernels]. If other kernels are consuming system resources, you can shut down all kernels first, and then restart the program's specific kernel.