Welcome to RDK X3 Robot repository
2. Calibration of camera internal reference
2. Calibration of camera internal reference
2. Calibration of camera internal reference2.1、Code Function Description2.2、Preparation before calibration2.3、Start up2.3.1、Start the camera2.3.2、Color Image Calibration2.3.3、ir infrared calibration
2.1、Code Function Description
2.2、Preparation before calibration
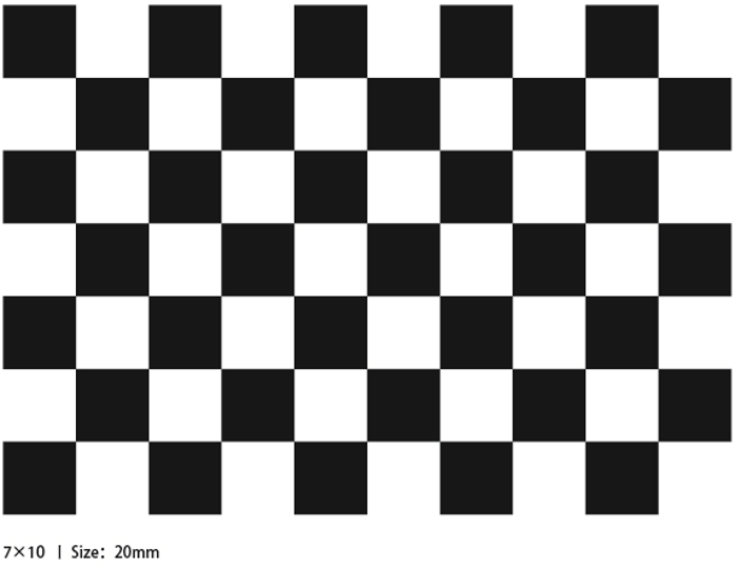
- This tutorial uses a 9x6 checkerboard and a 20mm square, flattened when scaling. Calibration uses the interior vertices of the checkerboard, so a "10x7" checkerboard uses interior vertex parameters of "9x6", as shown below.
- An open area, free of obstacles and calibration board patterns.
- Monocular camera that publishes images via ROS.
Checkerboard (calibration board)
2.3、Start up
2.3.1、Start the camera
Take starting the Astra pro camera as an example, after SSH connects to the car, enter in the terminal,
ros2 launch astra_camera astro_pro_plus.launch.xml
Start the camera before calibration, and turn off the camera until all calibrations are completed.
Obi Zhongguang camera model and the corresponding launch file:
| launch file | camera model |
|---|---|
| ros2 launch astra_camera astra_pro.launch.xml | Astrapro |
| ros2 launch astra_camera astro_pro_plus.launch.xml | Astraproplus |
| ros2 launch astra_camera astra.launch.xml | Astramini |
Since the car has no graphical interface, the next calibration program needs to be run in a virtual machine.
Enter following command in the virtual machine terminal.
xxxxxxxxxxros2 topic list
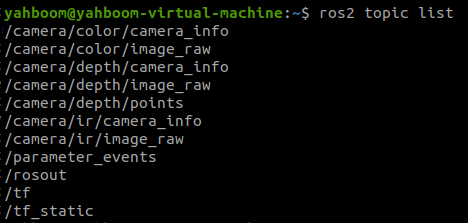
The topic we need to calibrate the RGB color image is /camera/color/image_raw, and the topic used to calibrate the ir infrared image is /camera/ir/image_raw.
2.3.2、Color Image Calibration
The virtual machine installs the camera calibration function package.
Input following command in virtual machine terminal.
xxxxxxxxxxsudo apt install ros-foxy-camera-calibration*
Input " y", press Enter to start the installation, and wait for the installation to complete.
Input following command in virtual machine terminal.
xxxxxxxxxxros2 run camera_calibration cameracalibrator --size 9x6 --square 0.02 --ros-args --remap /image:=/camera/color/image_raw- size: Calibrate the number of internal corners of the checkerboard, for example, 9X6, the corners have a total of six rows and nine columns.
- square: The side length of the checkerboard, in meters.
- /camera/color/image_raw: RGB image topic name.
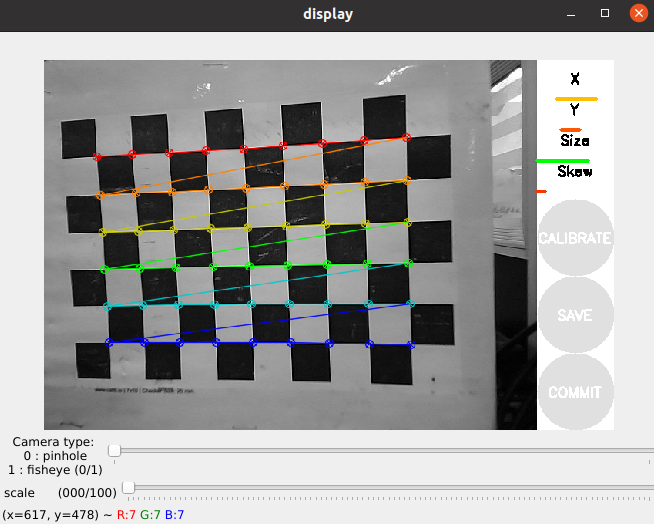
- X: left and right movement of the checkerboard in the camera field of view
- Y: The up and down movement of the checkerboard in the camera field of view
- Size: the checkerboard moves back and forth in the camera field of view
- Skew: The tilt and rotation of the checkerboard in the camera field of view
Collect images by moving up, down, back and forth, left and right, and turning them over, so that the [X], [Y], [Size], and [Skew] on the right turn green, as shown in the figure below, and then click [CALIBRATE] to start calculating the internal camera parameters. About 60-70 pictures.
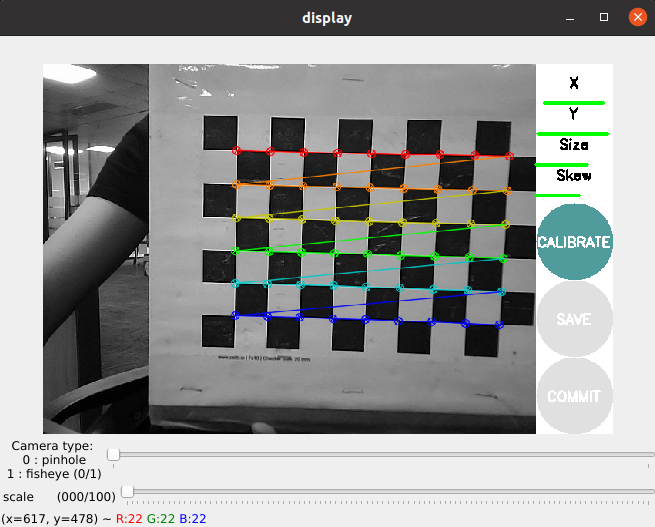
After the calibration is completed, click [SAVE], as shown in the figure below.
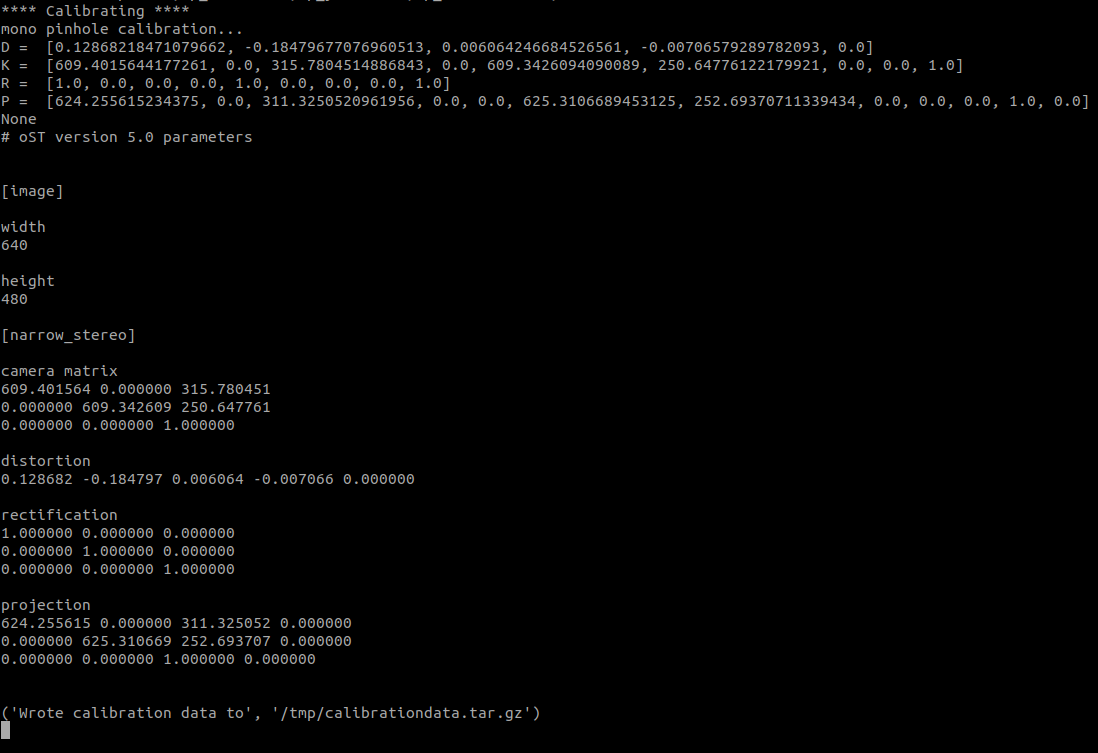
The calibration result is saved to [/tmp/calibrationdata.tar.gz], and the file can be moved out to view the content.
After exiting the program, enter the following command in the virtual machine terminal.
x
#move the file to the current directorysudo mv /tmp/calibrationdata.tar.gz .#create foldermkdir calibrationdata_rgb#Unzip to a specified foldertar -zxvf calibrationdata.tar.gz -C ./calibrationdata_rgb
We will get the calibrated png file, ost.yaml and ost.txt files in the calibrationdata_rgb folder in this directory.
Since the Astra driver loads the calibrated built-in parameters in the code when it starts, there is no need to load the calibrated parameters. In the case of [AR vision] in [opencv series courses], the internal reference of the camera will be used.
2.3.3、ir infrared calibration
Since the RGBD camera uses structured light as the depth imaging principle, the infrared light projected by it is a special disordered spot, which makes the infrared receiving device unable to receive clear and complete picture content.
At this point we can have several special processing methods:
- Forcibly find various angles, let the camera find corners as much as possible (poor accuracy)
- By pasting some frosted translucent paper in front of the red hair emitter, even out the infrared spot (moderate accuracy, more convenient)
- Block the infrared projection camera and use an external infrared camera to fill in the light (high precision, requires additional equipment)
Choose a processing method according to your needs.
Enter the following command in the virtual machine terminal.
xxxxxxxxxxros2 run camera_calibration cameracalibrator --size 9x6 --square 0.02 --ros-args --remap /image:=/camera/ir/image_raw
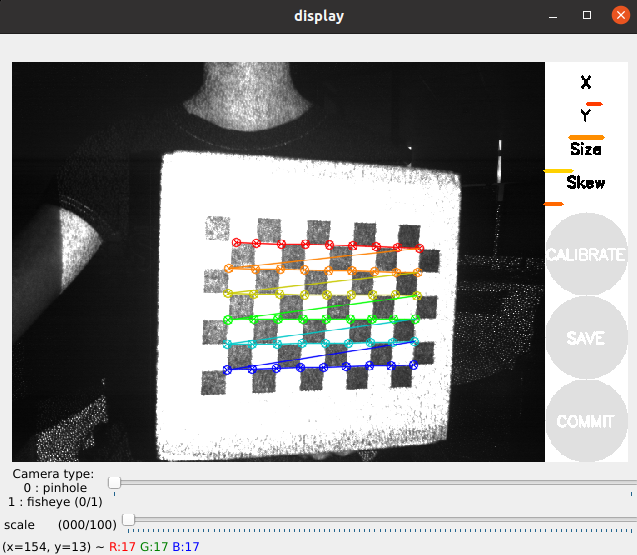
In the same way, the following operation is similar to the color camera calibration, change different poses, and fill the lines under [X], [Y], [Size], and [Skew] as much as possible.
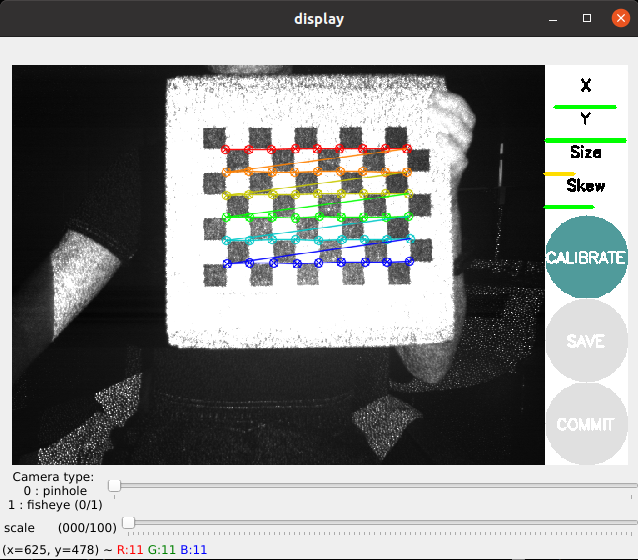
Click [CALIBRATE] to calculate the internal parameters of the camera, and click [SAVE], as shown below.
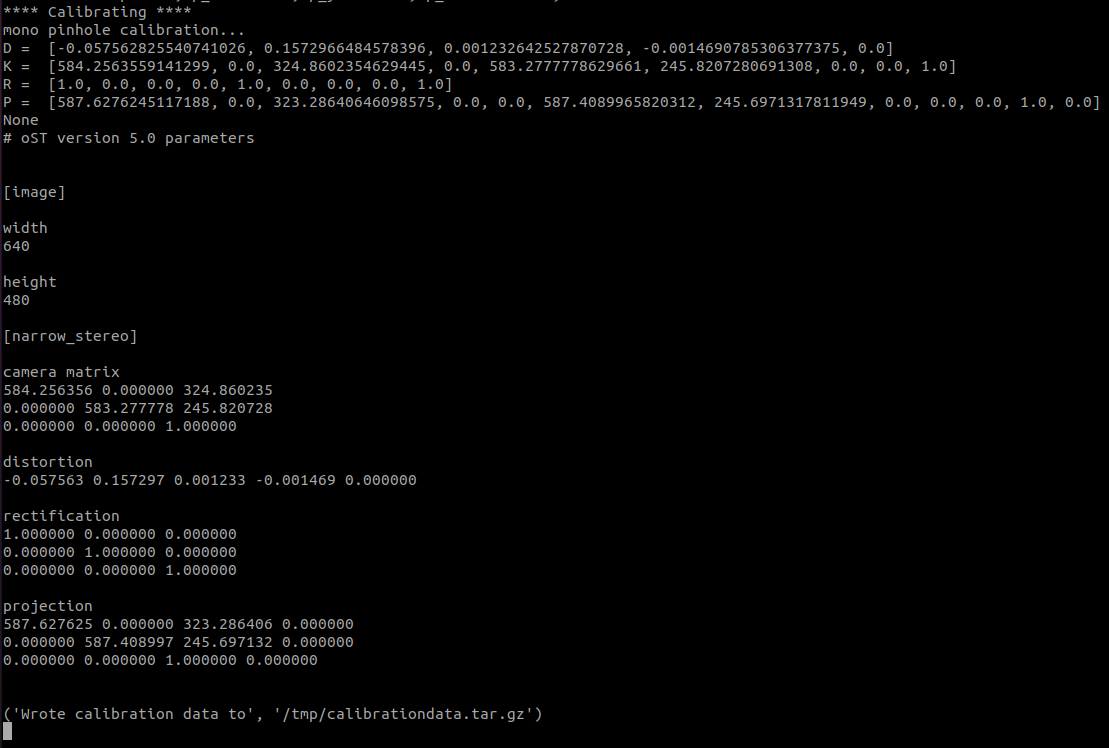
The calibration result is saved to [/tmp/calibrationdata.tar.gz], and the file can be moved out to view the content.
After exiting the program, enter the following command in the virtual machine terminal.
x
#move the file to the current directorysudo mv /tmp/calibrationdata.tar.gz .#create foldermkdir calibrationdata_depth#Unzip to a specified foldertar -zxvf calibrationdata.tar.gz -C ./calibrationdata_depth
We will get the calibrated png file, ost.yaml and ost.txt files in the calibrationdata_depth folder in this directory.