Welcome to ROSMASTER R2 repository
05. Static ip and hotspot mode
05. Static ip and hotspot mode
This section uses the jetson nano as an example.
5.1, Static IP
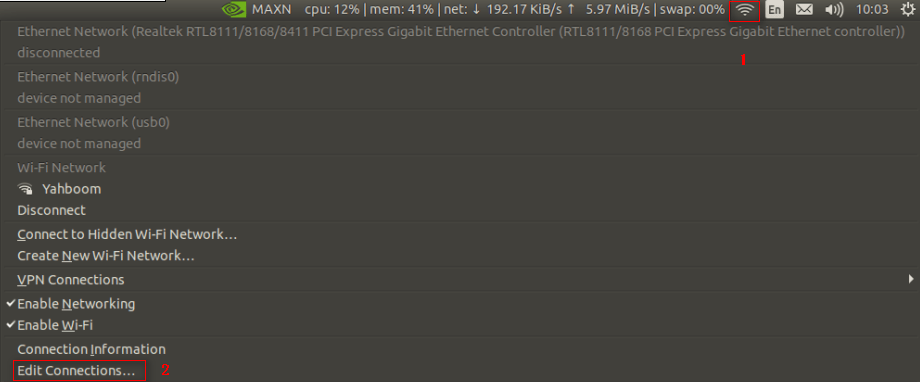
First of all, click on the WiFi icon in the upper right corner will appear in the following picture box, click on the bottom of the [Edit Connections...]. .
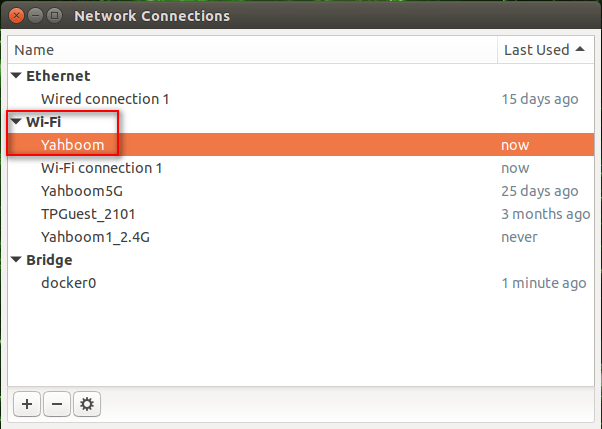
Double click on the connected Wi-Fi, in this case [Yahboom].
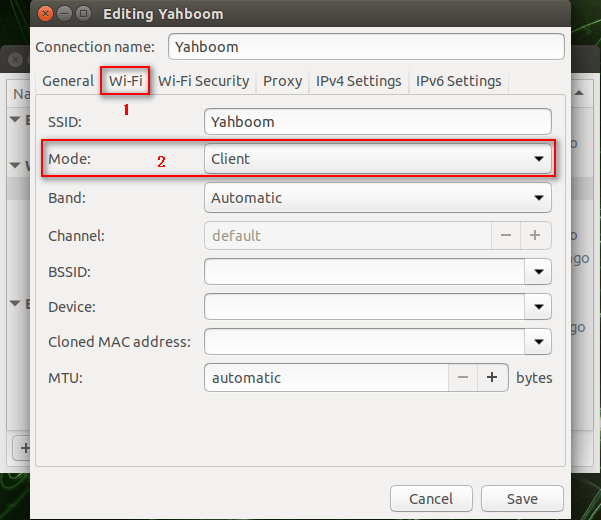
In the [Wi-Fi] directory, [Mode] select [Client].
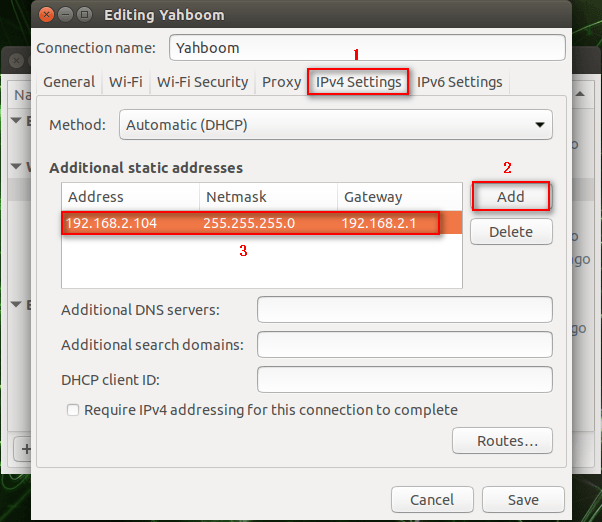
In the [IPv4 Settings] directory, click the [Add] icon, please enter the IP as shown in the following figure, and finally click [save] to save.
Modify the .bashrc file by entering the command
xxxxxxxxxxsudo vim ~/.bashrc
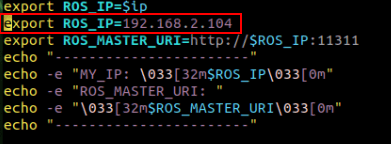
Set the ROS_IP to the IP modified in the previous step, as shown below. Note; if you don't connect to this Wi-Fi, be sure to comment out which line you modified (just put # in front of it).
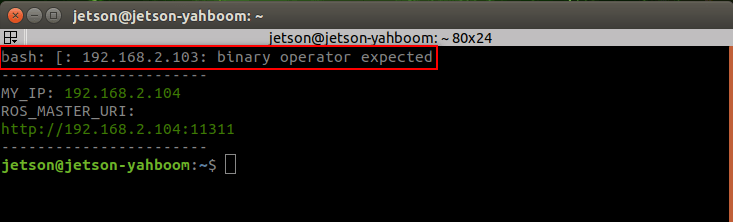
We newly open the terminal appears [binary operator expected], do not have to pay attention to, does not affect the use.
5.2 Hotspot Mode
First of all, click the WiFi icon in the upper right corner and the following picture box will appear, click the bottom [Edit Connections...]. .
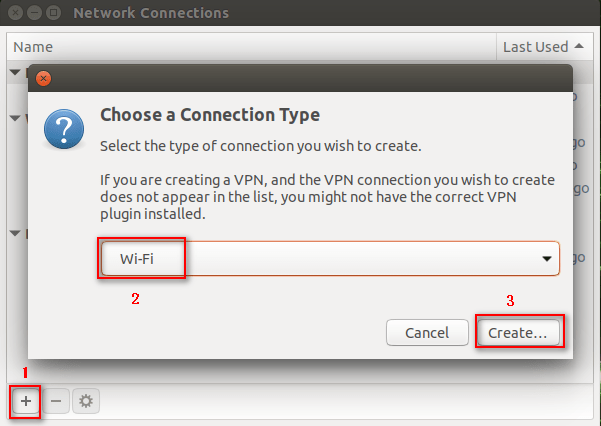
The picture box shown below pops up, click [+] to select [Wi-Fi] mode, click [Create...]. .
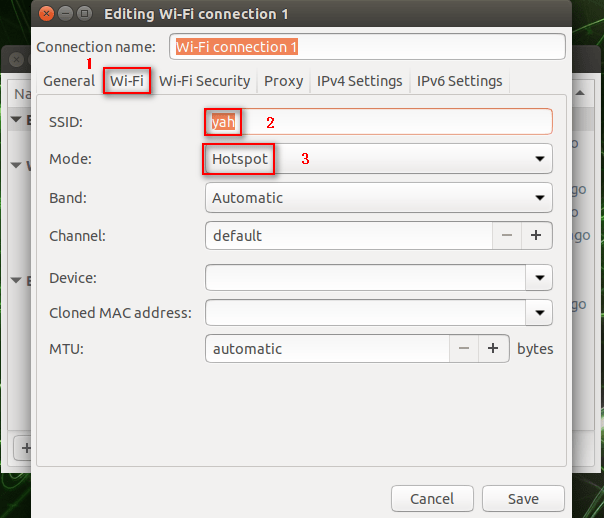
In the [Wi-Fi] directory, add [yah] in the [SSID] field and select [Hotspot] in the [Mode] field.
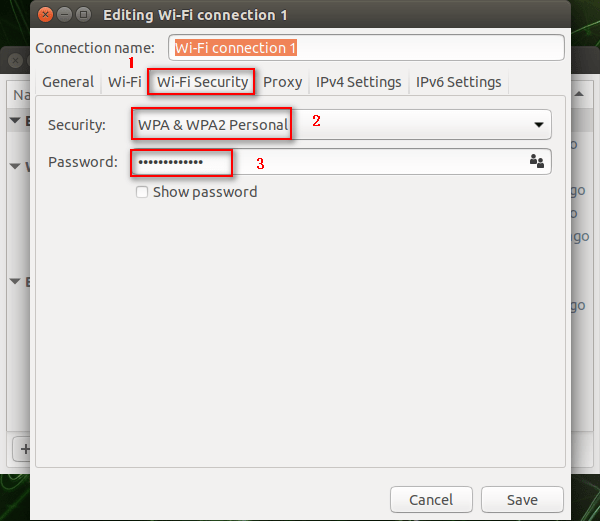
In the [Wi-Fi Security] directory, select [WPA & WPA2 Personal] in the [Security] field, and enter the password in the [Password] field.
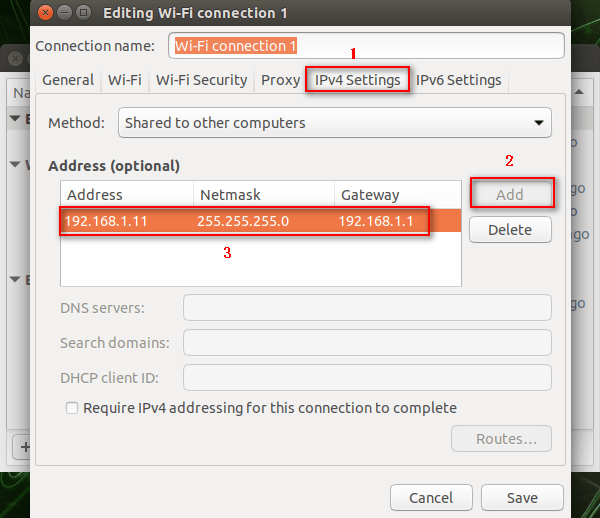
In the [IPv4 Settings] directory, click the [Add] icon, and please enter the IP as shown below.
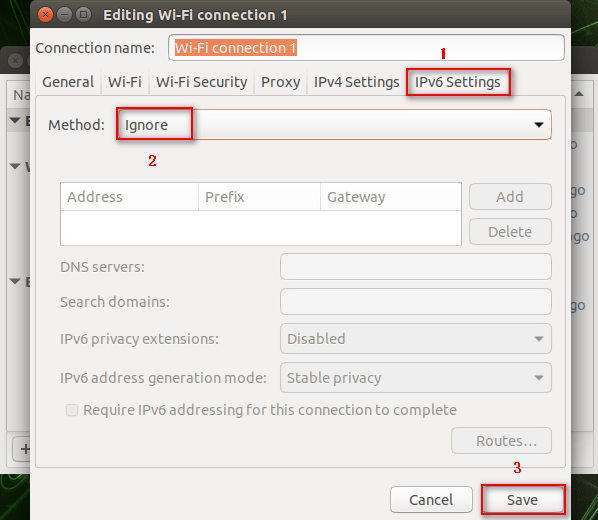
In the [IPv4 Settings] directory, select [Ignore] in the [Method] column, and finally click [Save] to save.
In [Wi-Fi] mode, our newly created WIFI appears.
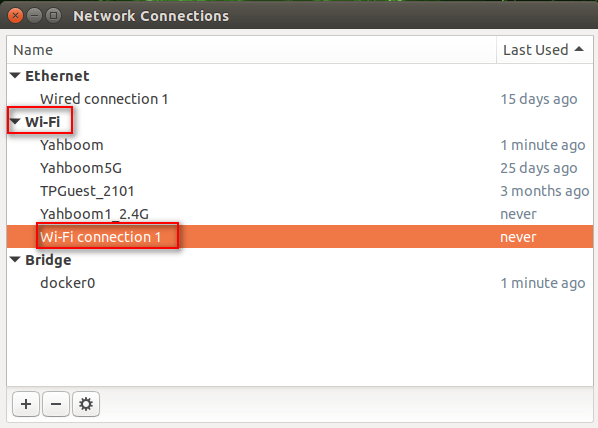
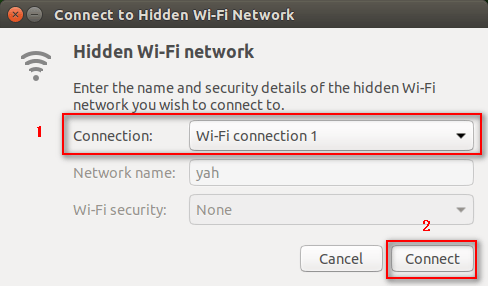
At this point, the new WIFI has been successful, the next connection to the new WIFI. the following figure steps to operate.
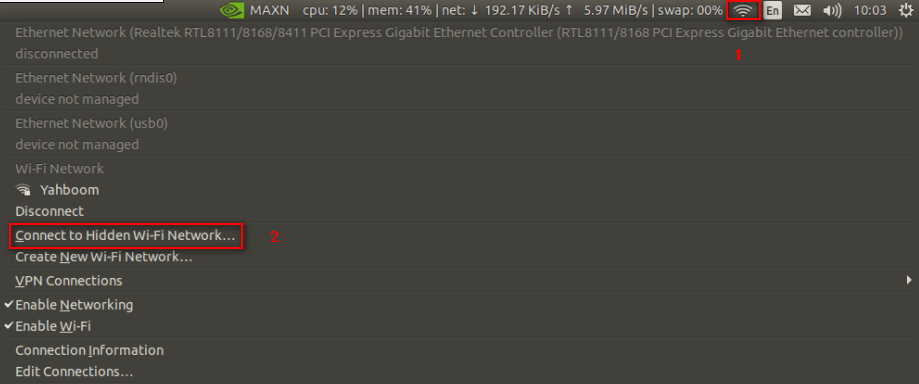
Select the newly created WIFI [Wi-Fi connections 1] in the [Connections] column of the pop-up dialog box and click [Connect].