Welcome to ROSMASTER R2 repository
2. Camera calibration
2、Camera internal reference calibration
Raspberry Pi PI5 master needs to enter the docker container first. Orin motherboard does not need to enter, and the device number has been bound
Before driving a depth camera, it is necessary for the host to be able to recognize the Astra camera device; When entering the Docker container, you need to mount this Astra device to recognize the camera in the Docker container. The supporting host has already been built in an environment and does not require additional configuration. If it is on a new host, a rule file needs to be added. The addition method is very simple. Copy the "/etc/udev rules. d/56 orbbec-usb rules" file from the host computer to the "/etc/udev rules. d" directory in the new environment, and then restart system.
1、Preparation before calibration
A large chessboard of known size. This tutorial uses a 9x6 checkerboard and a 20mm square, which needs to be flattened during calibration.The calibration uses the internal vertices of the chessboard grid, so the "10x7" chessboard uses the internal vertex parameter "9x6", as shown in the following example. Any specification of calibration board is fine, just change the parameters. An open area with no obstacles or calibration board patterns
Monocamera for publishing images through ROS.
2、Start calibration
Install the calibrated feature pack camera_ Calibration, Docker terminal input,
xsudo apt install ros-foxy-camera-calibration* #pi5 master control
sudo apt install ros-humble-camera-calibration* #orin master controlStart the camera before calibration, and then turn off the camera until all calibration is completed. Start the camera (taking starting the astraproplus camera as an example), input in the Docker terminal,
xxxxxxxxxxros2 launch astra_camera astro_pro_plus.launch.xml
Starting reference for other Astra camera models,
| Launch file | Camera model |
|---|---|
| ros2 launch astra_camera astra_pro.launch.xml | Astrapro |
| ros2 launch astra_camera astro_pro_plus.launch.xml | Astraproplus |
| ros2 launch astra_camera astra.launch.xml | Astramini |
Use the following command to view the topic, enter in the Docker terminal,
xxxxxxxxxxros2 topic list
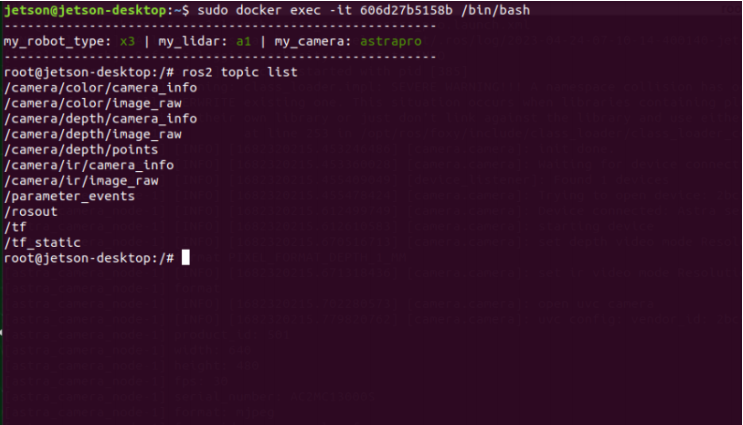
The topic we need to use to calibrate RGB color images is "/camera/color/imageraw".
Run the calibration program and input it into the Docker terminal,
xxxxxxxxxxros2 run camera_calibration cameracalibrator --size 9x6 --square 0.02 --ros-args --remap /image:=/camera/color/image_raw
size:Calibrate the number of internal corner points on the chessboard, such as 9X6, with a total of six rows and nine columns of corner points.
square:Calibrate the number of internal corner points on the chessboard, such as 9X6, with a total of six rows and nine columns of corner points. The side length of a chessboard grid, measured in meters.
Topic Name:/camera/color/image_raw,If you are running the [usb_cam] file,Need to modify here to [/imageraw]
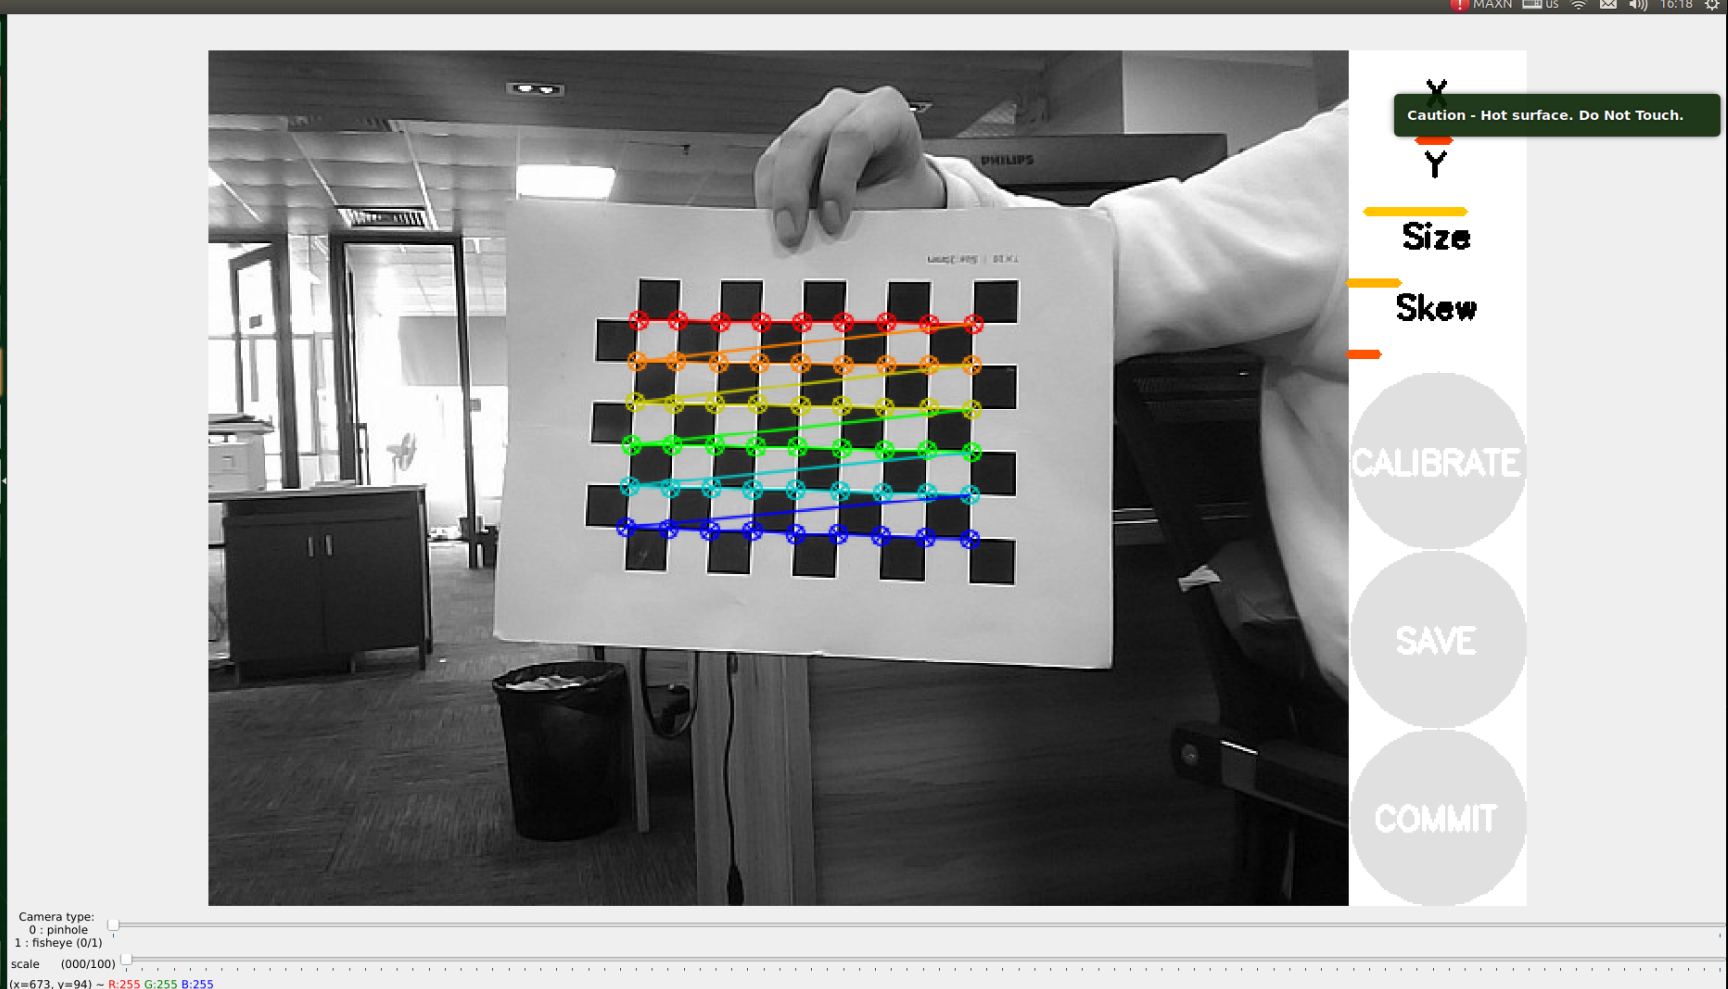
X:The left and right movement of the checkerboard in the camera's field of view
Y:Move the checkerboard up and down in the camera's field of view
Size :The forward and backward movement of the checkerboard in the camera's field of view
Skew:The tilting and rotation of the checkerboard in the camera's field of view
As shown in the above figure, it is necessary to capture the image by flipping it up, down, back, left, right, and left to make the X, Y, Size, and Skew on the right turn green, as shown in the following figure. Then, click CALIBRATE to start calibration.
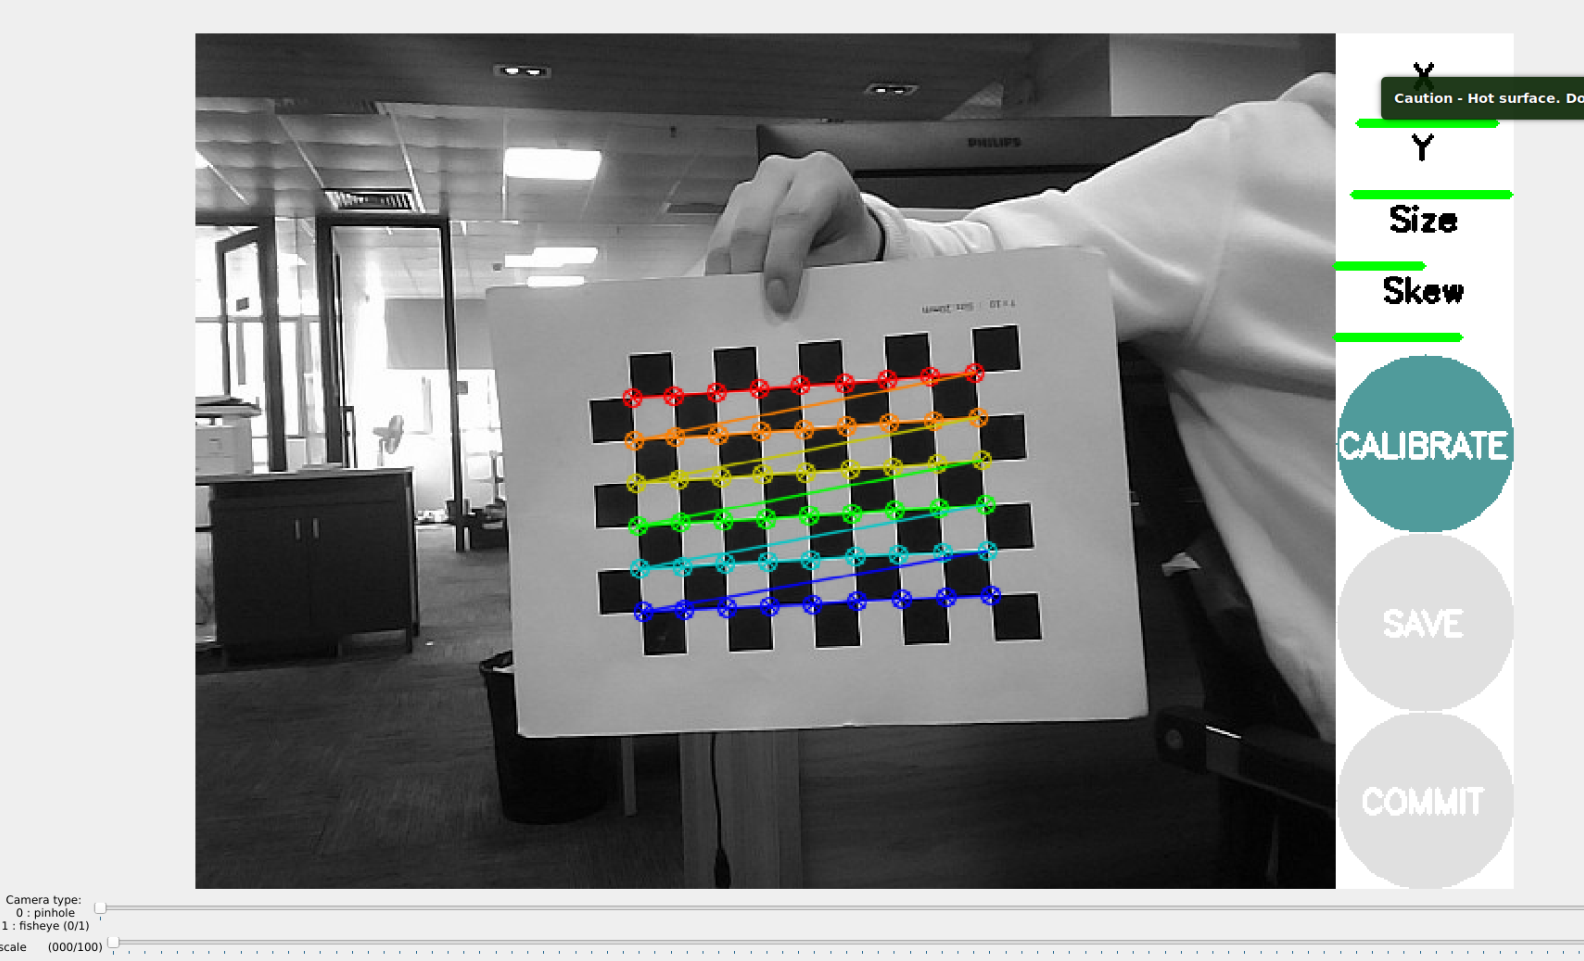
After calibration, click SAVE, as shown in the following figure,
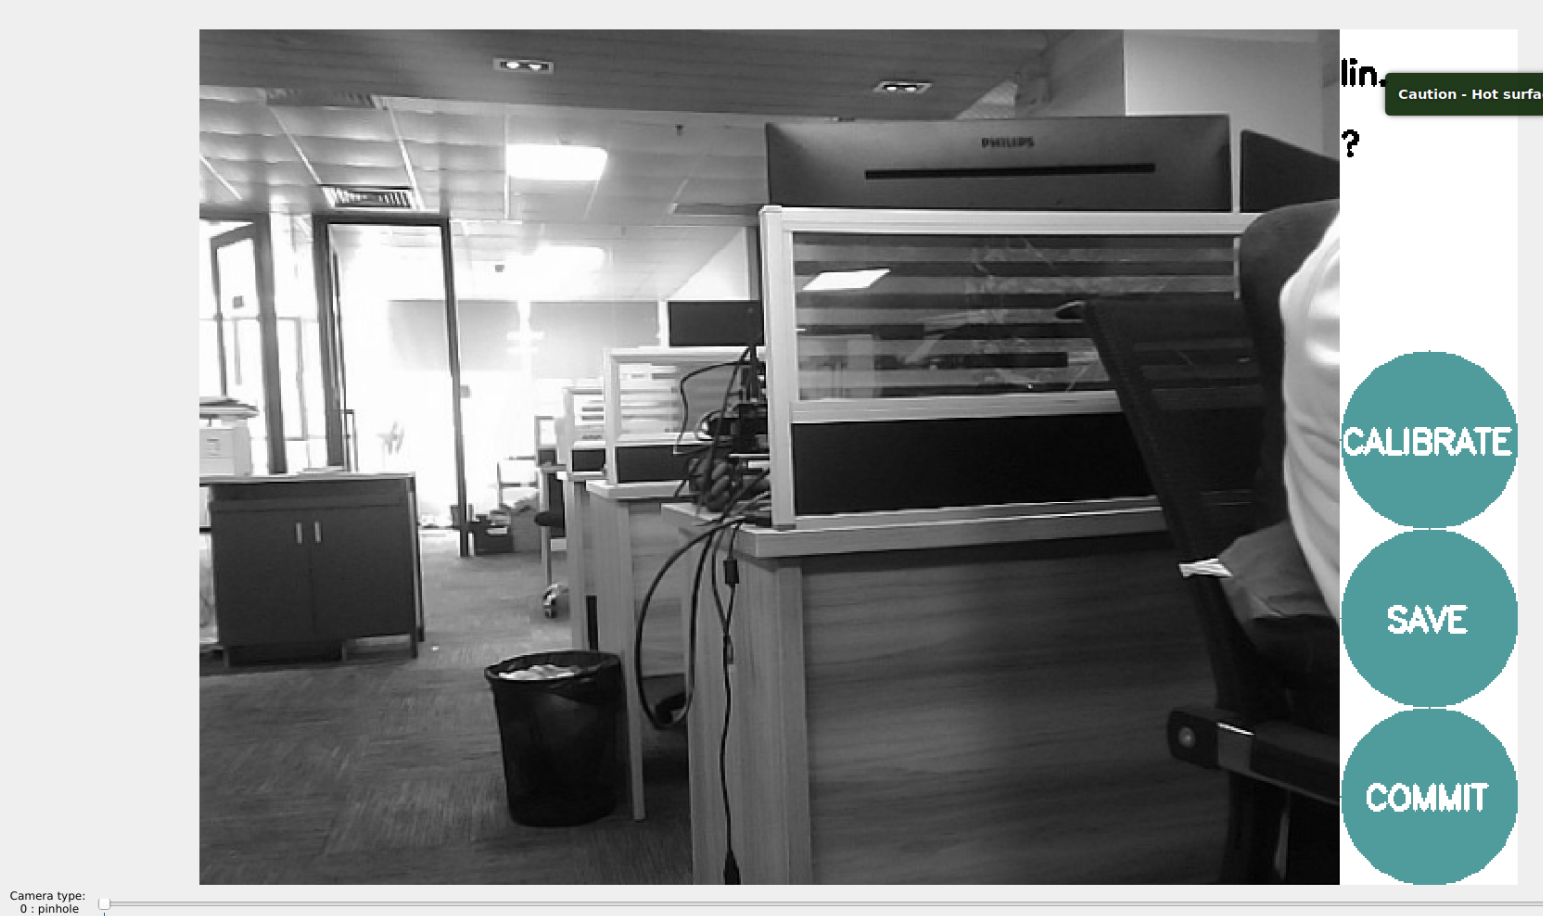
Save the calibration results to [/tmp/calibration data. tar. gz], and the saved path is in the terminal directory where the calibration program was started. After calibration, you can move out the file [/tmp/calibrationdata. tar. gz] to see the content
xxxxxxxxxxsudo mv /tmp/calibrationdata.tar.gz ~
Docker terminal input,
xxxxxxxxxxcd ~tar -xvf calibrationdata.tar.gz
The calibrated png file, ostyaml, and ost.txt files will be obtained in the terminal directory.
Due to the fact that the Astra driver starts with built-in parameters calibrated in the code, there is no need to load the calibrated parameters. However, when starting a USB camera, the parameters need to be loaded. Therefore, after calibration, the parameters need to be replaced with the original built-in parameters and the calibrated ost.yaml needs to be renamed camera_ Info.yaml, then replace the original camera_ Info.yaml, Docker terminal input,
xxxxxxxxxx#First, copy the file to/opt/ros/$ROS_DISTRO/share/USB_ Cam/configsudo cp ost.yaml /opt/ros/$ROS_DISTRO/share/usb_cam/config#Switch to/opt/ros/$ROS_DISTRO/share/USB_ Under the cam/config directorycd /opt/ros/$ROS_DISTRO/share/usb_cam/config#Back up the original camera_ Info.yamlsudo mv camera_info.yaml camera_info_BK.yaml#Rename ost.yaml to camera_ Info.yamlsudo mv ost.yaml camera_info.yaml