yahboom
HomeLearn
Solution
Blog
Online Store
About Us
EN/中文
Transbot SE📖
01.Introduction to Transbot SE
  • 01. Introduction to Transbot SE
  • 02. Precautions for use and battery safety
  • 03. First Trial
02.First Trial
  • 2.1.APP control
  • 2.2.USB wireless handle control(Optional)
  • 2.3.Handle video control Transbot(Optional)
  • 2.4.Network configuration tutorial in hotspot mode
03.Hardware control course
  • 3.1About expansion board and update firmware
  • 3.2.Close self-starting process
  • 3.3.Install Transbot library
  • 3.4.Control buzzer and button
  • 3.5.Control PWM servo
  • 3.6.Control bus servo
  • 3.7.Control motor
  • 3.8.Control robot movement
04.Linux operating system
  • 1. Virtual machine installation and use
  • 2. Linux basics
  • 3. Remote control
  • 4. Multi-machine communication configuration
  • 5. Static IP and hotspot mode
  • 6. Web page real-time monitoring
  • 7. Expansion tutorial
  • 8. Write system images
05.Docker couse(For Pi5)
  • 1.Docker overview and docker installation
  • 2.Common commands for docker image containers
  • 3.Docker images deeply understand and publish images
  • 4.Docker hardware interaction and data processing
  • 5.Start the transbot se container
06.ROS basic course
  • 1.ROS introduction
  • 2.Project file structure
  • 3.Common commands and tools
  • 4.Publisher
  • 5.Subscribers
  • 6.Customize topic messages and use
  • 7.Client
  • 8.Server
  • 9.Custom service messages and usage
  • 10.TF release and monitoring
07.OpenCV courses
  • 1. Getting started with Open Source CV
  • 2. Open Source CV geometric transformation
  • 3. Open Source CV image processing and drawing text line segments
  • 4. Open Source CV image beautification
  • 5. Opencv application
  • 6. AR vision
  • 7. AR QR code
  • 8. ROS+Opencv foundation
  • 9. ROS+Opencv application
  • 10. MediaPipe development
08.ROS robot course
  • 1.PID algorithm
  • 2.Basic communication
  • 3.Keyboard control
  • 4.Handle control(Optional)
  • 5.Robot state estimation
  • 6.Data calibration
09.ROS simple camera course
  • 1.HD camera calibration
  • 2.HD camera color tracking
  • 3.HD camera color tracking (robotic arm)
  • 4.HD camera object tracking
  • 5. KCF target tracking
  • 6.HD camera face tracking
  • 7.HD camera robotic arm carrying
  • 8.HD camera Autopilot
10.ROS robotic arm control tutorial
  • 1.MoveIt configuration
  • 2.MoveIt control the real machine
  • 3.MoveIt moves randomly
  • 4.MoveIt kinematics design
  • 5.MoveIt cartesian path
  • 6.MoveIt avoiding
  • 7.MoveIt scene design
  • 8.MoveIt trajectory planning
  • 9.Mediapipe palm control car
  • 10.Mediapipe gesture control robotic arm
  • 11.Mediapipe gesture control car
  • 12.Mediapipe arm attitude control robotic arm
11.ROS multi-robot control(Optional)
  • 1. Multi-robot control(Optional)
  • 2. Multi-robot queue performance(Optional)
  • 3. Multi-robot robot arm dancing(Optional)
12.Deep learning courses
  • 1.KNN recognizes handwritten digits
  • 2.Basic use of TensorFlow
  • 3.Basic use of PyTorch(jetson)
  • 4.yolov5 model training(jetson)
  • 5.yolov5+tensorrt acceleration(jetson)
  • 6.yolov4-tiny
13.Installation Video
  • Part18
  • Part1-6
  • Part7-12
  • Part13.1-13.3.3
  • Part13.4.1-17
14.FAQnew
  • 1.Using your own Jetson board,Transbot-SE cannot start normally
Download
  • APP(iOS/Android)
  • System_File-Pi5
  • System_File-Pi4
  • System_File-Jetson
  • VM_File
  • Appendix
  • Code
  • InstructionManual
  • Jetson_Boot_USB.tar.gz
  • Hardware_Info
Download ZIP

Welcome to Transbot SE repository

3.3.Install Transbot library

Install Transbot SE driver library

Install Transbot SE driver library1. Declaration before installing the driver library2. Download the Python driver library file3. Transfer files3.1jetson start installation3.2 Raspberry Pi 5start installation4. Check version6. Basic usage of driver library

1. Declaration before installing the driver library

Transbot SE factory image system has already installed the latest driver library, so there is no need to install it again. You only need to install the driver library if you are not using the factory image or if the driver library has updated content.

The driver library storage path that comes with the factory system: ~/Transbot/py_install

Please refer to the following steps for how to install the driver library. Here, the installation of V3.1.0 version is taken as an example.

2. Download the Python driver library file

We have provided Transbot SE Python library -- py_install.zip.
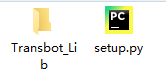
image-20210904173159963

Or you can download this file on our website, [Download]--[Transbot SE Library].

3. Transfer files

3.1jetson

You can transfer file into Jetson NANO system by WinSCP software. This software download link: https://winscp.en.softonic.com/
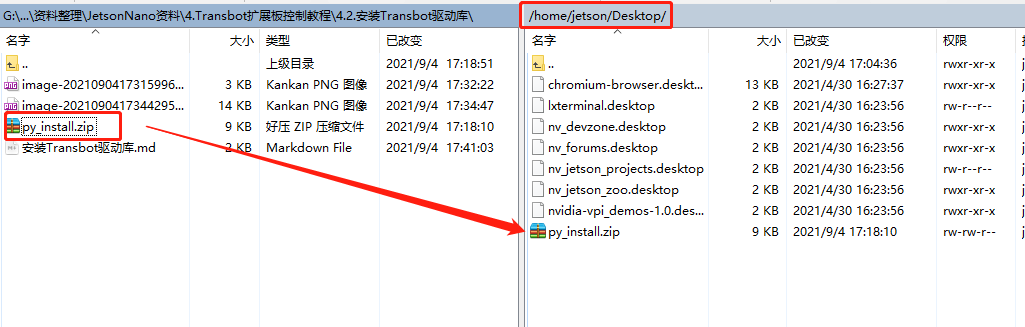
image-20210904174213656


start installation

Open the terminal of Jetson Nano and enter the following command to decompress it.

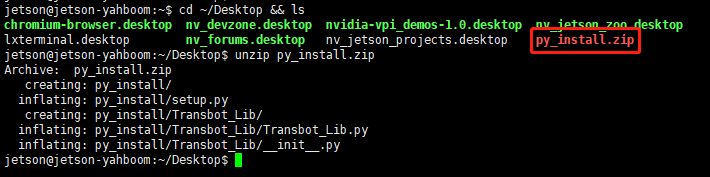
Enter the desktop and check whether the file exists. The target file is in the red box.

cd ~/Desktop && ls

unzip files

xxxxxxxxxx
unzip py_install.zip

image-20210904175034575

Note: The entire documentation routine uses the py_install.zip compressed package placed on the desktop of the Jetson Nano system as an example. If you store the compressed package in a different path, please enter the corresponding directory according to the actual path to operate.

Go to the folder of the driver library

xxxxxxxxxx
cd py_install

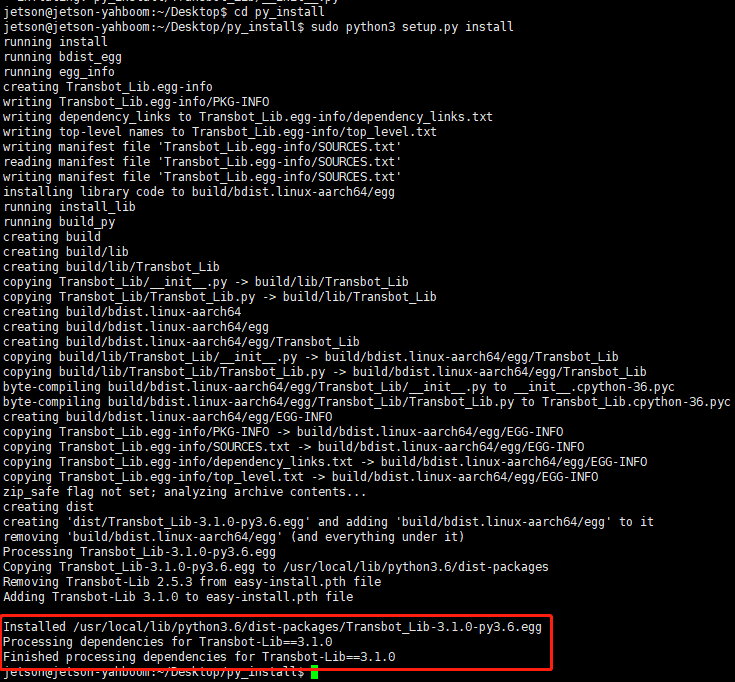
Run the installation command. If you see the installation version number prompted at the end, the installation is successful. This command will overwrite the previously installed Transbot_Lib driver library.

xxxxxxxxxx
sudo python3 setup.py install

image-20210904175520062


3.2 Raspberry Pi 5

You can transfer file into Jetson NANO system by WinSCP software. This software download link: https://winscp.en.softonic.com/
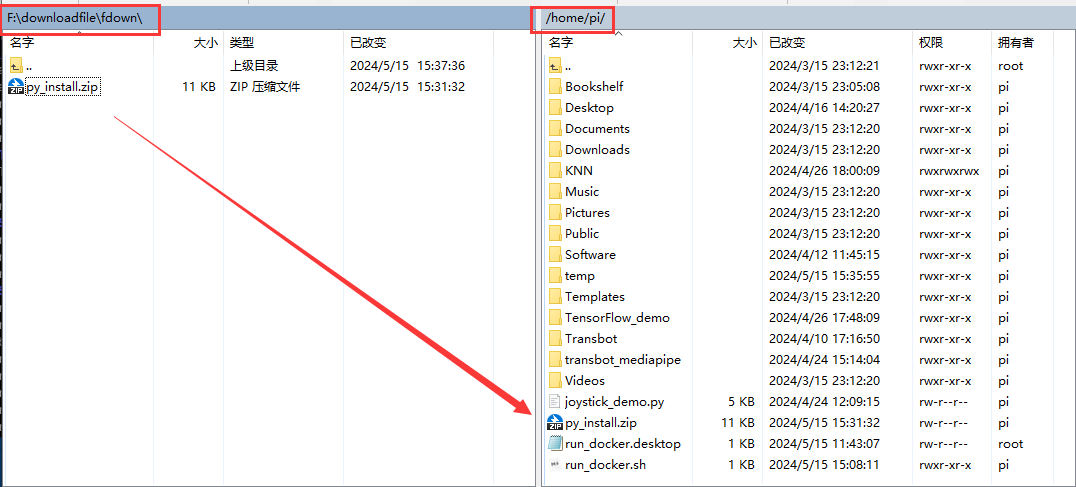
1

start installation

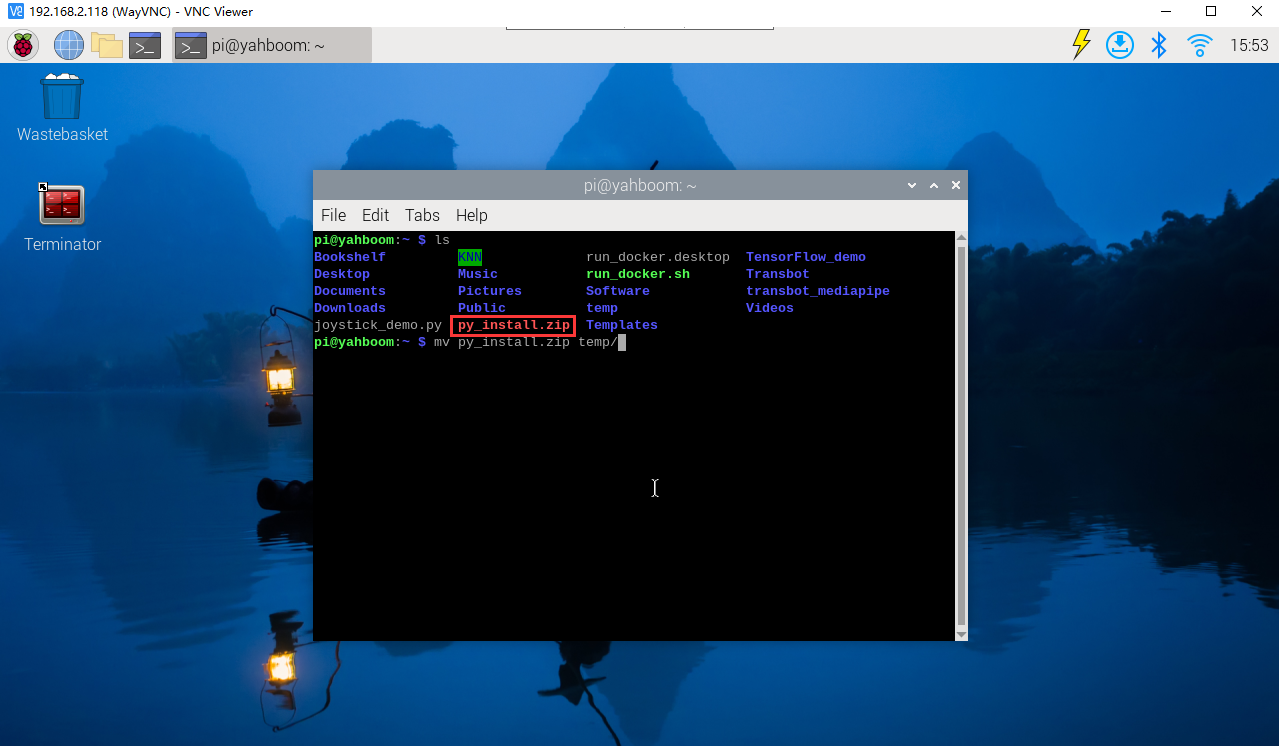
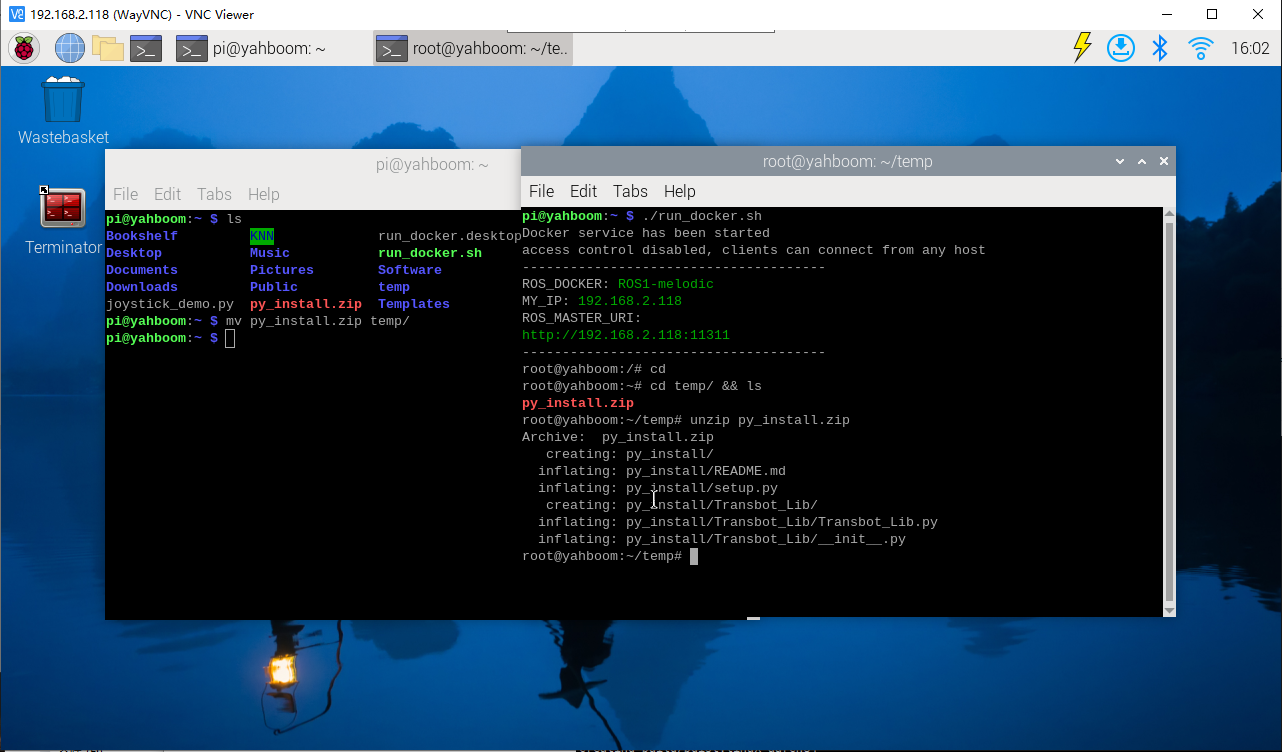
Open the Raspberry Pi terminal, check whether the file exists, and move the driver library to the Raspberry Pi's temp directory

xxxxxxxxxx
ls
xxxxxxxxxx
mv py_install.zip temp/

2

Enter docker

Note: If you have a terminal that automatically starts docker, you can directly enter the temp directory in docker to view it. There is no need to manually start docker

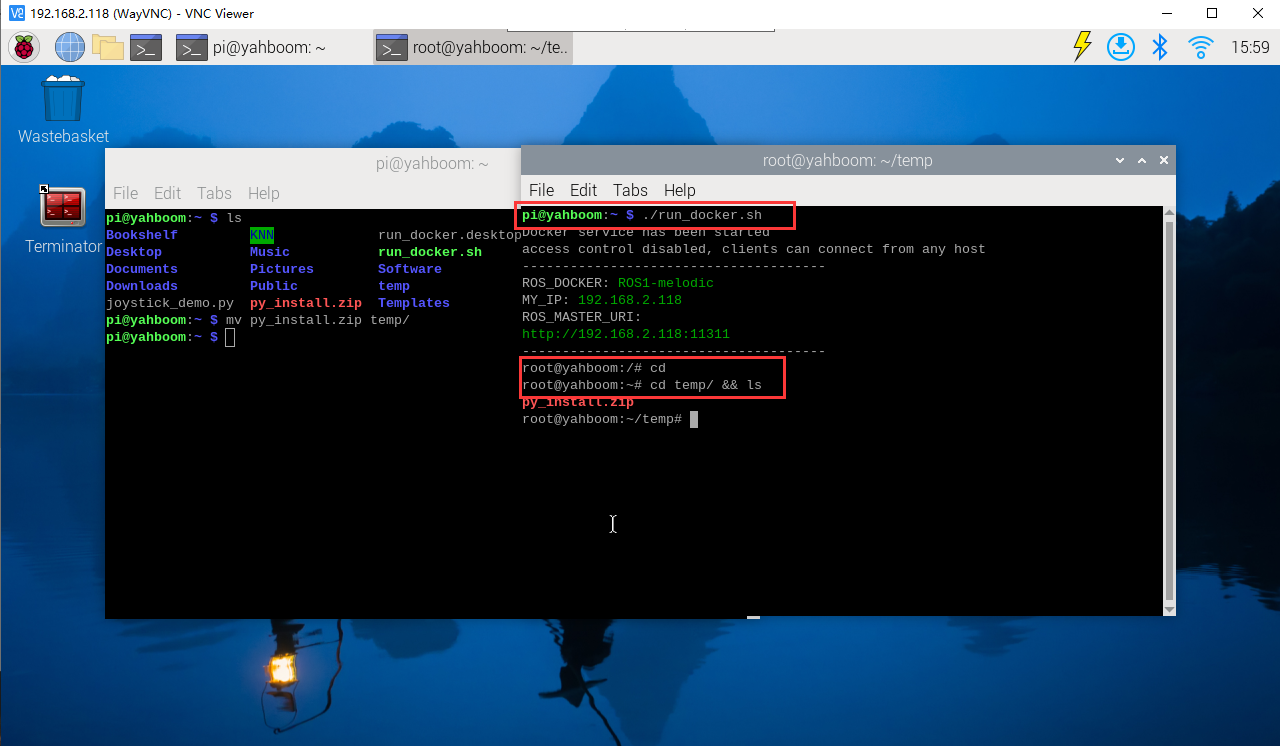
Start docker manually

xxxxxxxxxx
./run_docker.sh

Enter the temp directory to see if the file exists

xxxxxxxxxx
cd
xxxxxxxxxx
cd temp/ && ls

3

Unzip driver files

xxxxxxxxxx
unzip py_install.zip

4

Note: The entire documentation routine uses the py_install.zip compressed package on Raspberry Pi 5 as an example. If you store the compressed package in a different path, please enter the corresponding directory according to the actual path to operate.

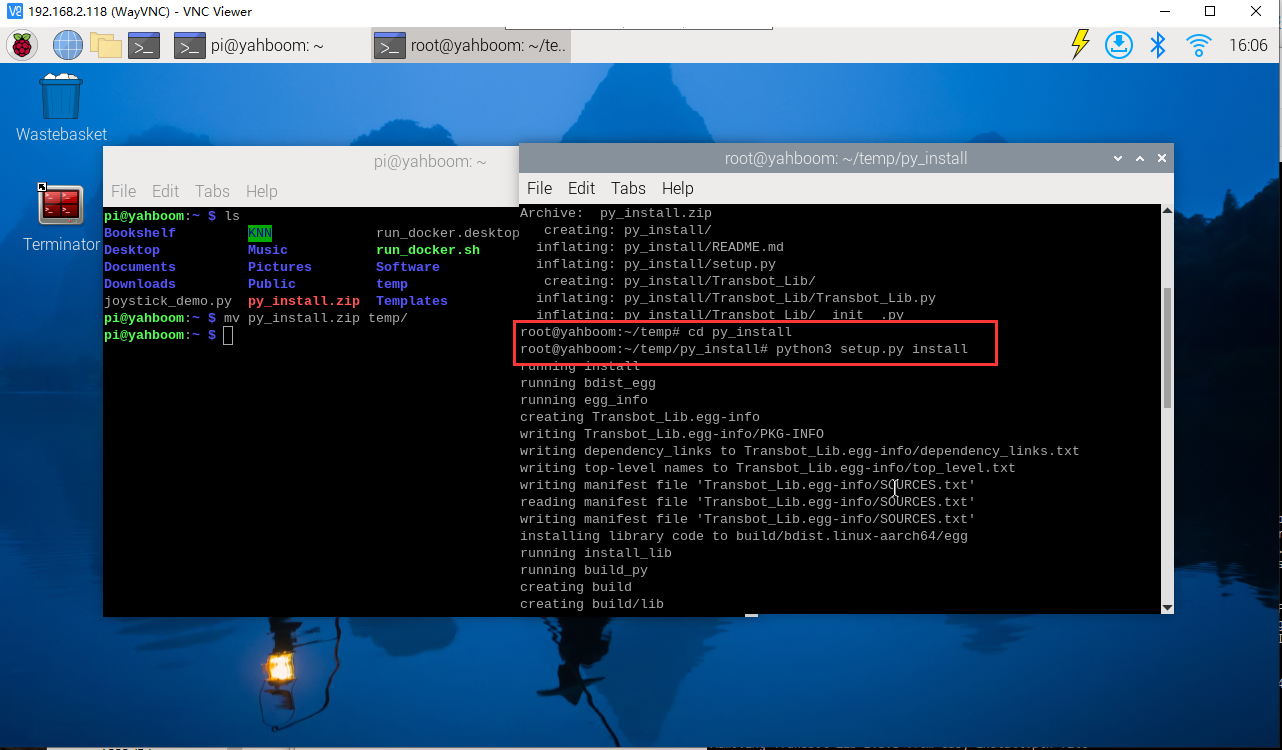
Go to folder

xxxxxxxxxx
cd py_install

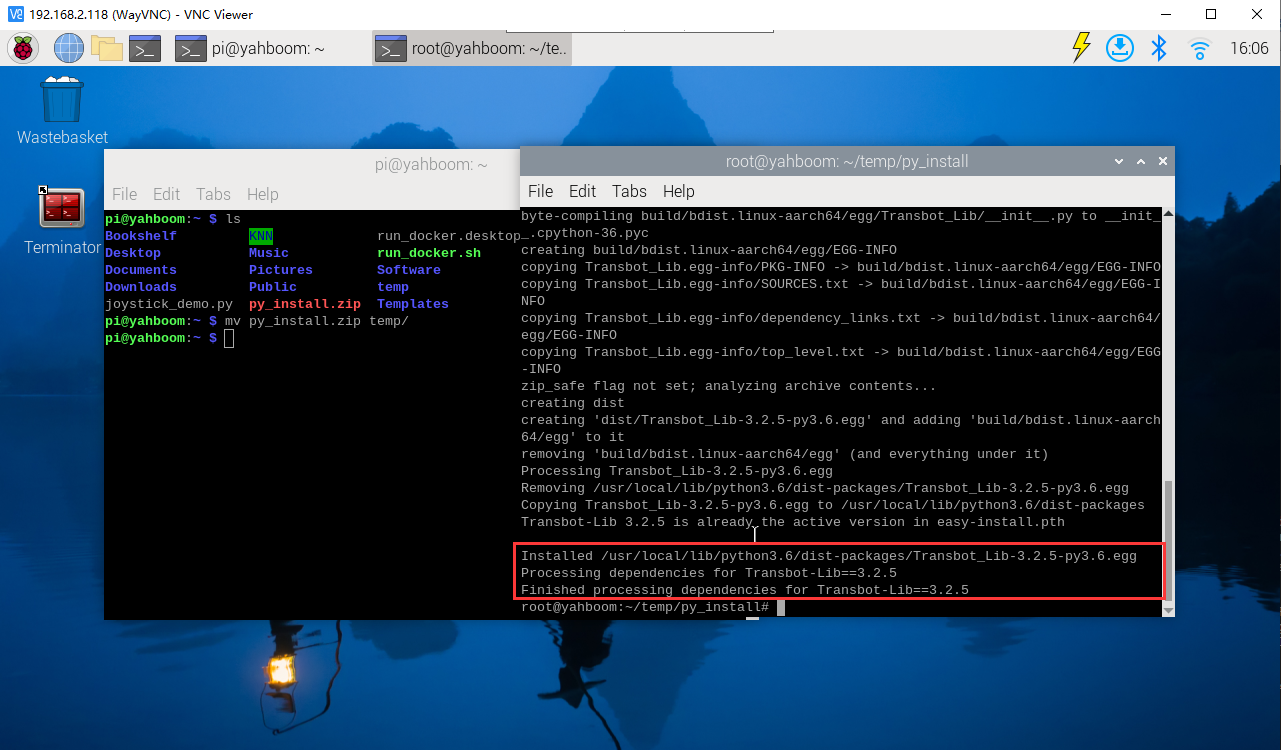
Run the installation command. If you see the installation version number prompted at the end, the installation is successful. This command will overwrite the previously installed Transbot_Lib driver library.

xxxxxxxxxx
python3 setup.py install

5

6

4. Check version


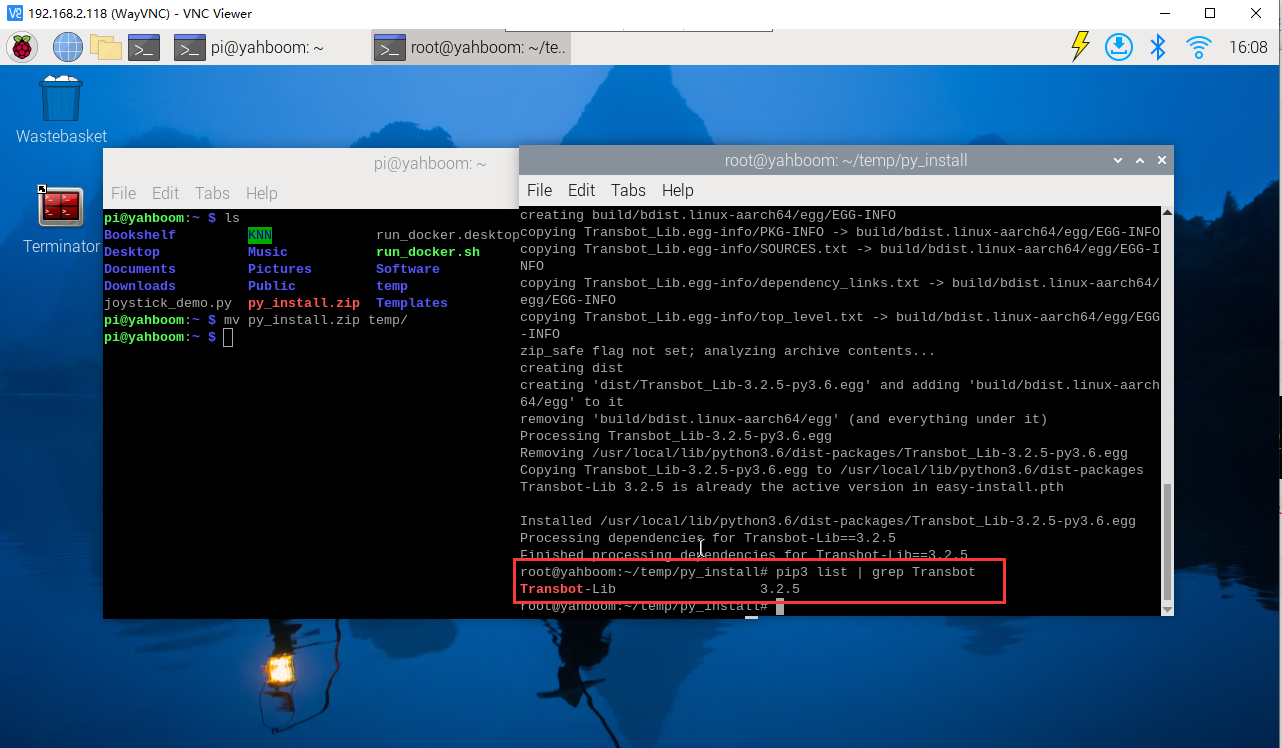
Enter the following command in the terminal to check the version number of Transbot-Lib. If you see that the version number is the same as the one prompted above, it is enough.

xxxxxxxxxx
pip3 list | grep Transbot

image-20210904175742781

Note: The name of the Transbot SE driver library is Transbot_Lib, but the name found in the python pip list is Transbot-Lib. This does not affect the actual use. Transbot_Lib is still used to import the library in the program.

xxxxxxxxxx
from Transbot_Lib import Transbot

6. Basic usage of driver library

Source code path: Transbot/Samples/1.test_transbot.ipynb


Close self-starting process
Control buzzer and button

COMPANY

  • About us
  • Team Style
  • Blog

LEARNING & EXPLORATION

  • Tutorials
  • Edge AI hardware
  • Educational robots
  • Embedded intelligent hardware

WHERE TO BUY

  • Yahboom Online Store
  • Amazon
  • Alibaba
  • AliExpress
  • Mercado

TECHNOLOGY SUPPORT

  • Email: support@yahboom.com

BE A DISTRIBUTOR

  • Email: sales@yahboom.com
QR Code

Copyright © 2017-2026 Yahboom. All Rights Reserved.

EN/中文