Welcome to Transbot SE repository
5. KCF target tracking
5、KCF object tracking
5、KCF object tracking5.1、Introduction5.2. Operation steps5.2.1. Start5.2.2. Identification5.2.3. Target tracking
5.1、Introduction
Website:https://learnopencv.com/object-tracking-using-opencv-cpp-python/#opencv-tracking-api
Transbot Se robot KCF target tracking, can track the target object at any time, and follow the target object to move on the table, transbot se (left and right) and mechanical arm (up and down) follow the target at the same time
Object Tracking
Object tracking is to locate an object in consecutive video frames. This definition sounds straightforward, but in computer vision and machine learning, tracking is a very broad term that encompasses concepts that are conceptually similar but technically different. For example, all of the following different but related ideas are commonly studied under object tracking:
(1)(Dense Optical flow DOF):These algorithms help to estimate the motion vector of each pixel in a video frame.
(2)(Sparse optical flow):An example is the Kanade-Lucas-Tomashi (KLT) feature tracking algorithm, which tracks the position of several feature points in an image.
(3)(Kalman Filtering):A very popular signal processing algorithm based on prior motion information is used to predict the position of a moving object. One of the early applications of this algorithm was missile guidance! The onboard computer that guided the Apollo 11 lunar module to the moon had a Kalman filter.
(4)Meanshift and Camshift:This is the algorithm that locates the maximum of the density function and they are also used for tracking.
(5)(Single object trackers):In this class of trackers, the first frame uses a rectangular marker to indicate the location of the object to be tracked. The object is then tracked in subsequent frames using a tracking algorithm. In most real-world applications, these trackers are used together with object detectors.
(6)(Multiple object track finding algorithms):When we have a fast object detector, it makes sense to detect multiple objects in each frame and then run a trace finding algorithm to identify which rectangle in one frame corresponds to the rectangle in the next frame.
OpenCV Tracking API
OpenCV 4 comes with a tracking API that contains implementations of many single-object tracking algorithms.
OpenCV 4.2 implements these eight trackers -Boosting, MIL, KCF, TLD, MEDIANFLOW, GOTURN, MOSSE, and CSRT.
OpenCV 3.2 implements the six trackers -Boosting, MIL, TLD, MEDIANFLOW, MOSSE, and GOTURN.
OpenCV 3.1 implements these five trackers -Boosting, MIL, KCF, TLD, MEDIANFLOW.
Comparison of OpenCV algorithms
| Algorithm | Speed | Accuracy | Description |
|---|---|---|---|
| BOOSTING | Slow | Low | It is the same as the machine learning algorithm behind Haar casades (AdaBoost), but it has been born for more than ten years, a veteran algorithm. |
| MIL | Slow | Low | It is more accurate than BOOSTING, but the failure rate is higher. |
| KCF | Fast | High | Faster than BOOSTING and MIL, but it is not effective when there is occlusion |
| TLD | Middle | Middle | There are a lot of erro |
| MEDIANFLOW | Middle+ | Middle | The model will fail for fast-jumping or fast-moving objects. |
| GOTURN | Middle | Middle | A deep learning-based object detector requires additional models to run. |
| MOSSE | Fastest | High | The speed is really fast, but not as high as the accuracy of CSRT and KCF. If you are looking for speed, you can choose it. |
| CSRT | Fast - | Higher | Slightly more accurate than KCF, but not as fast as KCF. |
5.2. Operation steps
Note: [R2] on the remote control handle has the [pause/start] function for all gameplays.
5.2.1. Start
jetson motherboard/Raspberry Pi 4B
Start the underlying driver control (robot side)
roslaunch transbot_track TrackSrv.launchRaspberry Pi 5
Before running, please confirm that the large program has been permanently closed
Enter docker
Note: If there is a terminal that automatically starts docker, or there is a docker terminal that has been opened, you can directly enter the docker terminal to run the command, and there is no need to manually start docker
Start docker manually
xxxxxxxxxx./run_docker.sh
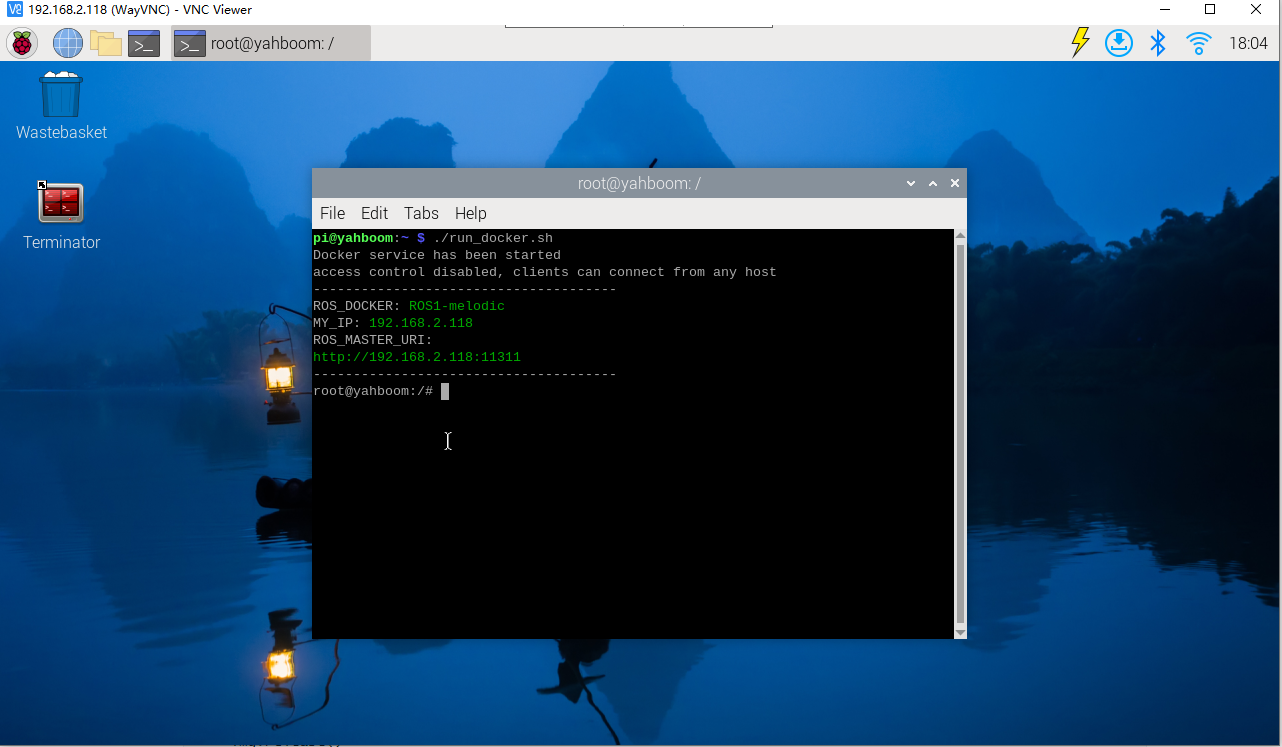
Start the underlying driver control (robot side)
xxxxxxxxxxroslaunch transbot_track TrackSrv.launch
method one
jetson motherboard/Raspberry Pi 4B
Start the monocular camera (robot side)
xxxxxxxxxxroslaunch usb_cam usb_cam-test.launchStart monocular target tracking control (virtual machine)
xxxxxxxxxxroslaunch transbot_track Tracker.launch VideoSwitch:=false tracker_type:=KCFRaspberry Pi 5
Enter the same docker from multiple terminals
Keep the program of the previous docker terminal running and open a new terminal
Enter the following command
xxxxxxxxxxdocker ps
Enter the same docker and use the following 18870bc3dc00 to modify the ID displayed on the actual terminal.
xxxxxxxxxxdocker exec -it 18870bc3dc00 /bin/bash
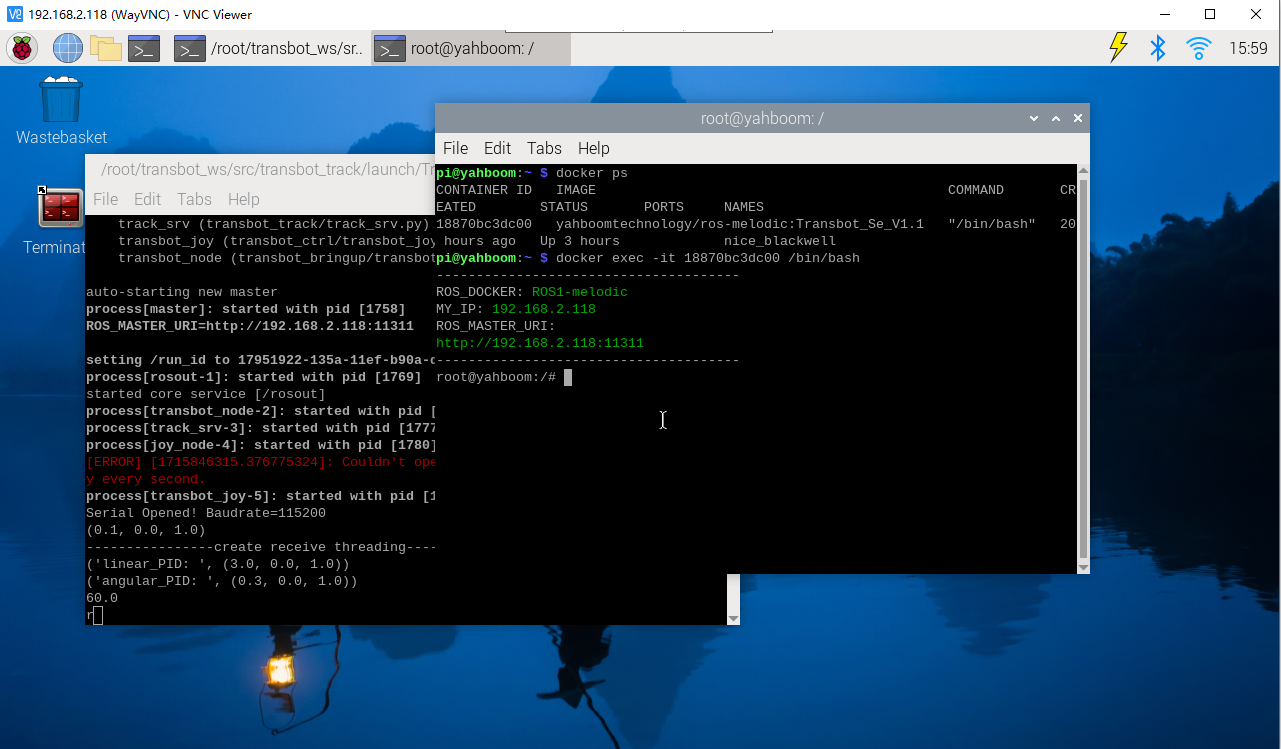
Start the monocular camera (robot side)
xxxxxxxxxxroslaunch usb_cam usb_cam-test.launch
Start monocular target tracking control (virtual machine)
xxxxxxxxxxroslaunch transbot_track Tracker.launch VideoSwitch:=false tracker_type:=KCF
Method 2
Note: [q] key to exit.
jetson motherboard/Raspberry Pi 4B
Start monocular target tracking control (robot side)
xxxxxxxxxxroslaunch transbot_track Tracker.launch VideoSwitch:=true tracker_type:=KCFRaspberry Pi 5
Enter the same docker from multiple terminals
Keep the program of the previous docker terminal running and open a new terminal
Enter the following command
xxxxxxxxxxdocker ps
Enter the same docker and use the following 18870bc3dc00 to modify the ID displayed on the actual terminal.
xxxxxxxxxxdocker exec -it 18870bc3dc00 /bin/bash
Start monocular target tracking control (robot side)
xxxxxxxxxxroslaunch transbot_track Tracker.launch VideoSwitch:=true tracker_type:=KCF
This method can only be started in the main control connected to the camera
- VideoSwitch parameter: whether to use the camera function package to launch; for example: to launch usb_cam-test.launch, this parameter must be set to true; otherwise, it is false.
- tracker_type parameter: OpenCV Tracking API; optional: ['BOOSTING', 'MIL', 'KCF', 'TLD', 'MEDIANFLOW', 'MOSSE', 'CSRT']
Set parameters according to needs, or modify the launch file directly, so there is no need to attach parameters when starting.
5.2.2. Identification
After starting, enter the selection mode, use the mouse to select the target location, as shown in the figure below, release it to start recognition.
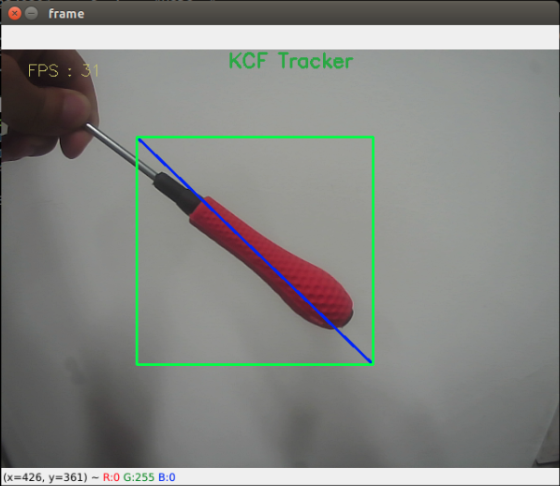
Keyboard key control:
[r]: Select mode, you can use the mouse to select the area to identify the target, as shown in the picture above. If the robotic arm blocks the camera, you can press the [r] key to reset the robotic arm.
[f]: Switching algorithm; ['BOOSTING', 'MIL', 'KCF', 'TLD', 'MEDIANFLOW', 'MOSSE', 'CSRT'].
[q]: Exit the program.
[Spacebar]: Target tracking; just move the target slowly while following. If you move too fast, you will lose the target.
5.2.3. Target tracking
After the recognition is correct, click the [space bar] on the keyboard to execute the object following program.
- Node view
jetson motherboard/Raspberry Pi
xxxxxxxxxxrqt_graph
Raspberry Pi 5
Enter the same docker from multiple terminals
Keep the program of the previous docker terminal running and open a new terminal
Enter the following command
xxxxxxxxxxdocker ps
Enter the same docker and use the following 18870bc3dc00 to modify the ID displayed on the actual terminal.
xxxxxxxxxxdocker exec -it 18870bc3dc00 /bin/bash
xxxxxxxxxxrqt_graph
- When starting method 1, node [m_Tracker]
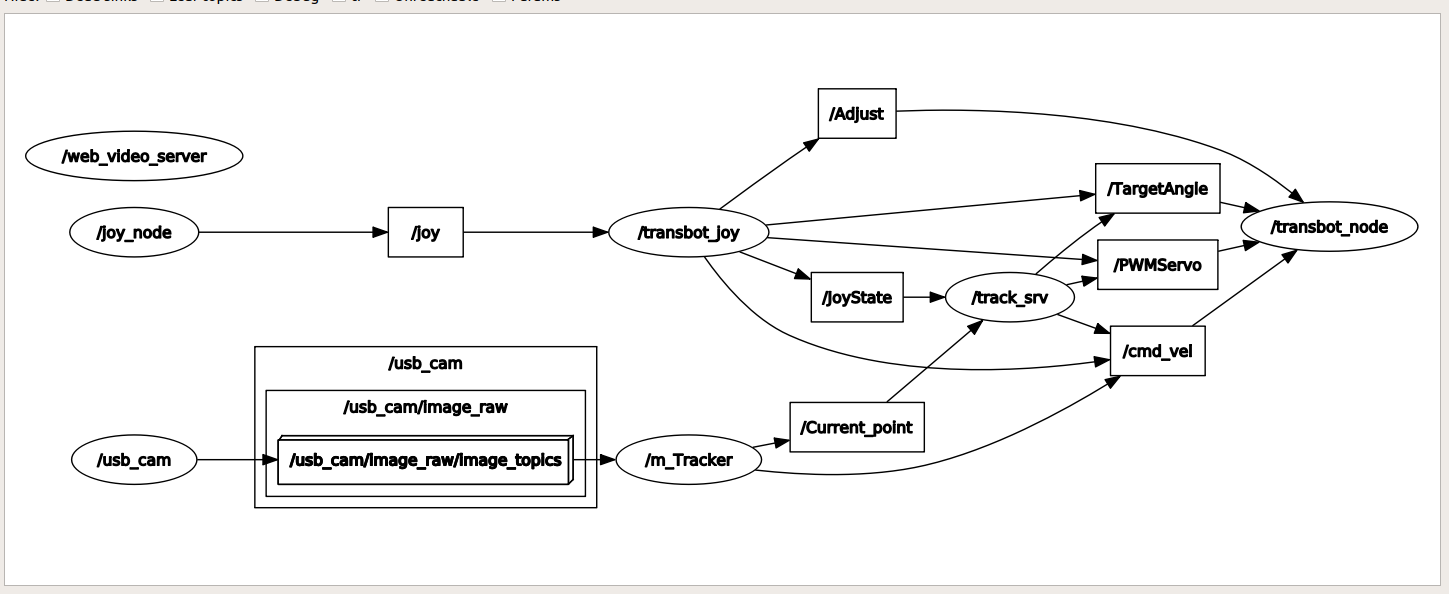
Subscribe to image topics; publish topics on gimbal servo, robotic arm, and chassis drive
- When starting method 2, node [m_Tracker]
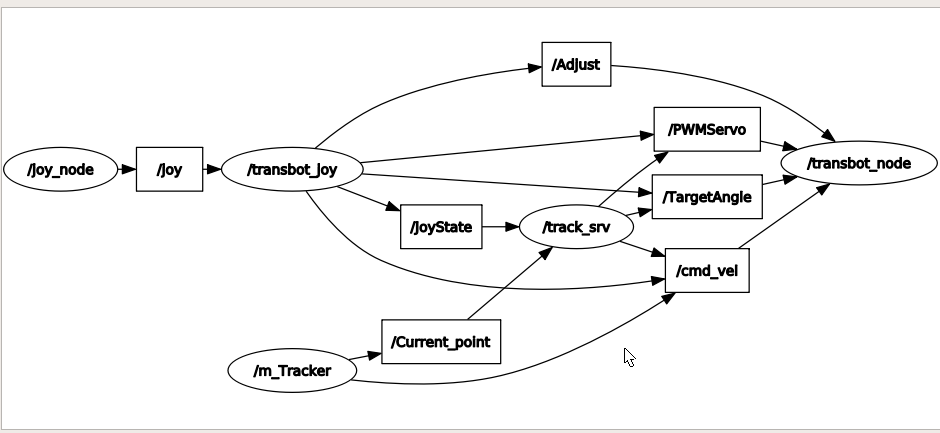
Publish the topic of gimbal servo, publish the topic of chassis driver and robotic arm.