Welcome to Transbot SE repository
3.6.Control bus servo
Control bus servo
Control bus servo1. Experimental goals2. Experiment preparation3. Experimental results3.1jetson motherboard/Raspberry Pi 4B3.2 Raspberry Pi 54. Program source code
1. Experimental goals
Control the movement of the bus servo robotic arm on the Transbot SE, control the movement of the robotic arm through the slider, and read the angle value of the current joint of the robotic arm.
2. Experiment preparation
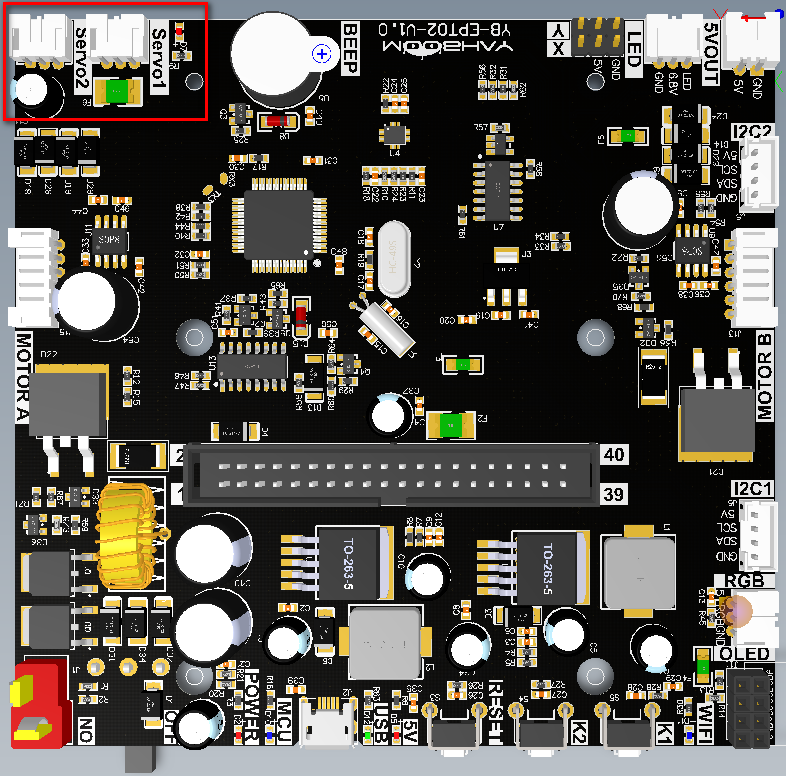
The position of the red box in the picture below is the interface of the bus servo robot arm. The Servo1 and Servo2 interfaces are parallel interfaces with exactly the same functions. When connecting the robot arm, you only need to connect one of the interfaces. This interface has an anti-reverse connection function, so you don’t have to worry about reverse plugging when using Transbot SE’s robotic arm cable.
The red indicator light D7 on the right is the indicator light for the voltage of the robot arm. If the D7 indicator light is always on, it means that the power supply of the robot arm is normal. If the D7 indicator light is off, it means that the power supply of the robot arm is abnormal.
The Transbot_Lib library functions needed to control the bus servo include the following:
Robotic arm control reference system: Assume the upright and upward clamping state, the three servos are all 180 degrees, No. 7/8 turns clockwise (downward) to decrease, counterclockwise (upward) to increase, and loosens the clamp to decrease. , clamping is increased.
set_uart_servo_angle(s_id, s_angle, run_time=500)Parameter explanation: control a bus servo, s_id: corresponding ID number: 7/8/9, run_time controls the running time of the servo, within the valid range, the smaller the time, the faster the servo rotates, the unit is milliseconds, the minimum value is 0.
s_angle: Corresponding steering gear angle value, 7:[0, 225], 8:[30, 270], 9:[30, 180]
servo_id=7,s_angle=[0, 225]
servo_id=8,s_angle=[30, 270]
servo_id=9,s_angle=[30, 180]
Return value: None.
xxxxxxxxxxset_uart_servo_angle_array(angle_7, angle_8, angle_9, run_time=500)Parameter explanation: control three bus servos, angle_7, angle_8, angle_9 control the angle values of the three servos, angle_7=[0, 225], angle_8=[30, 270], angle_9=[30, 180], run_time control The servo running time is within the valid range. The smaller the time, the faster the servo rotates. The unit is milliseconds and the minimum value is 0.
Return value: None.
xxxxxxxxxxset_uart_servo_torque(enable)
Parameter explanation: Turn off/on the bus servo torque, enable=[0, 1].
enable=0: Turn off the servo torque, you can turn the servo by hand, but the command cannot control the rotation; enable=1: Turn on the torque, the command can control the rotation, but you cannot turn the servo by hand.
Return value: None
xxxxxxxxxxget_uart_servo_angle(s_id)
Parameter explanation: Read the angle of the bus servo, s_id represents the ID number of the servo to be read, s_id=[7-9]
Return value: Returns the current angle of the input ID, and returns -1 for read errors.
xxxxxxxxxxget_uart_servo_angle_array()
Parameter explanation: Read the angles of three servos [xx, xx, xx] at one time. If a servo is wrong, that bit will be -1
Return value: [angle_7, angle_8, angle_9].
3. Experimental results
Note: Before running the program, please bend all three degrees of freedom of the robotic arm vertically upwards and then connect the robotic arm. Otherwise, the robot arm will stand up automatically when running the program for the first time.
3.1jetson motherboard/Raspberry Pi 4B
Please view the course video.
3.2 Raspberry Pi 5
Enter docker
Note: If you have a terminal that automatically starts docker, you can directly enter the temp directory in docker to view it. There is no need to manually start docker
Start docker manually
xxxxxxxxxx./run_docker.sh
Run jupyter lab program
xxxxxxxxxxcd
xxxxxxxxxxjupyter lab --allow-root
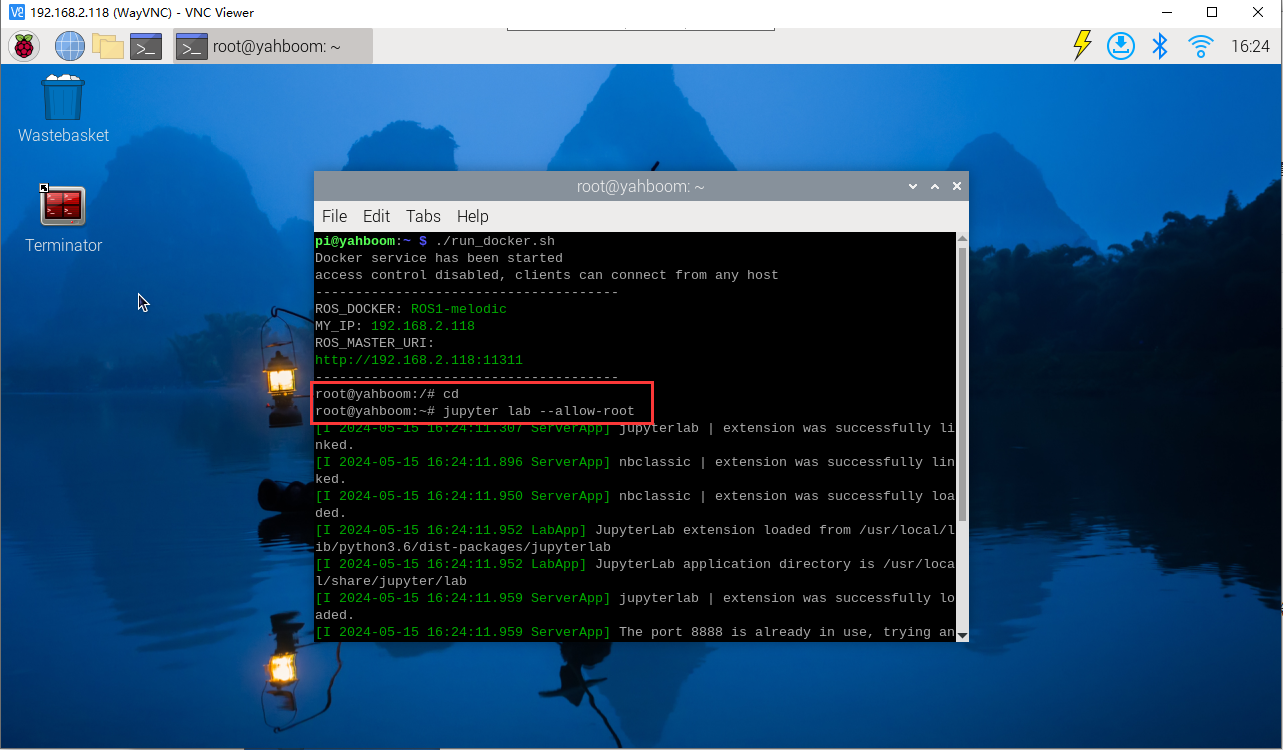
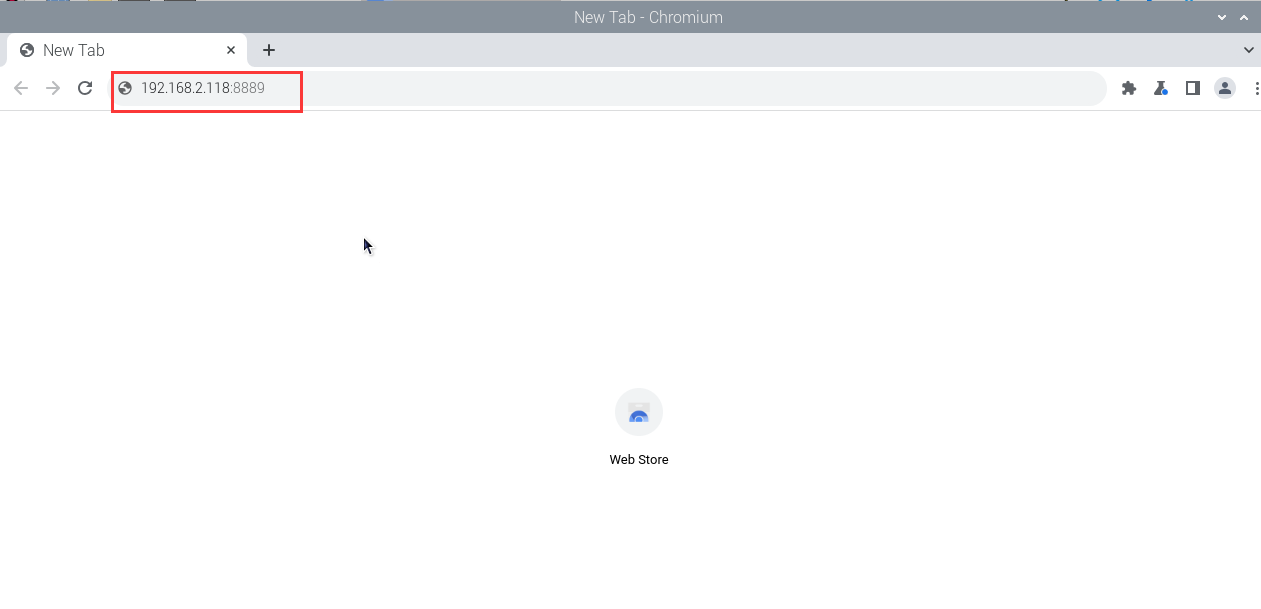
Taking the current IP address 192.168.2.118 as an example, open the browser of Raspberry Pi 5 or enter in the browser of your computer
xxxxxxxxxx192.168.2.118:8889
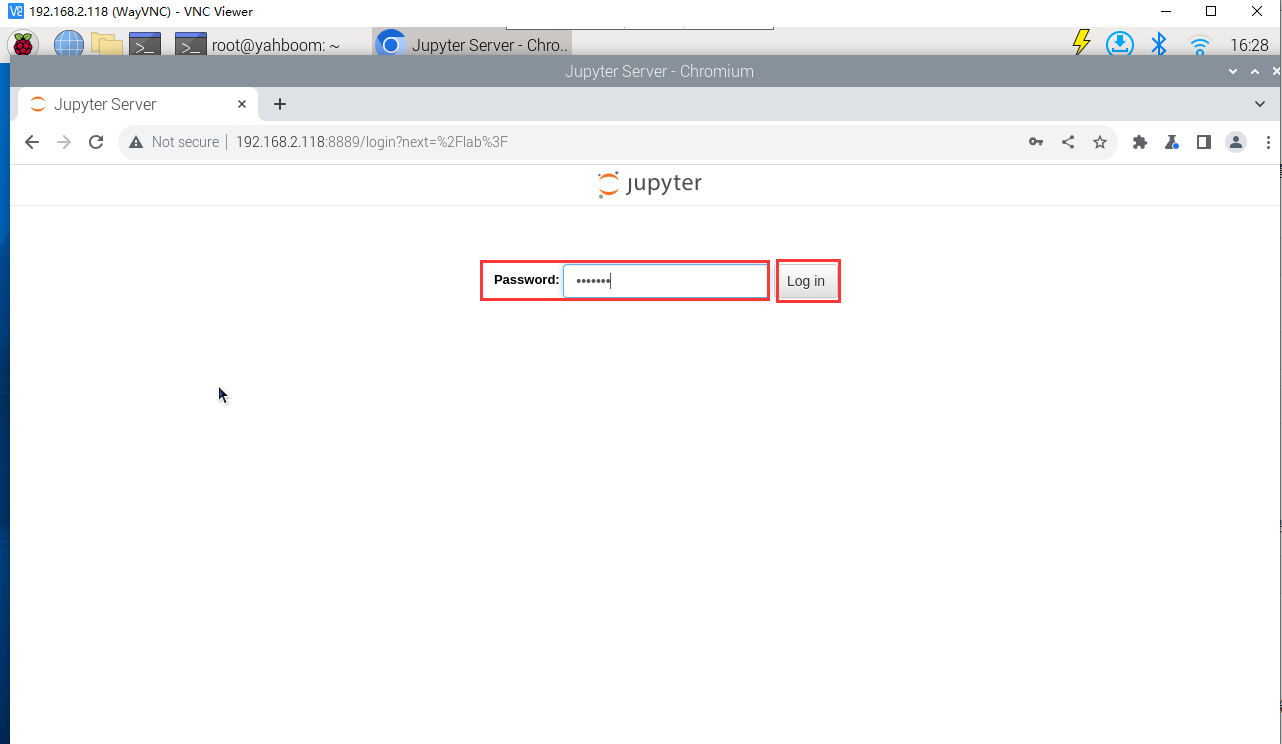
Enter the jupyter lab login interface after pressing Enter, enter the password yahboom, and then click login
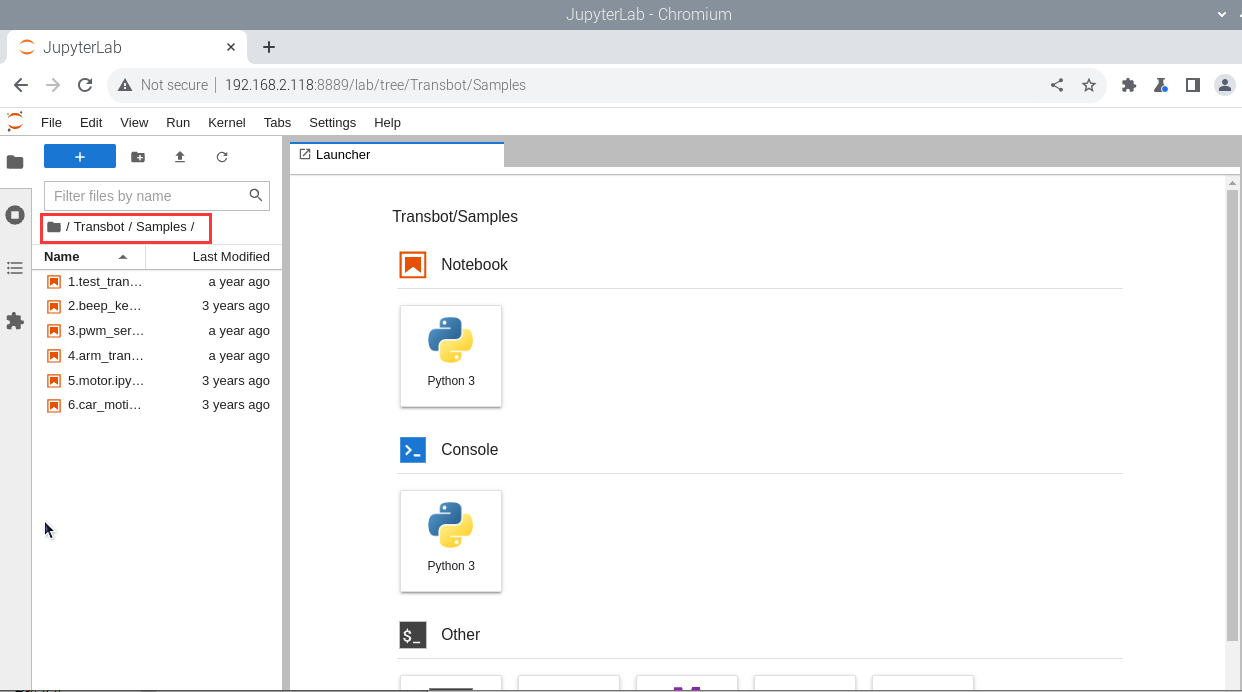
Enter the Transbot/Samples directory
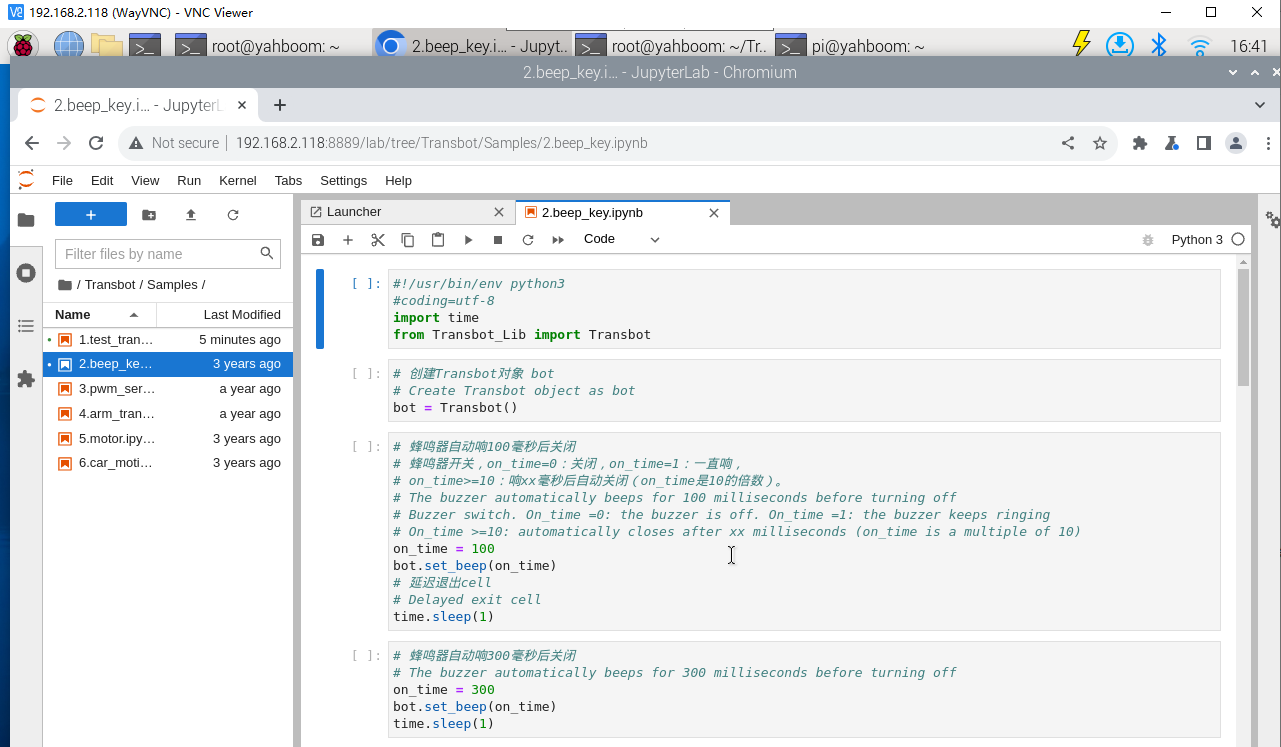
Double-click the code you want to run
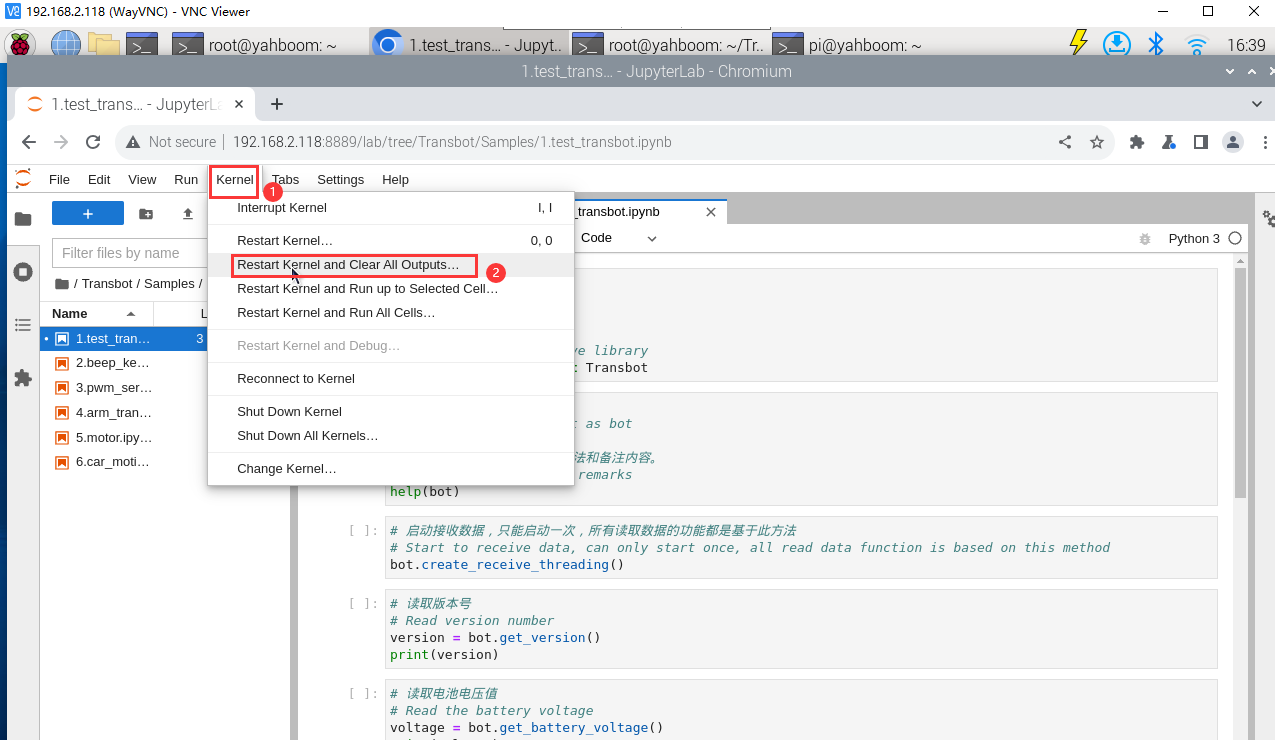
Restart the kernel and clear all output before running
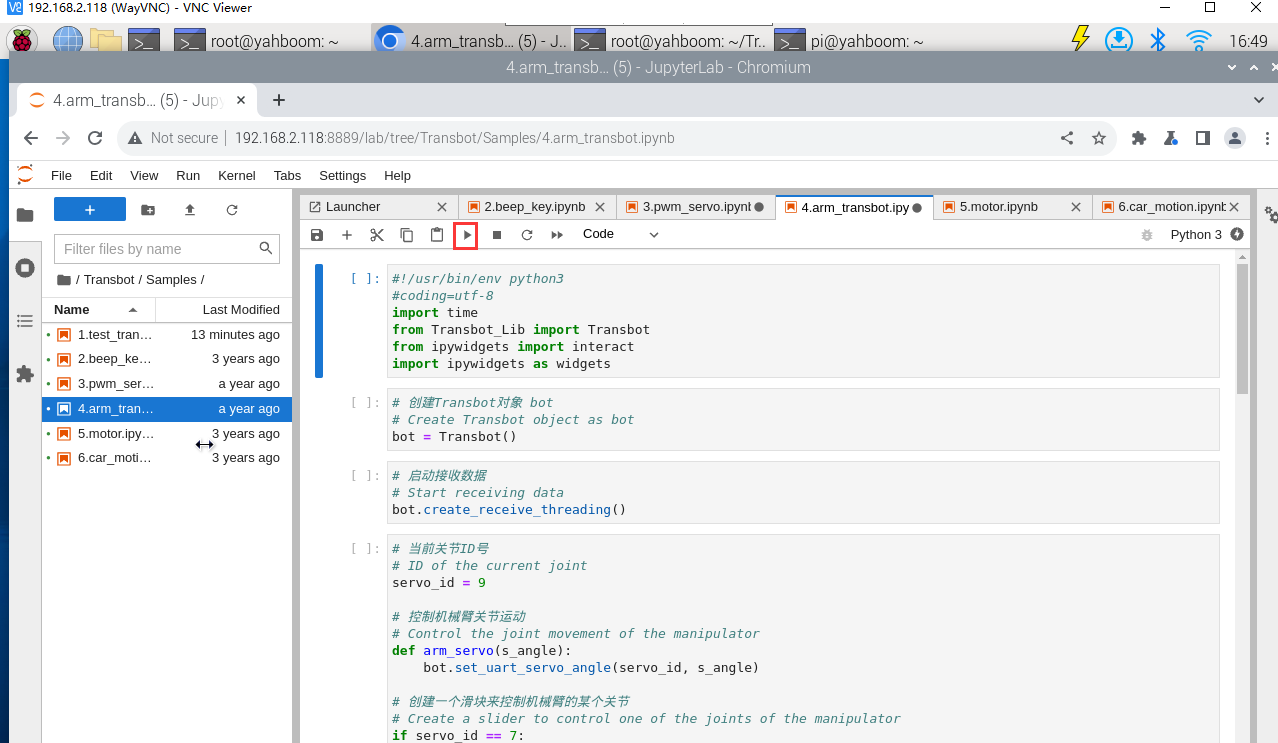
Click on the first code block, then click the run button to start running one by one
4. Program source code
Turn on the power of the Transbot SE robot, and open Jetson Nano or the browser of the remote computer to enter the Jupyter lab editor.
Reference code path: Transbot/Samples/4.arm_transbot.ipynb