Welcome to Transbot SE repository
6. AR vision
6. AR vision
6. AR vision6.1. Overview6.2. How to use6.2.1, launch6.2.2. Effect demonstration6.3. Source code analysis6.3.1. Algorithm principle6.3.2. Core code
Function package: ~/transbot_ws/src/transbot_visual
6.1. Overview
Augmented Reality, referred to as "AR", is a technology that cleverly integrates virtual information with the real world. It widely uses multimedia, three-dimensional modeling, real-time tracking and registration, intelligent interaction, sensing and other technologies. It simulates computer-generated text, images, three-dimensional models, music, videos and other virtual information and then applies it to the real world. The two types of information complement each other, thereby achieving "enhancement" of the real world.
The AR system has three outstanding characteristics: ① information integration between the real world and the virtual world; ② real-time interactivity; ③ adding positioning virtual objects in the three-dimensional scale space.
Augmented reality technology includes new technologies and methods such as multimedia, three-dimensional modeling, real-time video display and control, multi-sensor fusion, real-time tracking and registration, and scene fusion.
6.2. How to use
When using the AR case, you must have the internal parameters of the camera, otherwise it will not work. The internal parameter file is in the same directory as the code (under the AR folder of the function package); different cameras correspond to different internal parameters.
6.2.1, launch
method one
jetson motherboard/Raspberry Pi 4B
The camera is plugged into the virtual machine and multi-machine communication needs to be set up. The virtual machine is the slave machine and jetson nano is the master machine.
(Robot side) Start the camera
xxxxxxxxxxroslaunch usb_cam usb_cam-test.launch # USBCam(Virtual machine side) Startup identification
xxxxxxxxxx#USBCamroslaunch transbot_visual transbot_AR.launch VideoSwitch:=True camDevice:=USBCamRaspberry Pi 5
Before running, please confirm that the large program has been permanently closed
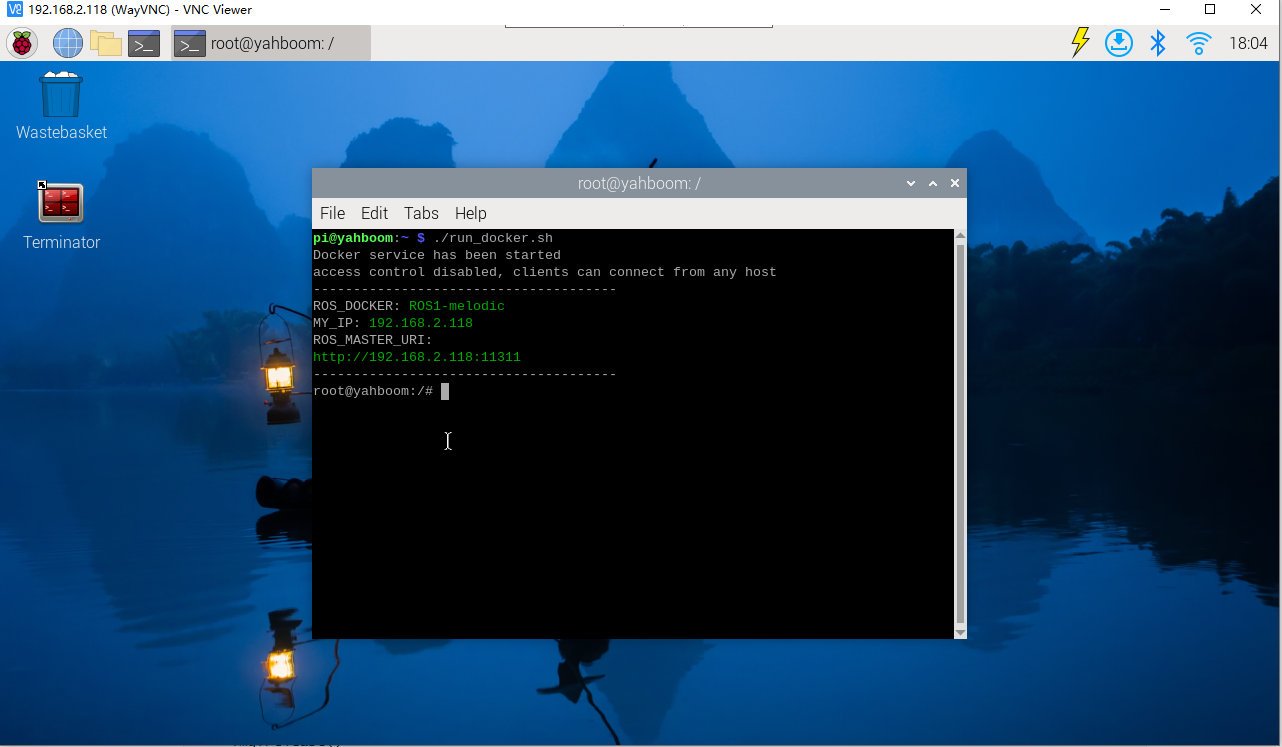
Enter docker
Note: If there is a terminal that automatically starts docker, or there is a docker terminal that has been opened, you can directly enter the docker terminal to run the command, and there is no need to manually start docker
Start docker manually
xxxxxxxxxx./run_docker.sh
The camera is plugged into the virtual machine and multi-machine communication needs to be set up. The virtual machine is the slave machine and the Raspberry Pi 5 is the master machine.
(Robot side) Start the camera
xxxxxxxxxxroslaunch usb_cam usb_cam-test.launch # USBCam(Virtual machine side) Startup identification
xxxxxxxxxx# USBCamroslaunch transbot_visual transbot_AR.launch VideoSwitch:=True camDevice:=USBCamMethod 2
jetson motherboard/Raspberry Pi 4B
Note: [q] key to exit. If you do not return to the input command environment, press ctrl+c to close the program
xxxxxxxxxx#USBCamroslaunch transbot_visual transbot_AR.launch VideoSwitch:=False camDevice:=USBCamRaspberry Pi 5
Before running, please confirm that the large program has been permanently closed
Enter docker
Note: If there is a terminal that automatically starts docker, or there is a docker terminal that has been opened, you can directly enter the docker terminal to run the command, and there is no need to manually start docker
Start docker manually
xxxxxxxxxx./run_docker.sh
Note: [q] key to exit. If you do not return to the input command environment, press ctrl+c to close the program
xxxxxxxxxx#USBCamroslaunch transbot_visual transbot_AR.launch VideoSwitch:=False camDevice:=USBCam
This method can only be started in the main control connected to the camera
- VideoSwitch parameter: whether to use the camera function package to launch; for example: to launch usb_cam-test.launch, this parameter must be set to True; otherwise, it is Fasle.
- camDevice parameter: The high frame rate camera is USBCam.
Set parameters according to needs, or modify the launch file directly, so there is no need to attach parameters when starting.
6.2.2. Effect demonstration
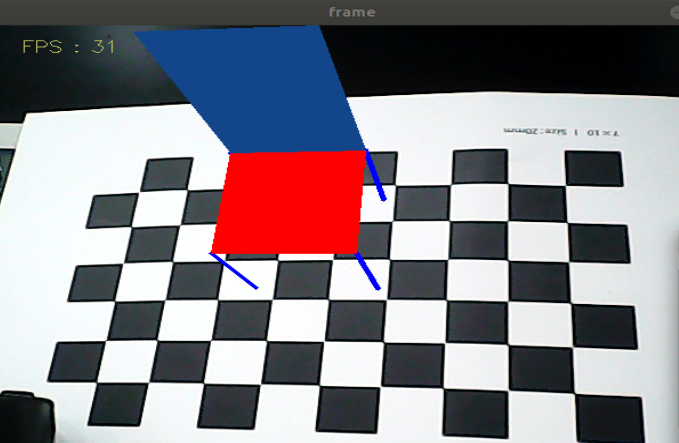
There are 12 effects in total.
xxxxxxxxxx["Triangle", "Rectangle", "Parallelogram","WindMill","TableTennisTable", "Ball", "Arrow", "Knife", "Desk","Bench", "Stickman", "ParallelBars"]
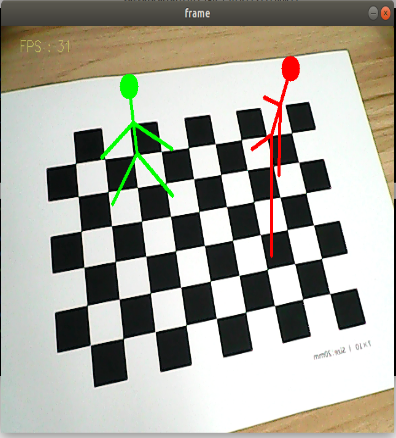
Use the [f] or [F] key to switch between different effects.
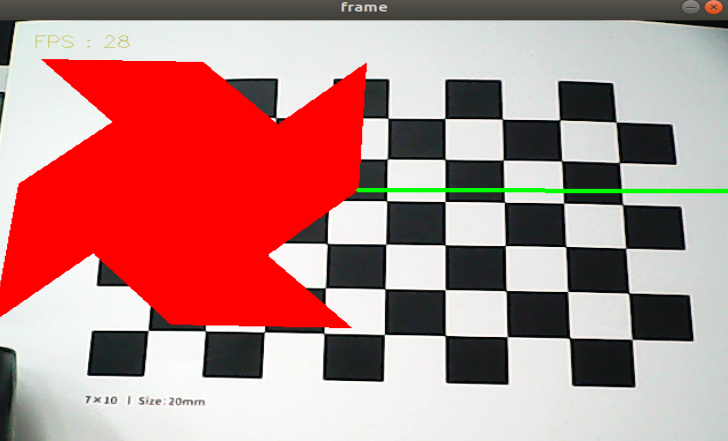
You can also switch effects through the command line

6.3. Source code analysis
6.3.1. Algorithm principle
Find object poses from 3D-2D point correspondences using a RANSAC scheme.
The RanSaC algorithm (Random Sampling Consistent) was originally a classic algorithm used for data processing. Its function is to extract specific components in objects in the presence of a large amount of noise. The figure below is an illustration of the effect of the RanSaC algorithm. There are some points in the picture that obviously satisfy a certain straight line, and there are other points that are pure noise. The purpose is to find the equation of the straight line in the presence of a large amount of noise, when the amount of noise data is 3 times that of the straight line.
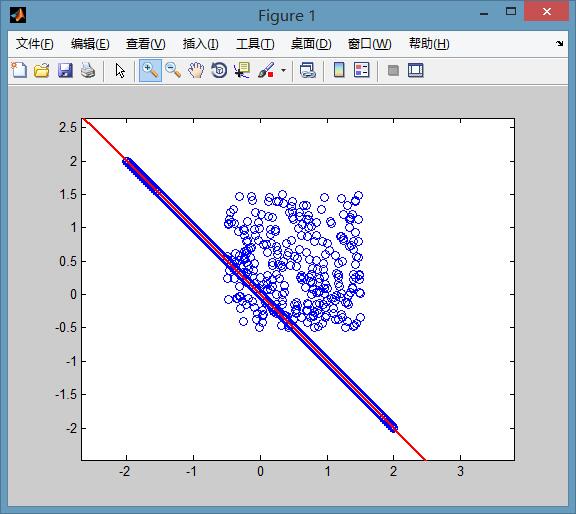
If the least squares method is used, such an effect cannot be obtained, and the straight line will be slightly higher than the straight line in the picture.
The basic assumptions of RANSAC are: (1) The data consists of "internal points". For example: the distribution of data can be explained by some model parameters; (2) "Outlier points" are data that cannot fit the model; (3) Other data are noise. The causes of outliers include: extreme values of noise; wrong measurement methods; wrong assumptions about the data. RANSAC also makes the following assumption: given a set of (usually small) internal points, there is a process that can estimate the parameters of the model; and the model can explain or be applicable to the internal points.
6.3.2. Core code
launch file
xxxxxxxxxx<launch> <arg name="camDevice" default="USBCam" doc="camDevice type [Astra,USBCam]"/> <arg name="launchCtrl" default="False"/> <arg name="flip" default="False"/> <arg name="cam_image_topic" default="/usb_cam/image_raw/compressed" if="$(eval arg('camDevice') == 'USBCam')"/> <node name="simple_AR" pkg="transbot_visual" type="simple_AR.py" output="screen"> <param name="flip" type="bool" value="$(arg flip)"/> <param name="launchCtrl" type="bool" value="$(arg launchCtrl)"/> <param name="camDevice" type="string" value="$(arg camDevice)"/> <param name="camera_image" type="string" value="$(arg cam_image_topic)"/> </node></launch>python main function
xxxxxxxxxx def process(self, img): if self.flip == 'True': img = cv.flip(img, 1) gray = cv.cvtColor(img, cv.COLOR_BGR2GRAY) # Find the corner points of each image retval, corners = cv.findChessboardCorners( gray, self.patternSize, None, flags=cv.CALIB_CB_ADAPTIVE_THRESH + cv.CALIB_CB_NORMALIZE_IMAGE + cv.CALIB_CB_FAST_CHECK) # Find corner sub-pixels if retval: corners = cv.cornerSubPix( gray, corners, (11, 11), (-1, -1), (cv.TERM_CRITERIA_EPS + cv.TERM_CRITERIA_MAX_ITER, 30, 0.001)) # Calculate object pose solvePnPRansac retval, rvec, tvec, inliers = cv.solvePnPRansac( self.objectPoints, corners, self.cameraMatrix, self.distCoeffs) # Output image points and Jacobian matrix image_Points, jacobian = cv.projectPoints( self.__axis, rvec, tvec, self.cameraMatrix, self.distCoeffs, ) # draw image img = self.draw(img, corners, image_Points) return imgkey function
https://docs.opencv.org/3.0-alpha/modules/calib3d/doc/camera_calibration_and_3d_reconstruction.html
- findChessboardCorners()
xxxxxxxxxxdef findChessboardCorners(image, patternSize, corners=None, flags=None): ''' Find image corners :param image: Input the original chessboard image. The image must be an 8-bit grayscale or color image. :param patternSize: (w,h), the number of interior corners in each row and column on the chessboard. w=the number of black and white pieces in one row of the chessboard -1, h=the number of black and white pieces in one column of the chessboard -1. For example: 10x6 chessboard, then (w,h)=(9,5) :param corners: array, output array of detected corner points. :param flags: int, different operation flags, which can be 0 or a combination of the following values: CALIB_CB_ADAPTIVE_THRESH Use adaptive thresholding to convert the image to black and white instead of using a fixed threshold.CALIB_CB_NORMALIZE_IMAGE Use histogram equalization of the image before binarizing it using fixed or adaptive thresholding.CALIB_CB_FILTER_QUADS uses additional criteria (such as contour area, perimeter, square shape) to filter out false quadrilaterals extracted during the contour retrieval stage.CALIB_CB_FAST_CHECK Runs a quick check mechanism on the image to find the corners of the checkerboard, returning a quick reminder if no corners are found.Calling under degenerate conditions can be greatly accelerated when no chessboard is observed. :return: retval, corners ''' pass- cornerSubPix()
We need to use cornerSubPix() to perform further optimization calculations on the detected corner points, so that the accuracy of the corner points can reach the sub-pixel level.
xxxxxxxxxxdef cornerSubPix(image, corners, winSize, zeroZone, criteria): ''' Sub-pixel corner detection function :param image: input image :param corners: pixel corners (both input and output) :param winSize: The area size is NXN; N=(winSize*2+1) :param zeroZone: similar to winSize, but always has a smaller range, Size(-1,-1) means ignore :param criteria: criteria for stopping optimization :return: sub-pixel corner point ''' pass- solvePnPRansac()
xxxxxxxxxxdef solvePnPRansac(objectPoints, imagePoints, cameraMatrix, distCoeffs, rvec=None, tvec=None, useExtrinsicGuess=None, iterationsCount=None, reprojectionError=None, confidence=None, inliers=None, flags=None): '''Calculate object pose :param objectPoints: object point list :param imagePoints: list of corner points :param cameraMatrix: camera matrix :param distCoeffs: distortion coefficient :param rvec: :param tvec: :param useExtrinsicGuess: :param iterationsCount: :param reprojectionError: :param confidence: :param inliers: :param flags: :return: retval, rvec, tvec, inliers ''' passFind object poses from 3D-2D point correspondences using a RANSAC scheme. This function estimates the object pose given a set of object points, their corresponding image projections, and the camera matrix and distortion coefficients. This function finds a pose that minimizes the re-projection error, which is the re-observation error, which is the sum of the squared distances between the observed pixel point projection imagePoints and the object projection (projectPoints()) objectPoints. The use of RANSAC can avoid the influence of outliers on the results.
- projectPoints()
def projectPoints(objectPoints, rvec, tvec, cameraMatrix, distCoeffs, imagePoints=None, jacobian=None, aspectRatio=None): ''' Output image points and Jacobian matrix :param objectPoints: :param rvec: rotation vector :param tvec: translation vector :param cameraMatrix: camera matrix :param distCoeffs: distortion coefficient :param imagePoints: :param jacobian: :param aspectRatio: :return: imagePoints, jacobian ''' pass