Welcome to Transbot SE repository
7.Client
7 Client
7 Client 7.1 Preparation 7.1.1 Create a function package 7.2 C++ language implementation 7.2.1 Implementation steps 7.2.2 Switch to the ~/catkin_ws/src/learning_server/src directory, create a new .cpp file, name it a_new_turtle, and paste the code below into it 7.3 Python language implementation 7.3.1 Switch to the ~/catkin_ws/src/learning_server directory, create a new script folder, cut it in, create a new py file, name it a_new_turtle, and paste the code below into it
In ROS communication, in addition to topic communication, there is also service communication. Services include clients and servers. The client requests the service and the server provides the service. This section takes the client as the main content and talks about how c++ and python implement the client.
7.1 Preparation
7.1.1 Create a function package
- switch to the ~/catkin_ws/src directory,
catkin_create_pkg learning_server std_msgs rospy roscpp geometry_msgs turtlesim
- switch to the ~/catkin_ws directory,
xxxxxxxxxxcatkin_make
7.2 C++ language implementation
7.2.1 Implementation steps
- initialize the ROS node
- create a handle
- create a Client instance
- initialize and publish service request data
- wait for the response result after server processing
7.2.2 Switch to the ~/catkin_ws/src/learning_server/src directory, create a new .cpp file, name it a_new_turtle, and paste the code below into it
a_new_turtle.cpp
x/** * This routine will request the /spawn service in the turtle node, and a new turtle will appear at the specified location */
int main(int argc, char** argv) { ros::init(argc, argv, "a_nes_turtle"); // initialize the ROS node
ros::NodeHandle node;
ros::service::waitForService("/spawn"); // wait for /spawn service ros::ServiceClient new_turtle = node.serviceClient < turtlesim::Spawn >("/spawn"); //Create a service client and connect to the service named /spawn
// Initialize request data for turtlesim::Spawn turtlesim::Spawn new_turtle_srv; new_turtle_srv.request.x = 6.0; new_turtle_srv.request.y = 8.0; new_turtle_srv.request.name = "turtle2";
// Request the service to pass in xy position parameters and name parameters ROS_INFO("Call service to create a new turtle name is %s,at the x:%.1f,y:%.1f", new_turtle_srv.request.name.c_str(), new_turtle_srv.request.x, new_turtle_srv.request.y);
new_turtle.call(new_turtle_srv);
ROS_INFO("Spwan turtle successfully [name:%s]", new_turtle_srv.response.name.c_str()); // Display service call result
return 0; }; - program flow chart

- configure in CMakelist.txt, under the build area, add the following content
xxxxxxxxxxadd_executable(a_new_turtle src/a_new_turtle.cpp) target_link_libraries(a_new_turtle ${catkin_LIBRARIES}) - Compile the code in the workspace directory
xxxxxxxxxxcd ~/catkin_ws catkin_make source devel/setup.bash #Environment variables need to be configured, otherwise the system cannot find the running program - run the program
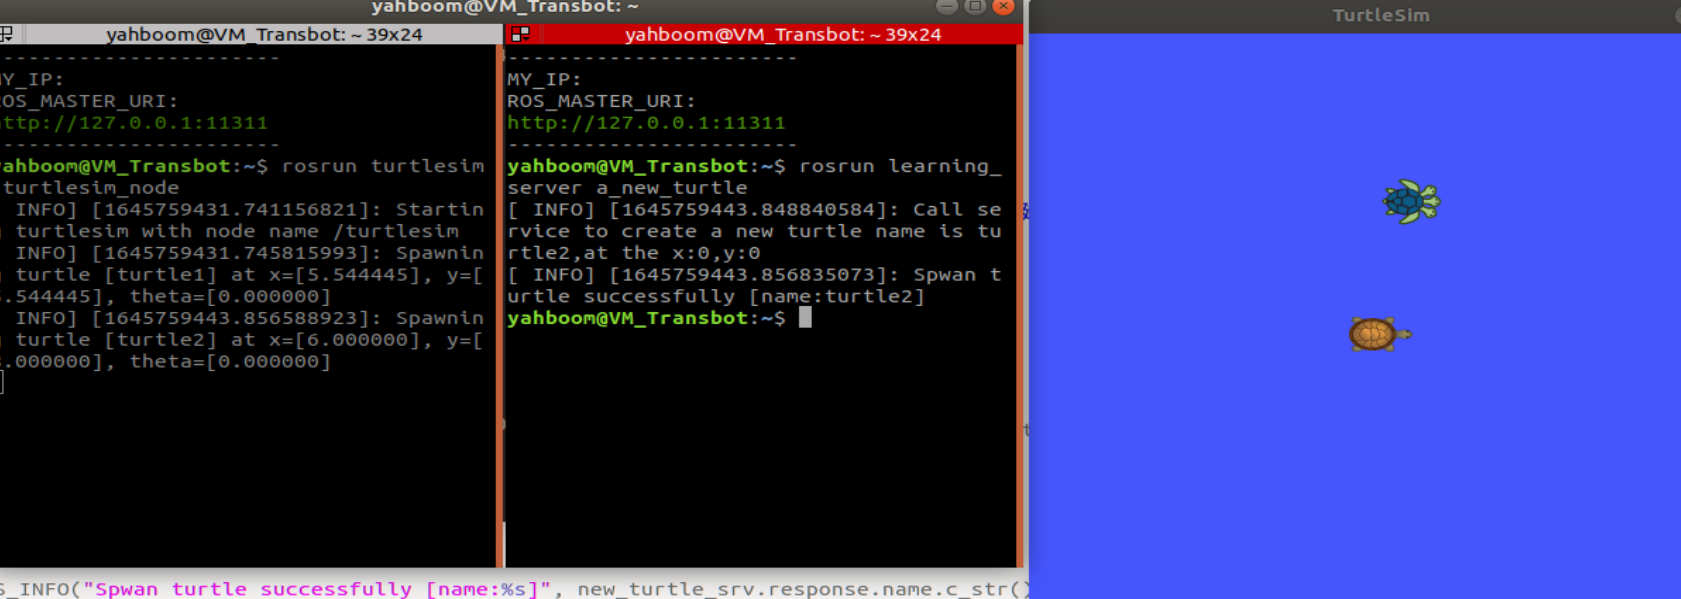
xxxxxxxxxxroscore rosrun turtlesim turtlesim_node rosrun learning_server a_new_turtle - Screenshot of running effect
- program description
After starting the node of the turtle, and running the a_new_turtle program, you will find that another turtle will appear on the screen. This is because the node of the turtle provides a service/spawn, which will generate another turtle. The services provided by the turtle can be viewed through the rosservice list command, as shown in the following figure
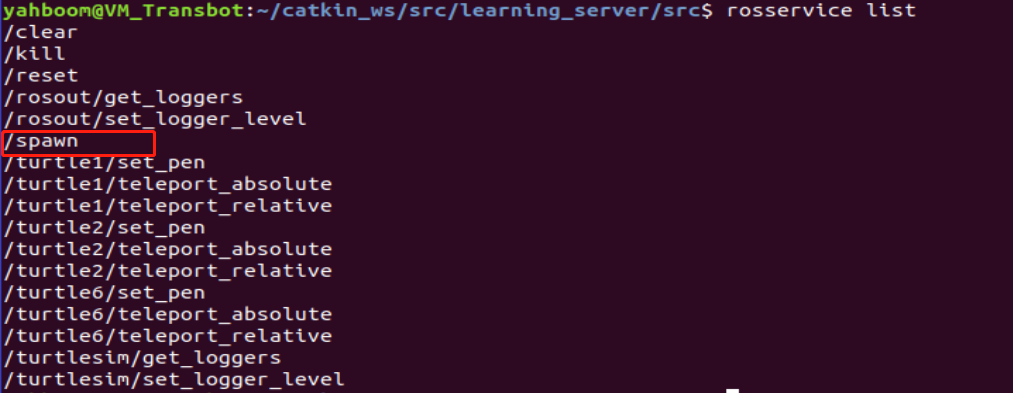
You can view the parameters required by this service through rosservice info /spawn, as shown in the following figure

It can be seen that there are 4 parameters: x, y, theta, name, these four parameters are initialized in a_new_turtle.cpp
xxxxxxxxxxsrv.request.x = 6.0; srv.request.y = 8.0; srv.request.name = "turtle2"; Note: theta is not assigned and defaults to 0 7.3 Python language implementation
7.3.1 Switch to the ~/catkin_ws/src/learning_server directory, create a new script folder, cut it in, create a new py file, name it a_new_turtle, and paste the code below into it
a_new_turtle.py
xxxxxxxxxx# !/usr/bin/env python # -*- coding: utf-8 -*-

import  sys import  rospy from  turtlesim.srv  import  Spawn
 def turtle_spawn():         rospy.init_node ('new_turtle') # ROS node initialization
    rospy.wait_for_service('/spawn') # wait for the /spawn service
    try :         new_turtle  =  rospy.ServiceProxy('/spawn', Spawn)
                response = new_turtle(2.0, 2.0, 0.0, "turtle2") # Enter request data         return  response _ .name     except  rospy.ServiceException, e :         print  "failed to call service : %s" % e
if __name__ == "__main__" : #Service call and display the call result print "a new turtle named %s." %(turtle_spawn()) - program flow chart

- run the program