Welcome to Raspberry Pi 5 repository
01. Peripheral Hardware Configuration
OpenClaw Peripheral Hardware Configuration
OpenClaw Peripheral Hardware Configuration1. Course Overview2. Hardware Configuration File Description2.1 Configuration File Location2.2 Current Configuration File Coverage3. DHT Hardware Testing3.1 Verification Method4. RGB Hardware Testing4.1 Verification Method5. Servo Hardware Testing5.1 Verification Method6. OpenClaw Firmware Serial Port Settings6.1 Current Default Values6.2 Modification Example6.3 Verification Method7. OLED Hardware Testing7.1 Current Default Values7.2 Scenarios Suitable for Modification7.3 Common Modification ItemsModify ResolutionModify I2C AddressModify Rotation Direction7.4 Verification Method8. Camera Hardware Testing8.1 Configuration8.2 Check Ports8.3 Photo Capture Verification Method8.4 Adjustable Parameter Description
1. Course Overview
This course will introduce the default configuration files related to hardware before using OpenClaw, focusing on how to modify the underlying default parameters according to your actual peripheral situation and complete basic verification.
- Use low-level commands to verify if modifications take effect
2. Hardware Configuration File Description
2.1 Configuration File Location
OpenClaw's current hardware default configuration file is located at:
/home/pi/hardware_hal_demo/hardware_config.pyThe default uses the factory image. If you are only following the tutorial and using the factory hardware, you usually don't need to modify it.
2.2 Current Configuration File Coverage
hardware_config.py currently mainly includes three types of default configurations:
- OpenClaw firmware serial port default parameters
- OLED default parameters
These default values are read by low-level command line tools, such as:
rgboleddht
Important notes:
- DHT and RGB are driven directly through the OpenClaw expansion board firmware
- OLED is driven through the motherboard's I2C pins
- CSI camera needs to check hardware connection
3. DHT Hardware Testing
Note: If you need to continuously read DHT through the Python driver library, it is recommended to read DHT data at a two-second interval, as DHT sensors are more suitable for 2s sampling
3.1 Verification Method
xxxxxxxxxxdht #Get sensor datadht_oled #Display sensor data on OLEDNormal terminal display will show temperature and humidity data on OLED

4. RGB Hardware Testing
4.1 Verification Method
Run in terminal:
xxxxxxxxxxrgb color --color red #All turn redrgb effect --effect breathe --color blue --speed 5 #Blue breathing lightNormal terminal display will show RGB lights displaying normally

Turn off the light strip
xxxxxxxxxxrgb off

5. Servo Hardware Testing
5.1 Verification Method
Control single servo:
xservo call-tool Servo1 --action set_angle --angle 90 #Servo 1 rotates to 90 degreesservo call-tool Servo2 --action set_angle --angle 180 #Servo 2 rotates to 90 degrees#Servo1 is the servo to control#90 is the angle to rotate to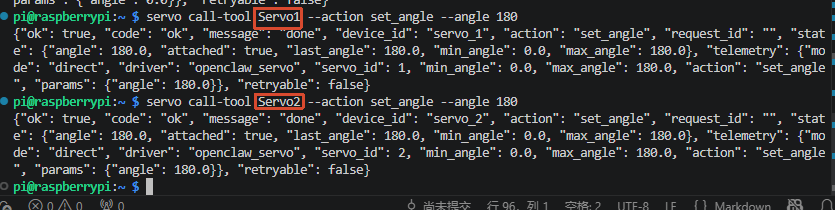
Synchronously control multiple servos:
Note: If there are only two servos, fill in the angles for both servos, the angles for the other two servos can be arbitrary
xxxxxxxxxx# Four servos simultaneously reach specified anglesservo call-tool ServoAll --action set_all --angle1 90 --angle2 45 --angle3 135 --angle4 60# All servos return to center positionservo call-tool ServoAll --action set_all --angle1 90 --angle2 90 --angle3 90 --angle4 906. OpenClaw Firmware Serial Port Settings
6.1 Current Default Values
Current OpenClaw firmware serial port default parameters are:
port="/dev/ttyAMA0"baudrate=115200
Other motherboards' pin serials may not be named this way. For example, Jetson's is "/dev/ttyTHS1"
6.2 Modification Example
Edit the configuration file:
xxxxxxxxxxnano /home/pi/hardware_hal_demo/hardware_config.pyChange Raspberry Pi to, for example:
xxxxxxxxxx"port": "/dev/ttyAMA0","baudrate": 115200,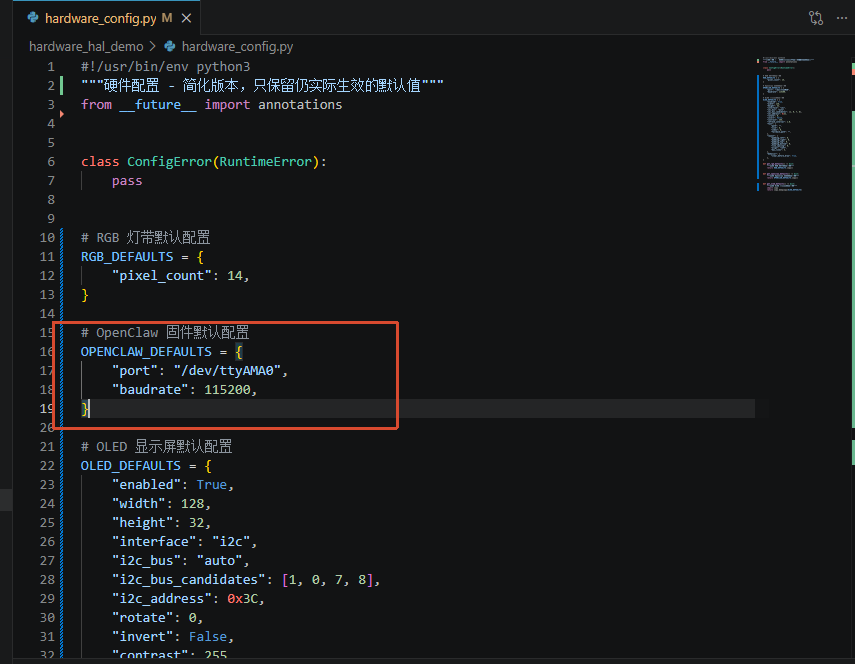
6.3 Verification Method
After saving, it is recommended to first test with either servo or RGB low-level commands, for example:
xxxxxxxxxxrgb color --color greenOr:
xxxxxxxxxxservo call-tool Servo1 --action center #Servo 1 returns to center 90 degrees# All servos return to center positionservo call-tool ServoAll --action set_all --angle1 90 --angle2 90 --angle3 90 --angle4 90If commands can return normally and peripherals can be controlled normally, the serial link is usable.

7. OLED Hardware Testing
7.1 Current Default Values
Current OLED default parameters mainly include:
width=128height=32interface="i2c"i2c_bus="auto"i2c_bus_candidates=[1, 0, 7, 8]i2c_address=0x3Crotate=0invert=Falsecontrast=255
7.2 Scenarios Suitable for Modification
It is recommended to modify OLED default values in the following situations:
- You are using an OLED with different resolution
- I2C address is not
0x3C - Screen orientation needs to be flipped
7.3 Common Modification Items
Modify Resolution
For example, change from:
xxxxxxxxxx"width": 128,"height": 32,To:
xxxxxxxxxx"width": 128,"height": 64,Modify I2C Address
For example, change from:
xxxxxxxxxx"i2c_address": 0x3C,To:
xxxxxxxxxx"i2c_address": 0x3D,Modify Rotation Direction
For example, change from:
xxxxxxxxxx"rotate": 0,To:
xxxxxxxxxx"rotate": 180,7.4 Verification Method
After saving, run in terminal:
xxxxxxxxxxoled text --text 'Hello OpenClaw'oled clearIf OLED can display normally and clear the screen, the configuration has taken effect.

8. Camera Hardware Testing
8.1 Configuration
The premise is ensuring a CSI camera is connected. The current CSI camera chain mainly works through the following two entry points:
xxxxxxxxxx/home/pi/hardware_hal_demo/camera/home/pi/.openclaw/workspace/skills/pi-vision/scripts/csi_snap8.2 Check Ports
Input in terminal:
xxxxxxxxxxls /dev/video*
Normally you can see video0 and video1 devices.

8.3 Photo Capture Verification Method
Input in terminal and directly test the photo capture chain:
xxxxxxxxxxcsi_snap snap
If the photo is taken successfully, you will usually see output files in the following directory:
xxxxxxxxxx~/.openclaw/media/csi-camera/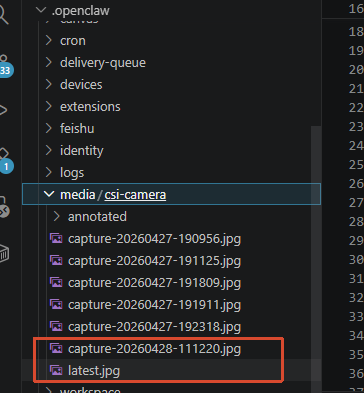
8.4 Adjustable Parameter Description
Although camera is currently not configured in hardware_config.py, csi_snap supports some photo parameters when called, such as:
--width--height--timeout-ms--rotation--hflip--vflip--camera
For example:
xxxxxxxxxxcsi_snap snap --width 1280 --height 720