Welcome to Raspbot V2 repository
当製品の日本語版マニュアル資料は、こちらからご取得ください。
8. Jupyter Lab environment construction
Jupyter Lab environment construction
Jupyter Lab environment construction1. Install Jupyter Lab2. Open Jupyter Lab3. Set up LAN access to jupyter lab4. Set up access to jupyter lab5. Set Jupyter Lab to start automatically
Jupyter Lab is a web-based interactive development environment that supports multiple programming languages. It provides a flexible workspace for data cleaning, visualization, machine learning modeling and other data science tasks.
Note: The factory image has already installed this environment, so there is no need to install it again. Just learn how to build it
1. Install Jupyter Lab
- Check the system python version
Enter the command in the terminal:
python
- Install Jupyter Lab
Update the repository list and software before installing the software:
xxxxxxxxxxsudo apt updatesudo apt upgrade
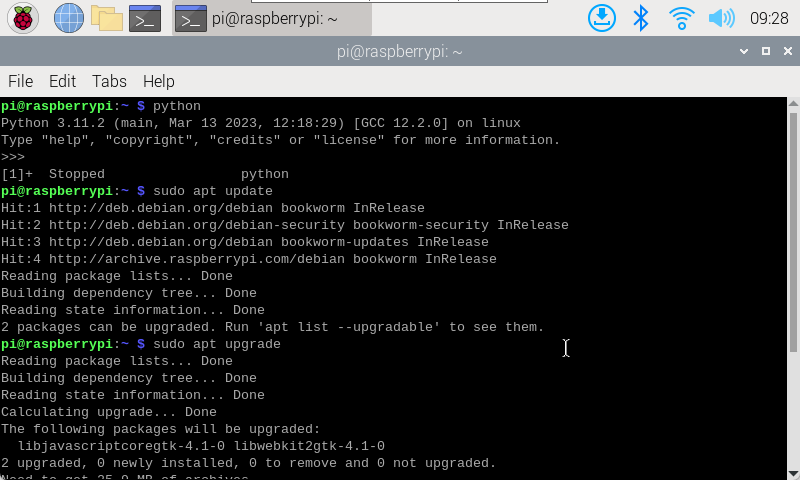
Install Jupyter Lab in the Python 3 environment and enter the command in the terminal:
xxxxxxxxxxsudo pip3 install jupyterlab
If multiple downloads fail, you can specify the Python package mirror address of Tsinghua University to speed up the domestic download speed:
xxxxxxxxxxsudo pip3 install jupyterlab -i https://pypi.tuna.tsinghua.edu.cn/simple
- Error solution
If you directly enter the Jupyter Lab installation command in the terminal, an error "error: externally-managed-environment" will appear. You can use the following command to solve it: The python version is modified according to the version of your system. My current system version is 3.11
xxxxxxxxxxsudo mv /usr/lib/python3.11/EXTERNALLY-MANAGED /usr/lib/python3.11/EXTERNALLY-MANAGED.bk
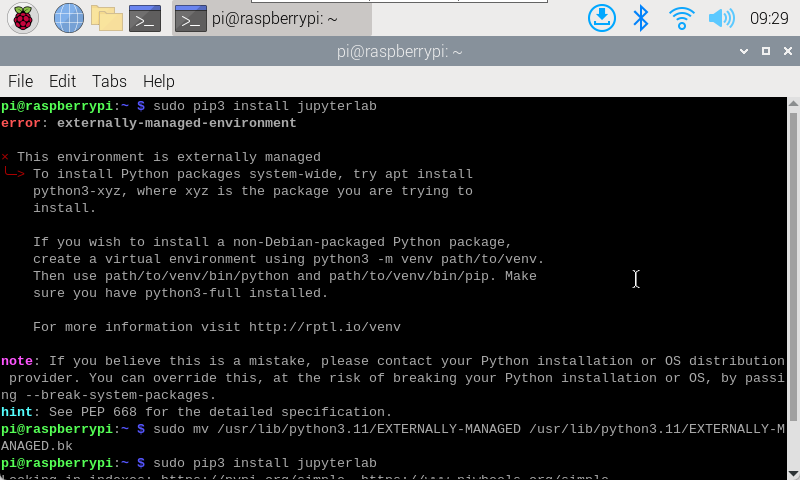
- Installation success prompt
The following prompt indicates that the installation is successful.
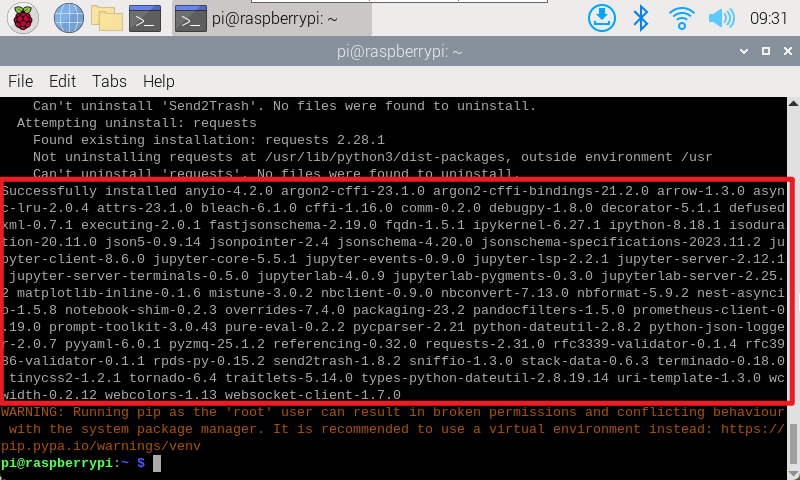
2. Open Jupyter Lab
Input jupyter lab in the terminal. If a password is required, you can set the password according to the fourth step of the tutorial before using it!
xxxxxxxxxxjupyter lab
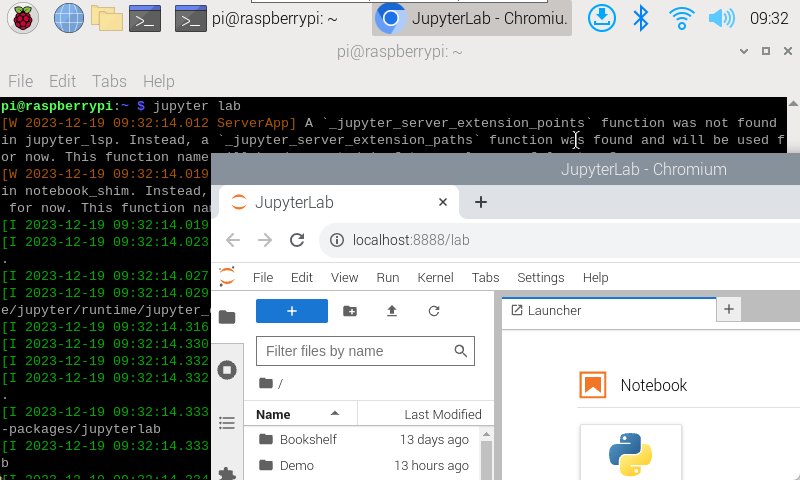
xxxxxxxxxxBefore installing jupyter lab, select the system default browser, otherwise jupyter lab will not be started directly from the browser;Use the sudo command to install the jupyter lab command, and the warning message that appears can be ignored.
3. Set up LAN access to jupyter lab
- Create a configuration file
The generated configuration file path is the path to modify the file later
xxxxxxxxxxjupyter lab --generate-config

- Modify the configuration file
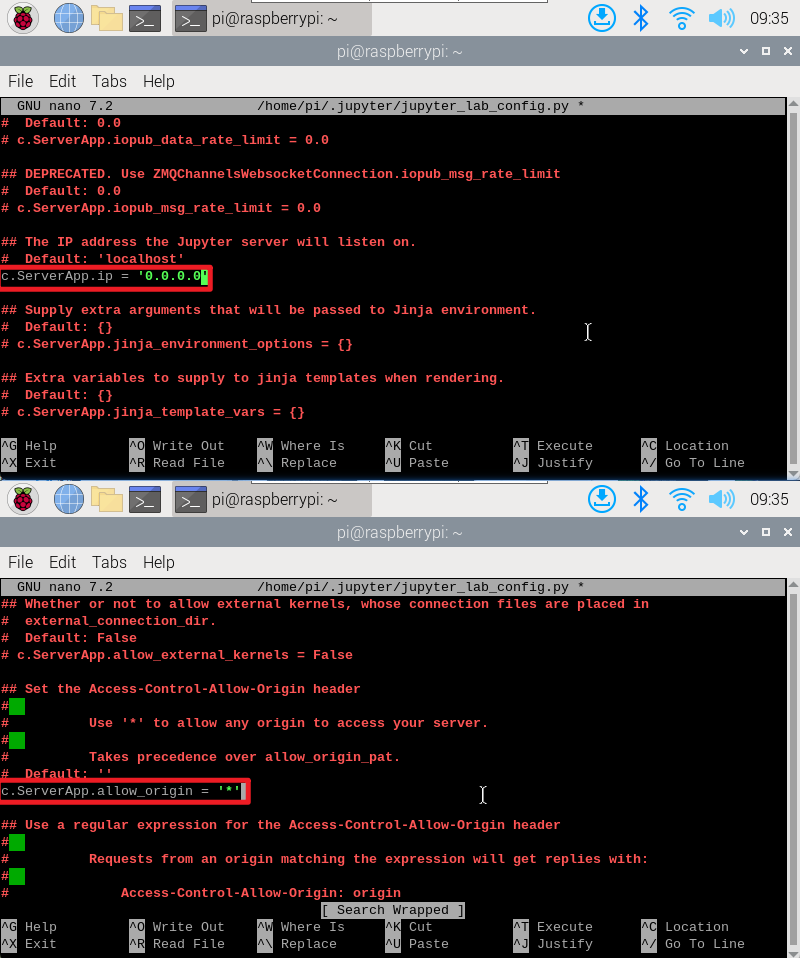
xxxxxxxxxxsudo nano /home/pi/.jupyter/jupyter_lab_config.py
xxxxxxxxxxRemove the comments from the file and modify it to the following: In the nano editor, you can use the Ctrl+W shortcut key to search for keywordsc.ServerApp.allow_origin = '*'c.ServerApp.ip = '0.0.0.0'
Press Ctrl+X, enter Y, and then press Enter to save and exit editing!
4. Set up access to jupyter lab
Enter the command to set the password in the terminal. You need to enter it twice. The input content will not be displayed after entering the password
xxxxxxxxxxjupyter lab password

Restart the Raspberry Pi after setting the password!
- Verification
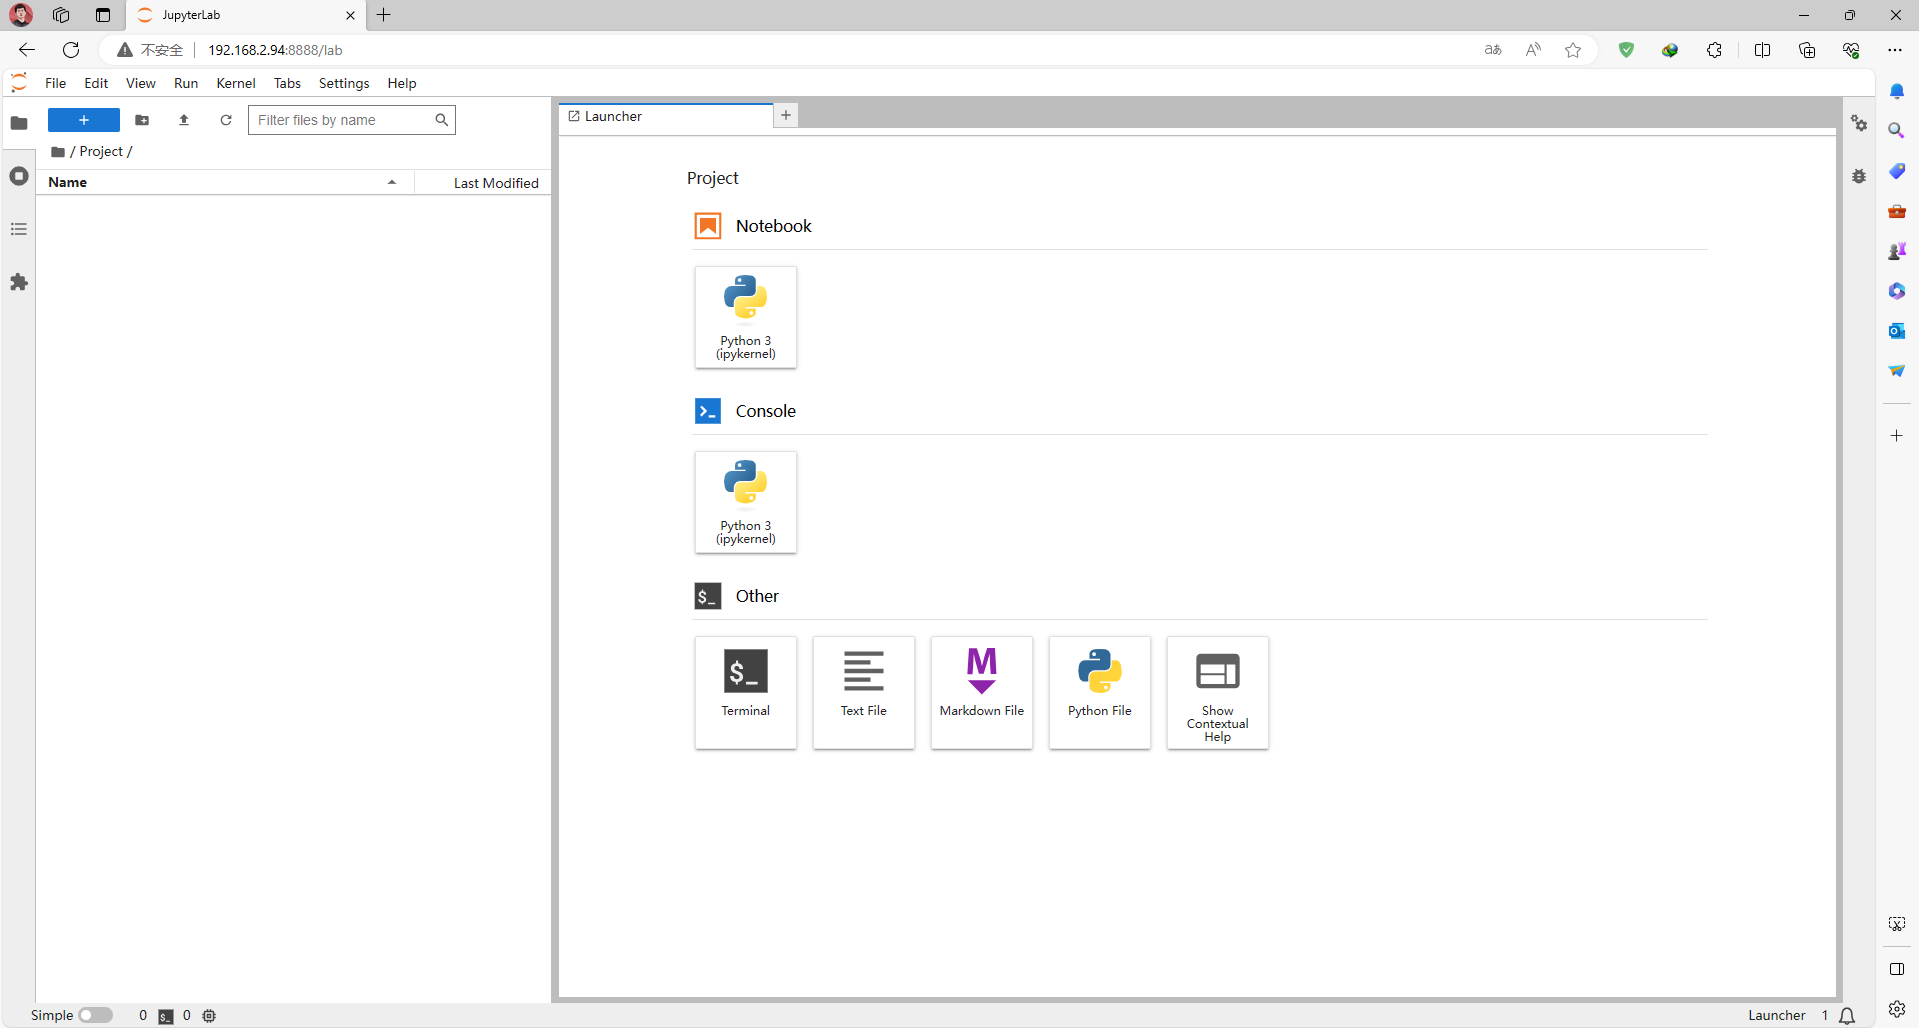
Devices in the same LAN can enter IP:8888 in the browser to access!
xxxxxxxxxxThe password is the password set before: yahboom
5. Set Jupyter Lab to start automatically
After completing the above steps, you need to enter the command in the terminal each time you use Juypter Lab. For more convenient use, we can configure Jupyter Lab to start automatically.
- Configure startup items
Enter the following command in the terminal:
xxxxxxxxxxsudo nano /etc/systemd/system/jupyter.service
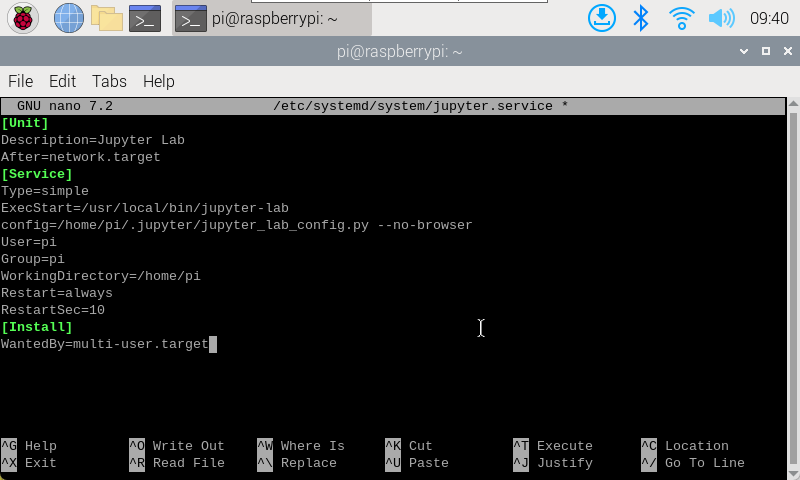
Add the following content to the file:
xxxxxxxxxx[Unit]Description=Jupyter LabAfter=network.target[Service]Type=simpleExecStart=/usr/local/bin/jupyter-labconfig=/home/pi/.jupyter/jupyter_lab_config.py --no-browserUser=piGroup=piWorkingDirectory=/home/piRestart=alwaysRestartSec=10[Install]WantedBy=multi-user.target
pi: my current system user name
ExecStart: command to start Jupyter lab, change to JupyterLab installation path and configuration file path (if the steps are all in accordance with our operation, then enter the same path)
xxxxxxxxxxCheck Jupyter-lab installation path: which jupyter-labThe configuration file path refers to the path of the configuration file generated above
WorkingDirectory: Jupyter-lab's working directory, which can be changed at your own discretion
- jupyter.service service
Enable automatic startup
xxxxxxxxxxsudo systemctl enable jupyter
Disable automatic startup
xxxxxxxxxxsudo systemctl disable jupyter
Start the service
xxxxxxxxxxsudo systemctl start jupyter
Stop the service
xxxxxxxxxxsudo systemctl stop jupyter
Check the service status
xxxxxxxxxxsudo systemctl status jupyter
Enter the command to enable the jupyter.service service to start automatically and restart the Raspberry Pi system.

After completing the above steps, you can access the LAN without entering jupyter lab in the terminal!