yahboom
HomeLearn
Solution
Blog
Online Store
About Us
EN/中文
ROSMASTER M3📖
00.Configuration and Operation Guide
  • 1.Quick start handle to control the car
  • 2.Log in to the car and view the code
  • 3.Enter the Docker (For RPI5)
  • 4.Camera and Radar Configuration (Must Read)
  • 5.Assembly video
  • 6.Modify Control Board Firmware Parameters
01.Chassis Control Course
  • 01.ROS control
  • 02.Handle control
  • 03.Keyboard control
  • 04.Robot state estimation
  • 05.Data remote visualization
  • 06.Line velocity calibration
  • 07.Angular velocity calibration
  • 08.Robot URDF model
  • 09.Line patrol automatic driving
  • 10.Patrol
02.Lidar Course
  • 01.Lidar introduction and use
  • 02.Lidar point cloud fusion and filtering
  • 03.Lidar obstacle avoidance
  • 04.Lidar tracking
  • 05.Lidar guard
  • 06.Gmapping-SLAM mapping
  • 07.Cartographer-SLAM mapping
  • 08.slam_toolbox mapping
  • 09.Lifelong mapping
  • 10.Navigation2 single-point navigation avoid
  • 11.Navigation2 multi-point navigation avoid
  • 12.Cartographer relocalization navigation
  • 13.slam_toolbox localization and navigation
  • 14.Synchronous mapping and navigation
  • 15.RTAB-Map mapping
  • 16.RTAB-Map navigation
  • 17.APP mapping and navigation
03.AI Model Basics
  • 1.AI large model types and principles
  • 2.RAG retrieval enhancement and model training samples
  • 3.Embodied intelligent robot system architecture
  • 4.Embodied intelligent functions core source code
04.AI Model Development
  • 01.Register a model service provider account
  • 02.Configuring API-KEY
  • 03.Introduction to Dify
  • 04.Basic Dify Features
  • 05.AI Large Model Development - chatbot
  • 06.Deploy the RAG knowledge base
  • 07.RAG knowledge base + chatbot
  • 08.AI agent workflow
  • 09.Custom wake-up response
  • 10.Core module testing tools
05.AI Model - Voice Version
  • 1.Semantic understand and command follow
  • 2.Multimodal visual understanding
  • 3.Multimodal visual understanding+SLAM navigation
  • 4.Intention estimation
06.AI Model - Text Version
  • 1.Semantic understand and command follow
  • 2.Multimodal visual understanding
  • 3.Multimodal visual understanding+SLAM navigation
  • 4.Intention estimation
07.Road Network Planning and Navigation
  • 1.Introduction and Quick Start
  • 2.Constructing a Pose Map
  • 3.Road Network Labelling
  • 4.Inter-Road Network Planning and Navigation
  • 5.Free-Pose Road Network Navigation
  • 6.Path Replanning
08.Autonomous Driving expand(Need purchase track map)
  • 01.Environment Setup & Precautions
  • 02.YOLO Environment Configuration
  • 03.Data Collection
  • 04.Data Annotation
  • 05.YOLOv11 Model Training
  • 06.Model Format Conversion
  • 07.Vehicle Centerline Calibration
  • 08.Lane Detection
  • 09.Lane-Keeping Autonomous Driving
  • 10.Traffic Sign Recognition
  • 11.Comprehensive Autonomous Driving Applications
  • 12.Autonomous Driving Debugging Module
  • 13.Road Network Planning with Track Map
  • 14.Road Network Planning with Traffic Sign Recognition
  • 15.AI Model with Road Network Planning
  • 16.AI Model with Track Map and SLAM Navigation
  • 17.AI Model with Road Network Planning and Autonomous Driving
09.Depth Camera Course
  • 01.Dabai_DCW2 Camera Introduction
  • 02.Nuwa-HP60C Camera Introduction
  • 03.Depth Pseudo-Color Image
  • 04.Depth Camera Distance Measurement
  • 05.Wood Block Volume Measurement
  • 06.Edge Detection
  • 07.YOLOv11 Object Detection
  • 08.YOLOv11 Object Tracking
  • 09.Color Following
  • 10.Face Following
  • 11.QR Code Following
  • 12.Machine Code Following
  • 13.KCF Object Tracking
  • 14.QR Code Motion Control
  • 15.AR Vision
10.Mediapipe Visual Course
  • 01.Hand Detection
  • 02.Posture Detection
  • 03.Overall Detection
  • 04.Facial Landmark Detection
  • 05.3D Object Recognition
  • 06.Face Detection
  • 07.Gesture Recognition
  • 08.Face Special Effects
  • 09.Brush
  • 10.Finger Control
  • 11.Palm Target Positioning
  • 12.Fingertip Trajectory Recognition
  • 13.Gesture Following
  • 14.Posture Following
  • 15.Gesture Motion Control
11.Multi-vehicle Course
  • 1.Multi-vehicle Control
  • 2.Multi-vehicle Navigation
  • 3.Multi-vehicle Platoon
12.AI Large Model Basic Course
Offline large model (Text Interaction)
  • 0. AI Large Model Mirroring Explanation
  • 1. Deployment of large-scale AI models
  • 2. Installation of the large model dialogue platform
  • 3. Meta AI Llama 3.2 model
  • 4. Alibaba Cloud Qwen3 Model
  • 5. DeepSeek DeepSeek-R1 model
  • 6. Microsoft Phi-4 mini model
  • 7. Alibaba Cloud Qwen2.5vl Visual Multimodal Large Model
  • 8. Google Gemma3 Visual Multimodal Large Model
  • 9. Llava Visual Multimodal Large Model
  • 10. Multimodal Visual Understanding Applications
  • 11.MiniCPM-V Visual Multimodal Large Model
  • 12. Multimodal Text-Based Image Application
  • 13. Multimodal Video Analysis Application
  • 14. Multimodal table scanning application
  • 15. Multimodal visual positioning applications
  • 16. Multimodal Autonomous Agent Application
Offline large model (Voice Interaction)
  • 0. Voice Interaction Hardware Connection (Must Read)
  • 1. Offline speech-to-text (ASR)
  • 2. Offline Text-to-Speech (TTS)
  • 3. AI large model voice interaction
  • 4. Multimodal visual understanding and voice interaction
  • 5. Multimodal Text-Based Image Application
  • 6. Multimodal Video Analysis Application
  • 7. Multimodal visual positioning applications
  • 8. Multimodal table scanning application
  • 9. Multimodal Autonomous Agent Applications
  • 10. AI large model offline voice assistant
Online large model (Text Interaction)
  • 1. OpenRouter Large Model API Aggregation Platform
  • 2. Multimodal visual understanding applications
  • 3. Multimodal visual positioning applications
  • 4. Multimodal table scanning application
  • 5. Multimodal Autonomous Agent Applications
Online large model (Voice Interaction)
  • 0. Voice Interaction Hardware Connection (Must Read)
  • 1. Online speech-to-text (ASR)
  • 2. Online Text-to-Speech (TTS)
  • 3. AI large model voice interaction
  • 4. Multimodal visual and voice interaction
  • 5. Multimodal visual positioning applications
  • 6. Multimodal table scanning application
  • 7. Multimodal Autonomous Agent Applications
  • 8. AI large model online voice assistant
13.Control Board Course
1.Development environment setup
  • 1.Introduction to the Control Board
  • 2.Set up the STM32CUBEIDE development environment
  • 3.Burning STM32 firmware using SWD
  • 4.Burning STM32 firmware using serial port
  • 5.Compile the microros driver library
  • 6.Install and start the microros agent
  • 7.Import Project
2.Control board STM32 basic routine
  • 1.Turn on the LED light
  • 2.Button functions
  • 3.Drive the buzzer
  • 4.Serial communication
  • 5.Battery voltage detection
  • 6.Driving PWM Servo
  • 7.Drive motor
  • 8.Read motor encoder data
  • 9.PID control of motor speed
  • 10.Robot kinematics analysis theory
  • 11.Read IMU data
  • 12.Read Lidar data
  • 13.Flash access data
  • 14.Driving OLED Displays
  • 15.Driving RGB light strip
  • 16.SBUS model aircraft remote control
  • 17.USB controller remote control
  • 18.CAN bus communication
3.Control board micro_ros basic routine
  • 1.Post a topic
  • 2.Subscribe to a topic
  • 3.Multi-topic subscription and publishing
  • 4.Subscribe to the buzzer topic
  • 5.Subscribe to the bus servo topic
  • 6.Subscribe to the rate control topic
  • 7.Release Speed Topic
  • 8.Publish IMU data topic
  • 9.Publish radar data topic
14.Main Control Course
Jetson Orin Nano_NX
  • 1.Jetson Orin board introduction
  • 2.Restore the factory image system
  • 3.Backup SSD system
  • 4.SSD expansion
  • 5.Network configuration
  • 6.SSH remote login
  • 7.VNC remote control
  • 8.Remote file transfer
  • 9.Jtop tool
  • 10.Exchange space expansion
Raspberry Pi
  • 1. Introduction to Raspberry PI 5
  • 2. Raspberry PI system installation and backup
  • 3. Powering the Raspberry PI 5
  • 4. Startup of Raspberry PI 5
  • 5. Update and upgrade operating system
  • 6. Introduction to raspi-config tool
  • 7. config.txt file description
  • 8. Network Configuration
  • 9. remote access
  • 10. Transfer files remotely
  • 11. Set display resolution and rotation
  • 12. Set screen to sleep
  • 13. Play audio and video
  • 14. Using USB camera
  • 15. Using MIPI camera
  • 16. Get real-time temperature of Raspberry Pi
RDKX5
  • 1.Introduction to RDK X5 board
  • 2.Write system file
  • 3.Hardware interface description
  • 4.Install case and other accessories
  • 5.Network configuration
  • 6.Remote login
  • 7.Update system
  • 8.srpi-config user guide
  • 9.config. txt configuration file
  • 10.Self-startup setting
  • 11.RDK exclusive command usage
  • 12.Linux command usage
  • 13.GPIO readwrite operation
  • 14.Image classification algorithm
  • 15.Use USB camera
  • 16.Use MIPI camera
  • 17.Binocular camera depth algorithm
15.YOLOv11 Development (ORIN)
  • 1.YOLO environment construction
  • 2.CLI use
  • 3.Object detection
  • 4.Instance segmentation
  • 5.Pose estimation
  • 6.Image classification
  • 7.Oriented object detection
  • 8.Model conversion
  • 9.Dataset annotation
  • 10.Model Training_Conversion
  • 11.Model prediction
16.YOLOv11 Development(RDKX5)
  • 1.YOLO environment construction
  • 2.CLI use
  • 3.Object detection
  • 4.Instance segmentation
  • 5.Pose estimation
  • 6.Image classification
  • 7.Oriented object detection
  • 8.Model prediction
  • 9.Model Quantization
17.YOLOv11 Development (RPI)
  • 1.YOLO environment construction
  • 2.CLI use
  • 3.Object detection
  • 4.Instance segmentation
  • 5.Pose estimation
  • 6.Image classification
  • 7.Oriented object detection
  • 8.Model conversion
  • 9.Model prediction
18.Linux Operating System
  • 1.Introduction to Linux system
  • 2.Ubuntu file system
  • 3.Ubuntu common commands
  • 4.Ubuntu common editors
  • 5.Ubuntu software operation commands
  • 6.Virtual machine installation
  • 7.SSH remote control
  • 8.VNC remote control
  • 9.Transfer files remotely
  • 10.Driver library and communication
  • 11.Static IP and hotspot mode
  • 12.Bind device ID
  • 13.Capacity expansion and resource allocation
  • 14.Update system software sources
  • 15.Set root user password
  • 16.sudo free password
  • 17.Connect to WiFi network
  • 18.View system version
  • 19.Customized service management
  • 20.Back up system image
19.ROS2 Basic Course
  • 1.Introduction to ROS2
  • 2.ROS2 install Humble
  • 3.ROS2 development environment
  • 4.ROS2 workspace
  • 5.ROS2 function package
  • 6.ROS2 node
  • 7.ROS2 topic communication
  • 8.ROS2 service communication
  • 9.ROS2 action communication
  • 10.ROS2 custom interface message
  • 11.ROS2 parameter service case
  • 12.ROS2 meta-function package
  • 13.ROS2 distributed communication
  • 14.ROS2 DDS
  • 15.ROS2 time related API
  • 16.ROS2 common command tools
  • 17.ROS2 rviz2 use
  • 18.ROS2 rqt toolbox
  • 19.ROS2 Launch startup file configuration
  • 20.ROS2 recording and playback tool
  • 21.ROS2 URDF model
  • 22.ROS2 Gazebo simulation platform
  • 23.ROS2 TF2 coordinate transformation
20.Docker Course
  • 1、Docker overview and docker installation
  • 2、Common commands for docker image containers
  • 3、Docker images deeply understand and publish images
  • 4、Docker hardware interaction and data processing
  • 5、Enter the bot's docker container
  • 6、Robot development environment construction in Docker
21.Image Processing Basics Course
  • 1. Introduction to Open Source CV
  • 2. Image reading and display
  • 3. Image writing
  • 4. Image quality
  • 5. Pixel Operation
  • 6. Image zoom
  • 7. Image cutting
  • 8. Image translation
  • 9. Image Mirroring
  • 10. Affine Transformation
  • 11. Image Rotation
  • 12. Perspective Transformation
  • 13. Grayscale processing
  • 14. Image Binarization
  • 15. Edge Detection
  • 16. Line drawing
  • 17. Rectangle and circle drawing
  • 18. Drawing text and pictures
Download
  • Mapping_APP(iOS_Android)
  • MainBoard_AI_Pure_System
  • Robot_Image_System_File
  • Code-Firmware
  • Instruction_Manual
  • VM_File
  • Software_Tools
  • Firmware_DriverFile
  • 3D_Model_File
  • ROS2_Basic_VM
  • Other_Annex
Download ZIP

Welcome to ROSMASTER M3 repository

15.RTAB-Map mapping

RTAB-Map SLAM Mapping

RTAB-Map SLAM Mapping1. Course Content2. RTAB-Map IntroductionHow RTAB-Map Works3. Start the Agent4. Run the Example5. Source Code Analysis


1. Course Content

  • Run the sample program to perform RTAB-Map SLAM mapping using a Lidar and a depth camera.


2. RTAB-Map Introduction

RTAB-Map (Real-Time Appearance-Based Mapping) is a vision-based real-time Simultaneous Localization and Mapping (SLAM) algorithm, primarily used for mapping and navigation tasks in robotics and augmented reality. RTAB-Map has the following features:

  • Appearance-Based Loop Closure Detection: Mainly uses visual features for place recognition.
  • Real-Time Performance: Ensures real-time operation through a memory management mechanism.
  • Multi-Sensor Support: Supports RGB-D cameras, stereo cameras, and monocular cameras.
  • 3D Map Construction: Capable of creating dense 3D point cloud maps.

How RTAB-Map Works

  • Frontend Processing

    • Acquires image data from sensors.
    • Extracts visual features (e.g., SIFT, SURF, ORB).
    • Calculates the pose transformation between the current frame and previous frames.
  • Backend Optimization

    • Uses graph optimization techniques (e.g., g2o) to optimize the pose graph.
    • Detects loop closures (when the robot returns to a previously visited location).
  • Memory Management

    • Employs a Working Memory (WM) and Long-Term Memory (LTM) mechanism.
    • Recent data is kept in WM, while older data is transferred to LTM.
    • When a loop closure is detected, relevant data is retrieved from LTM back into WM.


3. Start the Agent

Note: If it is already running, you do not need to start it again.

Enter the command in the vehicle's terminal:

start_agent

The terminal will print the following information, indicating a successful connection:
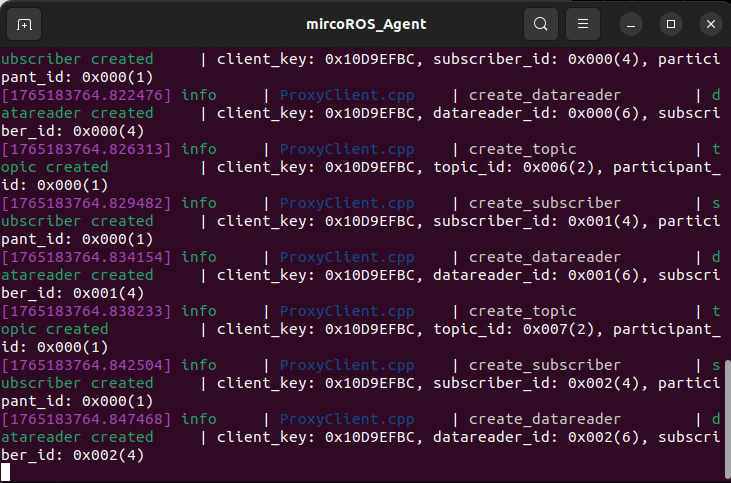
image-20251209102624926


4. Run the Example

  • Start the RTAB-Map mapping node:

For Raspberry Pi 5 users, if the ROS container is not started, you need to start it first,

xxxxxxxxxx
bringup_m3

Open a terminal inside the container,

xxxxxxxxxx
exec_m3

(ORIN board)

xxxxxxxxxx
ros2 launch m3_bringup rtab_map.launch.py

(RDK & PI5 boards) Run in separate steps, with visualization launched on the accompanying virtual machine Rosmaster-M3-Ubuntu22.04,

xxxxxxxxxx
# On the virtual machine
rviz2 -d /home/yahboom/yahboomM3_ws/user_ws/src/m3_bringup/rviz/rgbd.rviz
# On the host machine
ros2 launch m3_bringup rtab_map.launch.py use_rviz:=False
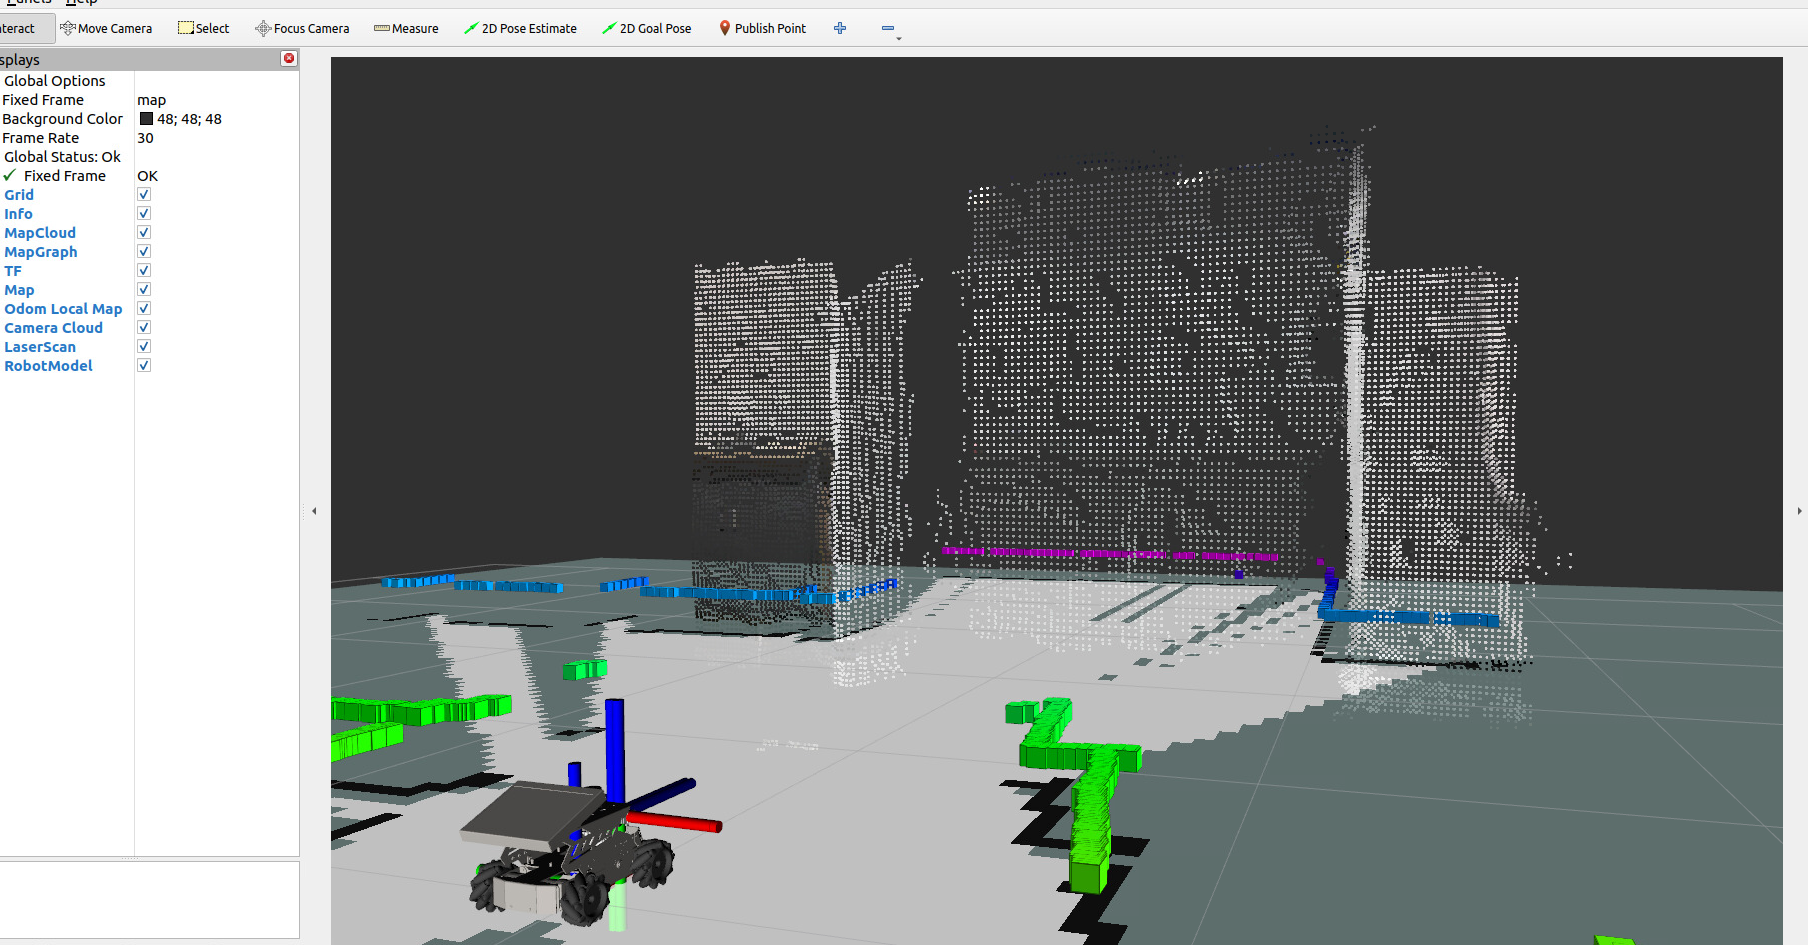
image-20251209192149598

  • To control the vehicle's movement, you can use either keyboard or joystick control. Here, we use keyboard control as an example:
xxxxxxxxxx
keyboard_control

Click on the terminal window with the mouse and press z to reduce the speed appropriately.
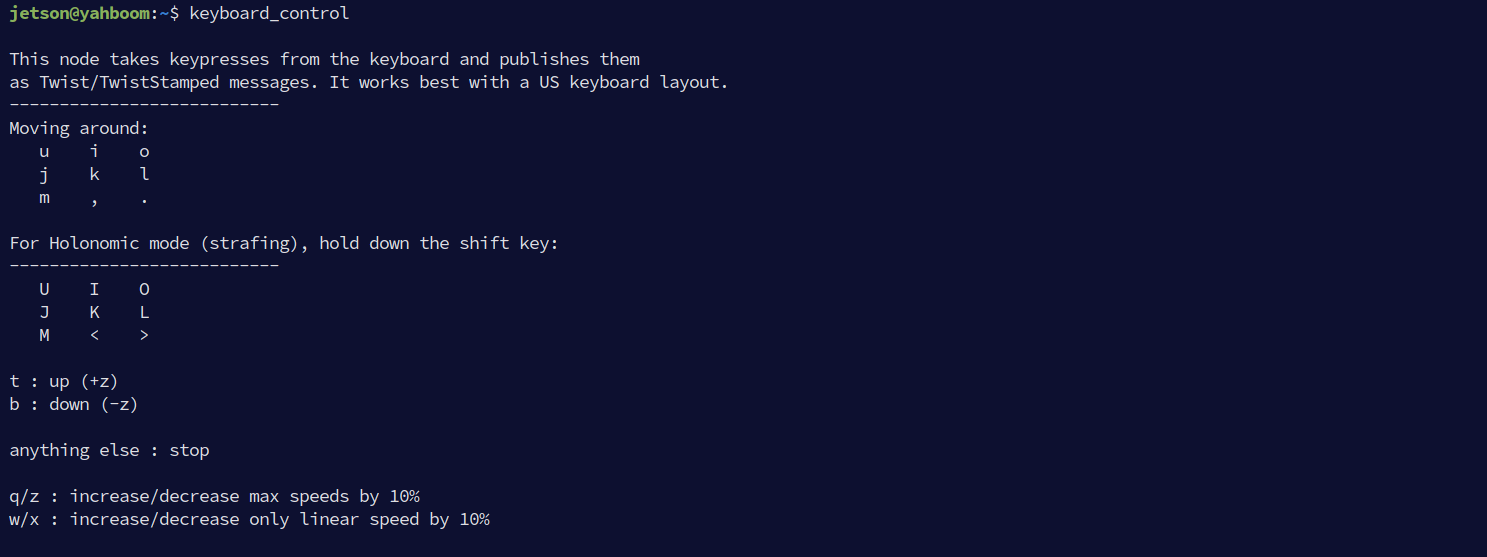
image-20251209192635908


  • Press I, <, J, L to control the car to move forward, backward, turn left, and turn right, respectively, and press k to stop. Control the car to move slowly to complete the mapping.
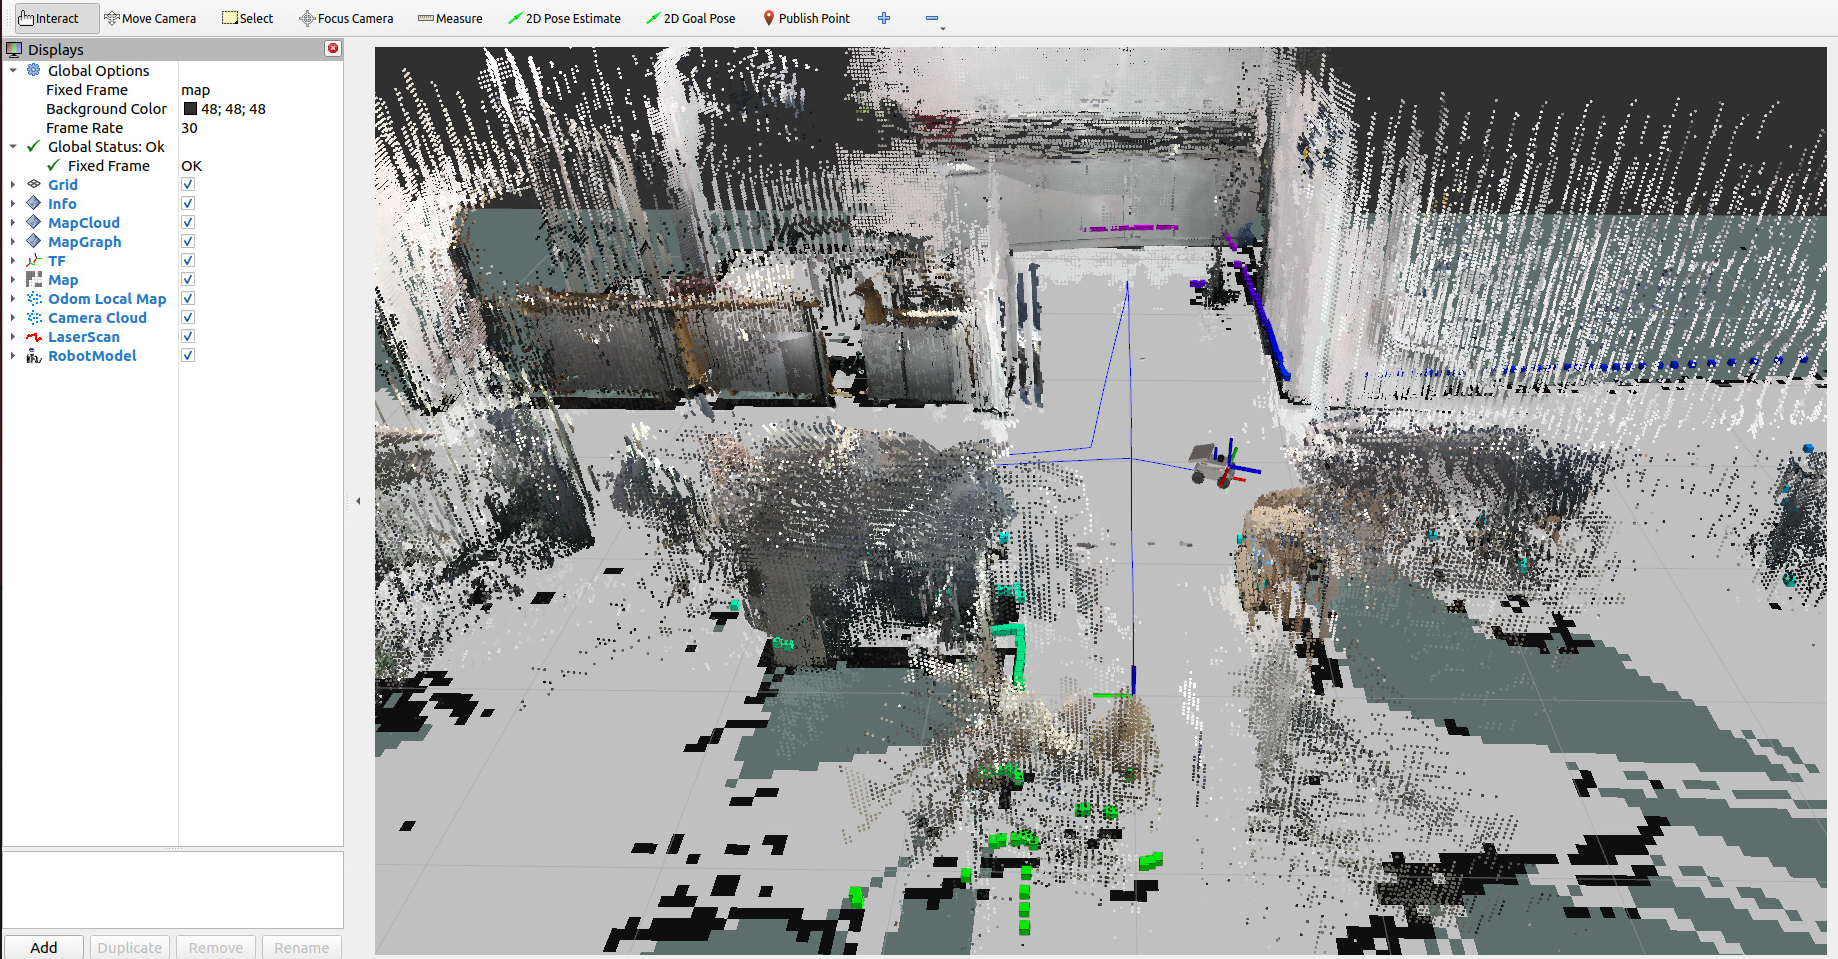
image-20251209192923496


  • After mapping is complete, press Ctrl+C to close the mapping program. The map will be automatically saved to ~/map/rtabmap.db.


5. Source Code Analysis

  • Launch file path:
xxxxxxxxxx
~/yahboomM3_ws/user_ws/src/m3_bringup/launch/slam/rtab_map.launch.py


  • The startup program related to RTAB-Map mapping is as follows:

    • It uses CAMERA_TYPE to distinguish and launch different types of camera files.
    • delay_start_rtabmap_slam is used to start the RTAB-Map mapping node after launching basic nodes like odometry, Lidar, and camera.
​x
def generate_launch_description():
    CAMERA_TYPE = os.environ['CAMERA_TYPE'] # Get camera type
    database_path=os.path.join(os.path.expanduser('~'), 'map','rtabmap.db') # Map database path
    m3_bringup_dir=os.path.join(get_package_share_directory('m3_bringup'))
    # Check camera type, as different cameras have different topic names
    if CAMERA_TYPE == 'as_hp60c':
        bringup_camera_launch=IncludeLaunchDescription(
                        PythonLaunchDescriptionSource(os.path.join(m3_bringup_dir,
                                        'launch',
                                        'common',
                                        'hp60c.launch.py')))
        rgb_topic='/ascamera_hp60c/camera_publisher/rgb0/image'
        depth_topic='/ascamera_hp60c/camera_publisher/depth0/image_raw'
        camera_info_topic='/ascamera_hp60c/camera_publisher/rgb0/camera_info'
    elif CAMERA_TYPE == 'dabai_dcw2':
        bringup_camera_launch=IncludeLaunchDescription(
                        PythonLaunchDescriptionSource(os.path.join(m3_bringup_dir,
                                        'launch',
                                        'common',
                                        'dabai_dcw2.launch.py')))
        rgb_topic='/camera/color/image_raw'
        depth_topic='/camera/depth/image_raw'
        camera_info_topic='/camera/color/camera_info'
    # Declare arguments
    declared_arguments = []
    declared_arguments.append(
        DeclareLaunchArgument(
            "mode",
            default_value="slam",
            description="Launch mode: slam/localization",
        )
    ) 
    rtabmap_launch=os.path.join(get_package_share_directory("rtabmap_launch"),
                                        'launch',
                                        'rtabmap.launch.py',)
​
    rviz_cfg=os.path.join(m3_bringup_dir,'rviz','rgbd.rviz')
    mode=LaunchConfiguration("mode", default="slam") 
    delay_start_rtabmap_slam= TimerAction(
        condition=IfCondition(PythonExpression(["'", mode, "' == 'slam'" ])),
        period=10.0,
        actions=[
            IncludeLaunchDescription(
                    PythonLaunchDescriptionSource(rtabmap_launch),
                    launch_arguments={
                        "rgb_topic":                    rgb_topic,
                        "depth_topic":                  depth_topic,
                        "camera_info_topic":            camera_info_topic,
                        "frame_id":                     'base_link',
                        "odom_topic":                   '/odom',
                        "use_sim_time":                 'false',
                        "rviz":                         'true',
                        "rviz_cfg":                      rviz_cfg,
                        "database_path":                 database_path,     
                        "rtabmap_viz":                  'false',
                        "approx_sync":                  'true',
                        "approx_sync_max_interval":     '0.01',
                        "qos":                          '0',
                        "visual_odometry":              'false',
                        "icp_odometry":                 'false',
                        "subscribe_scan":               'true',
                        "sync_queue_size":              '50',
                        "topic_queue_size":             '50',
                        "rtabmap_args":                 '--delete_db_on_start',
                        "log_level":                    'info'
                    }.items(),
                )
        ]
     )
​
    carbase = ExecuteProcess(
        cmd=['ros2', 'launch', 'm3_bringup', 'car_base.launch.py'],
        output='screen'
    )
    return LaunchDescription([
        bringup_camera_launch,
        carbase,
        delay_start_rtabmap_slam,
        delay_start_rtabmap_localization,
        LogInfo(msg=[Fore.GREEN+'================================SLAM RtabMap Start================================',Fore.RESET])
    ])


Synchronous mapping and navigation
RTAB-Map navigation

COMPANY

  • About us
  • Team Style
  • Blog

LEARNING & EXPLORATION

  • Tutorials
  • Edge AI hardware
  • Educational robots
  • Embedded intelligent hardware

WHERE TO BUY

  • Yahboom Online Store
  • Amazon
  • Alibaba
  • AliExpress
  • Mercado

TECHNOLOGY SUPPORT

  • Email: support@yahboom.com

BE A DISTRIBUTOR

  • Email: sales@yahboom.com
QR Code

Copyright © 2017-2026 Yahboom. All Rights Reserved.

EN/中文