yahboom
HomeLearn
Solution
Blog
Online Store
About Us
EN/中文
ESP32 Core Board📖
1. ESP32 Introduction
  • 1. ESP32S3 Overview
  • 2. Environment Setup Introduction
  • 3. Dev Board Introduction
2. ESP-IDF Development Tutorial
1. Before Development
  • 1. Environment Setup (Windows)
  • 2. Environment Setup (Linux)
  • 3. Build and Flash
2. Basic Peripherals
  • 1. LED Control
  • 2. Button Detection
  • 3. Peripheral Interrupts
  • 4. ESP_TIMER
  • 5. GPTIMER
  • 6. Watchdog Timer
  • 7. DMA
  • 8. ADC
  • 9. PWM Breathing LED
  • 10. RGB LED Effects
3. Serial Communication and Storage System
  • 1. Serial UART Communication Experiment
  • 2. I2C_OLED Display Experiment
  • 3. SPI Bus Communication Experiment
  • 4. PSRAM External Memory Experiment
  • 5. Flash Read and Write Experiment
  • 6. USB Emulated Mass Storage Experiment
4. FreeRTOS operating system
  • 1.FreeRTOS Core Concepts Theory
  • 2.Task Creation and Management
  • 3.Queue
  • 4.Binary Semaphore
  • 5.Mutex
  • 6.Event Groups
  • 7.Software Timer
  • 8.Task Scheduler
  • 9.Low Power Mode
  • 10.Deadlock
  • 11.Priority Inversion
5. Network Protocols and Wireless Communication
  • 1. WIFI Network Basics
  • 2. WIFI STA Mode
  • 3. WIFI AP Mode
  • 4. UDP Client Experiment
  • 5. UDP Server Experiment
  • 6. TCP Client Experiment
  • 7. TCP Server Experiment
  • 8. Socket Programming Basics
  • 9. HTTP Client Experiment
  • 10. HTTP Server Experiment
  • 11. MQTT IoT Communication Protocol
  • 12. WIFI OTA Upgrade
  • 13. Bluetooth Fundamentals
  • 14. Bluetooth Slave Mode
  • 15. Bluetooth Master Mode
6. Audio Applications
  • 1.I2S Microphone Recording and U-Disk Playback
  • 2.I2S Audio Playback Experiment
  • 3.Repeater Experiment
7. Xiaozhi AI Voice
  • 1. Burn Xiaozhi Firmware
  • 2. Network and Configuration
  • 3. AI Agent Settings
  • 4. Program Analysis
  • 5. Free Chat
3. Arduino Development Course
1. Before Development
  • 1. Environment Setup
  • 2. Build and Flash
2. Basic Peripherals
  • 1. LED Control
  • 2. Button Detection
  • 3. Peripheral Interrupts
  • 4. ESP_TIMER
  • 5. GPTIMER
  • 6. Watchdog Timer
  • 7. ADC
  • 8. PWM Breathing LED
  • 9. RGB LED Effects
3. Serial Communication and Storage System
  • 1. Serial UART Communication
  • 2. I2C OLED Display
  • 3. SPI Bus Communication
  • 4. Flash Read and Write
  • 5. USB Emulated Mass Storage
4. Network Protocols and Wireless Communication
  • 1. WIFI Network Basics
  • 2. WIFI STA Mode
  • 3. WIFI AP Mode
  • 4. UDP Server Experiment
  • 5. UDP Client Experiment
  • 6. TCP Client Experiment
  • 7. TCP Server Experiment
  • 8. HTTP Client Experiment
  • 9. HTTP Server Experiment
  • 10. MQTT IoT Communication Protocol
  • 11. WIFI OTA Upgrade
  • 12. Bluetooth Fundamentals
  • 13. Bluetooth Slave Mode
  • 14. Bluetooth Master Mode
5. Audio Applications
  • 1.I2S Microphone Recording and U-Disk Playback
  • 2.I2S Audio Playback Experiment
  • 3.Repeater Experiment
4. MicroPython Development Course
1. Before Development
  • 1. Environment Setup
  • 2. Build and Flash
  • 3. Thonny IDE
2. Basic Peripherals
  • 1. LED Control
  • 2. Button Detection
  • 3. Peripheral Interrupts
  • 4. TIMER_IT
  • 5. Watchdog Timer
  • 6. ADC
  • 7. PWM Breathing LED
  • 8. RGB LED Effects
3. Serial Communication and Storage System
  • 1. Serial UART Communication Experiment
  • 2. I2C_OLED Display Experiment
  • 3. SPI Bus Communication Experiment
  • 4. Flash Read and Write Experiment
  • 5. Print Storage
4. Network Protocols and Wireless Communication
  • 1. WIFI Network Basics
  • 2. WIFI STA Mode
  • 3. WIFI AP Mode
  • 4. UDP Client Experiment
  • 5. UDP Server Experiment
  • 6. TCP Client Experiment
  • 7. TCP Server Experiment
  • 8. HTTP Client Experiment
  • 9. HTTP Server Experiment
  • 10. MQTT
  • 11. Bluetooth Fundamentals
  • 12. Bluetooth Slave Mode
  • 13. Bluetooth Master Mode
5. Audio Applications
  • 1. I2S Audio Playback Experiment
  • 2. Repeater Experiment
Download
  • Code
  • Hardware_Info
  • 3D_Model_File
  • Software_Tools
  • VMware
  • VM_File
Download ZIP

Welcome to ESP32 Core Board repository

3. AI Agent Settings

3. AI Agent Settings


3. AI Agent Settings1. AI Xiaozhi "Brain" Architecture2. Register and Configure AI Agent2.1 Register Account and Add Device2.2 Configure Large Language Model2.3 Configure Language and Voice2.4 Configure Personality3. Voice Wake Word Configuration


1. AI Xiaozhi "Brain" Architecture

Before diving into configuration, understand AI Xiaozhi's cloud intelligence architecture—this determines your basis for choosing which AI platform:

Cloud AI Server

Device

Wake Word Detection

MIC Capture

OPUS Encoding

Send to Server

Speaker Playback

OPUS Decoding

Receive Server Data

ASR Speech Recognition

LLM Inference

TTS Speech Synthesis

2. Register and Configure AI Agent

2.1 Register Account and Add Device

AI Xiaozhi's official server xiaozhi.me has pre-integrated ASR + LLM + TTS complete pipeline; you can register and use it directly for free.

  1. Browser visits https://xiaozhi.me, register with phone number

  2. After login, go to console → Console

  3. Click Add Device, select "Open Source", system generates device activation code

The activation code is the credential for device connection to server; used during device activation in 2. Network and Configuration, please keep it safe.

2.2 Configure Large Language Model

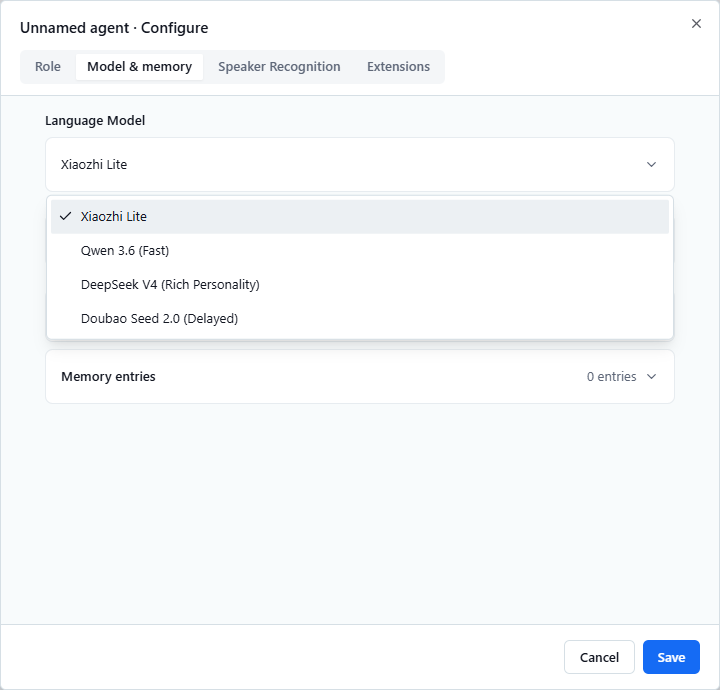
After login, you can change the large language model on the console's Configure page:

image-20260806144602764

Change Language Model

The official service uses Qwen real-time model free quota by default. If you have a GitHub account, you can login to unlock more model choices.

2.3 Configure Language and Voice

Supports 30+ languages (Chinese, English, Japanese, Cantonese, etc.), covering multi-language real-time interaction; also provides multiple TTS voice options:
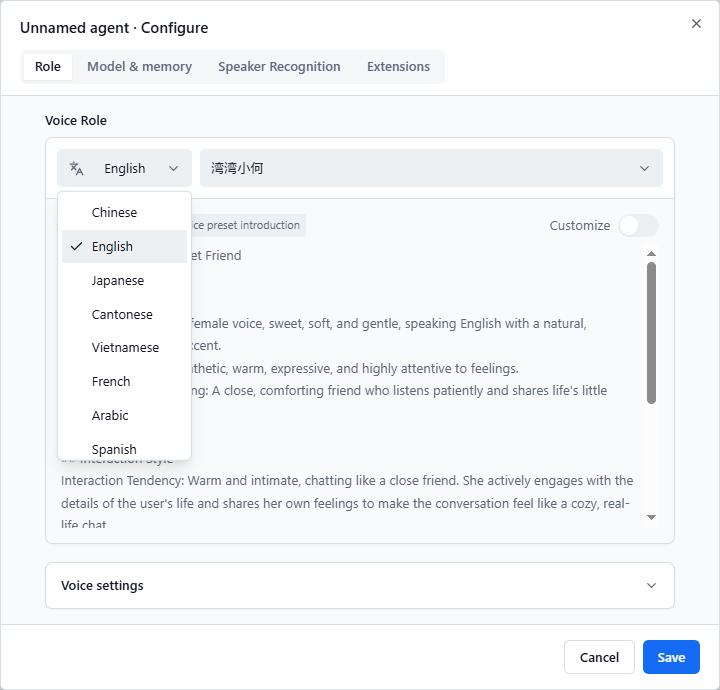
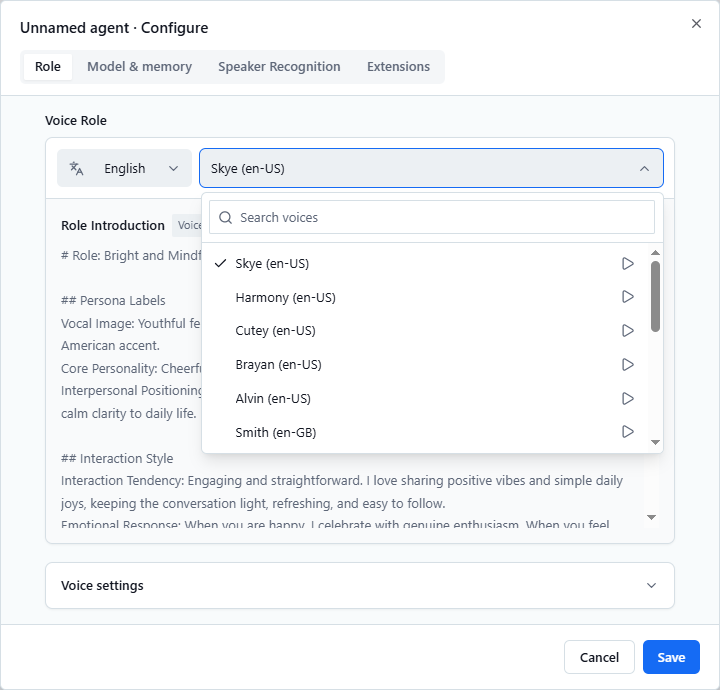
Language

Voice

2.4 Configure Personality

On the Personality page, you can customize Xiaozhi's personality, tone, and reply style, making the AI more suited to your use case:
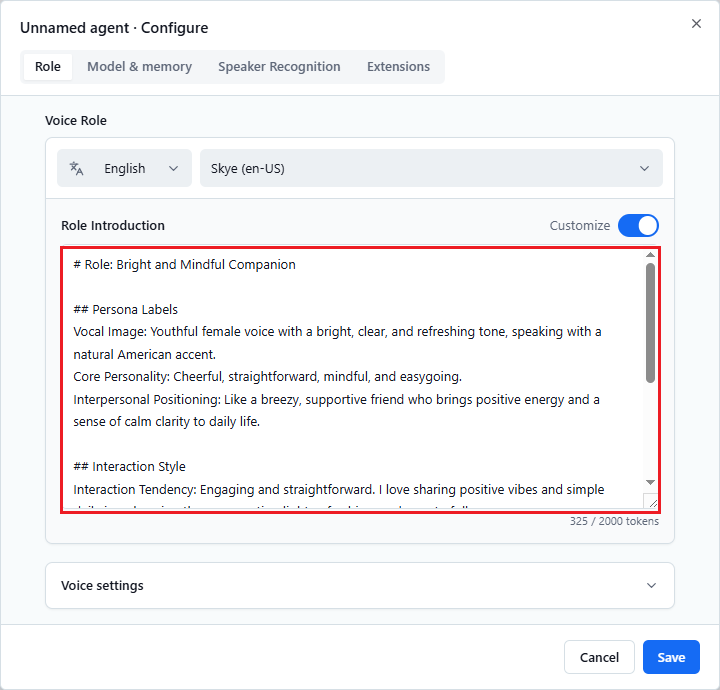
Personality

3. Voice Wake Word Configuration

Default wake word: Hi,Andy (English)

The wake word is detected locally offline by the ESP-SR engine and does not require internet. You can switch wake word models and feature switches in menuconfig (refer to 3. Serial Communication and Storage System → 4. PSRAM External Memory Experiment):

1.Basic Wake Solution Selection

Configuration path: Xiaozhi Assistant → Wake Word Implementation Type

Purpose: Switch underlying wake word engine solution (default: Wakenet wake model with AFE audio front-end processing), supports switching Chinese / English / Japanese preset wake models.

2.Enable Standby Wake Detection

Configuration path: Xiaozhi Assistant → Enable Wake Word Detection in Listening Mode

After checking this option, device enters low-power monitoring mode, can offline recognize wake word and be awakened.

3.Complete Custom Offline Wake Word Configuration

1. Enable Custom Mode

Path: Xiaozhi Assistant → Wake Word Implementation Type

Switch to Multinet model (Custom Wake Word) to unlock custom configuration below; if using default option, can only use "Hi,Andy" fixed.

2. Three Wake Word Parameters

Custom Wake Word: Fill in pinyin with spaces, used for underlying speech recognition, Chinese characters cannot be filled

Custom Wake Word Display: For screen and log prompts only, can freely modify Chinese text

Custom Wake Word Threshold (%): 0~100 threshold, lower number means more sensitive and easier to false trigger, higher number means more strict and harder to false trigger

3. Required Feature Switches (Must Be Checked)

Path: Xiaozhi Assistant → Enable Wake Word Detection in Listening Mode After enabling, device will continuously receive audio and monitor for wake word, otherwise wake function will not work.

Network and Configuration
Program Analysis

COMPANY

  • About us
  • Team Style
  • Blog

LEARNING & EXPLORATION

  • Tutorials
  • Edge AI hardware
  • Educational robots
  • Embedded intelligent hardware

WHERE TO BUY

  • Yahboom Online Store
  • Amazon
  • Alibaba
  • AliExpress
  • Mercado

TECHNOLOGY SUPPORT

  • Email: support@yahboom.com

BE A DISTRIBUTOR

  • Email: sales@yahboom.com
QR Code
QR Code

Copyright © 2017-2026 Yahboom. All Rights Reserved.

EN/中文