Welcome to ESP32 Core Board repository
9. HTTP Server Experiment
HTTP Server Experiment
HTTP Server Experiment1. HTTP Server Overview2. Core Concepts2.1 HTTP Request Parsing2.2 HTTP Response Construction2.3 Configuration Parameters3. Hardware Dependencies4. Project Architecture and Flow5. Source Code Explained5.1 Main Program6. Operating Procedures6.1 Flashing and Running6.2 Serial Output Example6.3 Expected Results6.4 Verification Methods6.5 Postman Testing7. Common Problems
1. HTTP Server Overview
This experiment runs a simple HTTP server on the ESP32-S3; a PC browser accessing http://<ESP32_IP> shows a device information page. The server accepts one connection, returns HTML, and exits.
Typical application scenarios:
| Application Type | Example |
|---|---|
| Web provisioning | Phone connects to ESP32 hotspot -> enter IP in browser -> provision via web page |
| Device management panel | Browser views sensor data, controls relays |
| REST API | Other devices call the ESP32 API over HTTP |
2. Core Concepts
2.1 HTTP Request Parsing
GET / HTTP/1.1\r\nHost: 192.168.1.105\r\nAccept: */*\r\n\r\n
The server parses three parts: request line (method + path) -> headers -> blank line.
2.2 HTTP Response Construction
xxxxxxxxxxresp = f"HTTP/1.1 200 OK\r\n" \ f"Content-Type: text/html; charset=utf-8\r\n" \ f"Content-Length: {len(body)}\r\n" \ f"Connection: close\r\n\r\n{body}"Status line + Content-Type + Content-Length + blank line separator + response body.
2.3 Configuration Parameters
| Parameter | Description | Value Used in This Experiment |
|---|---|---|
| LISTEN_PORT | ESP32 listen port | 80 |
3. Hardware Dependencies
The ESP32-S3 has built-in WiFi. The client only needs a browser on the same LAN as the ESP32-S3.
4. Project Architecture and Flow
xxxxxxxxxxScript execution (single-file .py)||- wifi_connect(): connect to WiFi (STA mode)|- create Server socket -> bind(80) -> listen(3)||- while True:|- accept(): block waiting for browser connection|- recv(): read the request|- print the request line|- construct HTML (with real-time memory/runtime)|- sendall(): return the response|- close() -> continue waiting for the next one
5. Source Code Explained
Full source code: Source Code -> MicroPython -> 4.Network Protocols -> HTTP_Server -> HTTP_Server.py
5.1 Main Program
bind(80) -> listen(3) -> while True loop -> accept() blocks waiting for a browser connection -> read the request -> print the request line -> construct HTML with real-time memory data -> sendall returns -> close -> continue waiting for the next one.
xdef main(): wlan = wifi_connect(WIFI_SSID, WIFI_PASS) # connect to WiFi server = socket.socket(socket.AF_INET, socket.SOCK_STREAM) # TCP socket server.bind(("0.0.0.0", LISTEN_PORT)) # bind port 80 server.listen(3) # start listening ip = wlan.ifconfig()[0] print(f"[HTTP] Server: http://{ip}:{LISTEN_PORT}/") print("Press Ctrl+C to stop") while True: conn, addr = server.accept() # block until accept print(f"[TCP] New connection: {addr[0]}:{addr[1]}") raw = conn.recv(4096).decode("utf-8") # read request if raw: print(f"[HTTP] {raw.split(chr(13))[0]}") # print request line free = gc.mem_free() # free heap total = gc.mem_alloc() + free # total heap body = f"""\<html><head><meta charset="utf-8"><title>ESP32-S3</title></head><body><h1>ESP32-S3 HTTP Server</h1><p>Free Memory: {free / 1024:.0f} KB</p><p>Total Memory: {total / 1024:.0f} KB</p><p>Uptime: {time.ticks_ms() / 1000:.0f}s</p></body></html>""" resp = f"HTTP/1.1 200 OK\r\nContent-Type: text/html; charset=utf-8\r\nContent-Length: {len(body)}\r\nConnection: close\r\n\r\n{body}" conn.sendall(resp.encode("utf-8")) # send response print(f"[HTTP] 200 {len(body)} bytes") conn.close() gc.collect() # collect garbage6. Operating Procedures
6.1 Flashing and Running
Thonny IDE steps: See MicroPython -> 1. Before Development -> 3.Thonny IDE.
Modify
WIFI_SSID/WIFI_PASS
Run
HTTP_Server.pyand note the address printed on the serial port
Open
http://<ESP32_IP>/in a browser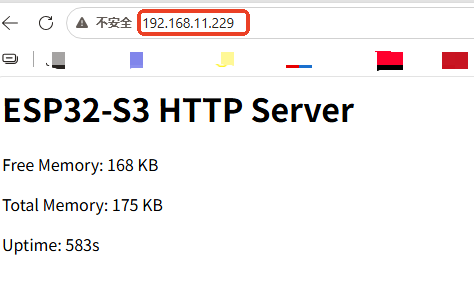
6.2 Serial Output Example
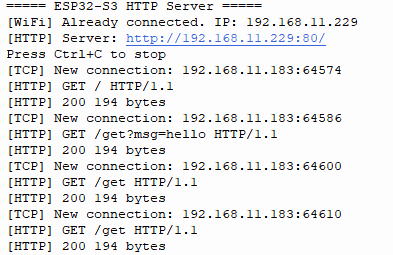
xxxxxxxxxx===== ESP32-S3 HTTP Server =====[WiFi] Already connected. IP: 192.168.11.229[HTTP] Server: http://192.168.11.229:80/Press Ctrl+C to stop[TCP] New connection: 192.168.11.183:64574[HTTP] GET / HTTP/1.1[HTTP] 200 194 bytes[TCP] New connection: 192.168.11.183:64586[HTTP] GET /get?msg=hello HTTP/1.1[HTTP] 200 194 bytes
6.3 Expected Results
After opening the browser, the ESP32-S3 device information and real-time memory data are displayed. Refreshing the page multiple times always shows updated memory data.
6.4 Verification Methods
Browser accesses http://<IP>/ | Displays an HTML page with memory/runtime |
|---|---|
| Refresh the browser multiple times | Returns the latest real-time data each time |
Ctrl+C to stop | The server shuts down |
6.5 Postman Testing
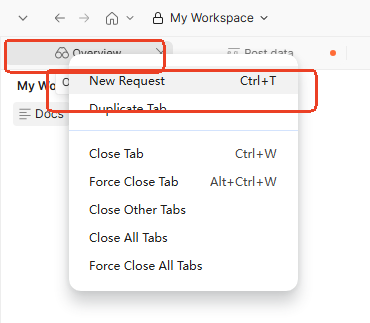
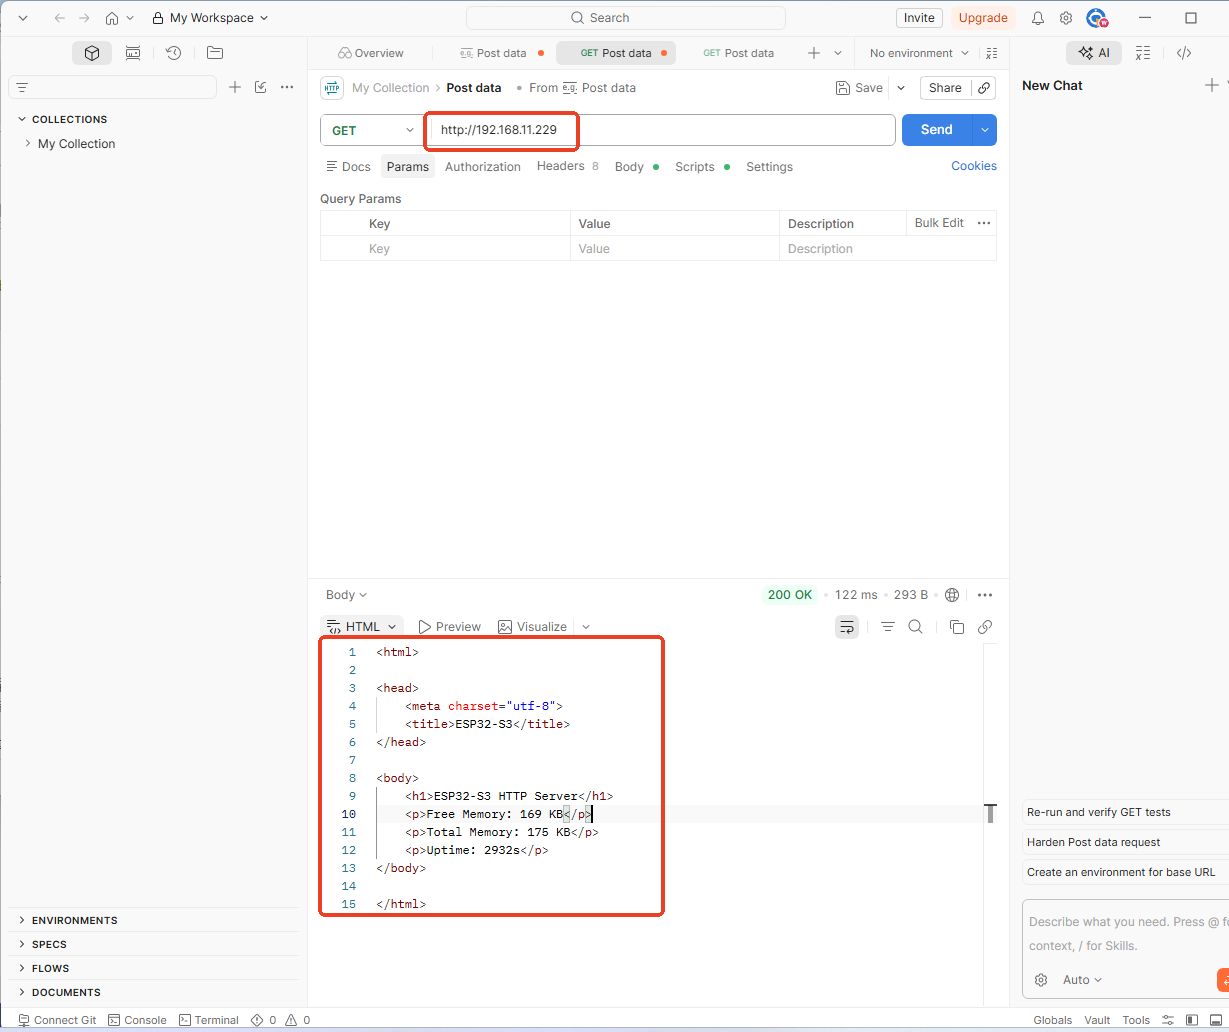
Start Postman  create a GET request, and enter the ESP32's IP and port in the URL:
GET http://<ESP32_IP>/ -> returns
xxxxxxxxxx<html><head><meta charset="utf-8"><title>ESP32-S3</title></head><body><h1>ESP32-S3 HTTP Server</h1><p>Free Memory: 169 KB</p><p>Total Memory: 175 KB</p><p>Uptime: 2094s</p></body></html>
7. Common Problems
| Symptom | Cause | Solution |
|---|---|---|
| Browser cannot open the page | Port 80 occupied or firewall blocking | Ensure the ESP32 and PC are on the same LAN |
| Garbled page | charset=utf-8 not set | The response Content-Type already includes charset=utf-8 |