Welcome to ESP32 Core Board repository
1. Environment Setup
Environment Setup — MicroPython (ESP32-S3)
Environment Setup — MicroPython (ESP32-S3)1. Overview2. Preparation2.1 Hardware Requirements2.2 Items to Download3. Install the CH340 Driver3.1 Check Whether the Driver Is Installed3.2 Download the Driver3.3 Installation Steps3.4 Verification4. Flash the MicroPython Firmware4.1 Download the Firmware4.2 Install esptool4.3 Erase Flash4.4 Flash the Firmware5. Install Thonny IDE5.1 Installation Steps5.2 Connect the ESP32-S36. Verification and the First Program6.1 REPL Interaction Verification6.2 Run the First Script6.3 File Management7. Install Commonly Used Libraries7.1 Online Installation via mip7.2 Manually Upload .py Files8. Common Problems
1. Overview
MicroPython is a streamlined implementation of Python 3 designed for microcontrollers. It can run .py scripts directly on the ESP32-S3 without compilation, making it well suited for rapid prototyping and teaching demonstrations.
This tutorial sets up the MicroPython development environment for the ESP32-S3 on Windows, in three steps:
Flash the MicroPython firmware — Write the
.binfirmware into the ESP32-S3 FlashInstall Thonny IDE — A lightweight Python IDE with built-in MicroPython REPL support
Verify REPL interaction — Interact with the ESP32-S3 in real time through the REPL console
The MicroPython firmware is essentially a complete Python interpreter plus a set of hardware drivers. After flashing, the ESP32-S3 enters REPL mode on power-up, and you can type Python statements directly over the serial port to execute them.
2. Preparation
2.1 Hardware Requirements
| Item | Requirement |
|---|---|
| Operating System | Windows 10 / 11 (64-bit) |
| Disk Space | ≥ 500 MB (Thonny IDE + firmware files + project scripts) |
| Memory | ≥ 4 GB |
| USB Port | At least 1 USB-A / USB-C port (to connect the development board) |
| Network | Access to micropython.org (to download the firmware) |
2.2 Items to Download
| File | Description | Download Address |
|---|---|---|
| MicroPython firmware | .bin firmware for the ESP32-S3 | https://micropython.org/download/ESP32_GENERIC_S3/ |
| Thonny IDE installer | Python IDE (with MicroPython support) | 6.Software Tools → thonny |
The esptool flashing tool is installed online via
pip; no manual download is needed.
3. Install the CH340 Driver
The ESP32-S3 development board communicates with the computer through a USB-to-serial chip. Most boards use the CH340 series chip, whose driver is not included in Windows by default and must be installed manually.
3.1 Check Whether the Driver Is Installed
Connect the board's COM port to the computer with a USB data cable
Right-click Start Menu → Device Manager → expand Ports (COM & LPT)
Check the list:
| Condition | Status | Action |
|---|---|---|
COMx appears (no exclamation mark) | Driver ready | Skip this section |
| A device with a yellow exclamation mark appears | Driver missing | Continue installing |
| No new device appears | USB cable / port issue | Replace the data cable or USB port |
3.2 Download the Driver
Home - Nanjing Qinheng Microelectronics Co., Ltd. → download the latest CH340SER.EXE (compatible with the CH340 series).
You can also search for "WCH CH340 driver" and download it from the official website. The board used in this tutorial uses the CH340K chip; the installer is about 300 KB.
3.3 Installation Steps
Double-click
CH341SER.EXEClick INSTALL
After installation completes, the prompt "Driver install success!" appears
Re-plug the board's USB cable
3.4 Verification
Go back to Device Manager → Ports (COM & LPT), you should see:
USB-SERIAL CH340 (COM3)
Note down the port number (e.g., COM3); you will need to select it later when flashing the firmware and connecting Thonny.
4. Flash the MicroPython Firmware
4.1 Download the Firmware
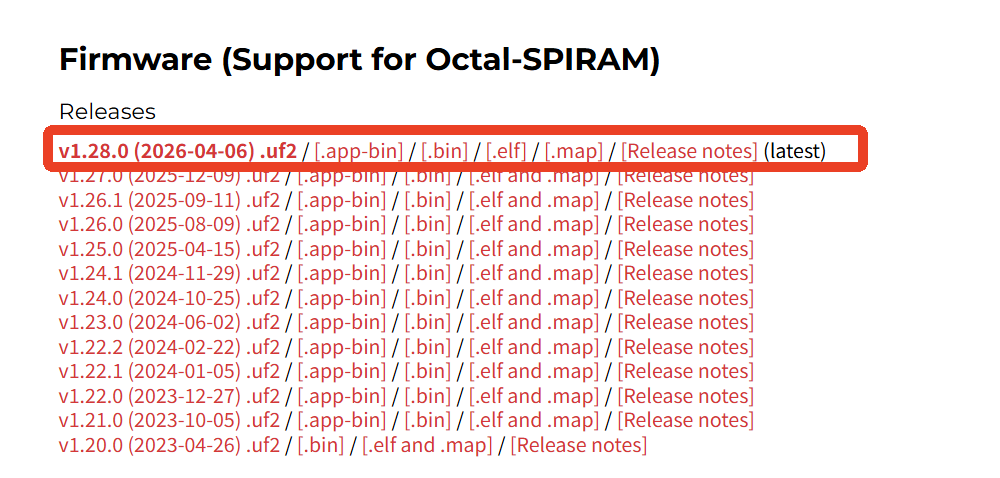
Open the MicroPython ESP32-S3 download page
Download the latest Stable version of the
.binfile (e.g.,ESP32_GENERIC_S3-SPIRAM_OCT-20260406-v1.28.0.bin)
| Firmware Type | Applicable Condition |
|---|---|
ESP32_GENERIC_S3 | Flash ≥ 8MB, no PSRAM or PSRAM ≤ 2MB |
ESP32_GENERIC_S3_SPIRAM | With PSRAM (≥ 8MB), such as the ESP32-S3 N16R8 used in this tutorial |
The board used in this tutorial is the ESP32-S3 N16R8 (16MB Flash + 8MB PSRAM); select the
GENERIC_S3_SPIRAMfirmware.
4.2 Install esptool
esptool is Espressif's official Flash flashing tool, installed via Python's pip:
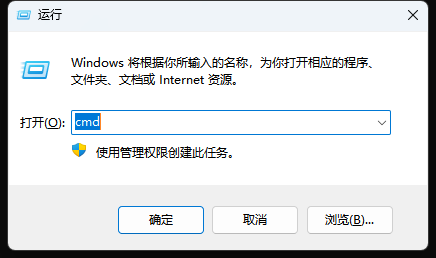
Open CMD (Win+R)
Download esptool
xxxxxxxxxxpython -m pip install esptool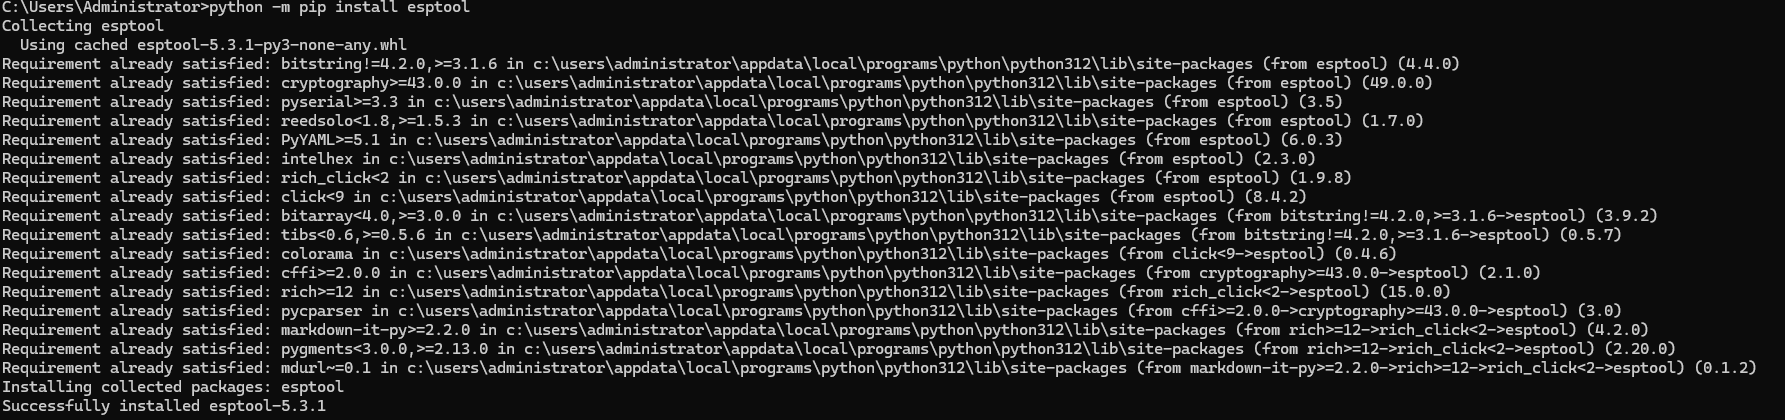
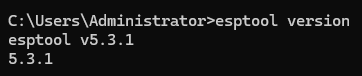
Verify the installation:
xxxxxxxxxxesptool versionIf you get a message that
esptoolis not recognized, install Python 3 (≥ 3.8) first and check "Add Python to PATH", then runpip install esptoolagain.
4.3 Erase Flash
Before flashing, erase the entire Flash first to avoid interference from old data:
xxxxxxxxxxesptool --chip esp32s3 --port COM3 erase-flashReplace
COM3with your actual port number. The erase process takes about 30 seconds to 2 minutes; wait for the promptChip erase completed successfully.
4.4 Flash the Firmware
You need the path to the downloaded firmware, for example: D:\Micropython\ESP32_GENERIC_S3-SPIRAM_OCT-20260406-v1.28.0.bin.
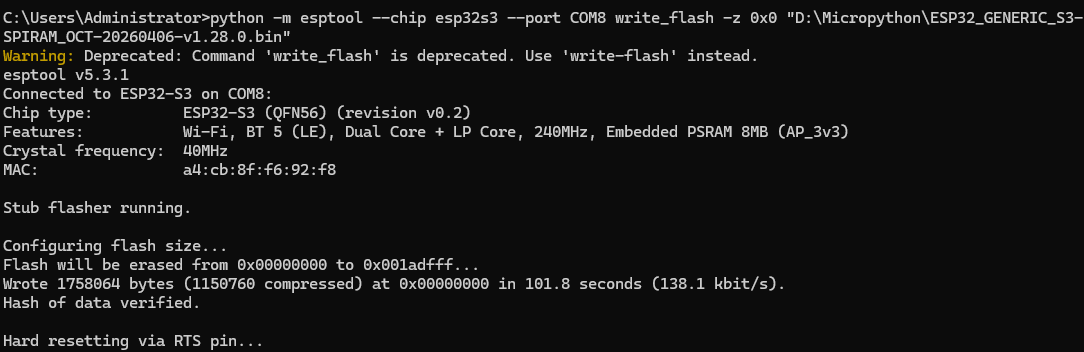
xxxxxxxxxxpython -m esptool --chip esp32s3 --port COM8 write_flash -z 0x0 "D:\Micropython\ESP32_GENERIC_S3-SPIRAM_OCT-20260406-v1.28.0.bin"| Parameter | Description |
|---|---|
--chip esp32s3 | Target chip model |
--port COM8 | Serial port number (replace with your actual port) |
write-flash | Write to Flash |
-z 0x0 | Firmware start address (ESP32-S3 starts at 0x0) |
After a successful flash, the output looks similar to:
xConnected to ESP32-S3 on COM8:Chip type: ESP32-S3 (QFN56) (revision v0.2)Features: Wi-Fi, BT 5 (LE), Dual Core + LP Core, 240MHz, Embedded PSRAM 8MB (AP_3v3)Crystal frequency: 40MHzMAC: a4:cb:8f:f6:92:f8Stub flasher running.Configuring flash size...Flash will be erased from 0x00000000 to 0x001adfff...Wrote 1758064 bytes (1150760 compressed) at 0x00000000 in 101.8 seconds (138.1 kbit/s).Hash of data verified.Hard resetting via RTS pin...
If flashing fails with "Timed out waiting for packet header", you need to enter download mode manually: Hold the BOOT key → press the RST key → release BOOT, then retry the flash command.
5. Install Thonny IDE
Thonny is a Python IDE designed for beginners, with built-in MicroPython REPL support and a file manager, requiring no additional plugin configuration.
5.1 Installation Steps
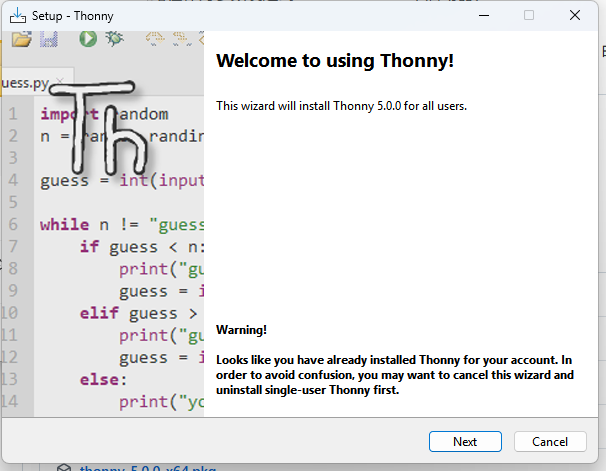
Double-click the Thonny installer (e.g.,
thonny-5.0.0-x64.exe)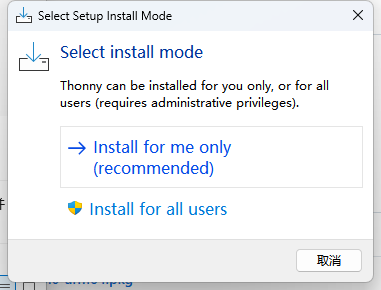
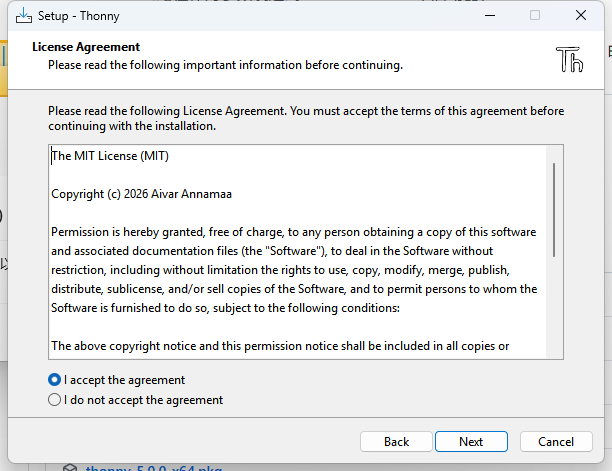
Click Next, read the license agreement, check I accept the agreement, click Next
Select the installation path (keeping the default is recommended), click Next
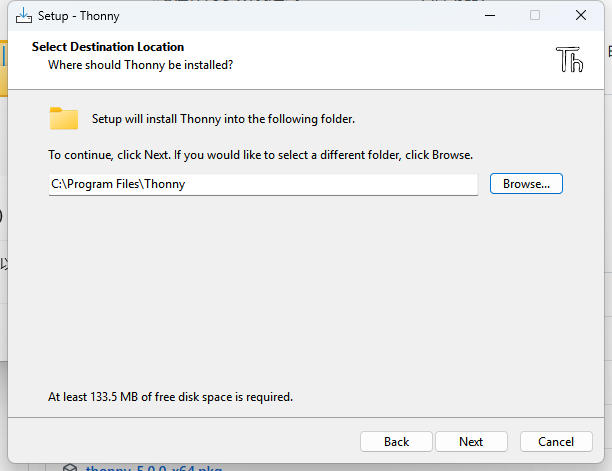
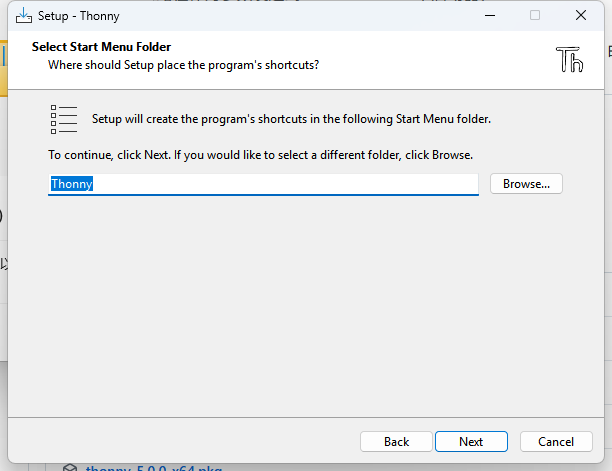
Select the Start Menu folder, click Next
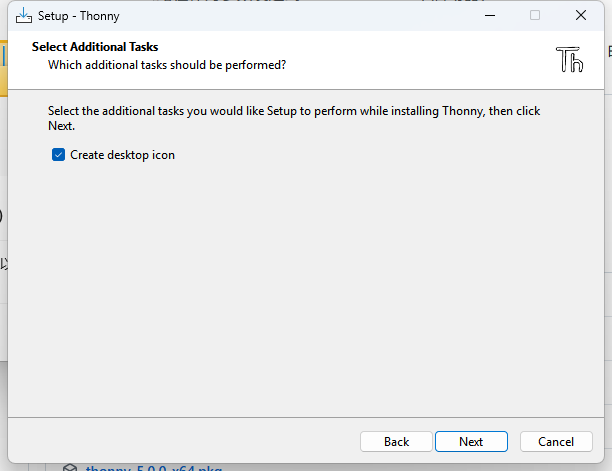
Check Create desktop icon, click Next
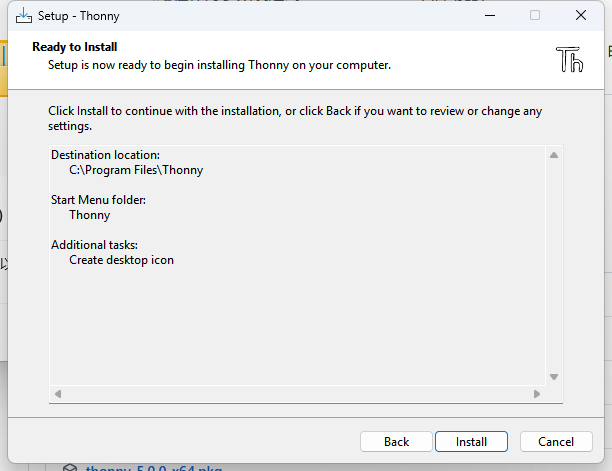
Click Install, wait for the installation to complete, click Finish
On first launch, you can choose the language as Simplified Chinese or keep English
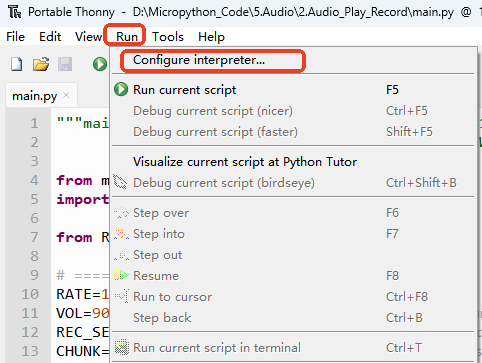
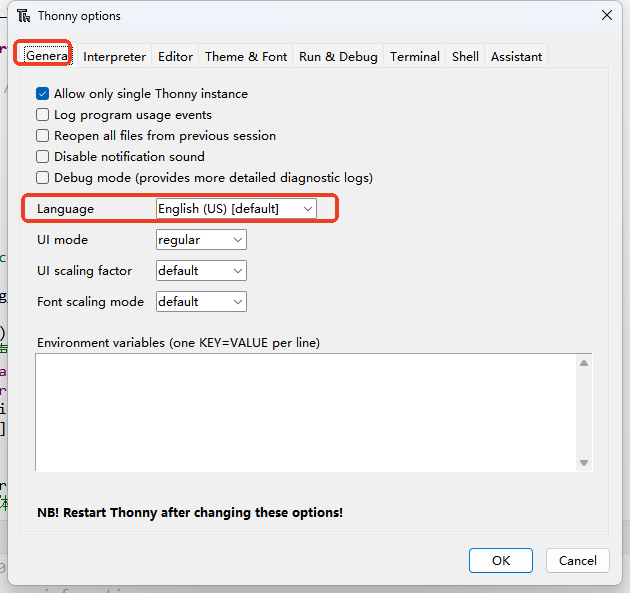
5.2 Connect the ESP32-S3
Connect the ESP32-S3 to the computer with a USB data cable
Open Thonny IDE and click the interpreter selection area in the bottom-right corner
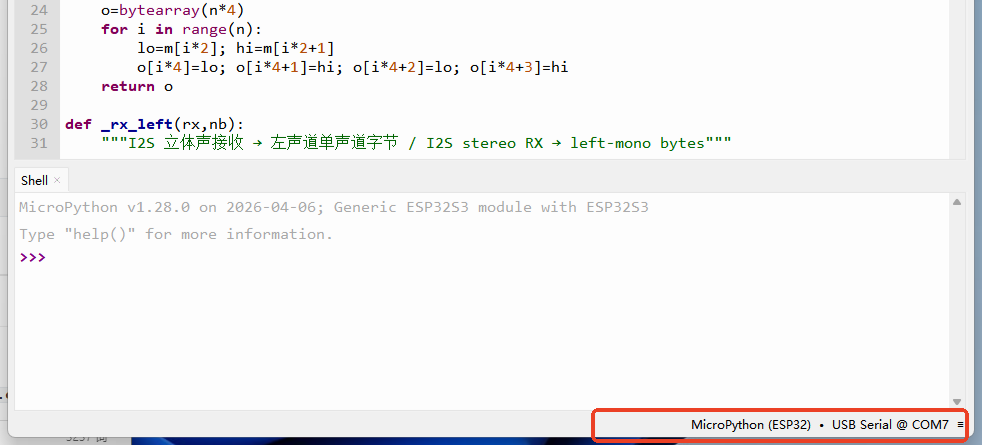
In the pop-up menu, select MicroPython (ESP32)
In the Port dropdown below, select the COM port corresponding to the ESP32-S3
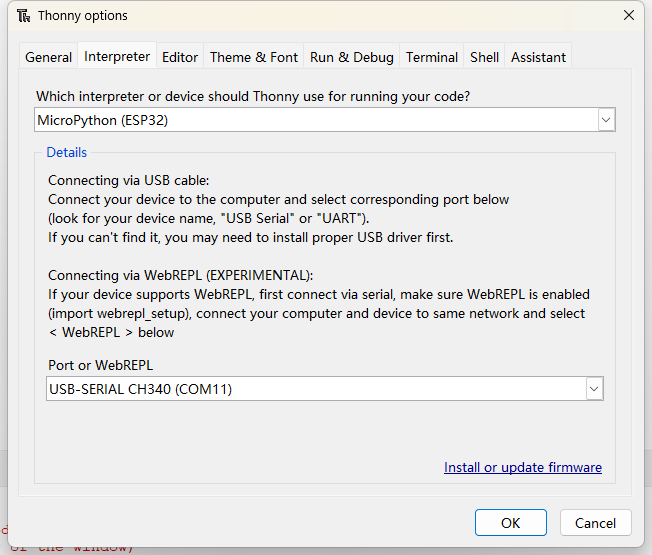
Click OK to confirm
Indicator of a successful connection: the Shell panel at the bottom shows the MicroPython REPL prompt:
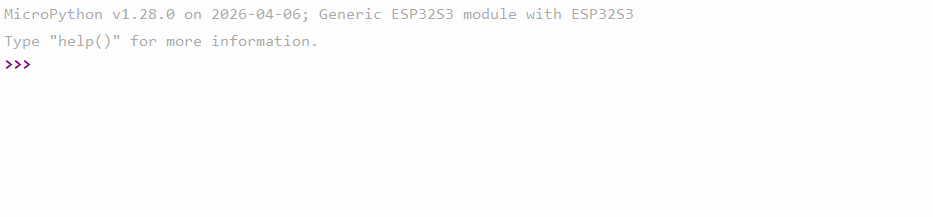
xxxxxxxxxxMicroPython v1.28.0 on 2026-04-06; Generic ESP32S3 module with ESP32S3Type "help()" for more information.>>>
If the Shell does not respond, press the RST key on the board to reset, or press
Ctrl + Din the Shell panel for a soft reset.
6. Verification and the First Program
6.1 REPL Interaction Verification
Type Python statements directly after the >>> prompt and press Enter to execute:
xxxxxxxxxx>>> print("Hello ESP32-S3")Hello ESP32-S3
>>> import machine    machine.freq()240000000
>>> import esp    esp.flash_size()16777216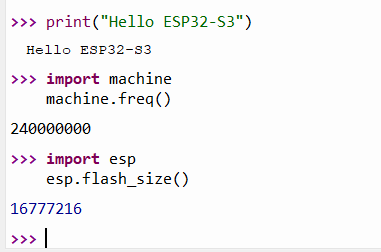
print("Hello ESP32-S3")— verifies basic Python executionmachine.freq()— queries the CPU frequency (240MHz by default)esp.flash_size()— queries the Flash capacity (16MB = 16777216 bytes)
REPL (Read-Eval-Print Loop) is MicroPython's interactive console. Each line of code is interpreted and executed immediately, making it very suitable for quickly testing peripherals and debugging.
6.2 Run the First Script
Enter the following code in the Thonny editor area:
xxxxxxxxxximport machineimport timeled = machine.Pin(44, machine.Pin.OUT)while True:led.value(1)time.sleep(0.5)led.value(0)time.sleep(0.5)Click Run on the toolbar (the green ▶ button) or press
F5A save dialog pops up; select MicroPython device, enter a file name (e.g.,
blink.py), click OKThe script is uploaded to the ESP32 and runs automatically; the on-board LED starts blinking at 0.5s intervals
Selecting MicroPython device saves the
.pyfile to the ESP32-S3's Flash file system, which survives power loss. Selecting This computer only saves it locally.
6.3 File Management
Thonny has a built-in file manager, so you can manage files on the ESP32 without extra tools:
Click View on the menu bar → check Files
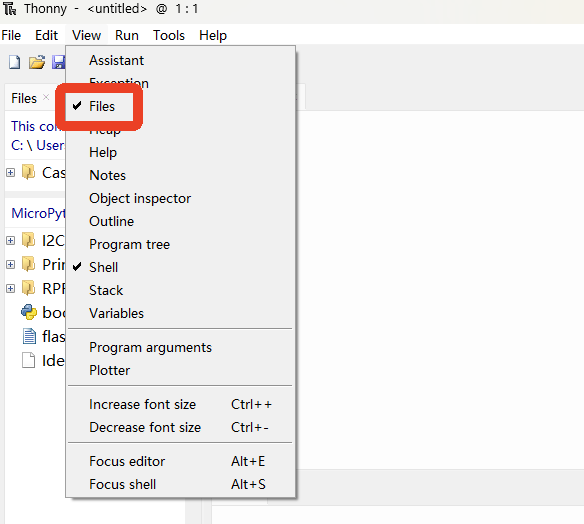
The left panel automatically shows the file management area:
Panel Path Description This computer Local hard drive Where local .pyfiles and firmware files are storedMicroPython device /flashESP32-S3's internal file system (survives power loss) 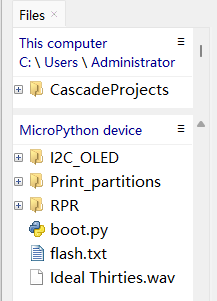
Common operations:
Upload: right-click a local file → Upload to / → copy to the ESP32
Download: right-click a device file → Download to / → copy back to the computer
Delete: right-click a device file → Delete
When the ESP32-S3 is powered on, it automatically executes
/flash/boot.py(if present) and then/flash/main.py(if present). Naming your startup scriptmain.pymakes it run automatically on power-up.
7. Install Commonly Used Libraries
MicroPython uses the mip package manager to install third-party libraries; pip is not needed.
7.1 Online Installation via mip
In the Thonny Shell (REPL), run:
xxxxxxxxxx>>> import mip>>> mip.install("umqtt.simple") # MQTT client>>> mip.install("urequests") # HTTP clientCommonly used MicroPython libraries:
| Library | Purpose | Later Experiment |
|---|---|---|
umqtt.simple | MQTT client | MQTT communication experiment |
urequests | HTTP client (requests-like) | HTTP client experiment |
ssd1306 | SSD1306 OLED driver (I2C/SPI) | I2C OLED display experiment |
neopixel | WS2812 RGB LED driver | RGB colorful light experiment |
miprequires the ESP32 to be connected to Wi-Fi. Built-in firmware libraries (machine,time,network,socket, etc.) need no installation; justimportthem directly.
7.2 Manually Upload .py Files
In an offline environment, you can download .py source files from MicroPython Libs and upload them to the device's /flash/lib/ directory with the Thonny file manager:
Download the
.pyfile of the target library to your computerCreate the
/flash/lib/directory in the Thonny device panel (if it does not exist)Right-click the
.pyfile → Upload to /flash/lib/
importfollows the standard Python path search rules: the device'slib/directory is insys.path, so a directimportwill find it.
8. Common Problems
| Symptom | Cause | Solution |
|---|---|---|
| Flash fails with "Timed out waiting for packet header" | The chip did not enter download mode | Hold the BOOT key → press the EN key → release BOOT, retry flashing |
| Flash succeeds but REPL does not respond | Firmware does not match the chip | Make sure you downloaded an ESP32_GENERIC_S3 series firmware, not ESP32_GENERIC (without S3) |
import machine reports no module named 'machine' | Still using the local Python interpreter | Make sure the interpreter at the bottom-right of Thonny is set to MicroPython (ESP32) |
| Thonny cannot see the COM port | Missing driver, or the data cable does not support data transfer | Reinstall the CH340 driver; replace with a USB cable that supports data transfer |
| Garbled REPL output | Baud rate mismatch | Check in Thonny's interpreter options that the baud rate is 115200 |
| Shell shows "busy" or freezes | The program is in an infinite loop occupying the REPL | Press Ctrl + C to interrupt the current program and return to the REPL |
mip.install reports "OSError: -202" | Wi-Fi not connected | Connect to Wi-Fi in the REPL first, then run mip |
| Device files lost | File system accidentally formatted | If the file system is corrupted, run import os; os.VfsLfs2.mkfs(bdev) to reformat; files cannot be recovered |
| Out of memory (MemoryError) | The program uses too much memory | Use gc.mem_free() to check the remaining memory; for large arrays, store them in a file and read them on demand |