Welcome to ROSMASTER M1 repository
3. First trial
First Trial
First Trial1. Connecting to the Robot1.1 SSH Connection1.2 VNC Login2. Network SwitchingJetson Main BoardCreate WiFiFill in WiFi InformationSet PriorityRestart to Take EffectVNC ConnectionRaspberry PiCreate WiFiFill in WiFi InformationSet PriorityRestart to Take EffectVNC ConnectionRDK X53. Modify Camera and LiDAR Models in ROS Environment
1. Connecting to the Robot
Recommended operation flow: Connect to robot hotspot/insert network cable to get IP → Check OLED screen IP → VNC login → Turn off auto hotspot, connect to your own WiFi (for convenient subsequent large model function operation) → Check OLED updated IP → Reconnect VNC
The default factory image hotspot name is: ROSMASTER-M1, password: 12345678, default IP: 192.168.1.11.
Regardless of which method you use to connect to the robot, both the computer and the robot need to be on the same local area network. The simplest condition to be on the same local area network is to connect to the same WiFi or hotspot. After successful connection, you can use the following methods to log in.
You can also directly connect a network cable to the main board. After connecting the network cable, the OLED screen will also automatically update the IP address. The following demonstrations will use the IP after connecting the network cable.
1.1 SSH Connection
We can use PuTTY, MobaXterm, or other SSH login tools to connect to the robot. Here we use PuTTY as an example. The PuTTY installation download address is: Download PuTTY: latest release (0.83)
Select and install according to your computer version. After successful installation, double-click to open. The PuTTY interface is shown in the figure below,
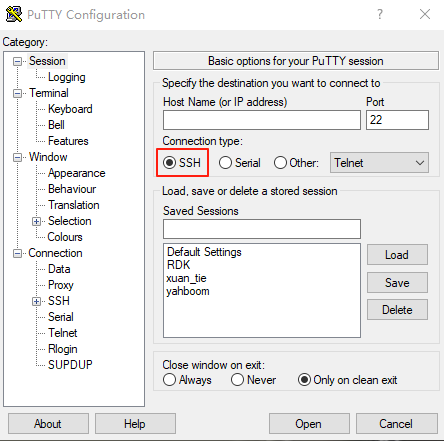
Here select SSH, then enter the IP address displayed on the OLED in the Host Name (or IP address) field. My IP address here is 192.168.2.92, so enter the IP address as shown below,
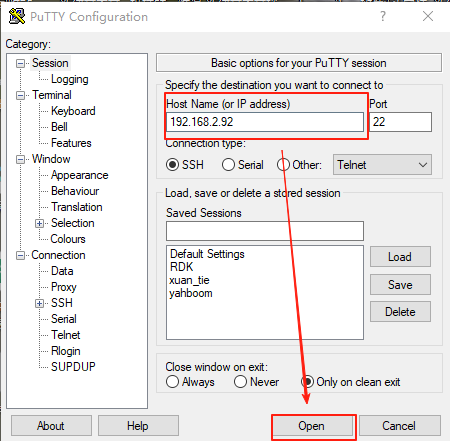
Then click Open, you will enter a terminal interface and a popup window. We click Accept to receive, as shown below,
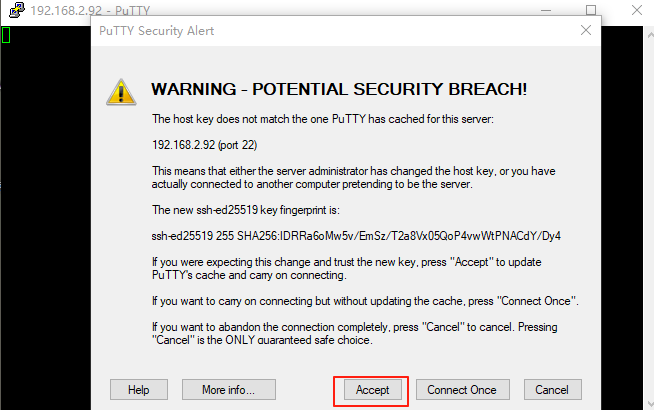
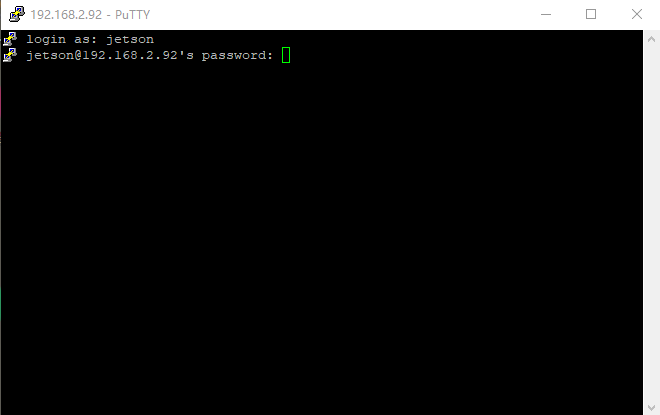
Then the terminal will display login as, here enter the username of the robot main board, then press Enter. Next it will prompt for password, then we enter the password. The usernames and passwords for each main board are as follows:
| Main Board | Username | Password |
|---|---|---|
| Raspberry Pi 5 | pi | yahboom |
| Jetson-Nano | jetson | yahboom |
| Orin-Nano | jetson | yahboom |
| RDK-X5 | sunrise | yahboom |
Assuming my main board here is Orin-Nano, then enter jetson, then press Enter, then enter the password. When entering the password, no content is displayed, enter yahboom, then press Enter.
The successfully connected robot interface is as follows,
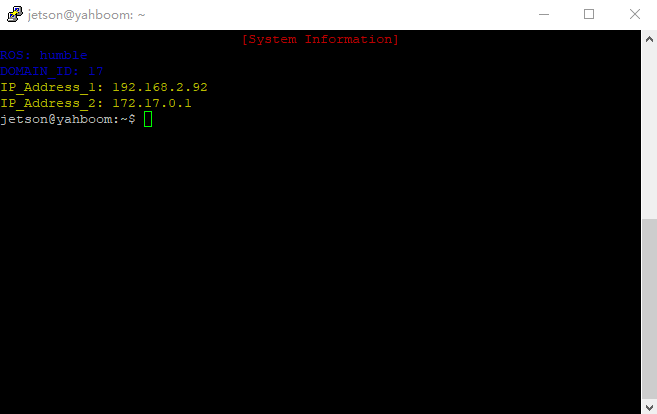
This will only open one terminal and cannot display the graphical interface, so SSH is suitable for logging in when not starting graphical programs.
1.2 VNC Login
VNC allows users to remotely access and control another computer's desktop environment over the network. So when we need to access the robot's desktop environment, such as when we want to start image display, we can use VNC to connect and log in to the robot. The VNC download address is: Download VNC Viewer by RealVNC®
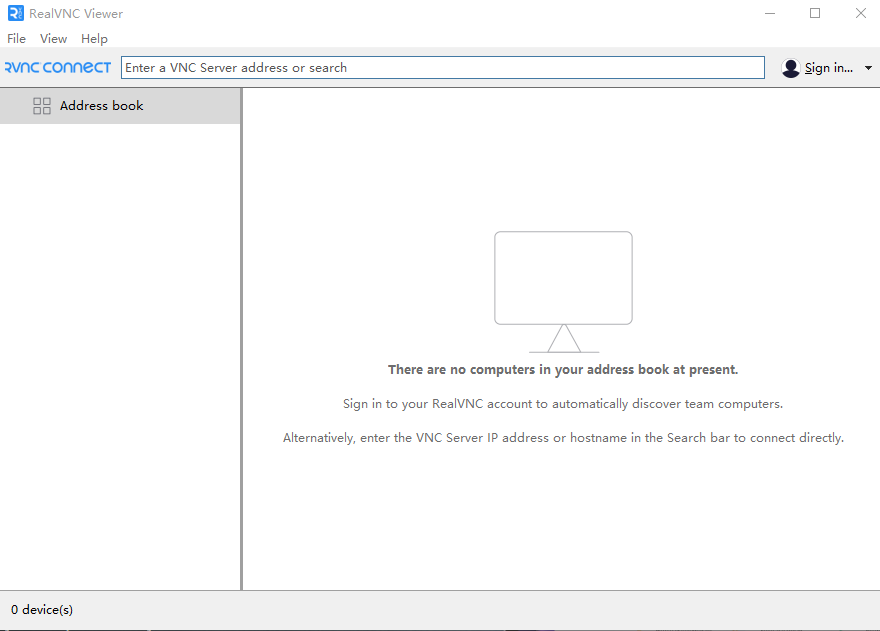
Download and install according to your computer version. After successful installation, double-click to open, the displayed screen is as follows,
Enter the robot's IP address. My IP address here is 192.168.2.92, as shown below,
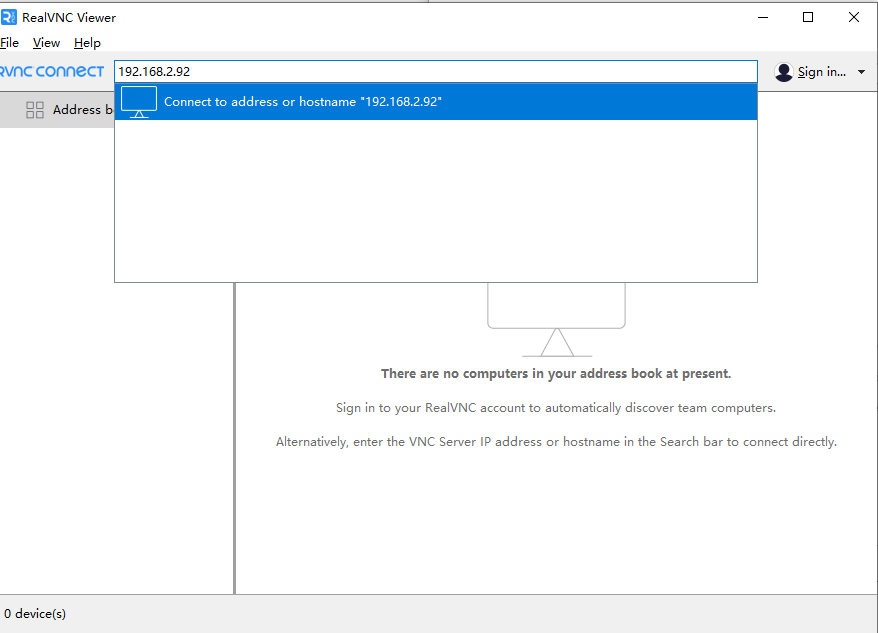
Then press Enter,
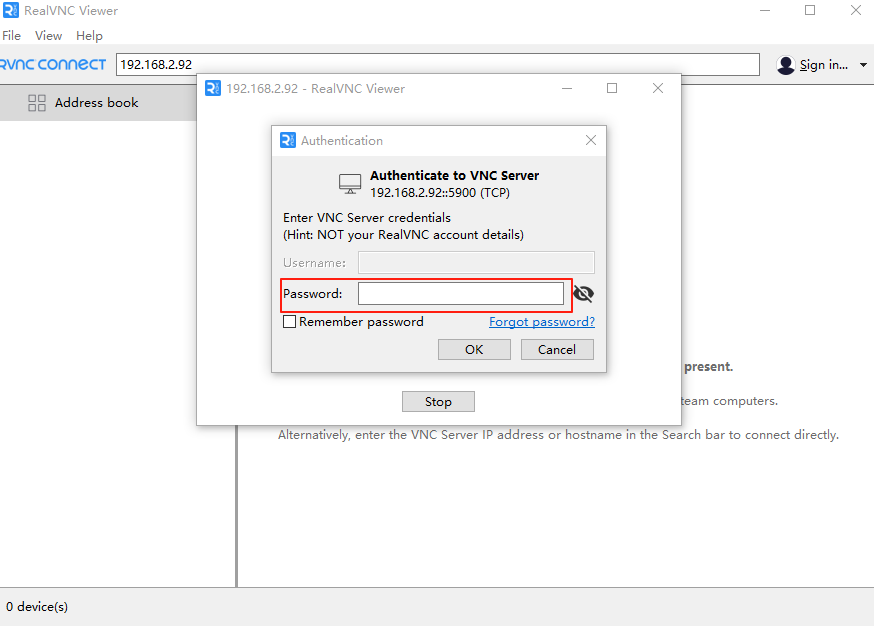
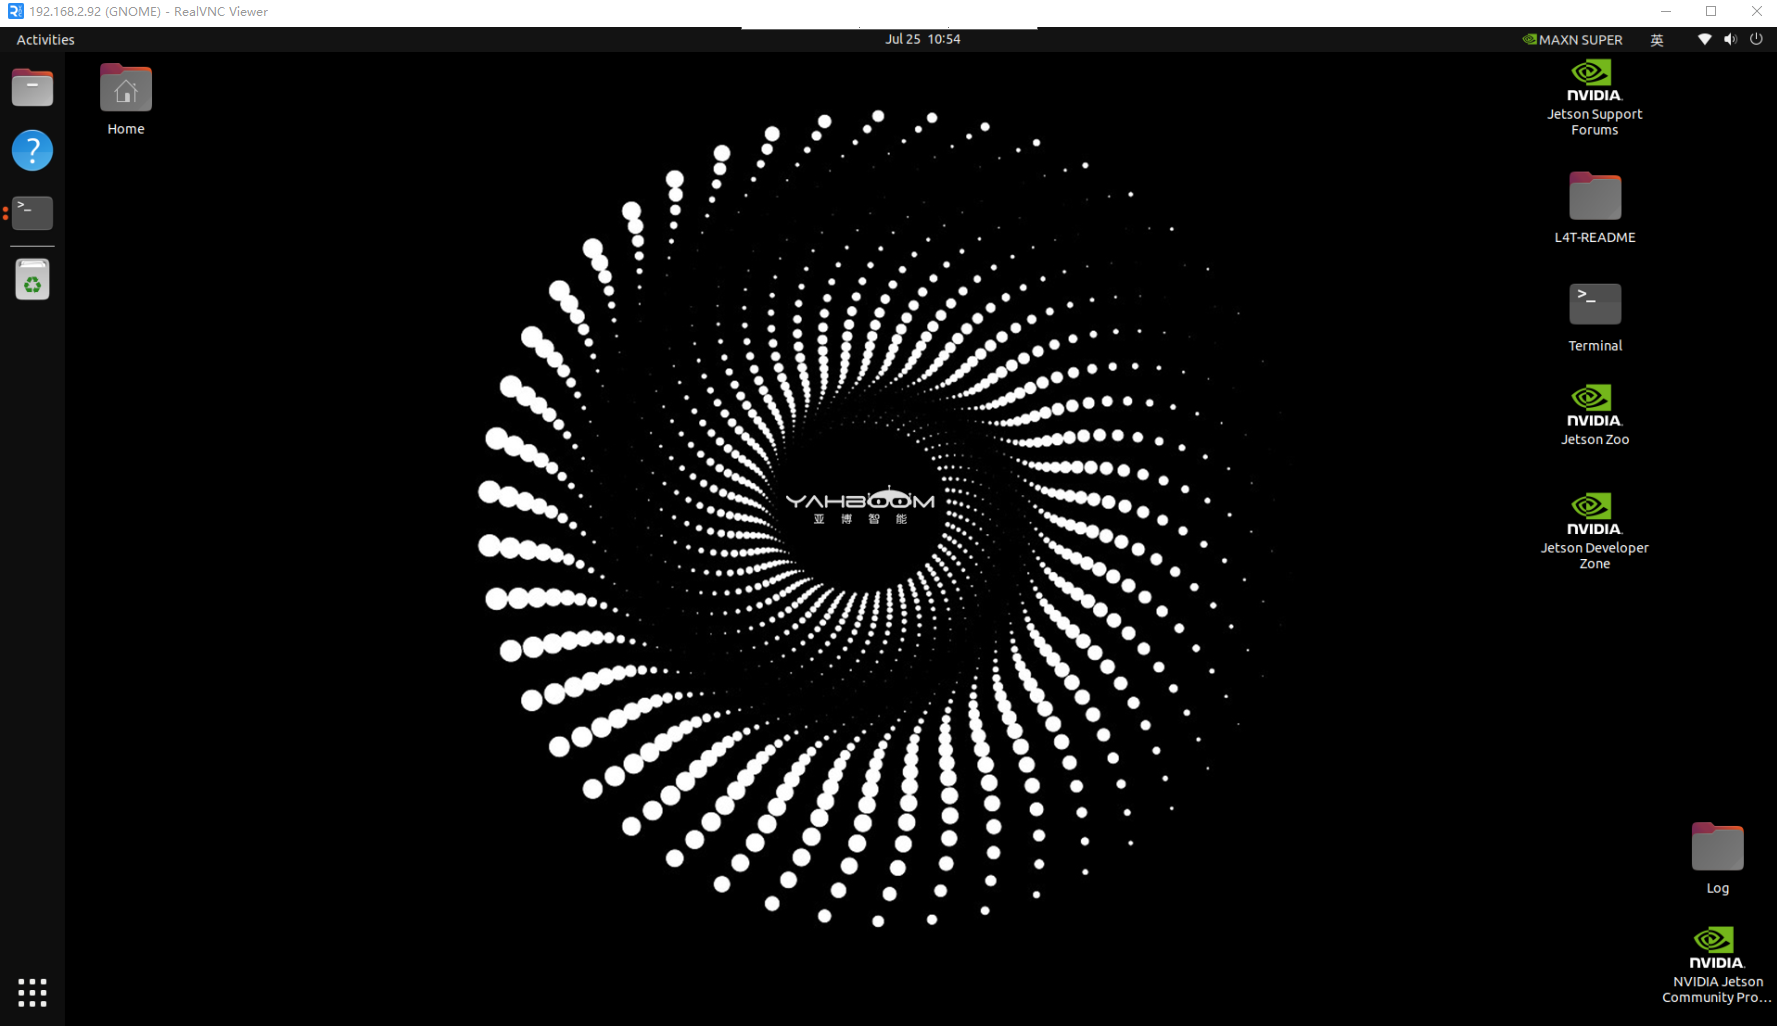
Enter the username in Username and password in Password. Refer to the table in 1.1. All main board passwords are yahboom. Then click OK, and you can enter the desktop as shown below,
If an abnormal screen is displayed, such as the following situation,
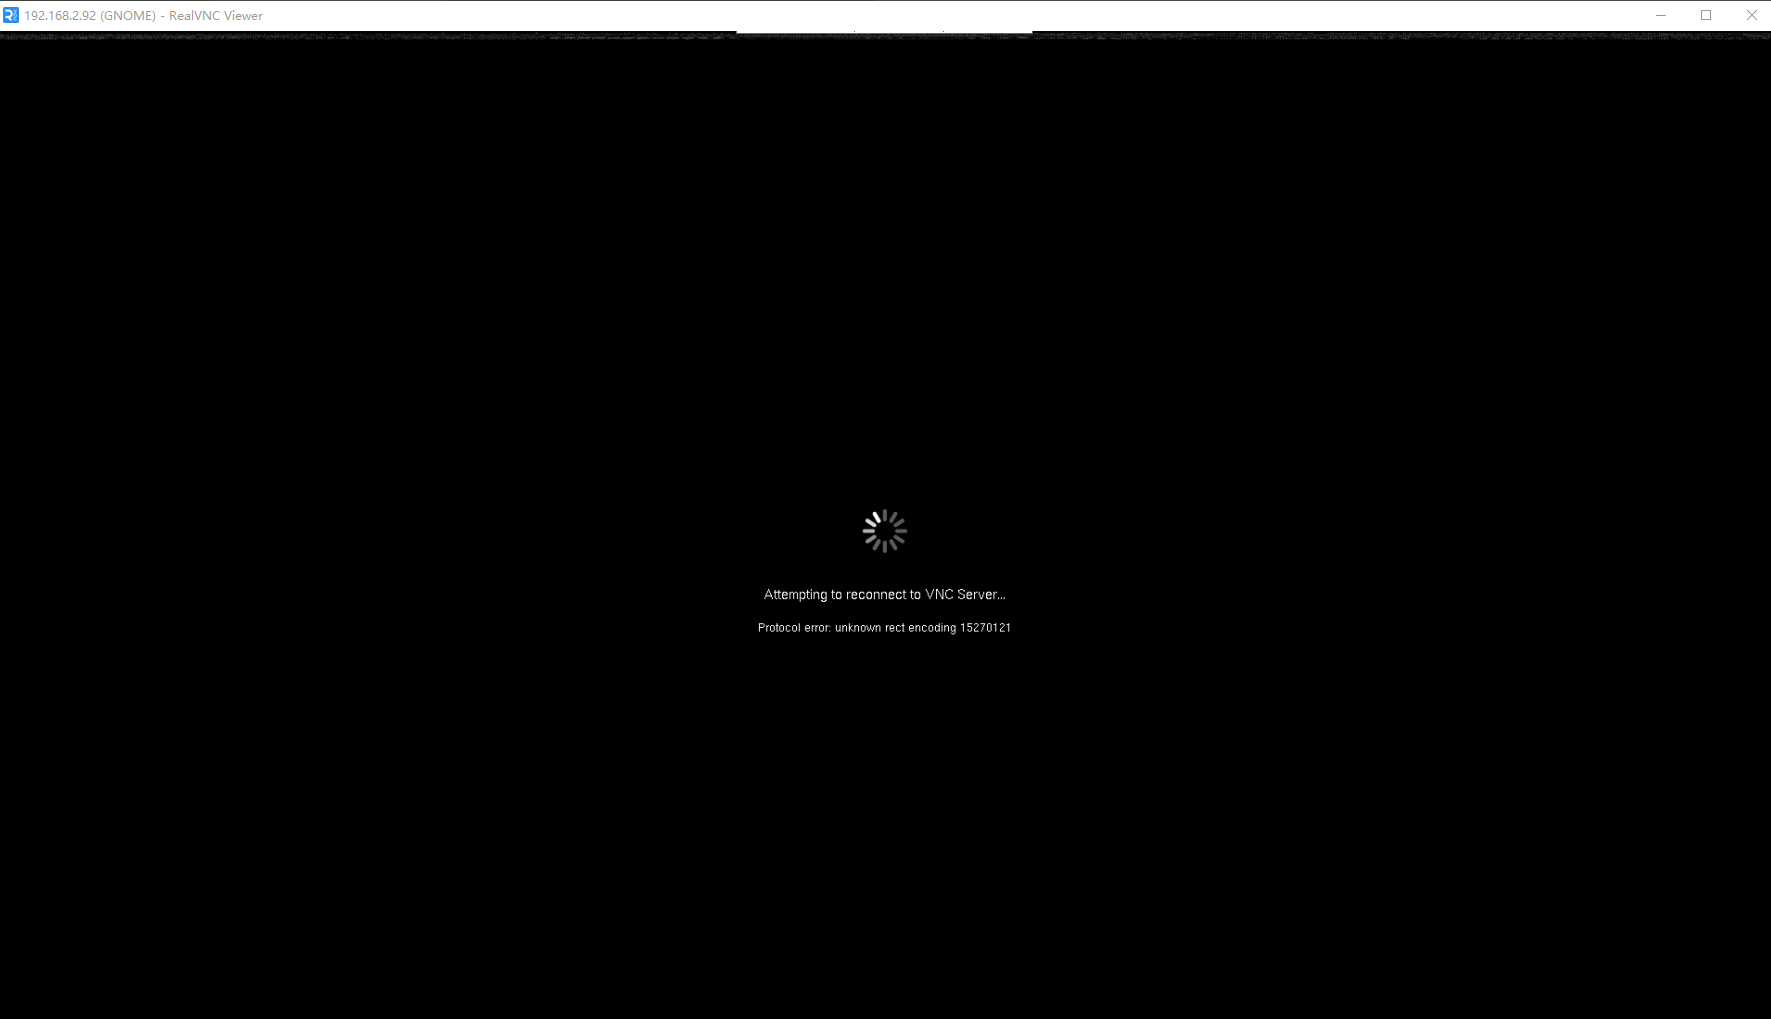
And it keeps crashing, you need to set it as shown below,
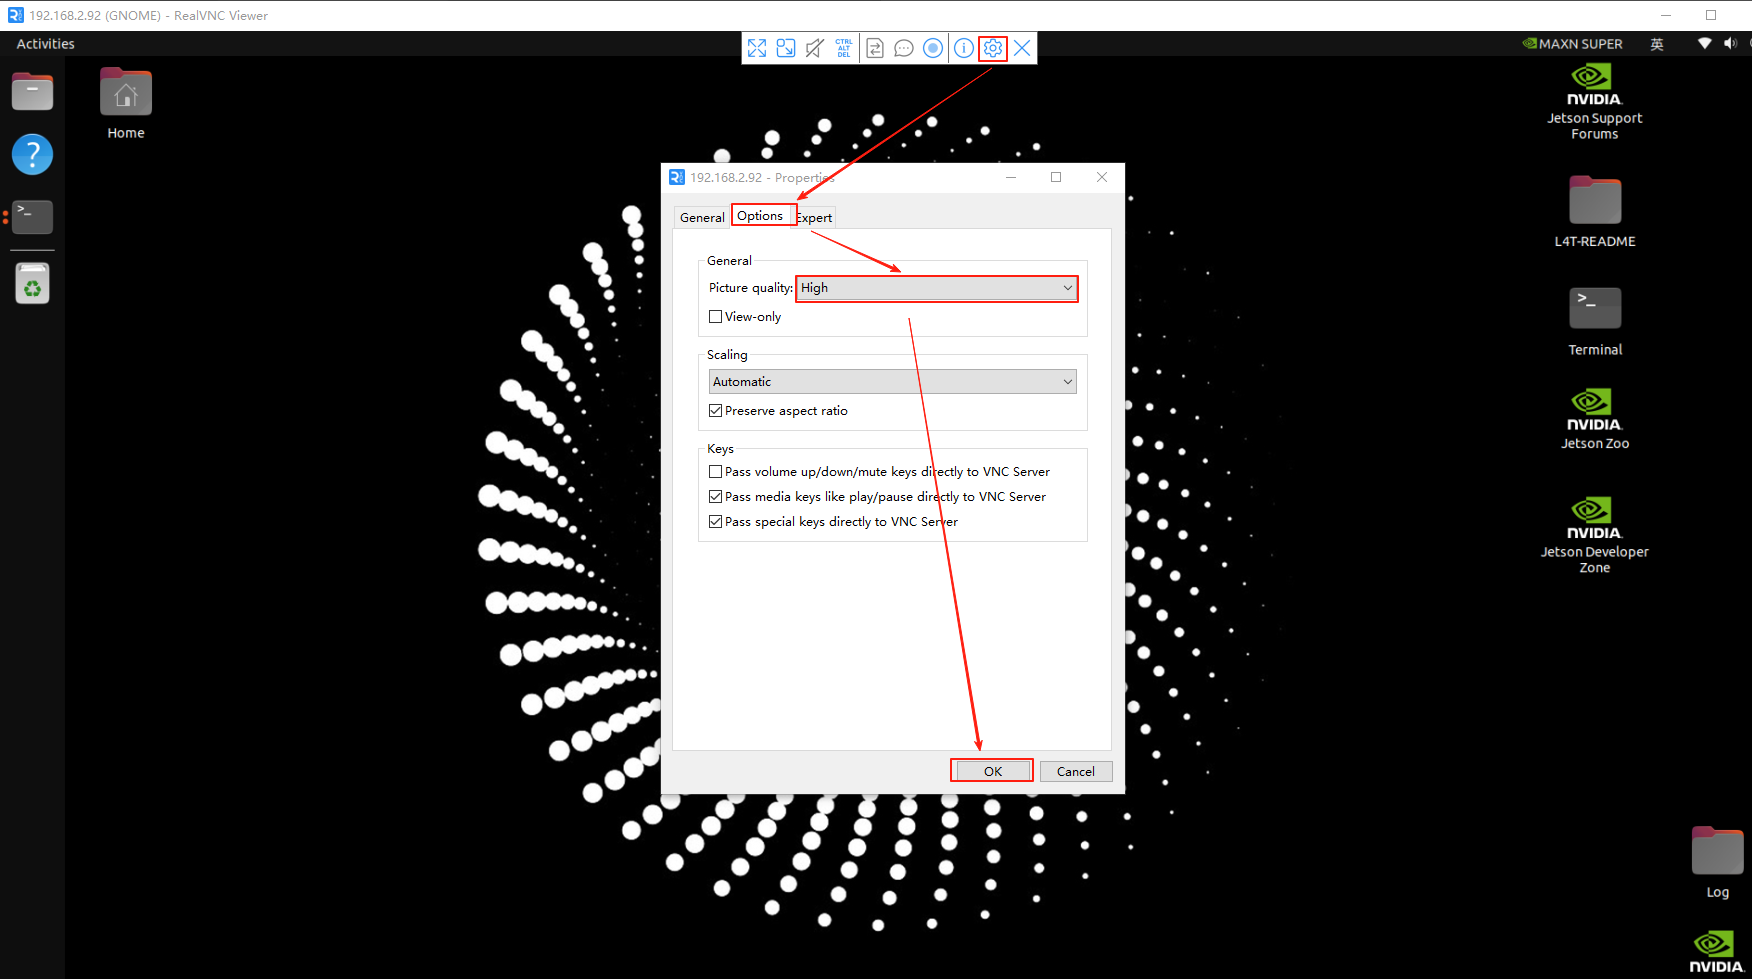
Then reconnect. Orin main board can only connect one remote desktop at a time. If the connection fails, you need to check whether a remote desktop is already connected.
After connecting, since AI large models need to be connected to the internet, the auto hotspot is only a local area network without actual data, so you need to switch networks to facilitate the use of AI large model functions later.
2. Network Switching
Jetson Main Board
Network switching is performed on the basis of successful VNC remote connection.
Create WiFi
For ORIN users, open the terminal and enter the command to open the network connection panel: nm-connection-editor
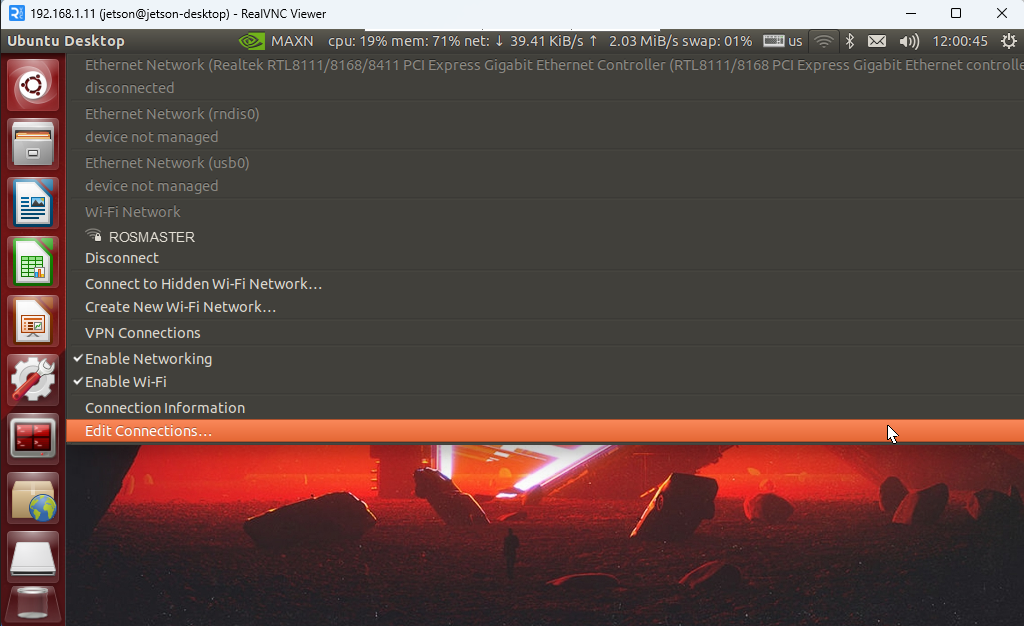
For Jetson nano users, click "WiFi icon" → "Edit Connections"
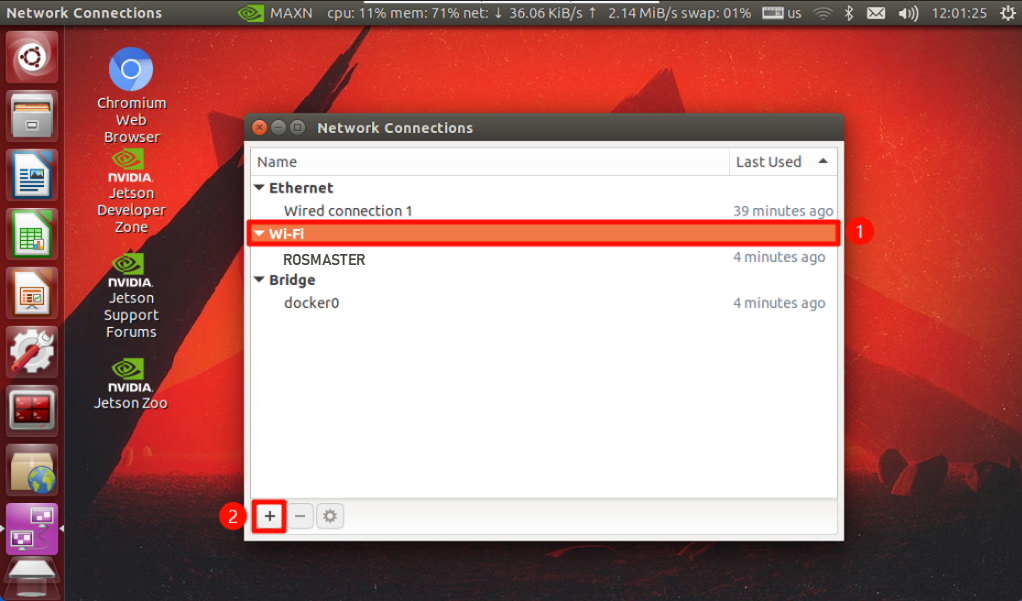
Select "WiFi" → "+" in the bottom left corner
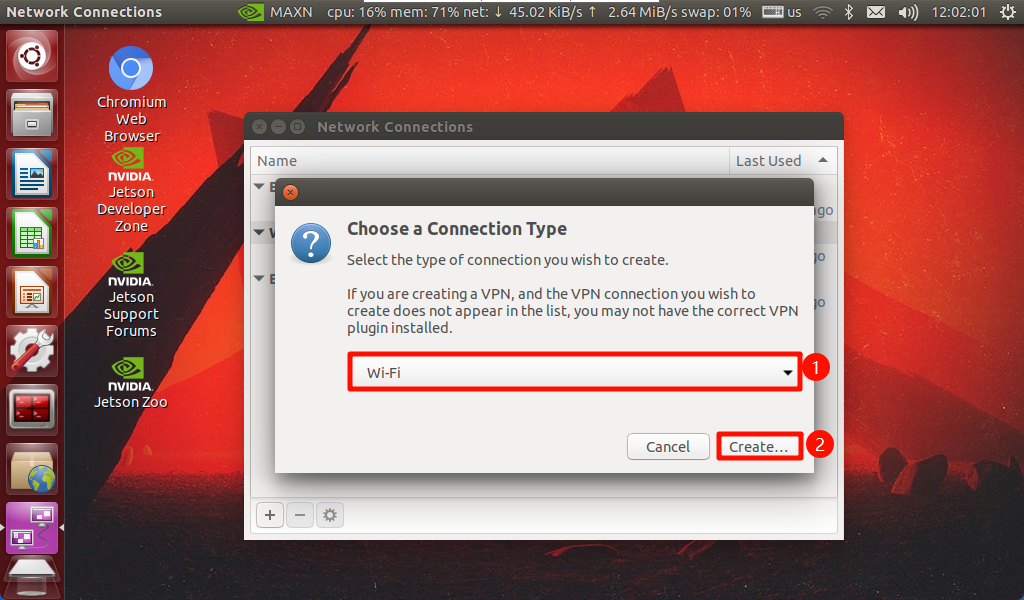
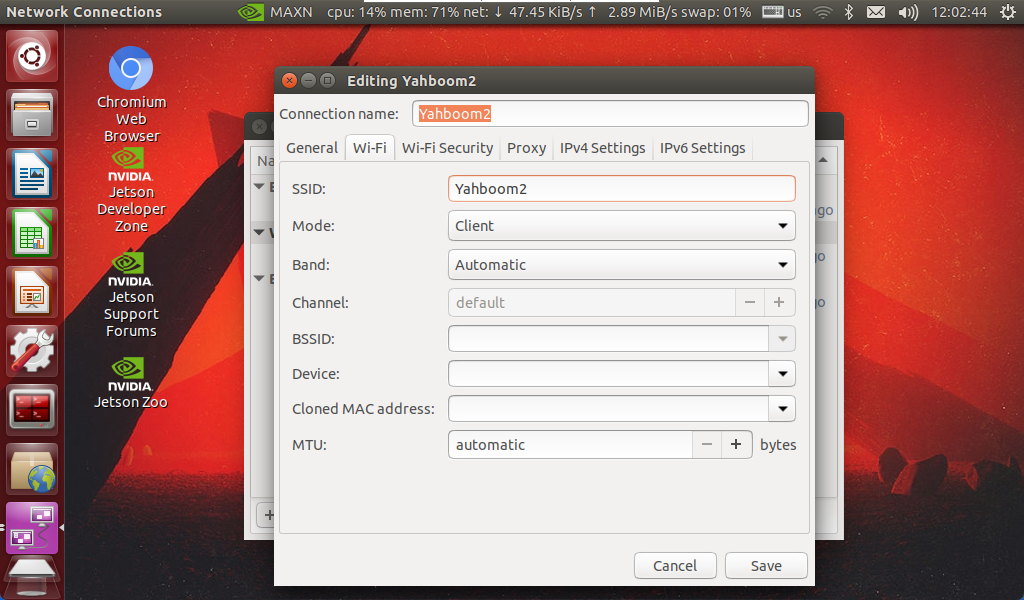
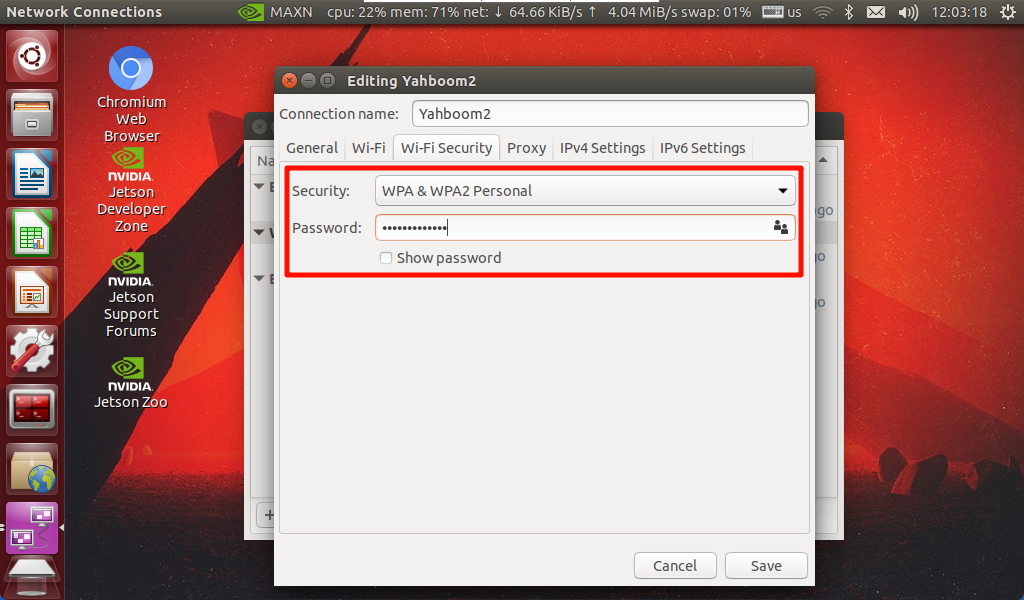
Fill in WiFi Information
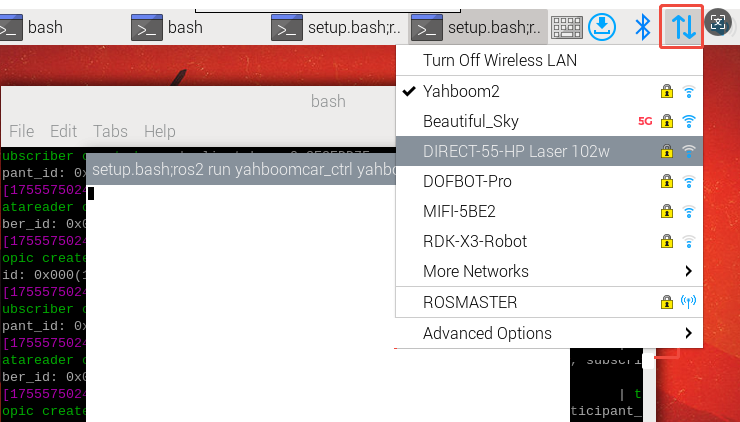
Here demonstrates connecting to WiFi: Yahboom2
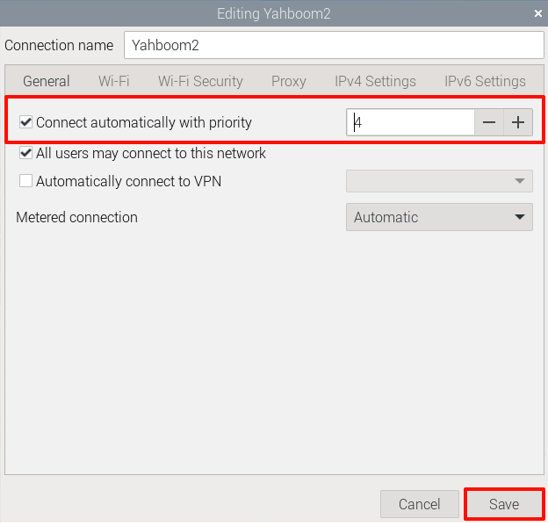
Set Priority
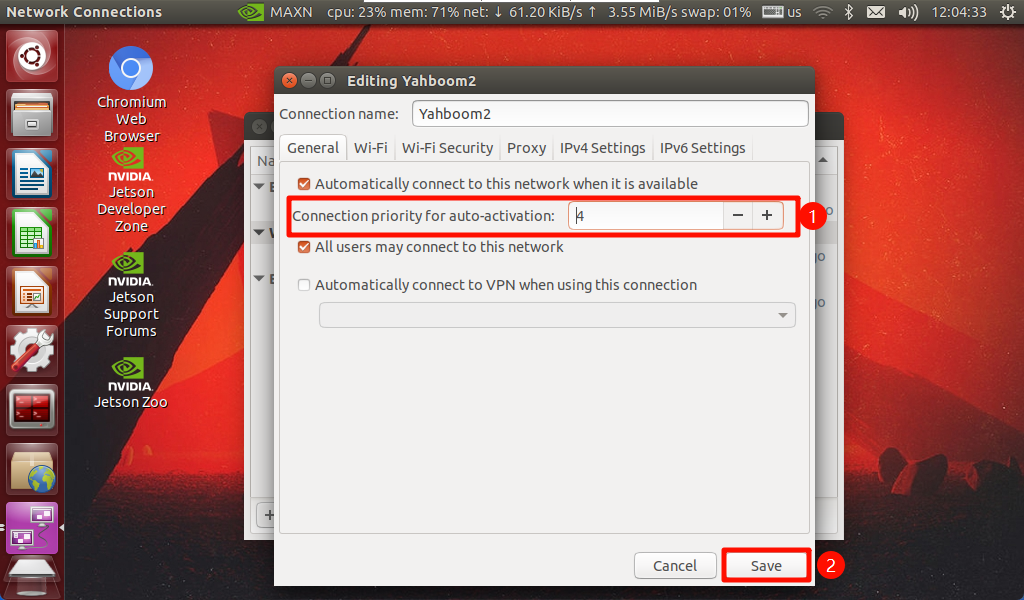
Priority determines the network selection order that the system prioritizes on startup. The larger the number, the higher the priority, and the system will prioritize selecting this method to start!
xxxxxxxxxxThe priority of ROSMASTER-M1 is 3, so if you want to automatically connect to WiFi on startup, the WiFi priority needs to be greater than 3
Restart to Take Effect
After setting is complete, restart jetson and observe the IP address on the OLED display. If it changes, it means the connection is successful!
xxxxxxxxxxIf the IP address displayed on OLED does not change and the hotspot does not disappear, it means either the WiFi name or password entered previously is incorrect.
VNC Connection
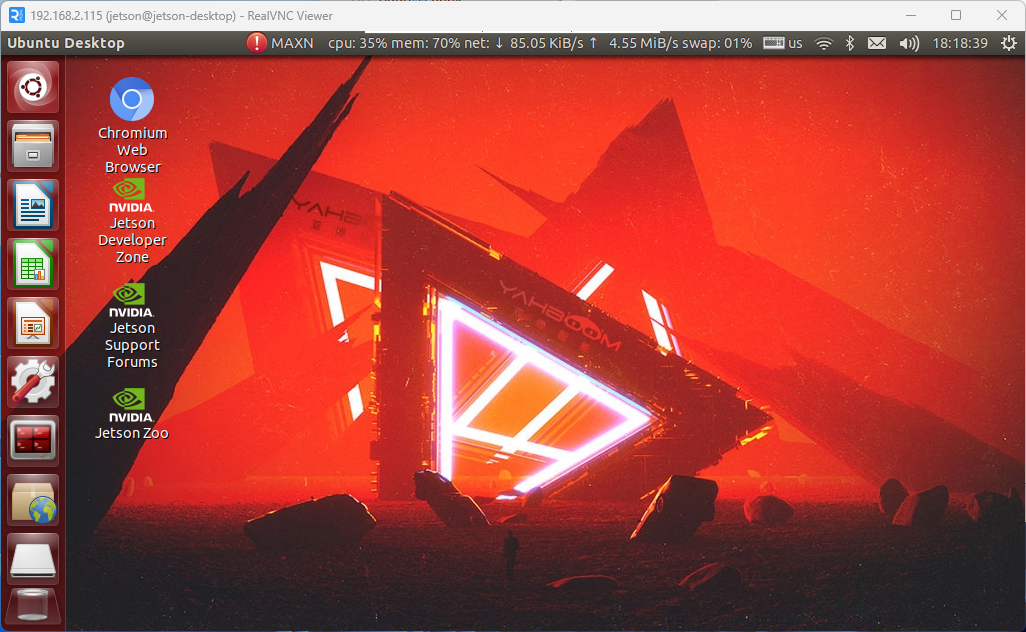
Connect according to the IP on the OLED display. This will not be demonstrated here!
Raspberry Pi
Network switching is performed on the basis of successful VNC remote connection.
Create WiFi
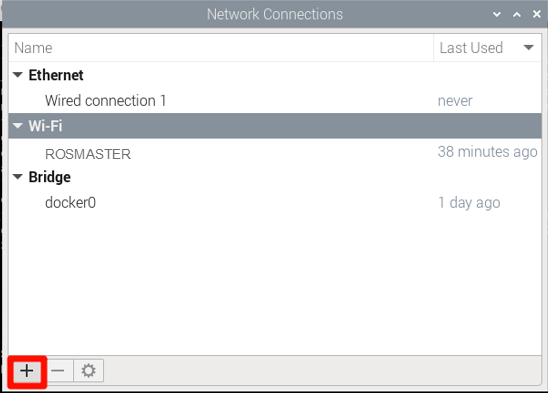
Click "WiFi icon" → "Advanced Options" → "Edit Connections"
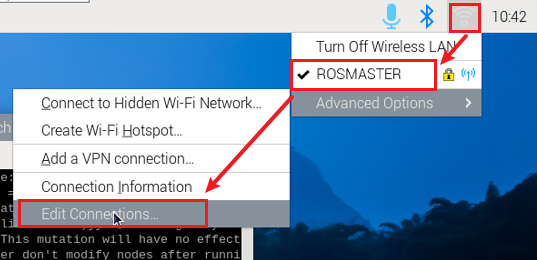
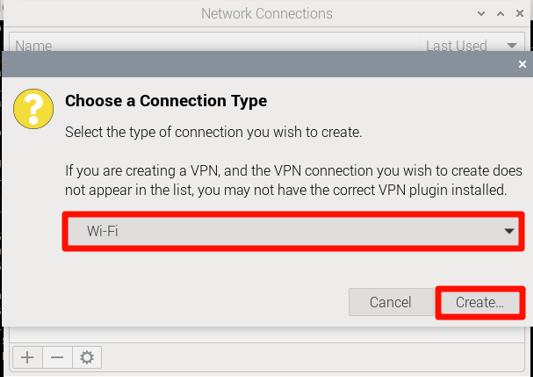
Select "WiFi" → "+" in the bottom left corner
Fill in WiFi Information
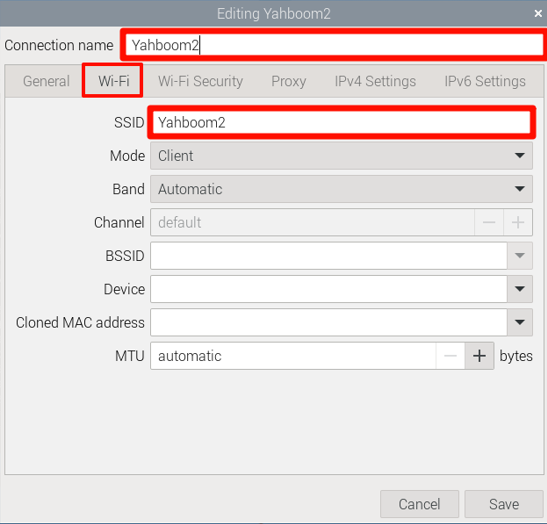
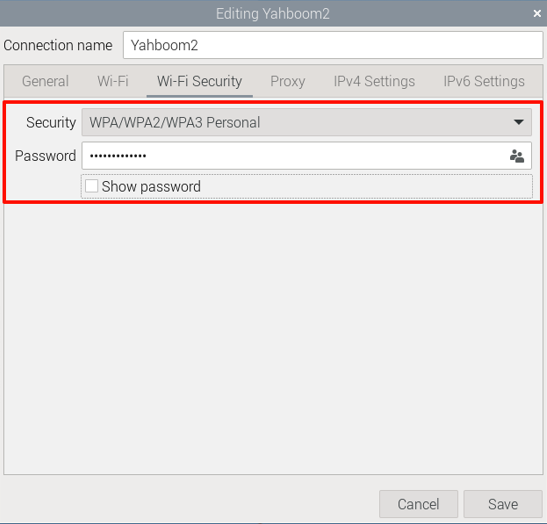
xxxxxxxxxxHere demonstrates connecting to WiFi: Yahboom2
Set Priority
Priority determines the network selection order that the system prioritizes on startup. The larger the number, the higher the priority, and the system will prioritize selecting this method to start!
xxxxxxxxxxThe priority of ROSMASTER-M1 is 3, so if you want to automatically connect to WiFi on startup, the WiFi priority needs to be greater than 3
Restart to Take Effect
After setting is complete, restart Raspberry Pi and observe the IP address on the OLED display. If it changes, it means the connection is successful!
xxxxxxxxxxIf the IP address displayed on OLED does not change and the hotspot does not disappear, it means either the WiFi name or password entered previously is incorrect.
VNC Connection
Connect according to the IP on the OLED display. This will not be demonstrated here!
RDK X5
Click "WiFi icon" → "Edit Connections", refer to the Jetson main board operation method.
3. Modify Camera and LiDAR Models in ROS Environment
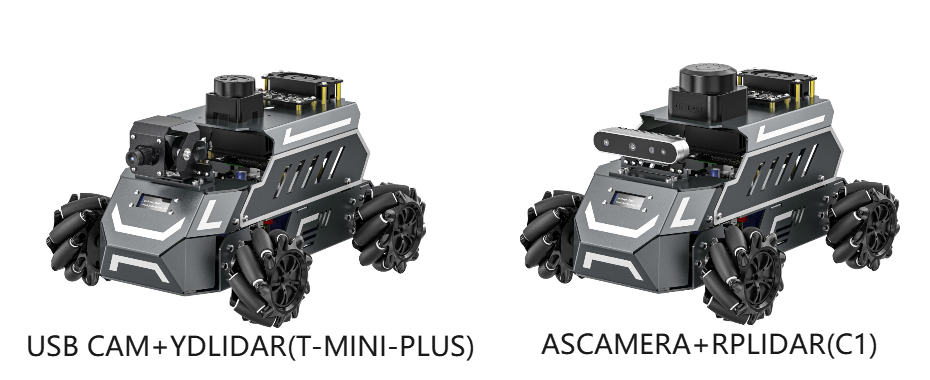
Note: Since the ROSMASTER-M1 robot has two camera models and two LiDAR devices, the factory system has configured routines for multiple devices. However, since it cannot automatically identify the product, you need to manually set the camera type and LiDAR model.
- Open the terminal of the robot system
x
# Raspberry Pi 5, NANO need to enter docker first, execute this step more# If running the script to enter docker fails, please refer to [17.Docker Course]-[4.Docker Startup Script]~/run_docker.sh- Set camera model and LiDAR model. You need to select the command to run according to the selected optional equipment.
If the optional equipment is NUWA-HP60C depth camera + C1 LiDAR, please set it as follows.
xxxxxxxxxx# orin , RDK X5sh ~/Rosmaster/RobotType/set_M1_nuwa_c1.sh# Raspberry Pi, jetson nanosh ~/yahboomcar_ros2_ws/software/RobotType/set_M1_nuwa_c1.shIf the optional equipment is NUWA-HP60C depth camera + Tmini LiDAR, please set it as follows.
xxxxxxxxxx# orin , RDK X5sh ~/Rosmaster/RobotType/set_M1_nuwa_tmini.sh# Raspberry Pi, jetson nanosh ~/yahboomcar_ros2_ws/software/RobotType/set_M1_nuwa_tmini.shIf the optional equipment is USB camera + C1 LiDAR, please set it as follows.
xxxxxxxxxx# orin, RDK X5sh ~/Rosmaster/RobotType/set_M1_usb_c1.sh# Raspberry Pi, jetson nanosh ~/yahboomcar_ros2_ws/software/RobotType/set_M1_usb_c1.shIf the optional equipment is USB camera + Tmini LiDAR, please set it as follows.
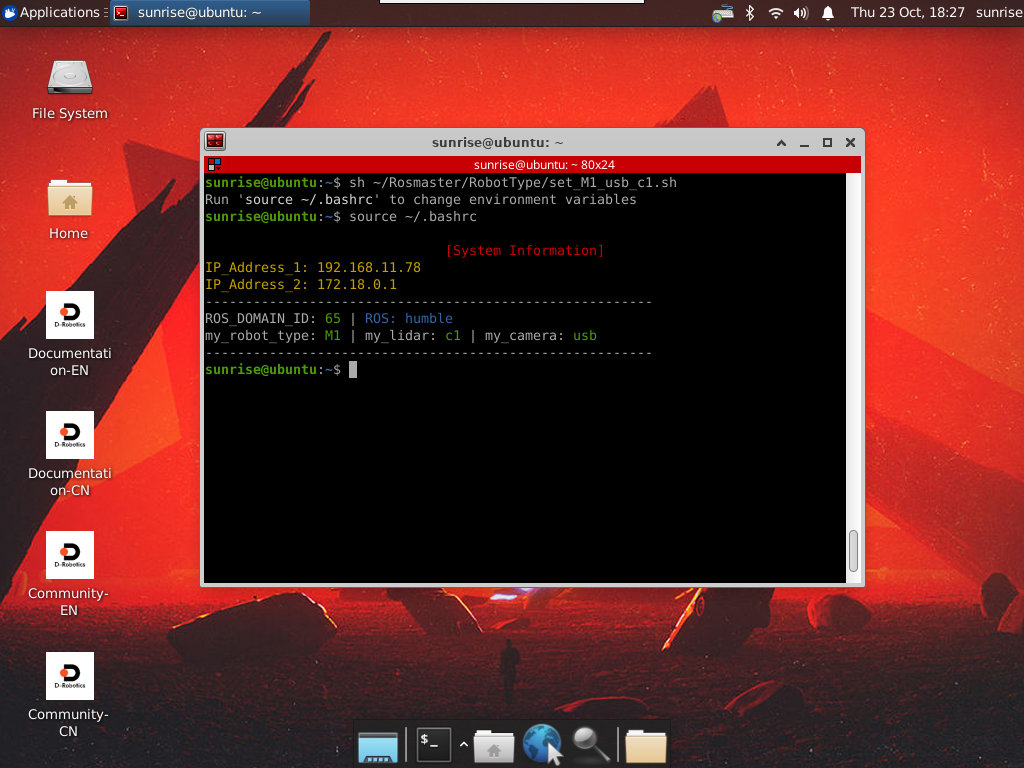
xxxxxxxxxx# orin, RDK X5sh ~/Rosmaster/RobotType/set_M1_usb_tmini.sh# Raspberry Pi, jetson nanosh ~/yahboomcar_ros2_ws/software/RobotType/set_M1_usb_tmini.sh- Check if it takes effect. Close the terminal and reopen it to see if the corresponding product model is printed.