Welcome to ROSMASTER M1 repository
AI Model Preparation
AI Model Preparation
1. LiDAR Mapping
Refer to the instructions in [Lidar Course] - [5. Gmapping-SLAM mapping] in this product tutorial to start the car and build and save the map. This map will be used for navigation in the AI large model later.
2. Color Calibration
Start the color calibration program to calibrate and save the HSV values of the four colors (red, green, blue, and yellow) in a parameter file. This parameter file will be loaded later in the AI large model color tracking example, primarily for voice commands such as "Start tracking red," "Start following the yellow block," etc.
- USB Camera
Source Code Path: ~/yahboomcar_ros2_ws/yahboomcar_ws/src/yahboomcar_voice_ctrl/yahboomcar_voice_ctrl/colorSelect.py
Parameter File Path: ~/yahboomcar_ros2_ws/yahboomcar_ws/src/yahboomcar_voice_ctrl/yahboomcar_voice_ctrl/colorHSV.text
"Start patrolling the green line," "Start autonomous driving patrolling the red line," and so on.
📝 You can copy the color parameters in colorHSV.text to colorfollowHSV.text.
Line-following autonomous driving parameter file path: ~/yahboomcar_ros2_ws/yahboomcar_ws/src/yahboomcar_voice_ctrl/yahboomcar_voice_ctrl/colorfollowHSV.text
- nuwa Depth Camera
Source code path: ~/yahboomcar_ros2_ws/yahboomcar_ws/src/yahboomcar_voice_ctrl_depth/yahboomcar_voice_ctrl_depth/colorSelect.py
Parameter file path: ~/yahboomcar_ros2_ws/yahboomcar_ws/src/yahboomcar_voice_ctrl_depth/yahboomcar_voice_ctrl_depth/colorHSV.text
For PI5/JETSON NANO controllers, you must first enter the Docker container. This is not necessary for Orin and RDKX5.
Starting the camera
#nuwa cameraros2 launch ascamera hp60c.launch.py#usb cameraros2 launch usb_cam camera.launch.pyStarting the color calibration program
xxxxxxxxxx#nuwa cameraros2 run yahboomcar_voice_ctrl_depth colorSelect#usb cameraros2 run yahboomcar_voice_ctrl colorSelectAfter successful startup, the current calibration color will be displayed in the upper left corner.
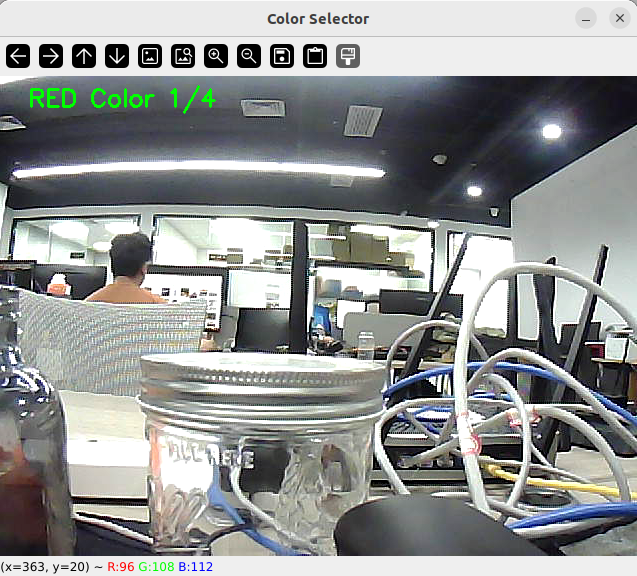
Use your mouse to select an area (this area can only have one color).
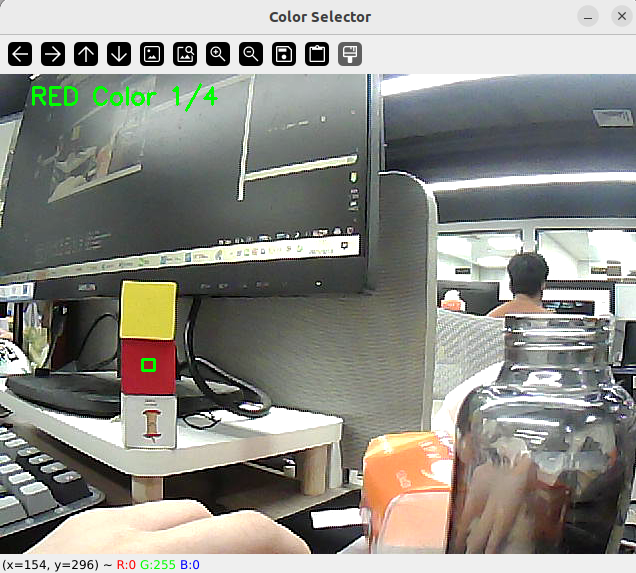
Once you release the mouse, the binarized image will be displayed.
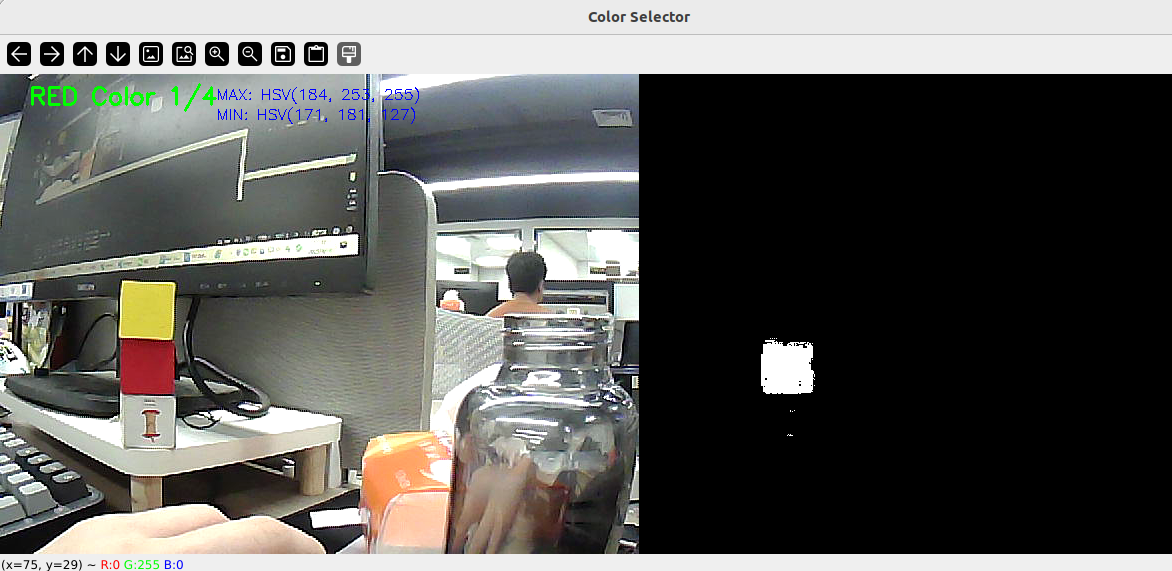
After confirming that the color calibration is correct, press the spacebar. The HSV value for red will be written to the first line of the parameter file.
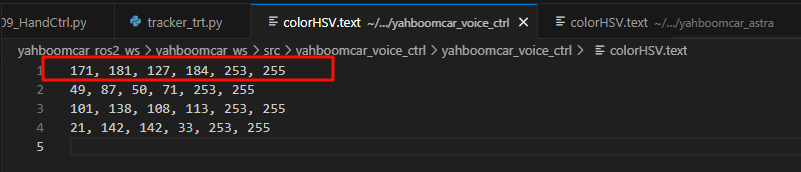
Now, we move on to the next color calibration, and so on. The HSV values are written to the second, third, and fourth lines of the parameter file.
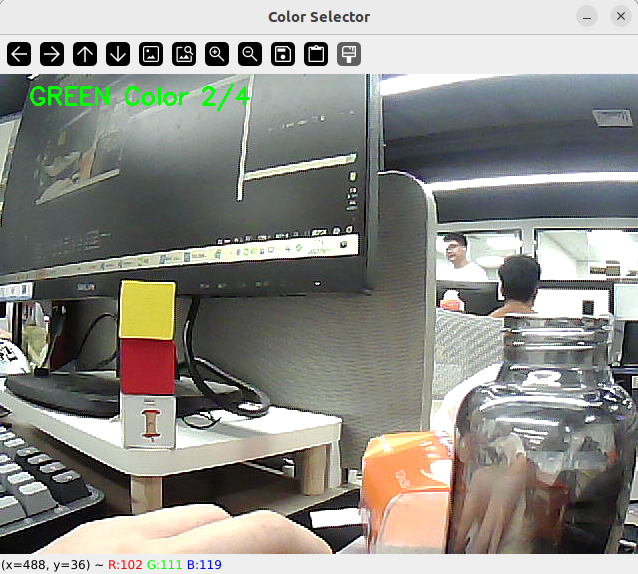
When the last color calibration is complete, "Finish" will be displayed in the upper left corner.
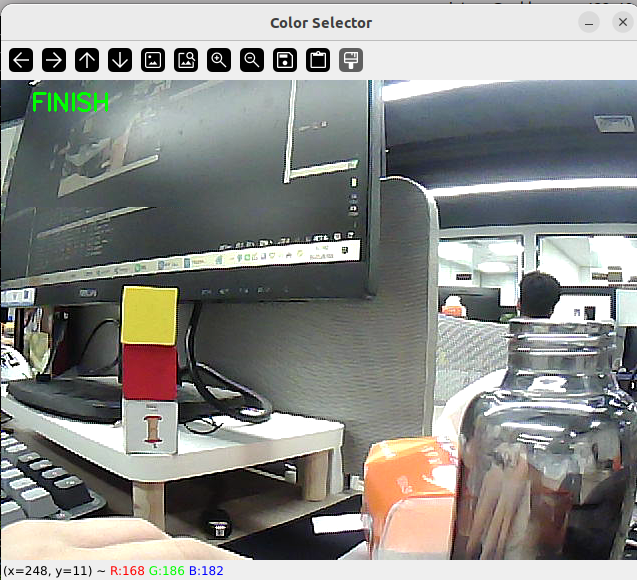
Finally, we can exit the program by pressing the Q/q key on the keyboard.
3. Configuring the Large Model API Key
All large model gameplay requires configuring the corresponding large model key. This section covers a lot of details, so I won't go into detail here. Please refer to the tutorial [4.AI Model Development] - [2. Configuring API-KEY]