Welcome to ROSMASTER M1 repository
4.Facial landmark detection
Facial Landmark Detection
1. Content Description
This course implements color image acquisition and facial detection using the MediaPipe framework. This section requires entering commands in a terminal. The terminal you open depends on your board type. This lesson uses the Raspberry Pi as an example.
For Raspberry Pi and Jetson-Nano boards, you need to open a terminal on the host computer and enter the command to enter the Docker container. Once inside the Docker container, enter the commands mentioned in this lesson in the terminal. For instructions on entering the Docker container from the host computer, refer to [01. Robot Configuration and Operation Guide] -- [4.Enter Docker (For JETSON Nano and RPi 5)].
For RDKX5 and Orin boards, simply open a terminal and enter the commands mentioned in this lesson.
2. Program Startup
For Raspberry Pi and Jetson-Nano boards, you need to enter the Docker container first. For RDKX5 and Orin controllers, this is not necessary.
Enter the Docker container (see [Docker course] --- [4. Docker Startup Script] for steps).
All the following commands must be executed within the same Docker container (see [Docker course] --- [3. Docker Submission and Multi-Terminal Access] for steps).
First, enter the following command in the terminal to start the camera.
#usb cameraros2 launch usb_cam camera.launch.py#nuwa cameraros2 launch ascamera hp60c.launch.pyAfter successfully starting the camera, open another terminal and enter the following command to start the face detection program.
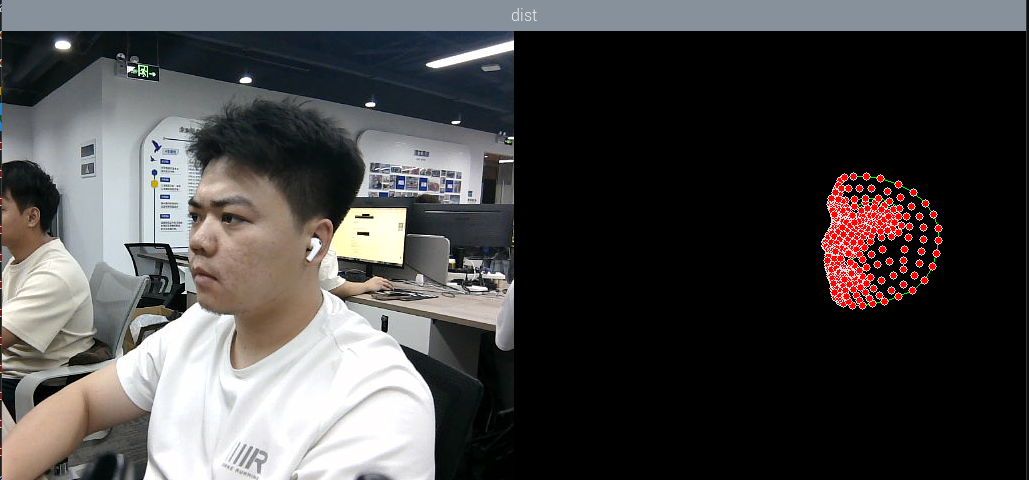
xxxxxxxxxxros2 run yahboomcar_mediapipe 04_FaceMeshAfter running the program, the image below shows the detected facial points on the right side of the image.
3. Core Code Analysis
Program Code Path:
Raspberry Pi 5 and Jetson-Nano Board
The program code is running in Docker. The path in Docker is
/root/yahboomcar_ros2_ws/yahboomcar_ws/src/yahboomcar_mediapipe/yahboomcar_mediapipe/04_FaceMesheMesh.pyOrin board
The program code path is
/home/jetson/yahboomcar_ros2_ws/yahboomcar_ws/src/yahboomcar_mediapipe/yahboomcar_mediapipe/04_FaceMesh.pyRDK X5
The program code path is
/home/sunrise/yahboomcar_ros2_ws/yahboomcar_ws/src/yahboomcar_mediapipe/yahboomcar_mediapipe/04_FaceMesh.py
Import the library files used,
xxxxxxxxxximport timeimport rclpyfrom rclpy.node import Nodeimport cv2 as cvimport numpy as npimport mediapipe as mpfrom geometry_msgs.msg import Pointfrom yahboomcar_msgs.msg import PointArrayfrom sensor_msgs.msg import Imagefrom cv_bridge import CvBridge, CvBridgeErrorimport osInitialize data and define publishers and subscribers,
xxxxxxxxxxdef __init__(self, staticMode=False, maxFaces=2, minDetectionCon=0.5, minTrackingCon=0.5): super().__init__('face_mesh_detector') self.mpDraw = mp.solutions.drawing_utils #Use the class in the mediapipe library to define a face object self.mpFaceMesh = mp.solutions.face_mesh self.faceMesh = self.mpFaceMesh.FaceMesh( static_image_mode=staticMode, max_num_faces=maxFaces, min_detection_confidence=minDetectionCon, min_tracking_confidence=minTrackingCon ) #Define the properties of the joint connection line, which will be used in the subsequent joint point connection function self.lmDrawSpec = mp.solutions.drawing_utils.DrawingSpec(color=(0, 0, 255), thickness=-1, circle_radius=3) self.drawSpec = self.mpDraw.DrawingSpec(color=(0, 255, 0), thickness=1, circle_radius=1) self.bridge = CvBridge() #Define subscribers for the color image topic camera_type = os.getenv('CAMERA_TYPE', 'usb') topic_name = '/ascamera_hp60c/camera_publisher/rgb0/image' if camera_type == 'nuwa' else '/usb_cam/image_raw' self.subscription = self.create_subscription( Image, topic_name, self.image_callback, 10)Color image callback function,
xxxxxxxxxxdef get_RGBImageCallBack(self,msg): #Use CvBridge to convert color image message data into image data frame = self.bridge.imgmsg_to_cv2(msg, desired_encoding='bgr8') #Pass the obtained image into the defined pubFaceMeshPoint function, draw=False means not to draw joint points on the original color image frame, img = self.pubFaceMeshPoint(frame, draw=True) #Merge two images dist = self.frame_combine(frame, img) key = cv2.waitKey(1) cv.imshow('dist', dist)pubFaceMeshPoint function,
xxxxxxxxxxdef pubFaceMeshPoint(self, frame, draw=True): #Create a new image based on the incoming image size. The image data type is uint8 img = np.zeros(frame.shape, np.uint8) #Convert the color space of the incoming image from BGR to RGB to facilitate subsequent image processing imgRGB = cv.cvtColor(frame, cv.COLOR_BGR2RGB) #Call the process function in the mediapipe library for image processing. During init, the self.faceMesh object is created and initialized. self.results = self.faceMesh.process(imgRGB) #Judge whether self.results.multi_face_landmarks exists, that is, whether the face is recognized if self.results.multi_face_landmarks: for i in range(len(self.results.multi_face_landmarks)): if draw: self.mpDraw.draw_landmarks(frame, self.results.multi_face_landmarks[i], self.mpFaceMesh.FACEMESH_CONTOURS, self.lmDrawSpec, self.drawSpec) #Connect each joint point on the blank image created previously self.mpDraw.draw_landmarks(img, self.results.multi_face_landmarks[i], self.mpFaceMesh.FACEMESH_CONTOURS, self.lmDrawSpec, self.drawSpec) return frame, imgThe frame_combine image merging function was mentioned in the first lesson of this chapter. Please refer to [07.Mediapipe Visual Course] - [1. Hand Detection] for an analysis of this function.