Welcome to ROSMASTER M1 repository
1. Update the expansion board firmware
1. Updating the Expansion Board Firmware
1. Updating the Expansion Board Firmware1.1. Firmware Update Notice1.2. Downloading the Burning Software and Firmware1.3. Install the CH340 Driver1.4. Connecting the Rosmaster to a Computer1.5. Configuring the Burning Software1.6. Start Flashing the Firmware
1.1. Firmware Update Notice
The MCU integrated in the Rosmaster expansion board is pre-burned with firmware at the factory. Do not update the firmware unless necessary.
1.2. Downloading the Burning Software and Firmware
Downloading the Burning Software
To burn the firmware for the Rosmaster expansion board's MCU, you will need the MCUISP (or FlyMCU) burning software. Please download the MCUISP (or FlyMCU) burning software from http://www.mcuisp.com. You can also use the MCUISP software provided in the course materials.
The MCUISP software is a portable version and does not require installation; simply double-click to open it.
Downloading the Expansion Board MCU Firmware
The latest version of the Rosmaster expansion board's firmware is available in the download section of this course material. The file is named Rosmaster_XXX.hex, where XXX is the version number.
In the Rosmaster download area, click [Expansion Board Firmware] to download the latest firmware.
1.3. Install the CH340 Driver
Since the Rosmaster expansion board uses the CH340 chip for USB communication, you need to install the CH340 chip driver. If the CH340 driver is already installed on your computer, you do not need to install it again.
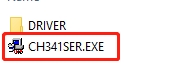
Unzip the [Uart driver (CH340).zip] file in this course material and double-click to open the CH341SER.EXE program.
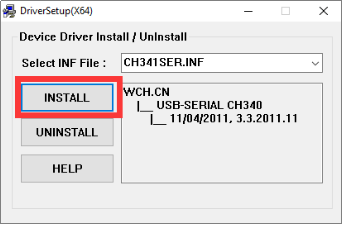
Click Install. A successful installation notification will appear after the installation is complete.
1.4. Connecting the Rosmaster to a Computer
Note: Before connecting the Rosmaster to a computer, unplug the Micro USB data cable and power cable connecting the expansion board to the mainboard.
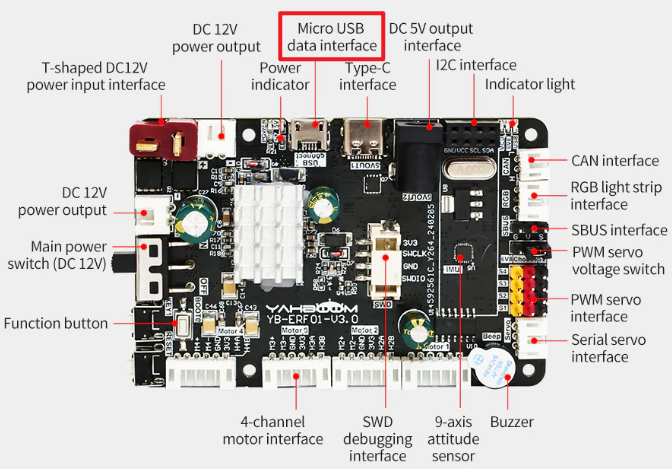
Plug one end of the USB data cable into a USB port on your computer and the other end into the Micro USB port on the Rosmaster expansion board.
1.5. Configuring the Burning Software
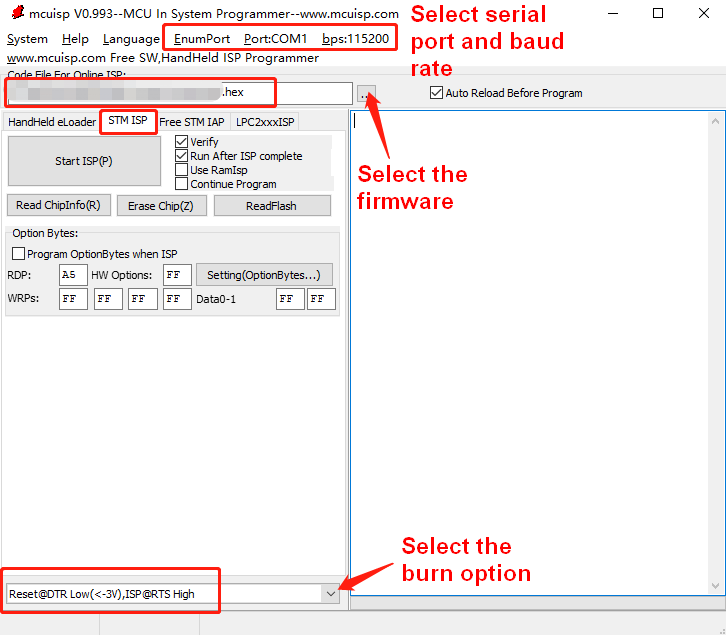
If multiple serial port numbers appear when searching for serial ports, and you're unsure which one is the Rosmaster one, Solution 1: Unplug other USB ports and search again. Solution 2: Unplug the Rosmaster's USB data cable, click Search Serial Port, write down the serial port number found, plug in the Rosmaster's USB data cable, and search again. Compare the two results. The newly added serial port number is the Rosmaster's serial port number.
When selecting the firmware, select the firmware path downloaded in the first step. It's best not to use Chinese characters or special characters in the path. As an example, the image above shows the downloaded Rosmaster_V3.5.1hex file placed on the desktop.
Finally, in the configuration options at the bottom, be sure to select the [DTR low reset, RTS high enters BootLoader] option; otherwise, the download may fail.
1.6. Start Flashing the Firmware
Note:
① Before starting flashing, ensure that the Rosmaster's serial port number is accessible, meaning it's not occupied by a serial port assistant.
② To enter flashing mode on the Rosmaster, first press and hold the BOOT0 button on the expansion board, then press the RESET button, and finally release the BOOT0 button.
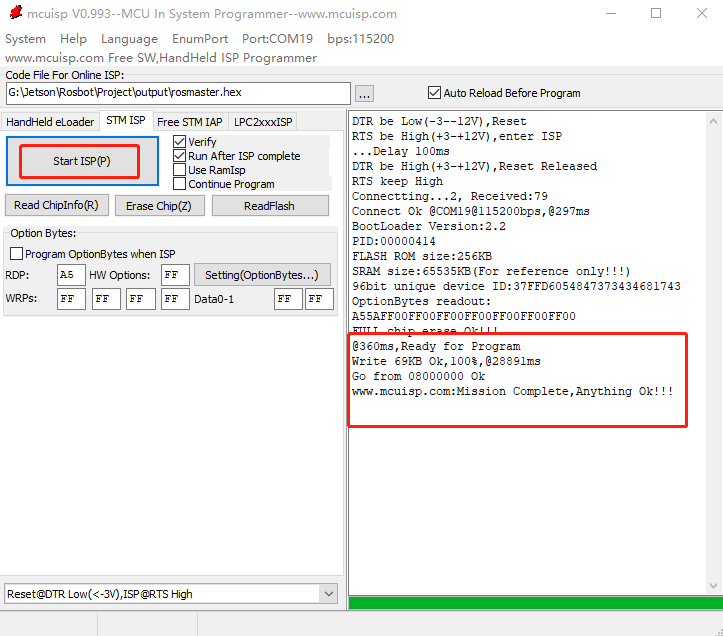
Click [Start Programming]. The MCUISP flashing software will flash the firmware selected in the previous step to the MCU on the Rosmaster expansion board. The download is successful when the message [Go from 08000000 Ok www.mcuisp.com :Missing Complete, Anything Ok!!!] appears on the right.