Welcome to ROSMASTER M3 PRO repository
2.Depth pseudo-color image
Depth pseudo-color image
1. Content Description
This section subscribes to the Deep Color Image topic and uses OpenCV image processing to convert a black-and-white depth image into a pseudo-color image.
This section requires entering commands in the terminal. The terminal you open depends on your motherboard type. This lesson uses the Raspberry Pi 5 as an example. For Raspberry Pi and Jetson-Nano boards, you need to open a terminal on the host computer and enter the command to enter the Docker container. Once inside the Docker container, enter the commands mentioned in this section in the terminal. For instructions on entering the Docker container from the host computer, refer to this product tutorial [Configuration and Operation Guide]--[Enter the Docker (Jetson Nano and Raspberry Pi 5 users, see here)].
Simply open the terminal on the Orin motherboard and enter the commands mentioned in this section.
2. Program startup
First, in the terminal, enter the following command to start the camera,
ros2 launch orbbec_camera dabai_dcw2.launch.py
After successfully starting the camera, open another terminal and enter the following command in the terminal to start the deep pseudo-color image conversion program:
xxxxxxxxxxros2 run yahboom_M3Pro_DepthCam GetDepthColor
After startup, as shown below,
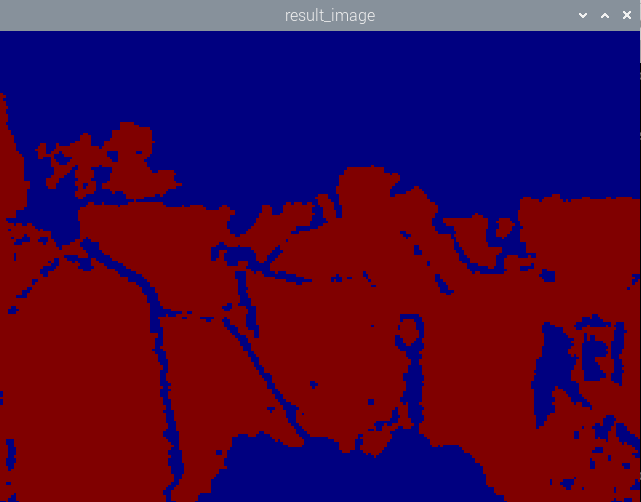
Different colors indicate the difference in depth information.
3. Core code analysis
Program code path:
Raspberry Pi 5 and Jetson-Nano board
The program code is in the running docker. The path in docker is
/root/yahboomcar_ws/src/yahboom_M3Pro_DepthCam/yahboom_M3Pro_DepthCam/GetDepthColor.pyOrin Motherboard
The program code path is,
/home/jetson/yahboomcar_ws/yahboom_M3Pro_DepthCam/yahboom_M3Pro_DepthCam/GetDepthColor.py
Import the library files used
xxxxxxxxxxfrom cv_bridge import CvBridgeimport cv2from rclpy.node import Nodeimport rclpyfrom sensor_msgs.msg import Image
Defines the depth image decoding format
xxxxxxxxxxencoding = ['16UC1', '32FC1']
Define subscribers and define deep image topics
xxxxxxxxxxself.sub_depth = self.create_subscription(Image,"/camera/depth/image_raw",self.get_DepthImgCallBack,100)
Define self.depth_bridge to convert the message format into an image format that openc can handle
xxxxxxxxxxself.depth_bridge = CvBridge()
Convert image data message into image
xxxxxxxxxxdepth_image = self.depth_bridge.imgmsg_to_cv2(depth_frame, encoding[1])
Call the opencv image processing function cv2.applyColorMap to convert the depth map
xxxxxxxxxxdepth_to_color_image = cv2.applyColorMap(cv2.convertScaleAbs(depth_image, alpha=1.0), cv2.COLORMAP_JET)
cv2.convertScaleAbs: performs a linear transformation on the image data and converts it to 8-bit unsigned integer (uint8) format with the scaling factor being the scaling factor.
cv2.applyColorMap: A function that converts a single-channel grayscale image to a pseudo-color image (Pseudo-color) , enhancing the visualization effect through color mapping. This parameter has two variables, the first variable is a single-channel 8-bit or floating-point image (grayscale image), and the second variable is a color map. The following values are optional:
xxxxxxxxxxcv2.COLORMAP_AUTUMN # red -orange-yellow cv2.COLORMAP_BONE #Black-white (grayscale with a bluish tint ) cv2.COLORMAP_HSV #HSV color space cv2.COLORMAP_JET #Blue- cyan -yellow-red (classic heat map ) cv2.COLORMAP_WINTER # blue -green cv2.COLORMAP_RAINBOW #Rainbow color (red-purple ) cv2.COLORMAP_OCEAN #dark blue-light blue cv2.COLORMAP_SUMMER # green -yellow cv2.COLORMAP_SPRING # Magenta - yellow cv2.COLORMAP_COOL #cyan - magenta cv2.COLORMAP_HSV #HSV color space cycle cv2.COLORMAP_PINK #pink tone cv2.COLORMAP_PARULA #MATLAB Parula style cv2.COLORMAP_VIRIDIS #Modern scientific color scale (green-purple) cv2.COLORMAP_INFERNO # Black -Red-Yellow-White (high contrast ) cv2.COLORMAP_PLASMA # purple -red-yellow cv2.COLORMAP_MAGMA # black -red-white cv2.COLORMAP_TWILIGHT # blue -pink - white gradient