Welcome to DOGZILLA-Lite repository
16. Age and gender identification
Age and gender identification
1. Purpose of the experiment
Realize the judgment of human gender and age by the robot dog
2. Experimental path source code
Enter the system of the robot dog, end the robot dog program, enter "ip (ip is the ip of the robot dog): 8888" in the browser, enter the password "yahboom" and log in. Enter the path of DOGZILLA_Lite_class/5.AI Visual Recognition Course/16. SexandAge and run SexandAge.ipynb . Or enter the terminal
xxxxxxxxxxcd ~/DOGZILLA_Lite_class/5.AI Visual Recognition Course/16. SexandAgepython3 SexandAge.ipynb
3. Experimental Phenomenon
After running the source code, you can see that the robot dog can detect the gender and age of people.
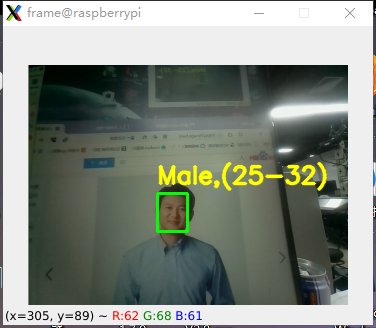
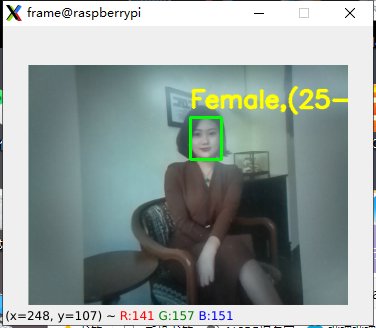
4. Main source code analysis
xxxxxxxxxxBG_COLOR = (192, 192, 192) # graycap=cv2.VideoCapture(0)cap.set(3,320)cap.set(4,240)with mp_selfie_segmentation.SelfieSegmentation( model_selection=1) as selfie_segmentation: bg_image = None while cap.isOpened(): success, image = cap.read() if not success: print("Ignoring empty camera frame.") # If loading a video, use 'break' instead of 'continue'. continue # Flip the image horizontally for a later selfie-view display, and convert # the BGR image to RGB. image = cv2.cvtColor(cv2.flip(image, 1), cv2.COLOR_BGR2RGB) # To improve performance, optionally mark the image as not writeable to # pass by reference. image.flags.writeable = False results = selfie_segmentation.process(image) image.flags.writeable = True image = cv2.cvtColor(image, cv2.COLOR_RGB2BGR) # Draw selfie segmentation on the background image. # To improve segmentation around boundaries, consider applying a joint # bilateral filter to "results.segmentation_mask" with "image". condition = np.stack( (results.segmentation_mask,) * 3, axis=-1) > 0.1 # The background can be customized. # a) Load an image (with the same width and height of the input image) to # be the background, e.g., bg_image = cv2.imread('/path/to/image/file') # b) Blur the input image by applying image filtering, e.g., # bg_image = cv2.GaussianBlur(image,(55,55),0) if bg_image is None: bg_image = np.zeros(image.shape, dtype=np.uint8) bg_image[:] = BG_COLOR output_image = np.where(condition, image, bg_image) b,g,r = cv2.split(image) image = cv2.merge((r,g,b)) output_image = np.where(condition, image, bg_image) imgok = Image.fromarray(output_image) display.ShowImage(imgok) r,g,b = cv2.split(output_image) imagecv2 = cv2.merge((b,g,r)) cv2.imshow('img',imagecv2) #cv2.imshow('MediaPipe Selfie Segmentation', output_image) if cv2.waitKey(5) & 0xFF == 27: break if button.press_b(): break