Welcome to Muto RS Robot repository
9)Color tracking
9.Color tracking
1. Program function description
After the program is started, the default tracking color is red. You can press the r/R key to enter the color selection mode. Select a color with the mouse. Muto will lock this color. Press the space bar to enter the tracking mode. Muto will keep a distance of 1 meter from the object being tracked and always ensure that the object being tracked remains in the center of the screen. Press the q/Q key to exit the program. After the controller program is started, you can also pause/continue tracking through the R2 key on the controller.
2. Program code reference path
/root/yahboomcar_ros2_ws/yahboomcar_ws/src/yahboomcar_astra/yahboomcar_astra/colorHSV.py/root/yahboomcar_ros2_ws/yahboomcar_ws/src/yahboomcar_astra/yahboomcar_astra/colorTracker.py/root/yahboomcar_ros2_ws/yahboomcar_ws/src/yahboomcar_astra/launch/color_tracker_launch.py
colorHSV.py
It mainly completes image processing and calculates the center coordinates of the tracked object.
colorTracker.py
It mainly calculates the speed based on the center coordinates and depth information of the tracked object, and releases the speed data to the chassis.
3. Program startup
3.1.Startup command
After entering the docker container, enter in the terminal
xxxxxxxxxx#Start color tracking noderos2 launch yahboomcar_astra color_tracker_launch.py#Start the depth camera and obtain depth imagesros2 launch astra_camera astra.launch.xmlTaking tracking red as an example, after the program is started, the following screen will appear:
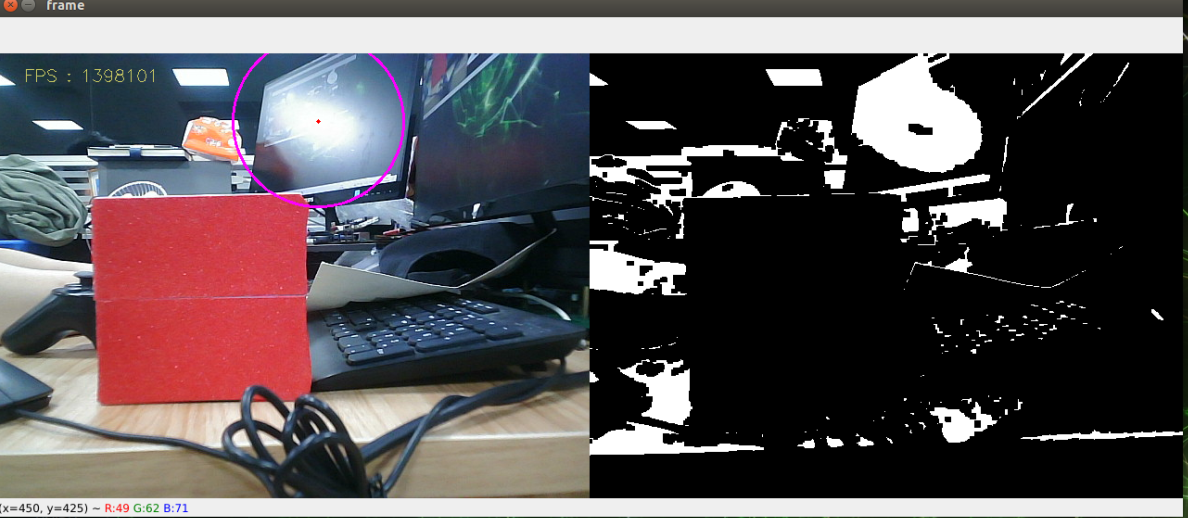
Then press the r/R key on the keyboard to enter the color selection mode, and use the mouse to frame an area (this area can only have one color).
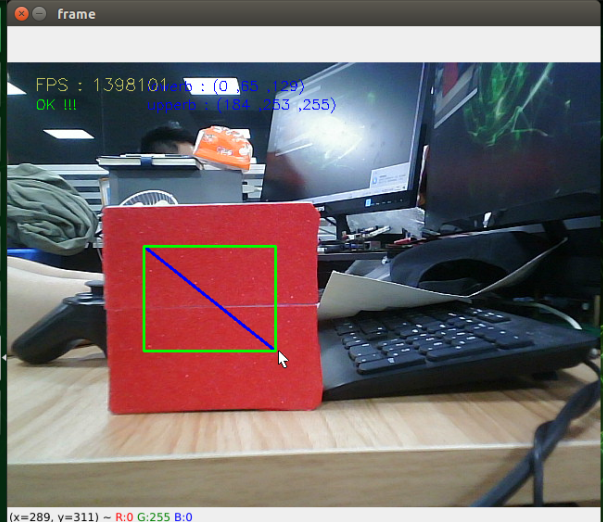
After selecting, the effect will be as shown below:
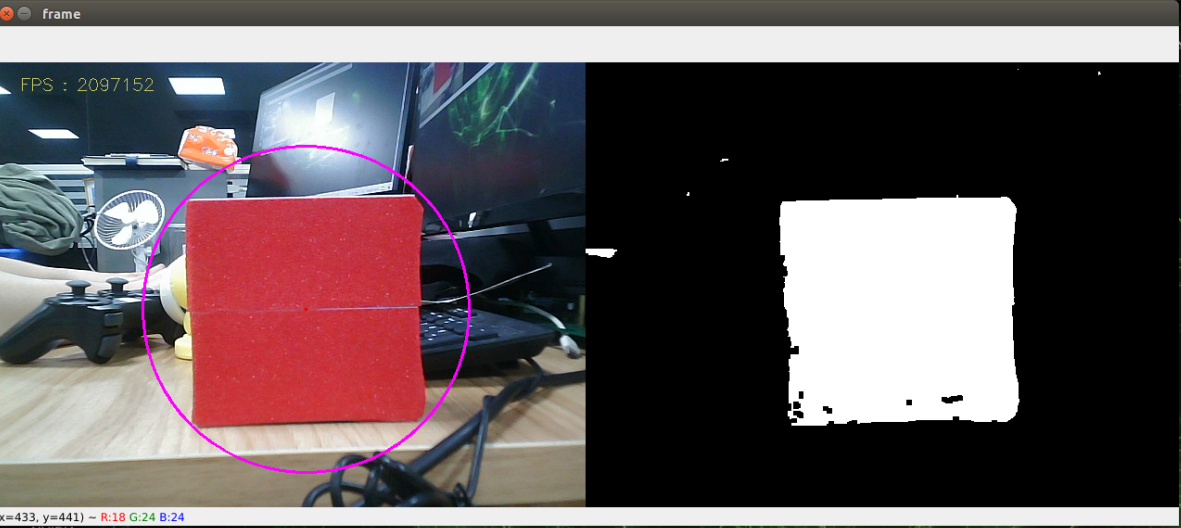
Then, press the space bar to enter tracking mode, move the object slowly, and the car will follow and maintain a distance of 1 meter.
3.2. Dynamic parameter adjustment
Docker terminal input,
xxxxxxxxxxros2 run rqt_reconfigure rqt_reconfigure
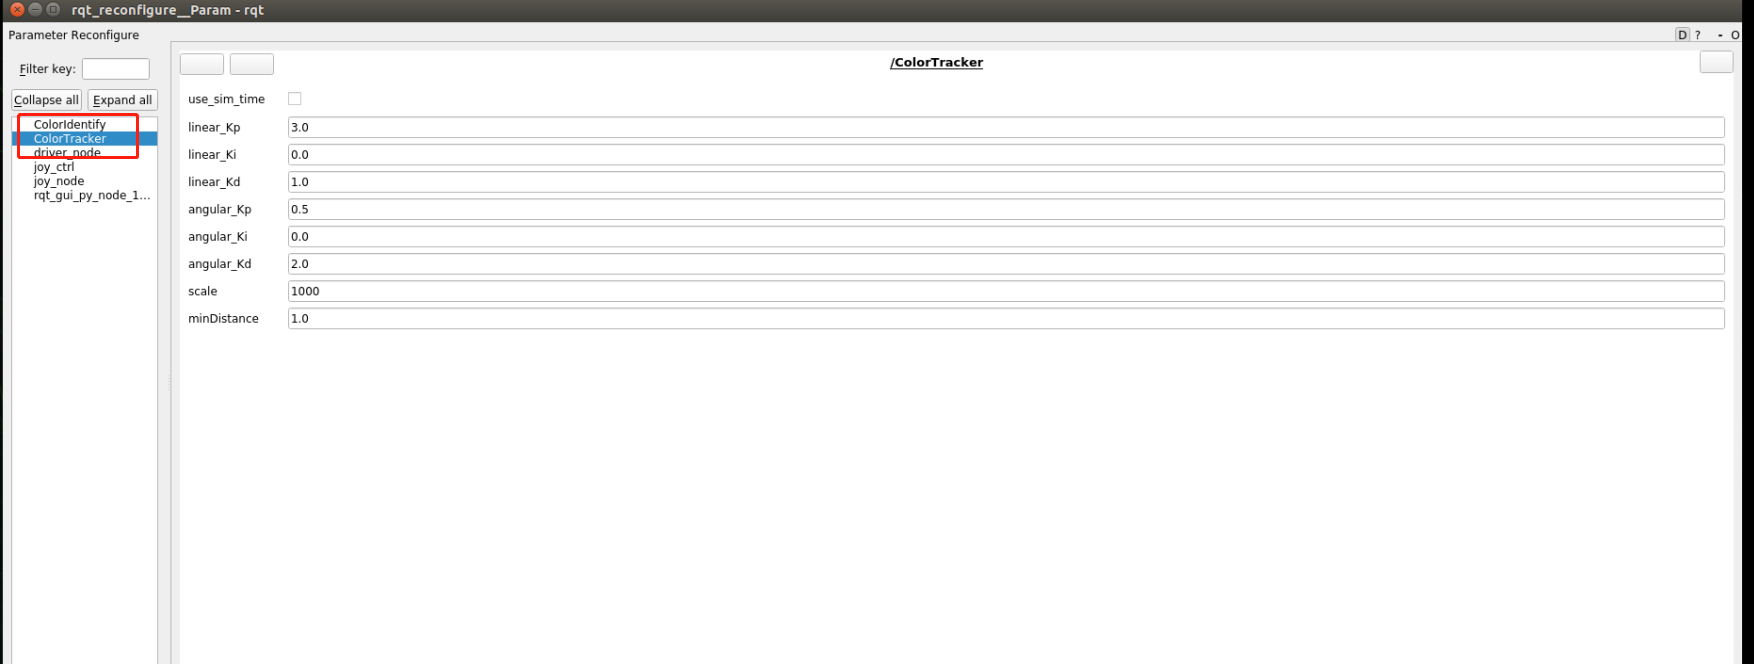
After modifying the parameters, click on a blank space in the GUI to write the parameter values. As can be seen from the above figure,
- colorTracker is mainly responsible for calculating speed and can adjust speed and distance related parameters.
4. Core code
4.1. colorHSV.py
This program mainly has the following functions:
- Turn on the camera and get images;
- Obtain keyboard and mouse events for switching modes and picking colors;
- Process images and publish the center coordinates of tracked objects and publish them.
Part of the core code is as follows:
xxxxxxxxxx#Create a publisher to publish the center coordinates of the tracking objectself.pub_position = self.create_publisher(Position,"/Current_point", 10)#Get keyboard and mouse events and get the value of hsv; if action == 32: self.Track_state = 'tracking' elif action == ord('i') or action == ord('I'): self.Track_state = "identify" elif action == ord('r') or action == ord('R'): self.Reset() elif action == ord('q') or action == ord('Q'): self.cancel() if self.Track_state == 'init': cv.namedWindow(self.windows_name, cv.WINDOW_AUTOSIZE) cv.setMouseCallback(self.windows_name, self.onMouse, 0) if self.select_flags == True: cv.line(rgb_img, self.cols, self.rows, (255, 0, 0), 2) cv.rectangle(rgb_img, self.cols, self.rows, (0, 255, 0), 2) if self.Roi_init[0] != self.Roi_init[2] and self.Roi_init[1] != self.Roi_init[3]: rgb_img, self.hsv_range = self.color.Roi_hsv(rgb_img, self.Roi_init) self.gTracker_state = True self.dyn_update = True else: self.Track_state = 'init'#Calculate the value of the center coordinate, self.circle stores the xy valuergb_img, binary, self.circle = self.color.object_follow(rgb_img, self.hsv_range)#Publish center coordinate newsthreading.Thread(target=self.execute, args=(self.circle[0], self.circle[1], self.circle[2])).start()def execute(self, x, y, z): position = Position() position.anglex = x * 1.0 position.angley = y * 1.0 position.distance = z * 1.0 self.pub_position.publish(position)4.2. colorTracker.py
This program mainly has the following functions: receiving /Current_point and depth image topic data, calculating the speed, and then publishing the speed data.
Part of the code is as follows,
xxxxxxxxxx#Define the topic data that subscribers need to receiveself.sub_depth = self.create_subscription(Image,"/camera/depth/image_raw",self.depth_img_Callback, 1)self.sub_position =self.create_subscription(Position,"/Current_point",self.positionCallback,1)#Define velocity publisherself.pub_cmdVel = self.create_publisher(Twist,'/cmd_vel',10)#Two important callback functions, obtain the self.Center_x value and distance_valuedef positionCallback(self, msg):def depth_img_Callback(self, msg):#self.Center_x value and distance_ value are calculated based on linear velocity and angular velocityself.execute(self.Center_x, distance_)def execute(self, point_x, dist): self.get_param() if abs(self.prev_dist - dist) > 300: self.prev_dist = dist return if abs(self.prev_angular - point_x) > 300: self.prev_angular = point_x return if self.Joy_active == True: return linear_x = self.linear_pid.compute(dist, self.minDist) angular_z = self.angular_pid.compute(320, point_x) if abs(dist - self.minDist) < 30: linear_x = 0 if abs(point_x - 320.0) < 30: angular_z = 0 twist = Twist() if angular_z>2.0: angular_z = 2.0 if angular_z<-2.0: angular_z = -2.0 if linear_x > 1.0: linear_x = 1.0 if linear_x <-1.0: linear_x = -1.0 twist.angular.z = angular_z * 1.0 twist.linear.x = linear_x * 1.0