Welcome to Muto RS Robot repository
12)APP navigation
12.APP navigation
1. Program function description
After the program is started, you can use the APP to remotely control the navigation function.
2. Program code reference path
After entering the docker container, the source code of this function is located at
/root/yahboomcar_ros2_ws/yahboomcar_ws/src/yahboomcar_nav/launch/root/yahboomcar_ros2_ws/yahboomcar_ws/src/robot_pose_publisher_ros2/root/yahboomcar_ros2_ws/yahboomcar_ws/src/laserscan_to_point_pulisher
3. Configuration before use
Note: Since the Muto series robots are equipped with multiple radar devices, the factory system has been configured with routines for multiple devices. However, since the product cannot be automatically recognized, the radar model needs to be manually set.
After entering the container: Make the following modifications according to the lidar type:
xxxxxxxxxxroot@ubuntu:/# cdroot@ubuntu:~# vim .bashrc
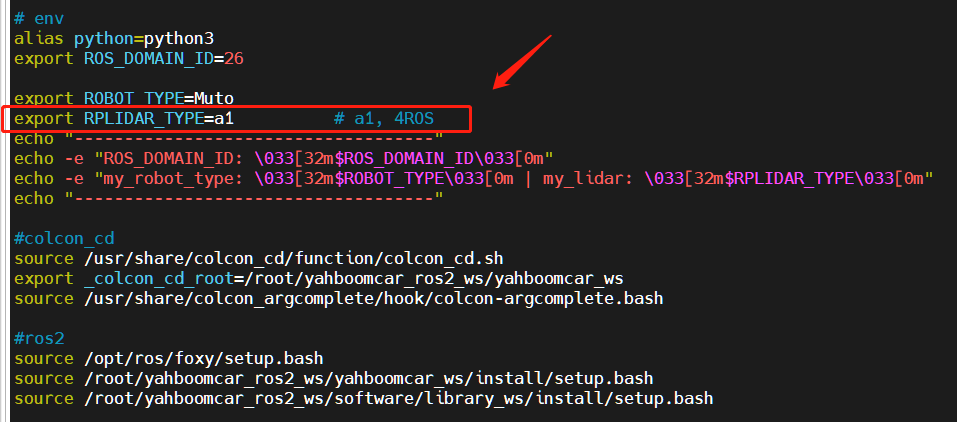
After the modification is completed, save and exit vim, and then execute:
xxxxxxxxxxroot@jetson-desktop:~# source .bashrc------------------------------------ROS_DOMAIN_ID: 26my_robot_type: Muto | my_lidar: a1------------------------------------root@jetson-desktop:~#
You can see the current modified lidar type.
4. Program startup
4.1. Start command
After entering the docker container, start the following nodes from the terminal:
x
#Start ROSBridge and web serviceros2 launch rosbridge_server rosbridge_websocket_launch.xml#Start chassis related nodesros2 launch yahboomcar_nav laser_bringup_launch.py #Start lidar odometryros2 launch rf2o_laser_odometry rf2o_laser_odometry.launch.py #--------------------------Choose one of the following navigation algorithms--------------------------------------# dwb navigation ros2 launch yahboomcar_nav navigation_dwa_launch.py map:=/root/yahboomcar_ros2_ws/yahboomcar_ws/src/yahboomcar_nav/maps/test.yaml #The path of the map above is the path of the map you want to load during navigation. test.yaml is the name of the map saved when the app is built, which means that the test map is loaded during navigation. If you saved another name, you need to change it accordingly.#Or# teb navigation ros2 launch yahboomcar_nav navigation_teb_launch.py map:=/root/yahboomcar_ros2_ws/yahboomcar_ws/src/yahboomcar_nav/maps/test.yaml#The path of the map above is the path of the map you want to load during navigation. test.yaml is the name of the map saved when the app is built, which means that the test map is loaded during navigation. If you saved another name, you need to change it accordingly.--------------------------------------------------------------------------------#Start publishing robot location noderos2 launch robot_pose_publisher_ros2 robot_pose_publisher_launch.py#Start the node that publishes laser data transfer pointsros2 run laserscan_to_point_pulisher laserscan_to_point_pulisher#Start the camera node to view the camera screenros2 run usb_cam usb_cam_node_exe --ros-args --remap /image_raw/compressed:=usb_cam/image_raw/compressedNotice:
After the above startup is completed, the navigation algorithm node will report an error:
Publishing the robot position node will report an error:
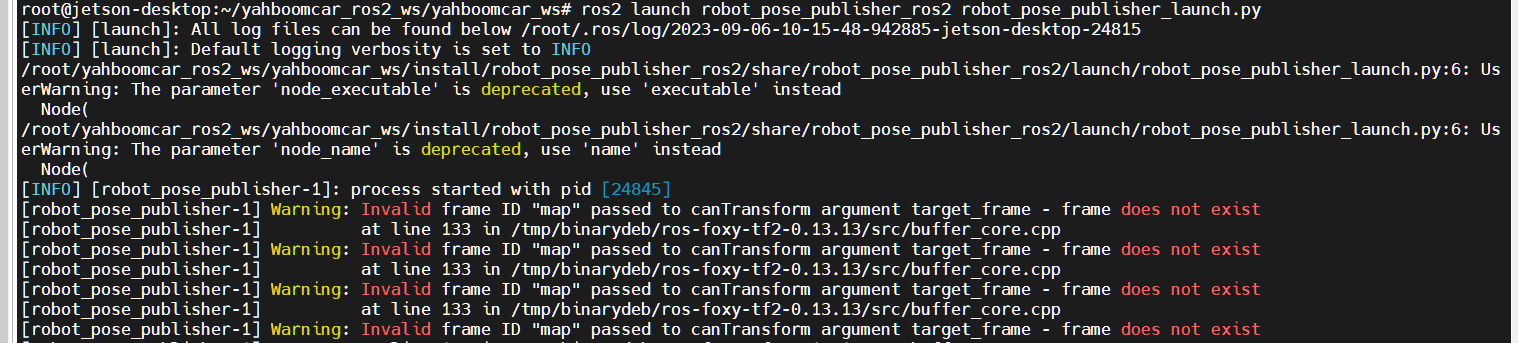
These errors are normal and will disappear after performing the "Initialization Point Settings" before navigating in step 4.2.
4.2. Open the APP and start navigation mode
For the installation of APP, please refer to the chapter "9. Using APP to Create Maps". Install the APP on your phone and open the APP.
Enter the IP address in the input box. The IP address here is the IP address of the car, such as 192.168.11.203. This address is the actual IP address of the car. Please enter it according to the actual situation during actual operation. After completing the input, click the Next button.
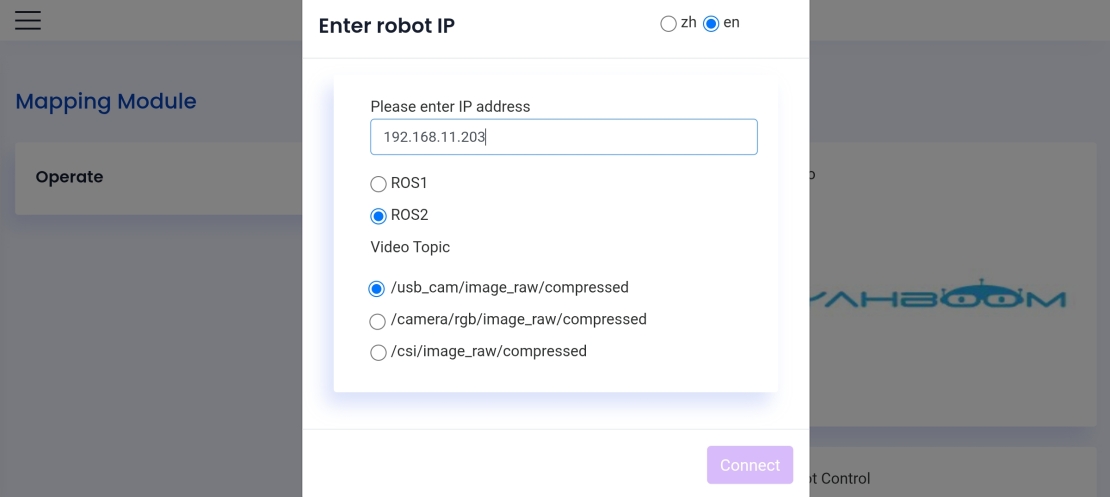
After the startup is completed, you can see the current position of the car and the laser point cloud. Set the initialization point before navigation. Click the Set Initialization Point button.
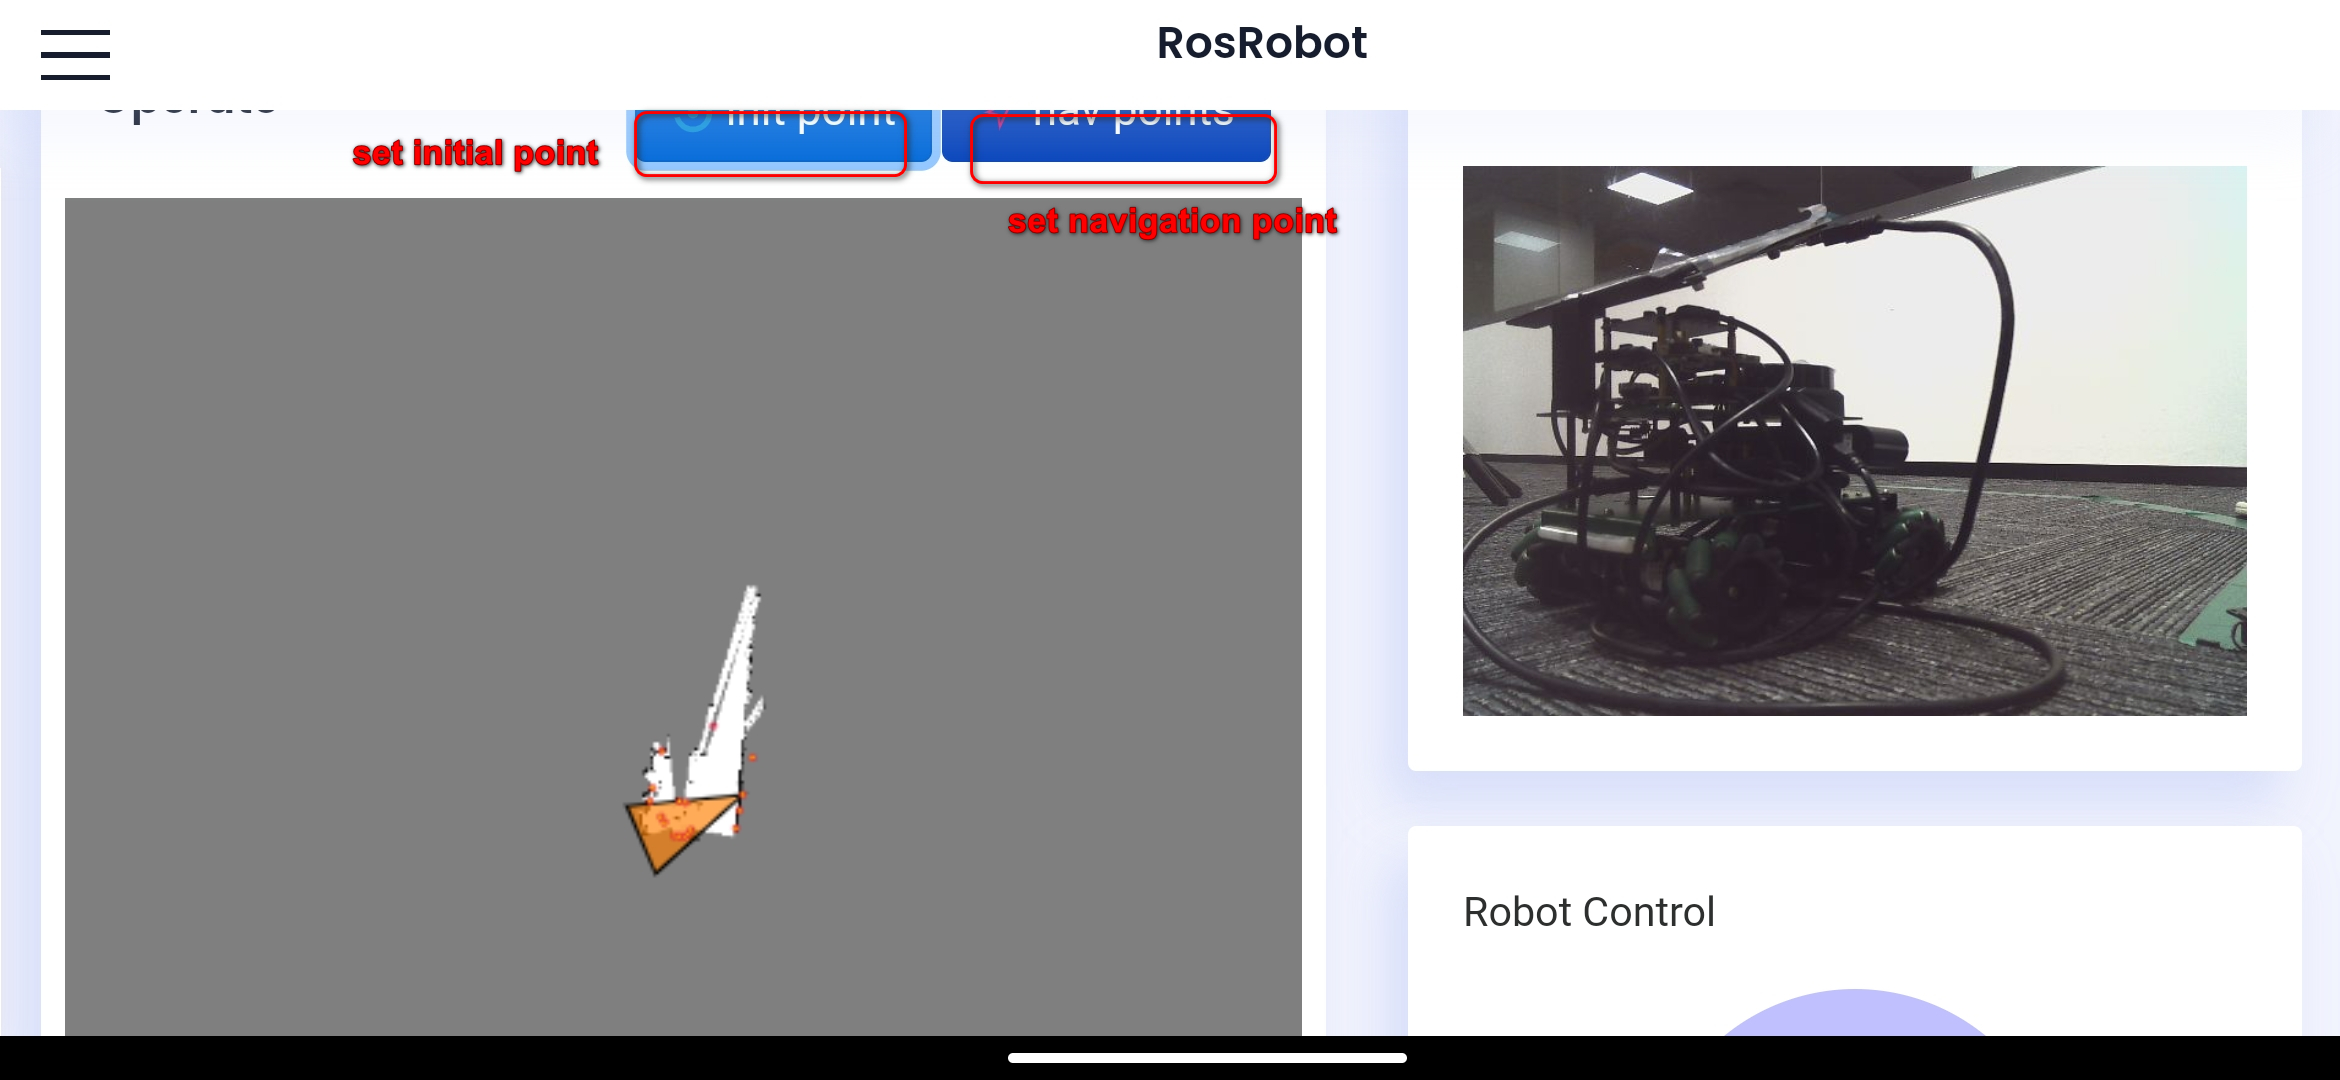
Then click a point on the map and rotate it in the desired direction, setting it as the initialization point.
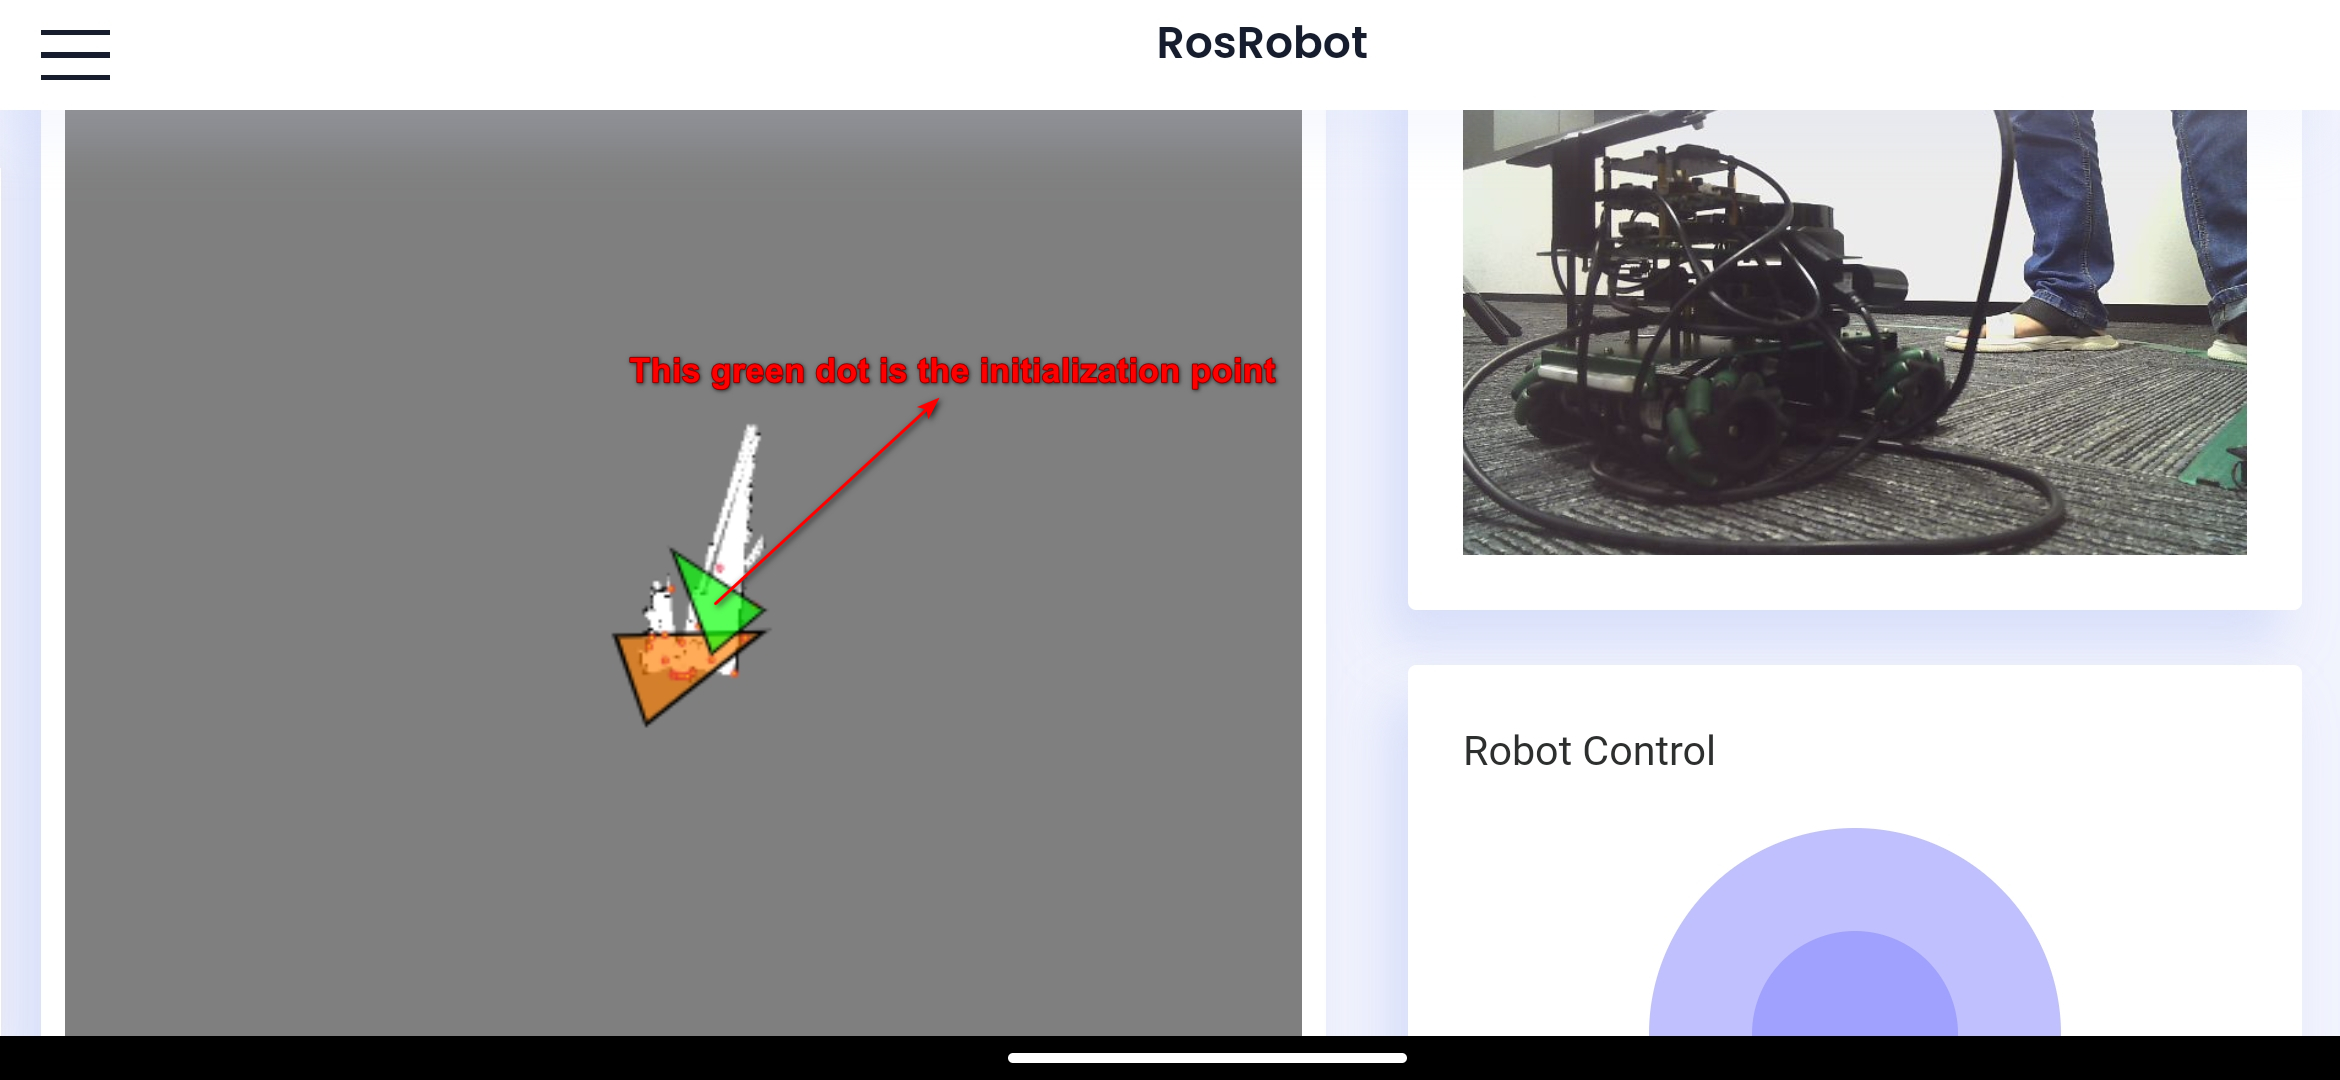
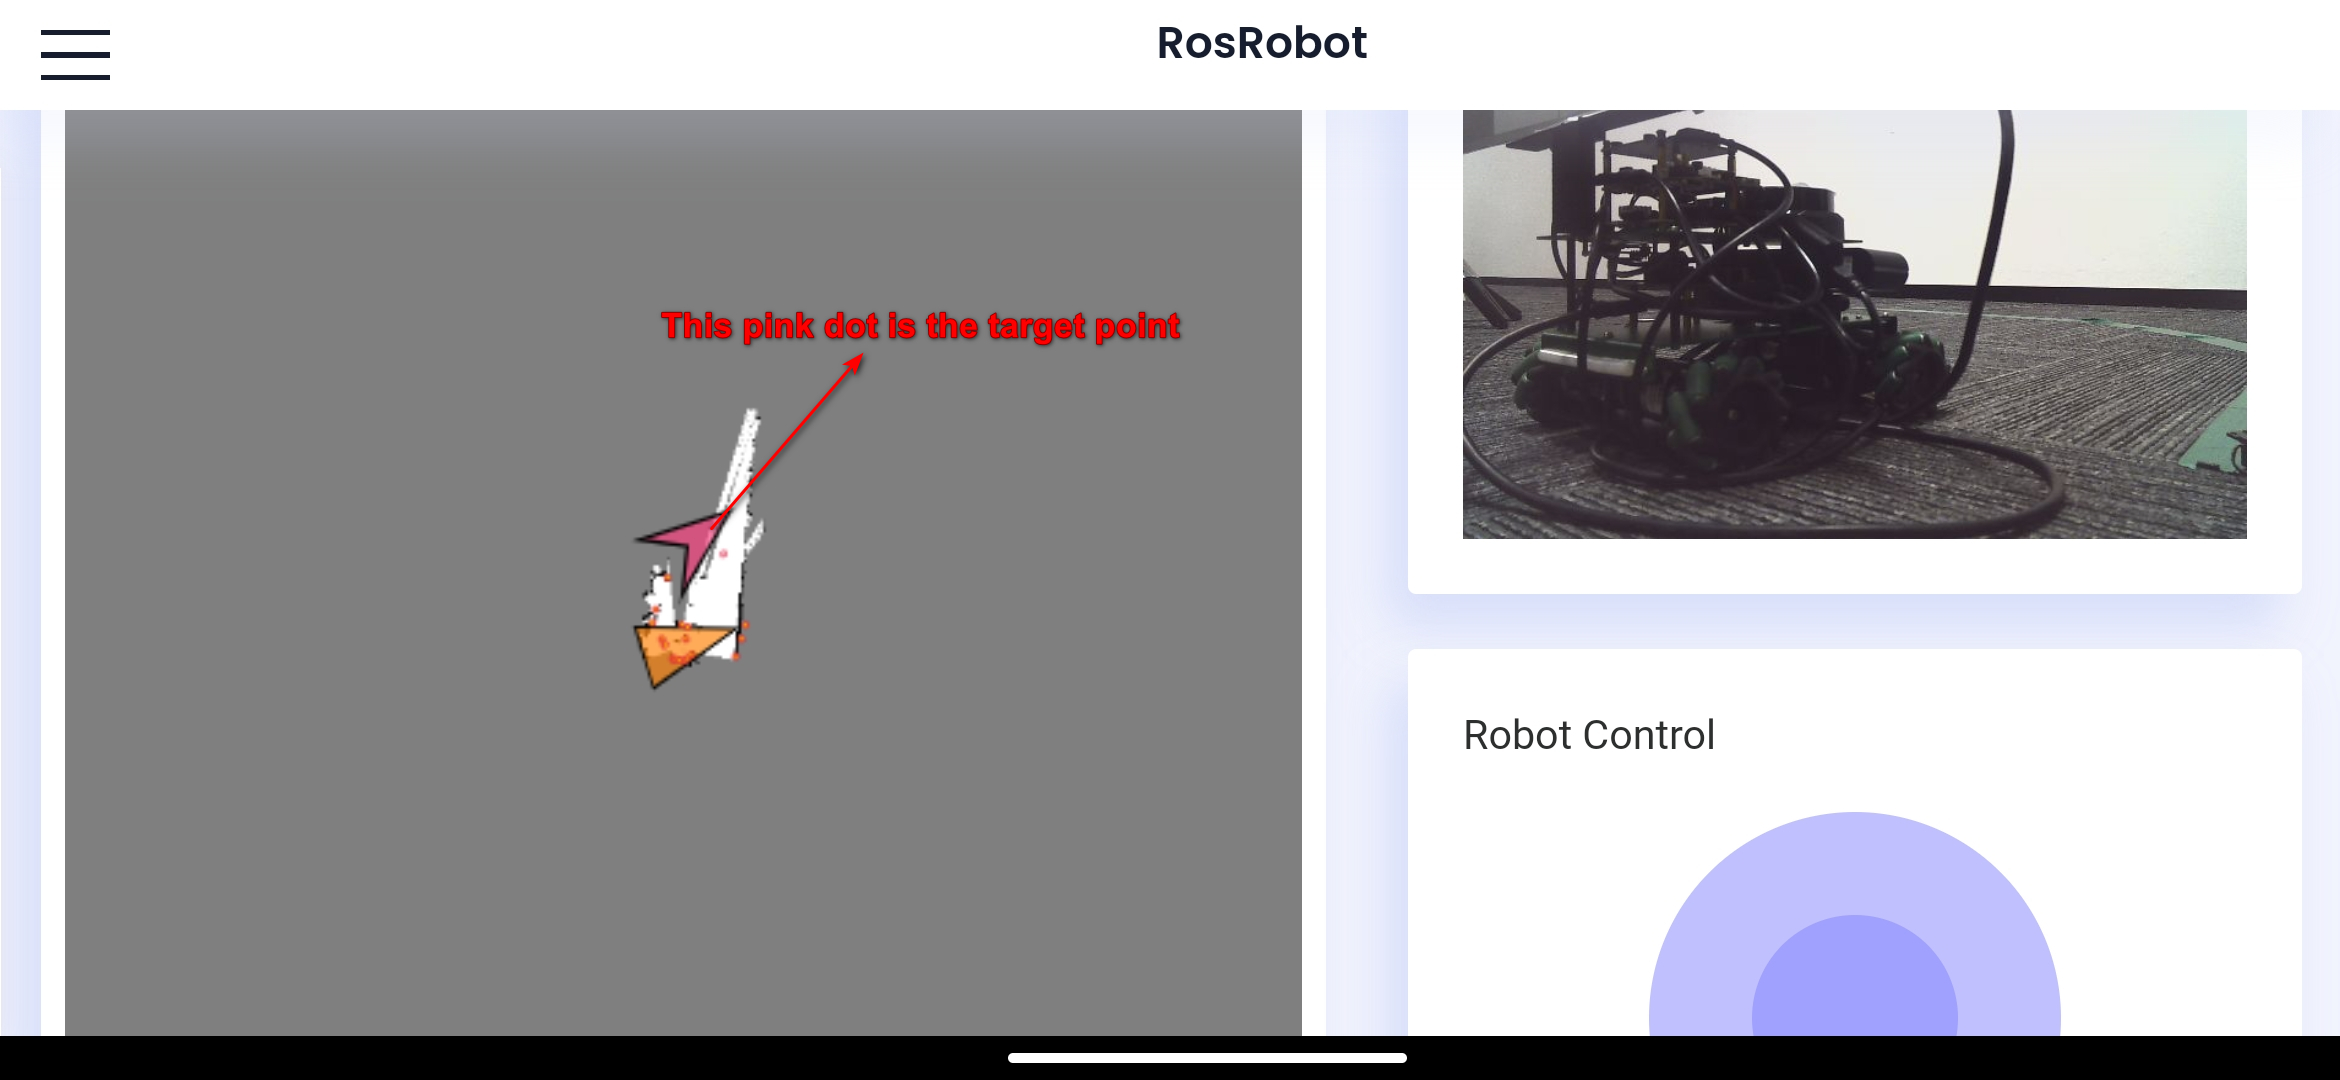
After the initial point setting is completed, the robot position and point cloud will move to the set point position. Then click the Set Navigation Point button. Then wait for the interface to load, set a target point on the map interface, wait for the car to automatically plan the route, and run to the target point.