Welcome to Muto RS Robot repository
4.Control Muto color tracking
4. Voice Control Muto Color Tracking
Before running this program, you need to bind the port numbers of the voice board and the ROS expansion board on the host machine. You can refer to the previous chapter for binding. When entering the Docker container, you need to mount this voice board so that it can be recognized in the Docker container.
1. Program Function Description
After the program starts, say "Hello, yahboom" to the module. The module will reply with "I'm here" to wake up the voice board. Then you can tell it to start tracking any color, such as red, green, blue, or yellow. After receiving the command, the program recognizes the color, loads the processed image, and starts the tracking program. Muto will track the recognized color, and when the recognized color moves slowly, Muto will also follow it.
2. Program Code Reference Path
After entering the Docker container, the source code for this function is located at:
/root/yahboomcar_ros2_ws/yahboomcar_ws/src/yahboomcar_voice_ctrl/yahboomcar_voice_ctrl/Voice_Ctrl_colorTracker.py/root/yahboomcar_ros2_ws/yahboomcar_ws/src/yahboomcar_voice_ctrl/yahboomcar_voice_ctrl/Voice_Ctrl_colorHSV.py3. Pre-use Configuration
Description: Since the Muto series of robots are equipped with various LiDAR devices, the factory system has configured examples for multiple devices. However, because the product cannot be automatically identified, you need to manually set the LiDAR model.
After entering the container, make the following modifications according to the LiDAR type:
xxxxxxxxxxroot@ubuntu:/# cdroot@ubuntu:~# vim .bashrc
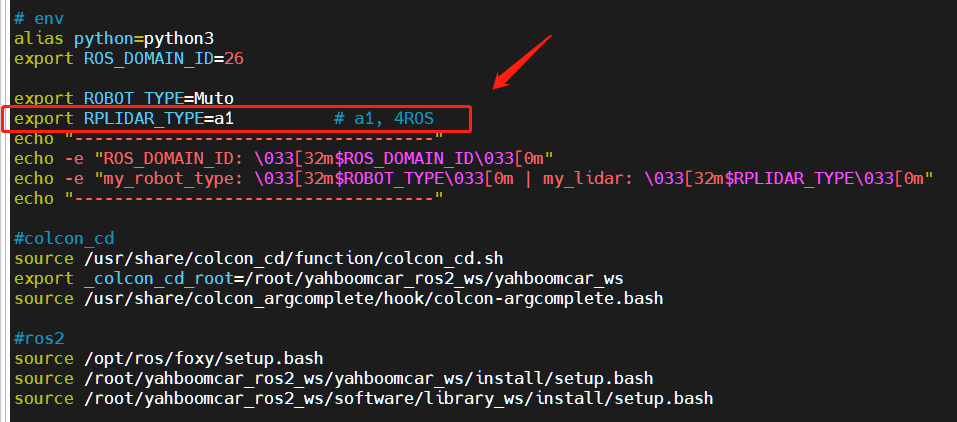
After completing the modification, save and exit vim, then execute:
xxxxxxxxxxroot@jetson-desktop:~# source .bashrc------------------------------------ROS_DOMAIN_ID: 26my_robot_type: Muto | my_lidar: a1------------------------------------root@jetson-desktop:~#
You can see the currently modified LiDAR type.
4. Program Startup
4.1. Startup Command
After entering the Docker container, enter the following in three separate terminals:
xxxxxxxxxx# Start voice processingros2 launch yahboom_speech speech.launch.py# Start the voice control color tracking noderos2 launch yahboomcar_voice_ctrl voice_ctrl_color_tracker_launch.py# Start the depth camera to get depth imagesros2 launch astra_camera astra.launch.xml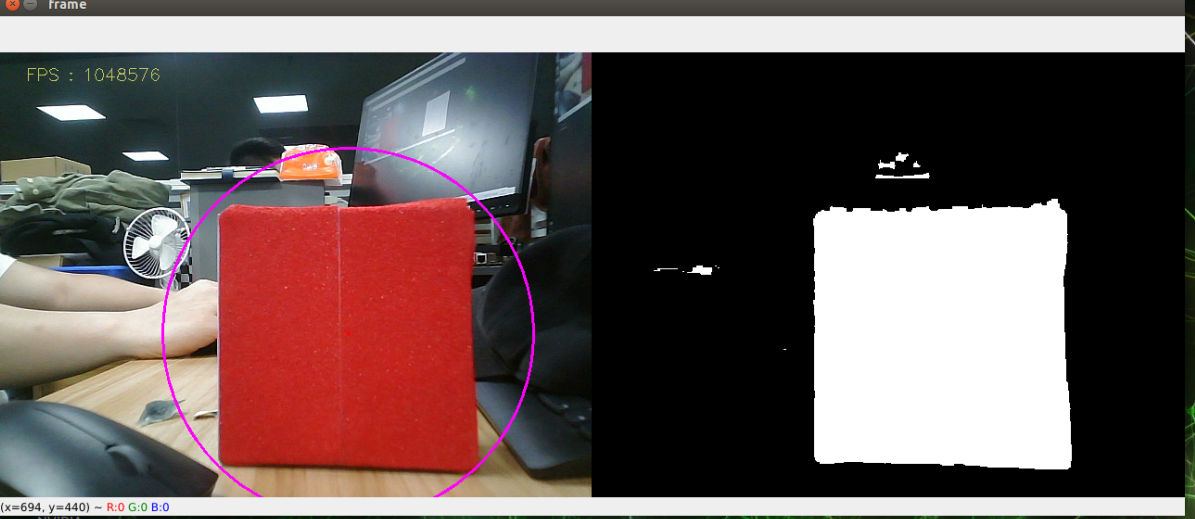
Taking tracking red as an example, after waking up the module, say "red following" The program receives the command, starts processing the image, calculates the center coordinates of the red object, and publishes the object's center coordinates. Combined with the depth information provided by the depth camera, it calculates the speed and finally publishes it to drive Muto.
Press the R2 button on the remote control or the space bar on the keyboard to forcibly stop tracking.
Voice command words are as follows (the items on the right in the table):
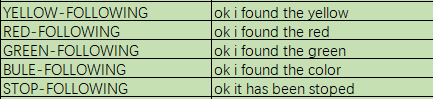
4.2. Node Topic Communication Diagram
Enter in the Docker terminal:
xxxxxxxxxxros2 run rqt_graph rqt_graph
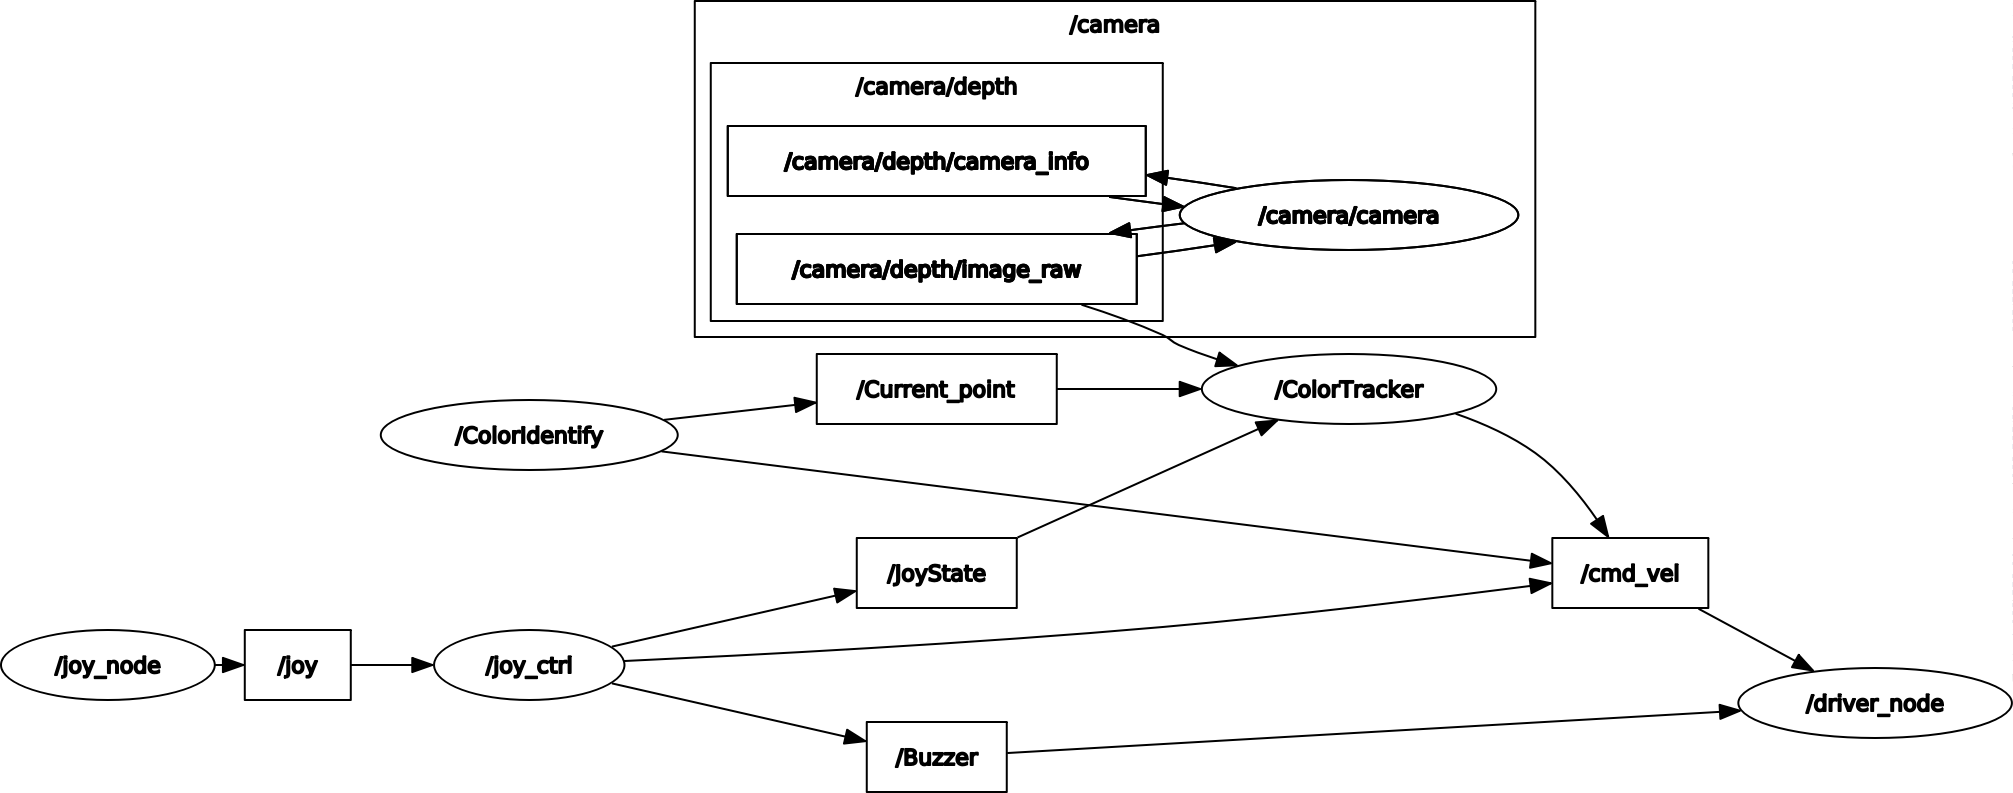
You can also use the dynamic parameter adjuster to modify parameters. Enter in the Docker terminal:
xxxxxxxxxxros2 run rqt_reconfigure rqt_reconfigure
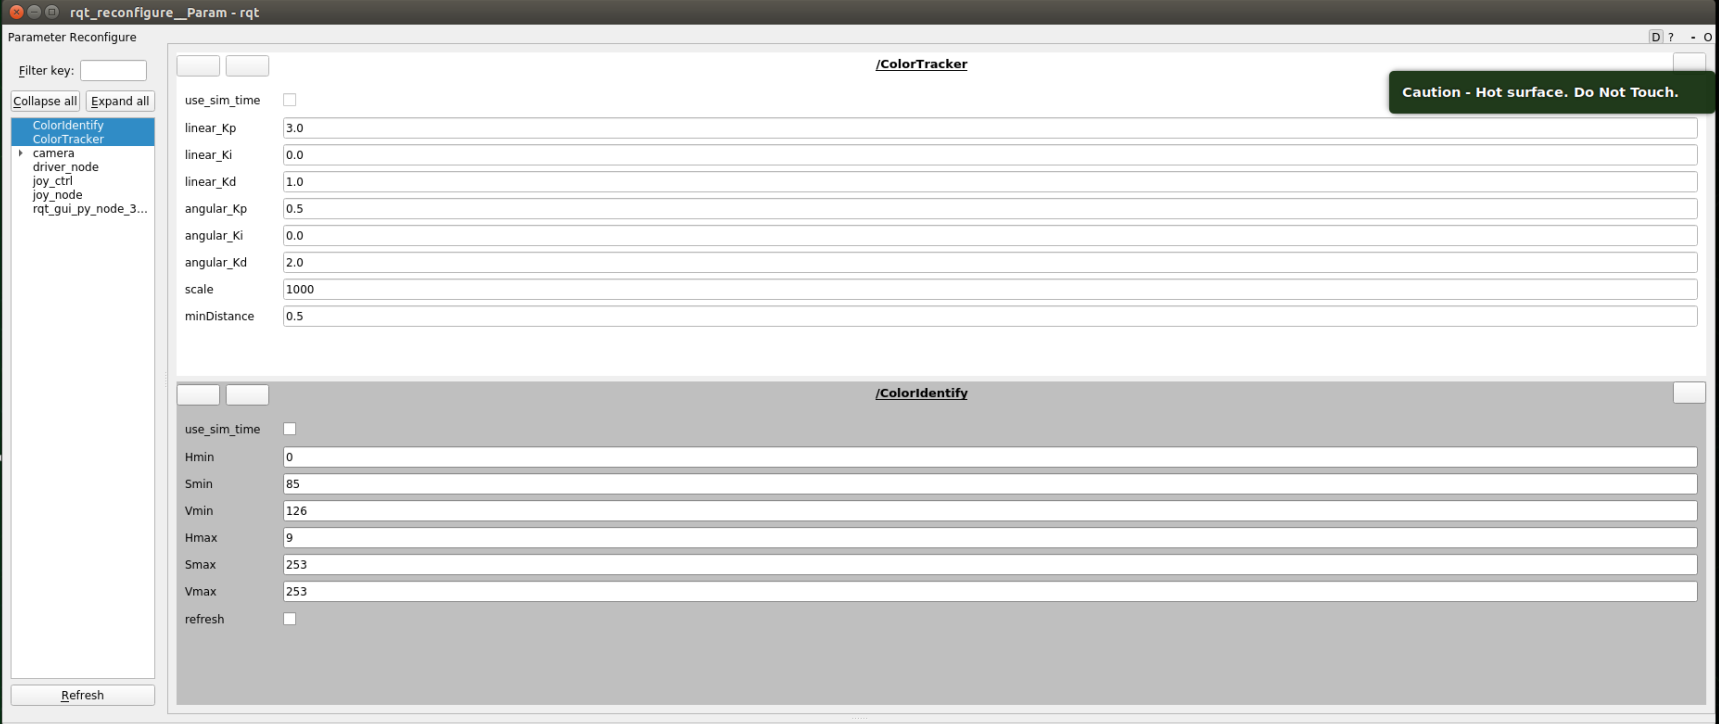
After modifying the parameters, click on the blank area of the GUI to write the parameter values. As can be seen from the figure above:
colorHSVis mainly responsible for image processing and can adjust HSV values.colorTrackeris mainly responsible for calculating speed and can adjust speed and distance-related parameters.
The meaning of each parameter is as follows:
colorHSV
| Parameter Name | Meaning |
|---|---|
| Hmin | H minimum value |
| Smin | S minimum value |
| Vmin | V minimum value |
| Hmax | H maximum value |
| Smax | S maximum value |
| Vmax | V maximum value |
| refresh | Refresh data to the program |
colorTracker
| Parameter Name | Meaning |
|---|---|
| linear_Kp | Linear velocity P value |
| linear_Ki | Linear velocity i value |
| linear_Kd | Linear velocity d value |
| angular_Kp | Angular velocity P value |
| angular_Ki | Angular velocity i value |
| angular_Kd | Angular velocity d value |
| scale | Proportional coefficient |
| minDistance | Tracking distance |
5. Core Code
5.1. colorHSV
This part mainly parses voice commands, processes images, and finally publishes the center coordinates.
xxxxxxxxxx# Define a publisher to publish the center coordinates of the detected objectself.pub_position = self.create_publisher(Position, "/Current_point", 10)# Import the voice driver libraryfrom Speech_Lib import Speech# Create a voice control objectself.spe = Speech()# The following is to get the command, then judge the recognition result, and load the corresponding HSV valuecommand_result = self.spe.speech_read()self.spe.void_write(command_result)if command_result == 73: self.model = "color_follow_line" print("tracker red") self.hsv_range = [(0, 175, 149), (180, 253, 255)]# Process the image, calculate the center coordinates of the detected object, enter the execute function, and publish the center coordinatesrgb_img, binary, self.circle = self.color.object_follow(rgb_img, self.hsv_range)if self.circle[2] != 0: threading.Thread( target=self.execute, args=(self.circle[0], self.circle[1], self.circle[2])).start()if self.point_pose[0] != 0 and self.point_pose[1] != 0: threading.Thread( target=self.execute, args=(self.point_pose[0], self.point_pose[1], self.point_pose[2])).start()5.2. colorTracker
This part receives the topic data of the center coordinates and depth data, then calculates the speed and publishes it to the chassis.
xxxxxxxxxx# Define a subscriber to subscribe to depth informationself.sub_depth = self.create_subscription(Image, "/camera/depth/image_raw", self.depth_img_Callback, 1)# Define a subscriber to subscribe to center coordinate informationself.sub_position = self.create_subscription(Position, "/Current_point", self.positionCallback, 1)# Callback functiondef positionCallback(self, msg) # Get center coordinate valuedef depth_img_Callback(self, msg) # Get depth information# Pass in the X value of the center coordinates and depth information, calculate the speed and publish it to the chassisdef execute(self, point_x, dist)Combining with the node communication diagram in 3.2, understanding the source code will be clearer.