Welcome to Muto RS Robot repository
5.Control multi-point navigation
5. Voice Control for Multi-Point Navigation
5. Voice Control for Multi-Point Navigation5.1. Function Description5.2. Preparation5.2.1. Pre-use Configuration5.3. Configure Navigation Points5.4. Use Voice for Multi-Point Navigation5.5. Node Analysis5.5.1. Display Computation Graph5.5.2. Voice Control Node Details
5.1. Function Description
Using the voice recognition module, you can achieve multi-point navigation in an established map through voice control.
Note: Before using the functions in this section, please first learn to use the [Lidar Course ----- Mapping and Navigation Function] module.
5.2. Preparation
This section requires the use of a voice control device. Before running this lesson, you need to perform the following preparatory operations:
5.2.1. Pre-use Configuration
Description: Since the Muto series robots are equipped with various lidar devices, the factory system has been configured with routines for multiple devices. However, because the product cannot be automatically identified, you need to manually set the lidar model.
After entering the container: make the following modifications according to the lidar type:
xxxxxxxxxxroot@ubuntu:/# cdroot@ubuntu:~# vim .bashrc
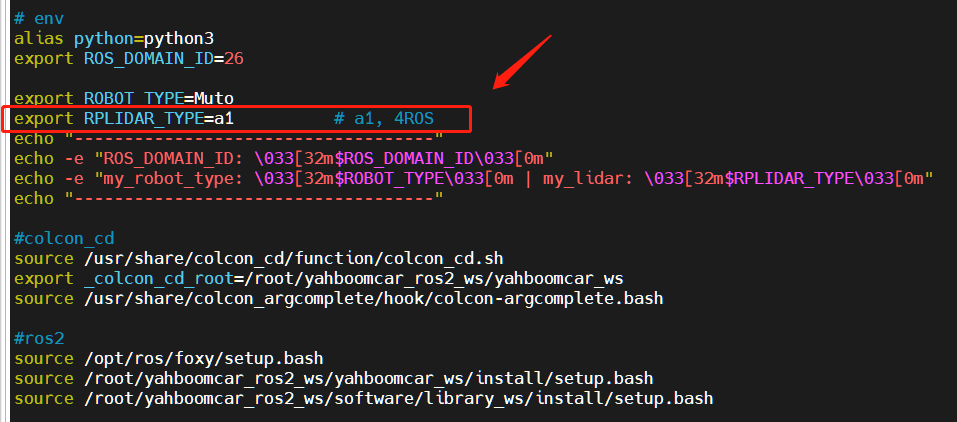
After the modification is complete, save and exit vim, then execute:
xxxxxxxxxxroot@jetson-desktop:~# source .bashrc------------------------------------ROS_DOMAIN_ID: 26my_robot_type: Muto | my_lidar: a1------------------------------------root@jetson-desktop:~#
You can see the currently modified lidar type is my_lidar: a1.
5.3. Configure Navigation Points
- Enter the container, refer to [Docker Course ----- 5. Enter the Muto's docker container], and execute the following command in a separate terminal:
xxxxxxxxxxros2 launch yahboomcar_nav laser_bringup_launch.py
- Open the virtual machine, configure multi-machine communication, and then execute the following command to display the rviz node:
xxxxxxxxxxros2 launch yahboomcar_nav display_nav_launch.py
- Start the lidar odometry in the docker container:
xxxxxxxxxxros2 launch rf2o_laser_odometry rf2o_laser_odometry.launch.py
- Execute the navigation node in the docker container:
xxxxxxxxxxros2 launch hexapod_nav hexapod_navigation_mppi.launch.py autostart:=true map:=/root/yahboomcar_ros2_ws/maps/test_map.yaml# The map path above is the map path you want to load during navigation. test_map.yaml is the map name, which means that the test_map will be loaded during navigation. If it is another name, it needs to be changed accordingly here.At this time, click [2D Pose Estimate] in the rviz interface of the virtual machine, and then compare the pose of the car to mark an initial pose for the car on the map;
The display after marking is as follows:
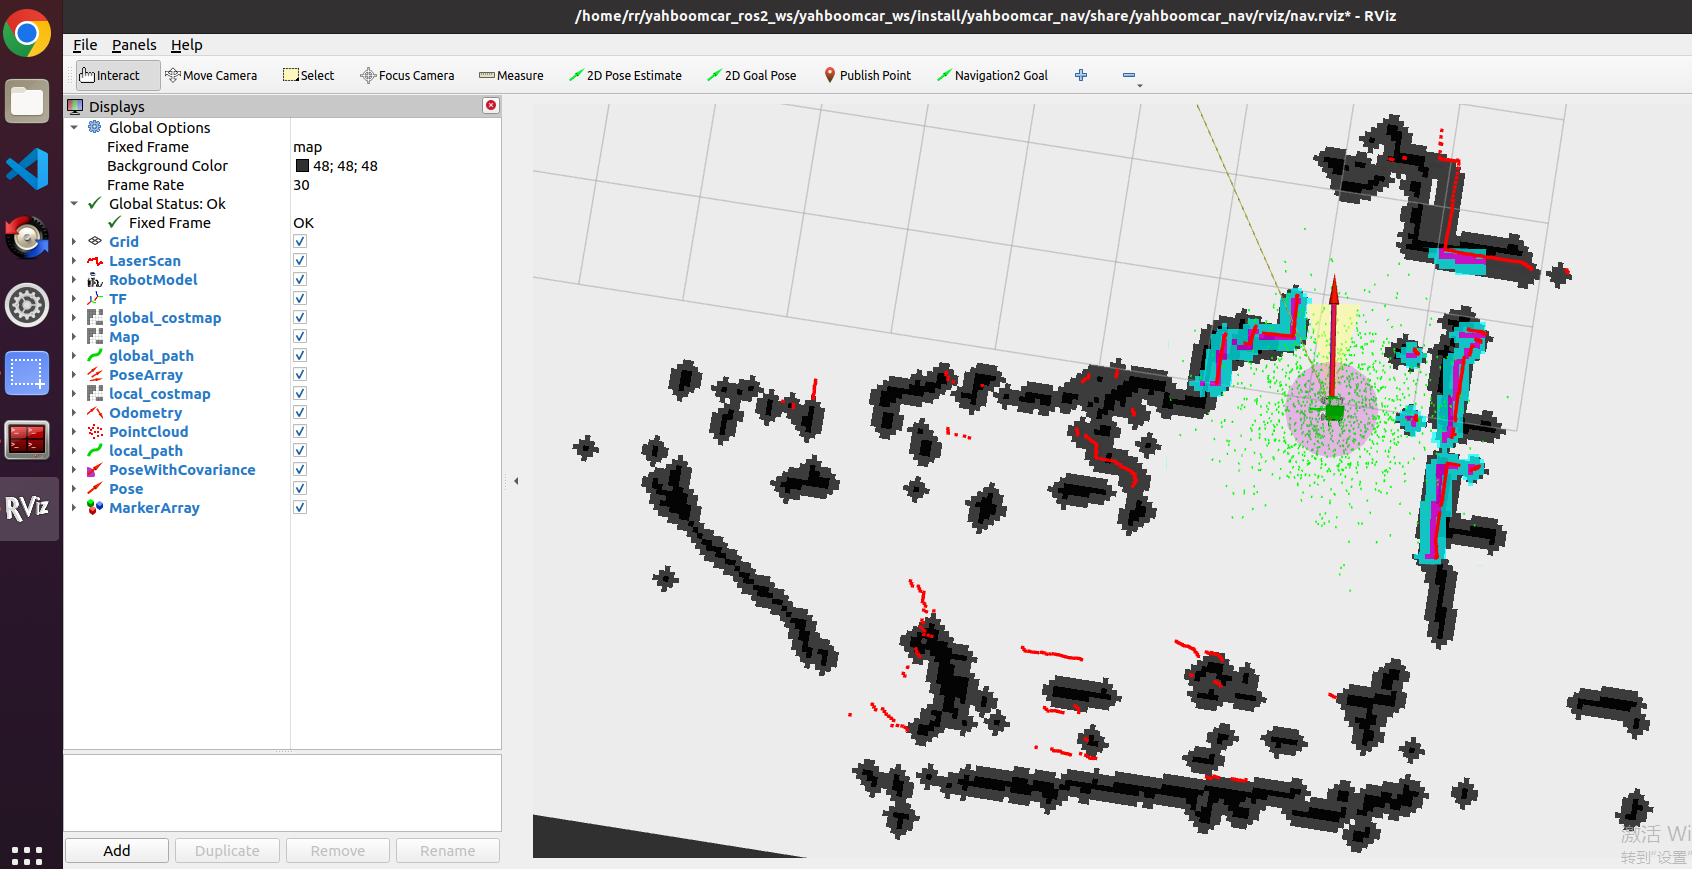
- Compare the coincidence of the radar scanning points and obstacles. You can set the initial pose of the car multiple times until the radar scanning points and obstacles roughly coincide;
- Open another terminal to enter the docker container and execute:
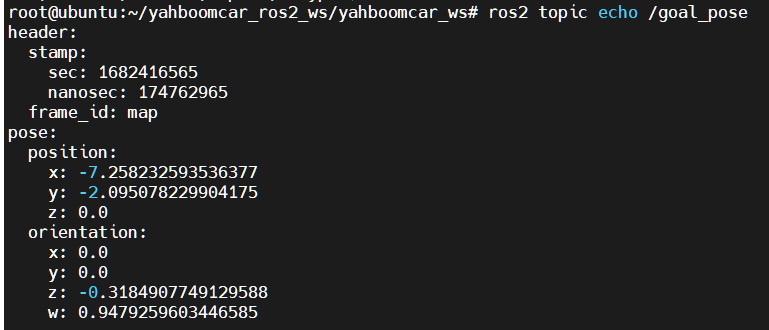
ros2 topic echo /goal_pose # Listen to the /goal_pose topic- Click [2D Goal Pose] to set the first navigation target point. At this time, the car starts to navigate, and the monitored topic data will be received in step 6:
- Open the code at the following location:
xxxxxxxxxx/root/yahboomcar_ros2_ws/yahboomcar_ws/src/yahboomcar_voice_ctrl/yahboomcar_voice_ctrl/voice_Ctrl_send_mark.py
Modify the pose of the first navigation point to the one printed in step 7:
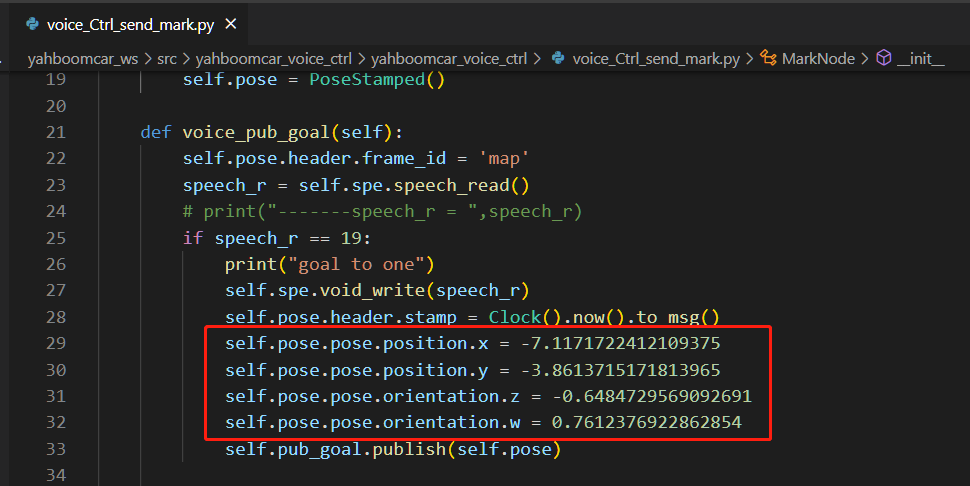
- Modify the poses of the other 4 navigation points in the same way.
5.4. Use Voice for Multi-Point Navigation
- Enter the container, refer to [5. Enter the Muto's docker container], and execute the following command in a separate terminal:
xxxxxxxxxxros2 launch yahboomcar_nav laser_odom_bringup_launch.py
- Open the virtual machine, configure multi-machine communication, and then execute the following command to display the rviz node:
xxxxxxxxxxros2 launch yahboomcar_nav display_nav_launch.py
- Execute the navigation node in the docker container:
ros2 launch yahboomcar_nav navigation_teb_launch.py# The above method loads the yahboomcar map by default. If you need to load other maps, please use the following method to start:ros2 launch yahboomcar_nav navigation_teb_launch.py map:=/root/yahboomcar_ros2_ws/yahboomcar_ws/src/yahboomcar_nav/maps/test.yaml# The map path above is the map path you want to load during navigation. test.yaml is the map name, which means that the test map will be loaded during navigation. If it is another name, it needs to be changed accordingly here.- At this time, click [2D Pose Estimate] in the rviz interface of the virtual machine, and then compare the pose of the car to mark an initial pose for the car on the map;
The display after marking is as follows:
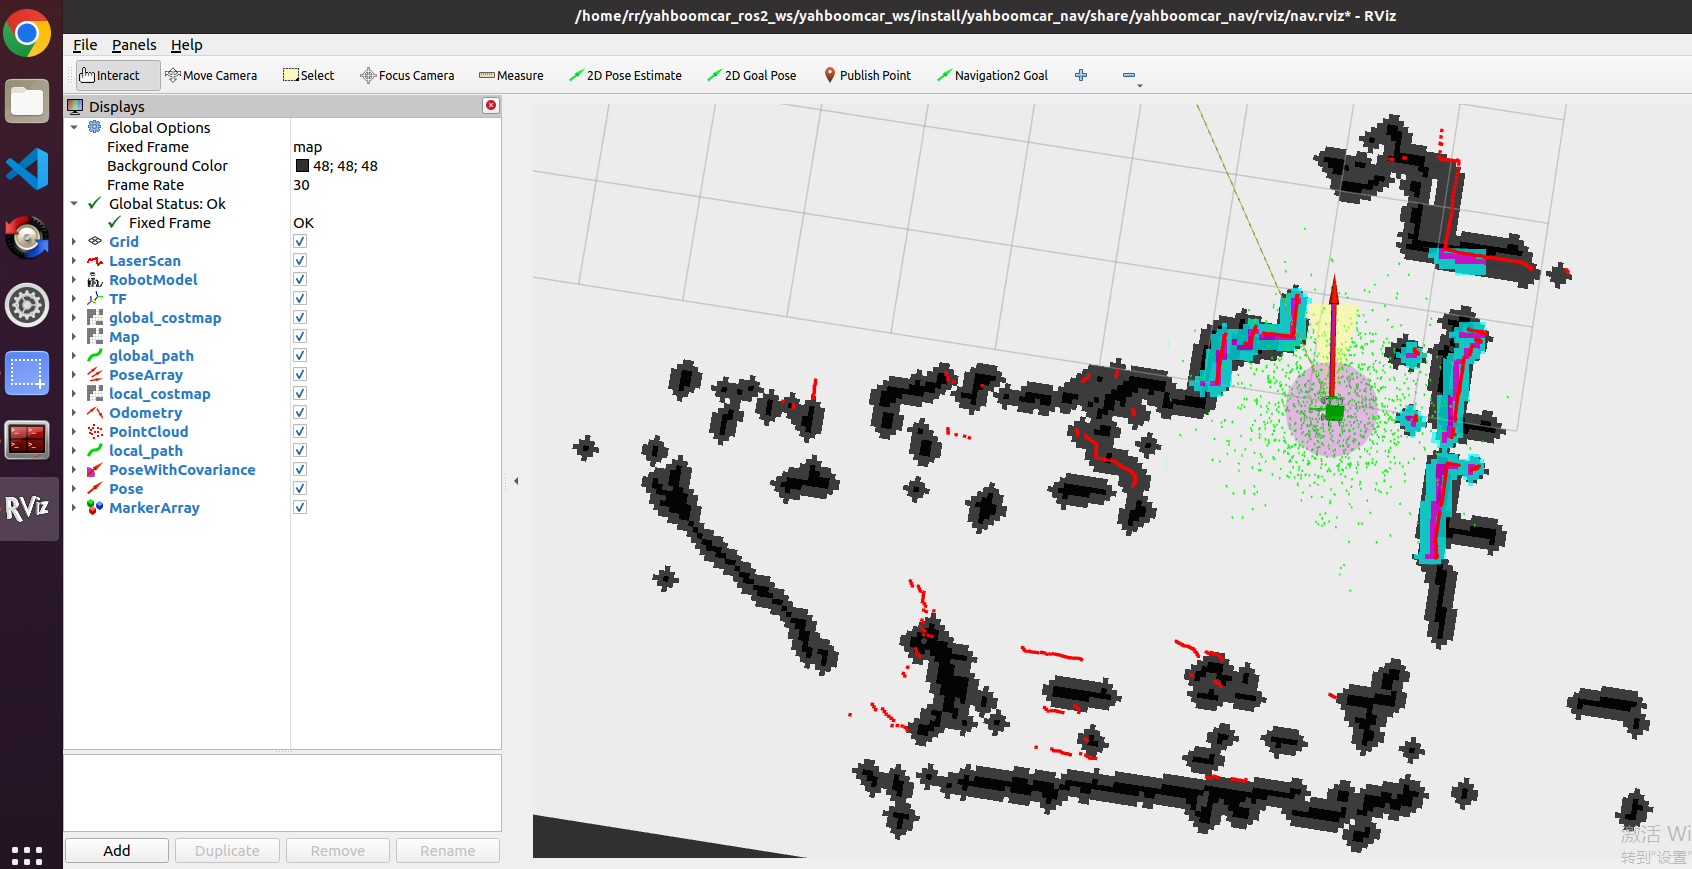
- Compare the coincidence of the radar scanning points and obstacles. You can set the initial pose of the car multiple times until the radar scanning points and obstacles roughly coincide;
- Open two more terminals to enter the docker container, and execute the commands to start the voice control navigation node and the voice recognition node respectively:
xxxxxxxxxxros2 launch yahboom_speech speech.launch.py
xxxxxxxxxxros2 run yahboomcar_voice_ctrl voice_Ctrl_send_mark
- Say "Hello, yahboom" to the voice module on the car to wake it up. After hearing the voice module's feedback broadcast "I'm here", continue to say "go to point A"; the voice module will feedback broadcast "OK, I am going to the point A", and the car will start navigating to position one. The navigation of other positions can be used in the same way. Refer to the table below for voice control function words:
| Function Word | Voice Recognition Module Result | Voice Broadcast Content |
|---|---|---|
| GO-TO-THE-POINT-A | 19 | ok I am going to the point a |
| GO-TO-THE-POINT-B | 20 | ok I am going to the point b |
| GO-TO-THE-POINT-C | 21 | ok I am going to the point c |
| GO-TO-THE-POINT-D | 32 | ok I am going to the point d |
| BACK-TO-ORIGIANL | 33 | ok i am return back |
5.5. Node Analysis
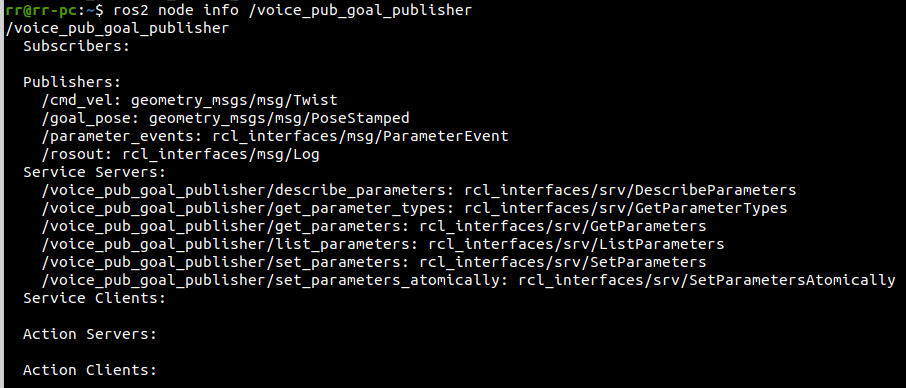
5.5.1. Display Computation Graph
xxxxxxxxxxrqt_graph
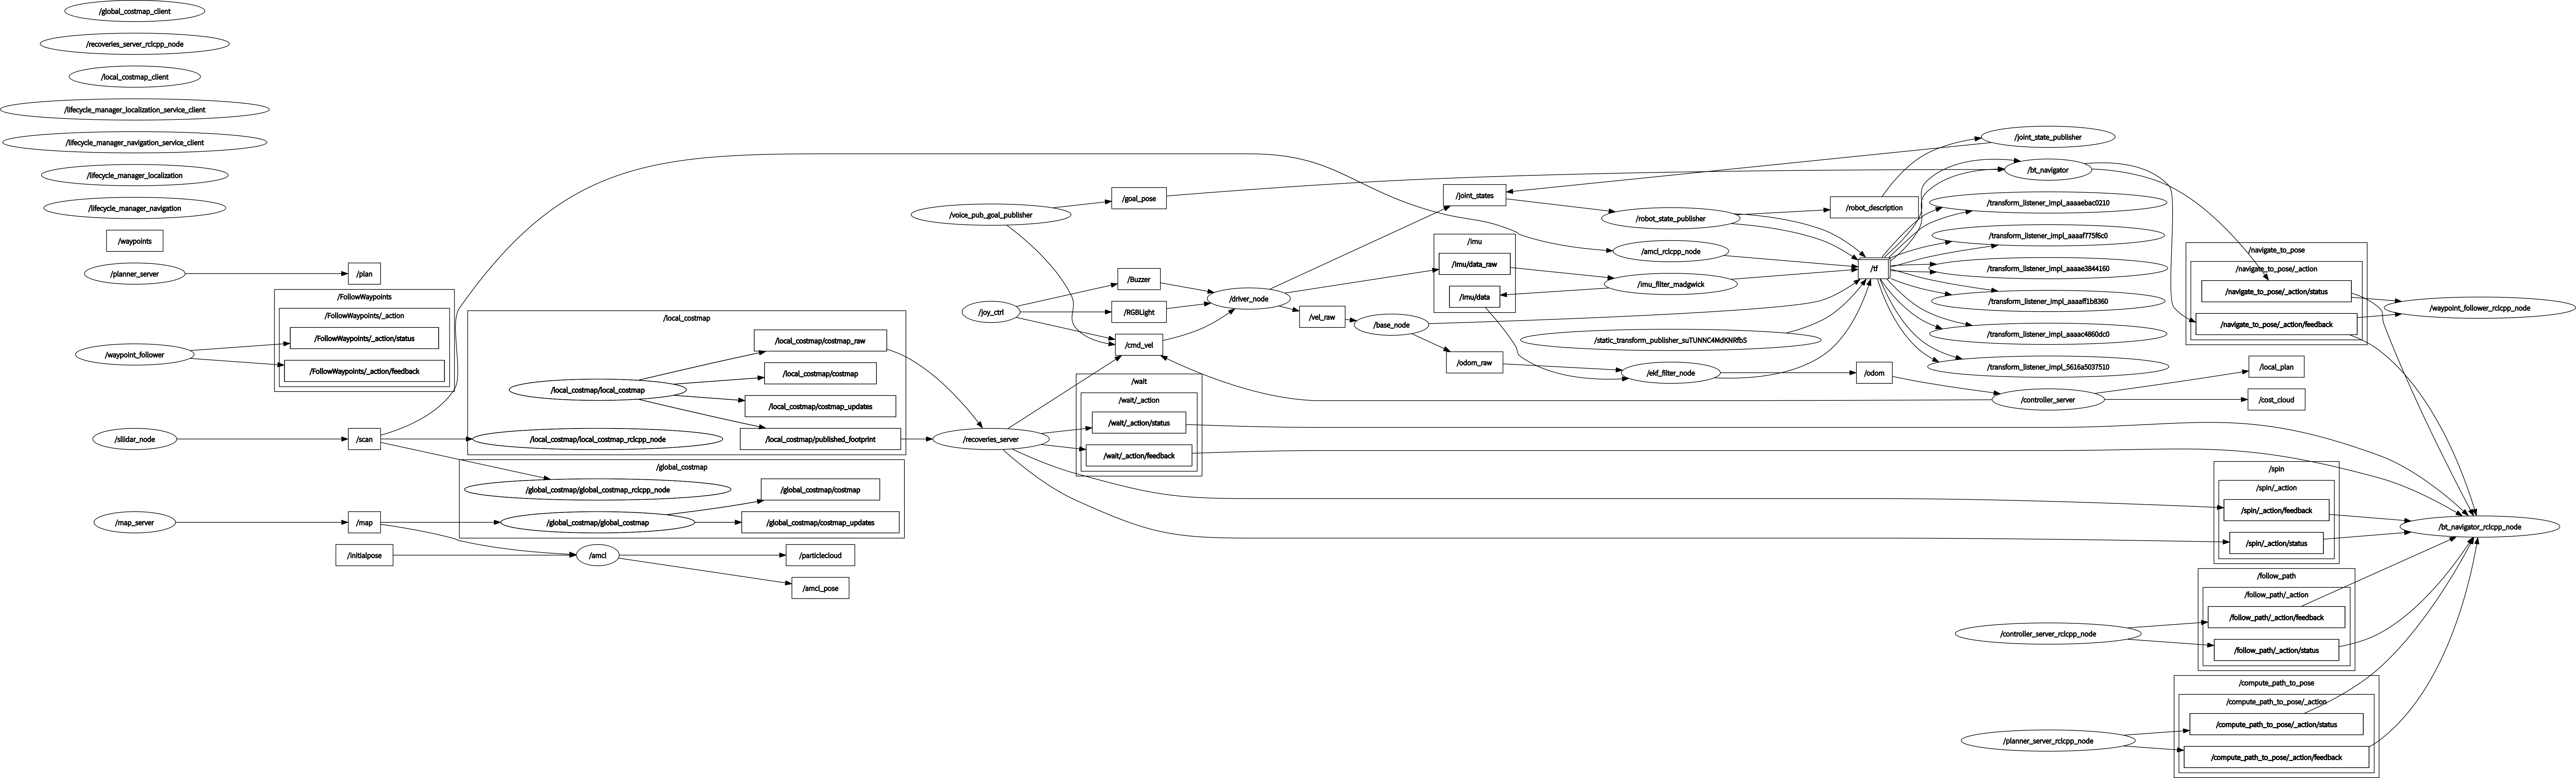
5.5.2. Voice Control Node Details