Welcome to ROSMASTER X3 Plus repository
10.5 Robot handle control
5. Robot handle control
According to different models, just set the purchased model in [.bashrc], X1 (normal four-wheel drive) X3 (Mailun) X3plus (Mailun robotic arm) R2 (Ackerman differential) etc. , this section takes X3 as an example
#Raspberry Pi 5 master needs to enter docker first, please perform this step#If running the script into docker fails, please refer to ROS/07, Docker tutorial~/run_docker.sh#Multiple ros commands require multiple terminals to be executed in the same docker container. Please refer to the tutorials in Sections 07/5 and 5.8.Open the [.bashrc] file
xxxxxxxxxxsudo vim .bashrc
Find the [ROBOT_TYPE] parameter and modify the corresponding model
xxxxxxxxxxexport ROBOT_TYPE=X3 # ROBOT_TYPE: X1 X3 X3plus R2 X7
5.1. Operating environment
Operating system: Ubuntu 18.04 LTS
ROS version: melodic
Equipment: jetson nano/Raspberry Pi, PC, wireless controller (USB receiver)
Controller function code path: ~/yahboomcar _ws/src/yahboomcar_ctrl/scripts
5.2. Install driver
ROS driver for universal Linux controllers. The Joy package contains Joy_node, a node that connects a generic Linux controller to ROS. This node publishes a "/Joy" message containing the current state of each button and axis of the controller.
xxxxxxxxxxsudo apt install ros-melodic-joy ros-melodic-joystick-drivers
5.3. Usage steps
5.3.1. Device connection
First, connect the USB end of the wireless controller to the device (jetson, Raspberry Pi, PC). This lesson takes connecting the USB end of the wireless controller to Jetson as an example. Connect the mouse, keyboard, and monitor; or you can also connect remotely via VNC.
5.3.2. View device
Open the terminal and enter the following command. [js0] is displayed. This is the wireless controller. In special cases, you can also view the changes in the device list through the two states of accessing and not accessing the USB end of the wireless controller. If there is a change, the changed device will be the same; otherwise, the connection will be unsuccessful or unrecognized.
xxxxxxxxxxls /dev/input
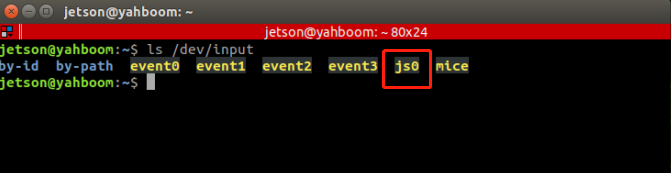
Note: If a keyboard or mouse or other device is connected to ROSMASTER first, the remote control receiver will be recognized as other devices. Therefore, if you need to connect a keyboard or mouse, you can connect the remote control receiver first and then connect it. into other devices.
5.3.3. Test handle
Open the terminal and enter the following command. As shown in the picture, the wireless handle has 8 axial inputs and 15 key inputs. You can press the keys individually to test the numbers corresponding to the keys.
xxxxxxxxxxsudo jstest /dev/input/js0
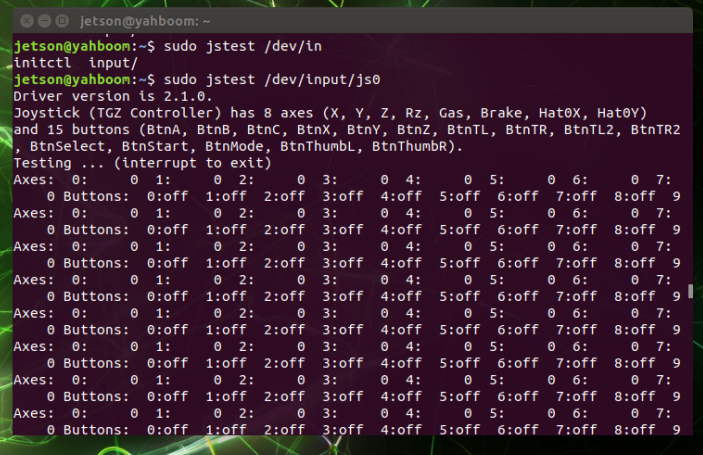
If jstest is not installed, run the following command:
xxxxxxxxxxsudo apt-get install joystick
5.3.4. Run the handle node
Open three terminals and enter the following commands in order to view detailed information, which is the same as [Test Controller]. Depending on the device (Raspberry Pi, Jetson Nano, PC) and the system, the controller status will be different.
xxxxxxxxxxroscorerosrun joy joy_noderostopic echo joy #Print released information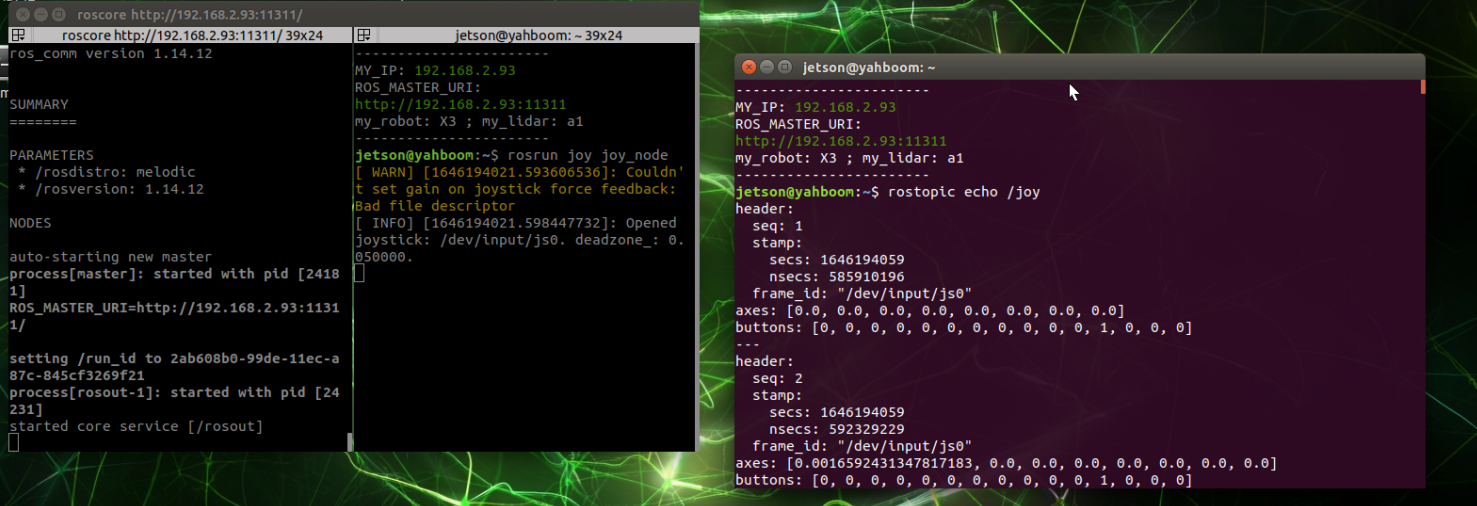
5.4. Control the little turtle with the handle
5.4.1. Start
xxxxxxxxxxroslaunch yahboomcar_ctrl twist_joy.launch
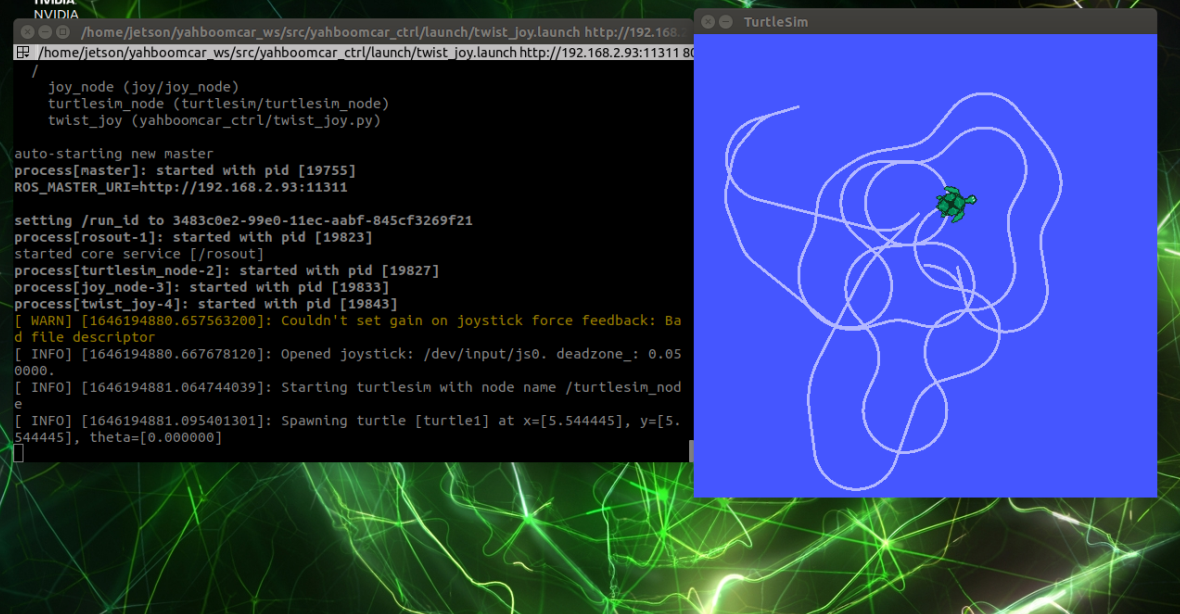
1), view nodes
xxxxxxxxxxrostopic list
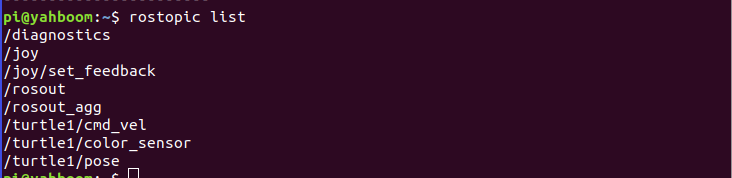
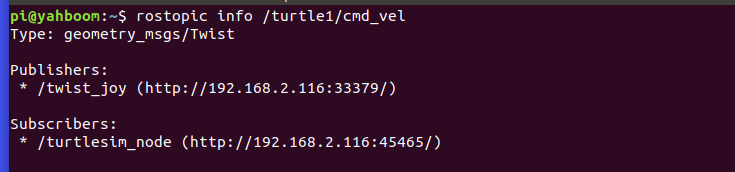
View speed topic information
Correspondence between the handle and the operation of the little turtle
| handle | little turtle |
|---|---|
| On the left joystick | Forward |
| Left joystick down | Backward |
| Right joystick left | Turn left |
| Right joystick right | Turn right |
View the node graph
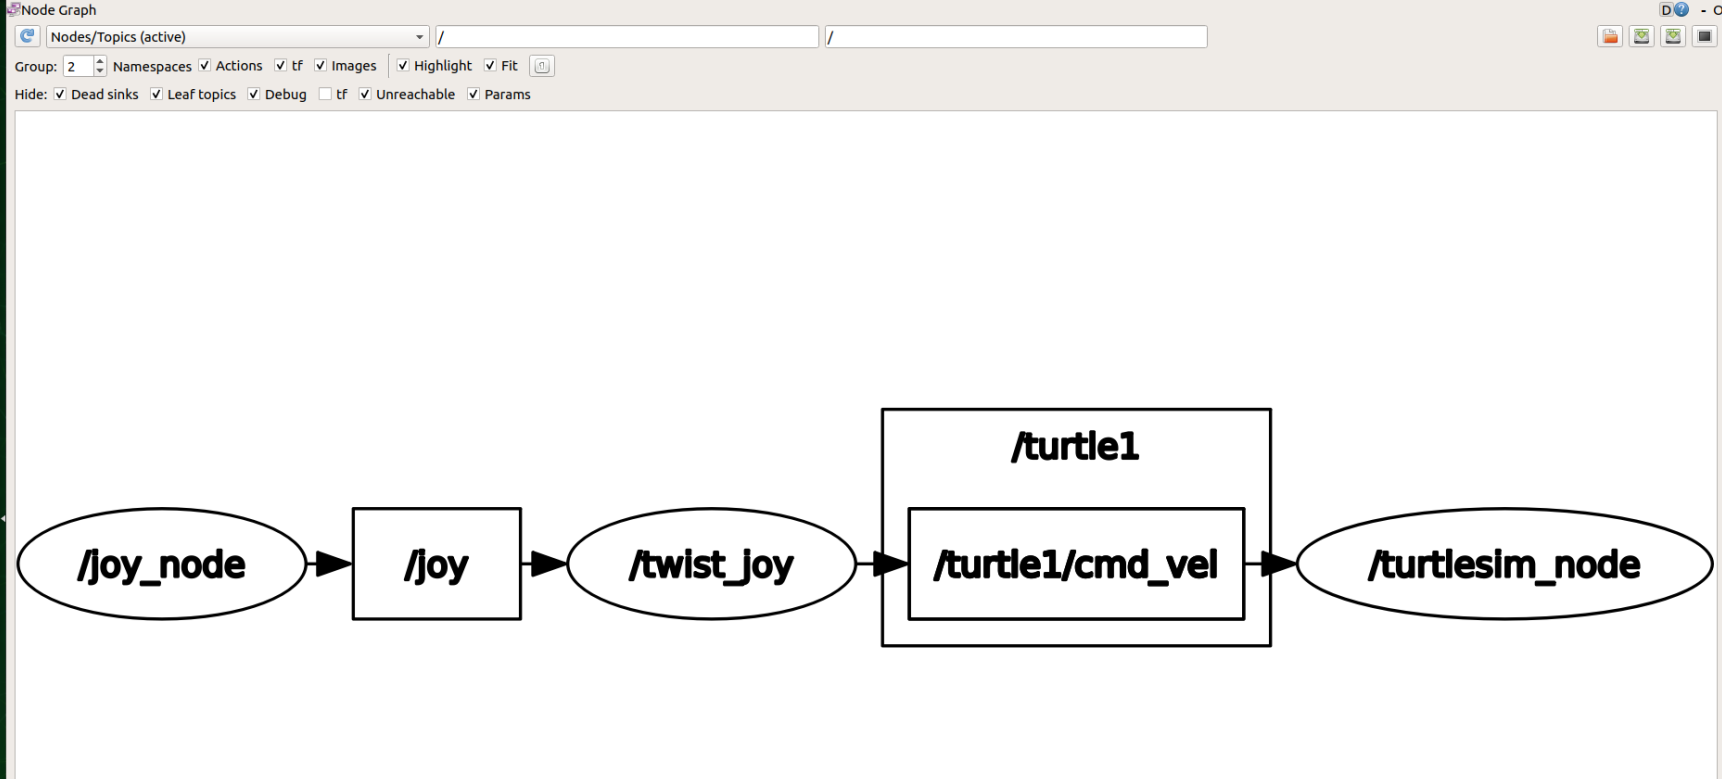
【/joy_node】:Node of controller information
【/twist_joy】:Nodes controlled by the handle
【/turtlesim_node】:The node of the little turtle
The node [/joy_node] publishes the topic [/joy] so that the node [/twist_joy] subscribes. After processing, it publishes the topic [/turtle1/cmd_vel] so that the node [/turtlesim_node] subscribes to drive the movement of the little turtle.
5.5. Handle control ROSMASTER
Controlling ROSMASTER with a handle is similar to controlling a little turtle with a handle; let the handle control node establish contact with the underlying drive node of ROSMASTER, change the current state of the handle, send different information to ROSMASTER, and drive ROSMASTER to make different reactions. Corresponding to different models of ROSMASTER, what we need to control is also different.
For the ROSMASTER-X3 (Mecanum wheel), what we can control through the handle are the buzzer, the light strip, the linear speed of the car's movement (x-axis and y-axis), and the angular speed of the car's movement. **
5.5.1. Start handle control
Reference path of handle control yahboom_joy.launch file
xxxxxxxxxx~/yahboomcar_ws/src/yahboomcar_ctrl/launch/
2), start
xxxxxxxxxxroslaunch yahboomcar_bringup bringup.launch #Start chassis and handle control, the launch of handle control is yahboom_joy.launchAfter turning it on, press the "START" button and hear the buzzer sound to start remote control. The remote control will enter sleep mode after being turned on for a period of time. You need to press the "START" button to end sleep.
3), remote control effect description
| Handle | Effect |
|---|---|
| Left joystick up/down | Car forward/backward to go straight |
| Left joystick left/right | The car goes straight left/right |
| Right joystick left/right | Rotate car left/right |
| Right "1" key | Control light strip effect |
| "2" key on the right | End/start other functions |
| "START" button | Control buzzer/end sleep |
| Press the left joystick | Adjust the X/Y axis speed |
| Press the right joystick | Adjust the angular velocity |
| Button up | Servo No. 4 up |
| Button down | Servo No. 4 down |
| Button left | No. 3 servo down |
| Button right | Servo No. 3 up |
| Button X | Servo No. 1 to the left |
| Button Y | Servo No. 2 up |
| Button A | Servo No. 2 down |
| Button B | Servo No. 1 to the right |
| Left "1" key | No. 6 servo clamp (tight)/No. 5 servo right turn |
| Left "2" key | No. 6 servo clamp (loosen)/No. 5 servo left turn |
| SELECT key | Switch control of No. 6/No. 5 servo |
View the node graph
xxxxxxxxxxrqt_graph
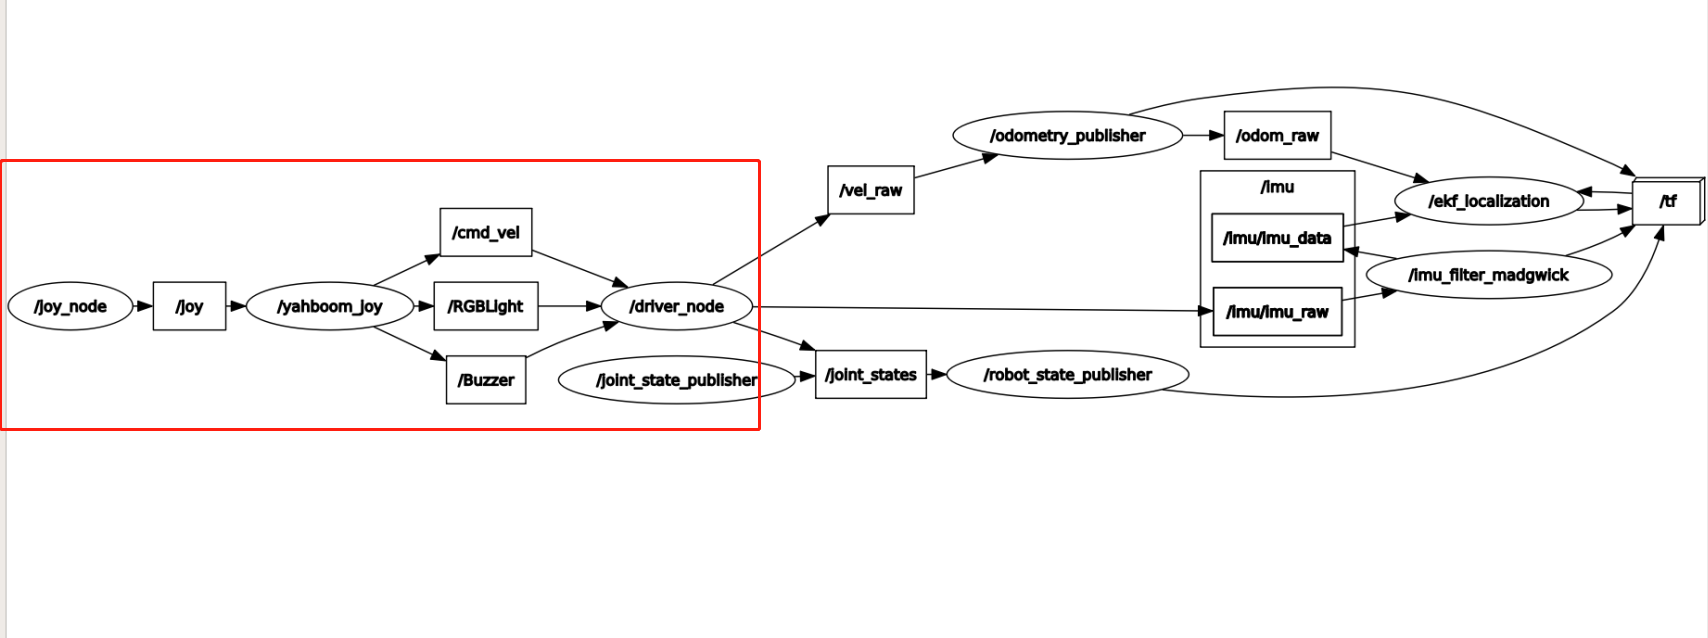
The red box part is the topic communication between the handle control node/yahboom_joy and the underlying node/driver_node.
5), program analysis
Underlying control program:
xxxxxxxxxxMcnamu_X3plus.py
The code path is:
xxxxxxxxxx~/yahboomcar_ws/src/yahboomcar_bringup/scripts
In Mcnamu_X3plus.py, the subscribers and their respective callback functions for the topic information of the buzzer, speed control, and light strip are defined,
xxxxxxxxxxself.sub_cmd_vel = rospy.Subscriber('cmd_vel', Twist, self.cmd_vel_callback, queue_size=100)self.sub_RGBLight = rospy.Subscriber("RGBLight", Int32, self.RGBLightcallback, queue_size=100)self.sub_Buzzer = rospy.Subscriber("Buzzer", Bool, self.Buzzercallback, queue_size=100)self.sub_Arm = rospy.Subscriber("TargetAngle", ArmJoint, self.Armcallback, queue_size=1000)
def cmd_vel_callback(self, msg) #Speed callback functiondef RGBLightcallback(self, msg) #Light strip callback functiondef Buzzercallback(self, msg) #Buzzer callback functiondef Armcallback(self, msg) #Robotic arm control callback function
Handle control program:
xxxxxxxxxxyahboom_joy.py
The code path is:
xxxxxxxxxx~/yahboomcar_ws/src/yahboomcar_ctrl/scripts
In yahboom_joy.py, define the publisher of the buzzer, speed control, and light strip topic information, and publish these messages
xxxxxxxxxxself.ArmPubUpdate = rospy.Publisher("ArmAngleUpdate", ArmJoint, queue_size=1000)self.EdiPublisher = rospy.Publisher('edition', Float32, queue_size=100)self.volPublisher = rospy.Publisher('voltage', Float32, queue_size=100)self.staPublisher = rospy.Publisher('joint_states', JointState, queue_size=100)self.velPublisher = rospy.Publisher("/pub_vel", Twist, queue_size=100)self.imuPublisher = rospy.Publisher("/pub_imu", Imu, queue_size=100)self.magPublisher = rospy.Publisher("/pub_mag", MagneticField, queue_size=100)
self.pub_cmdVel.publish(twist) #Publish velocity dataself.pub_RGBLight.publish(self.RGBLight_index) #Publish light strip dataself.pub_Buzzer.publish(self.Buzzer_active) #Publish buzzer data
6), code analysis
/joy topic data analysis
Run the joy_node node and view the /joy topic information,
xxxxxxxxxxrosrun joy joy_noderostopic echo joy
In the printed information, there are two arrays: axes and buttons. The data they store is the behavior of the joystick and buttons on the remote control. You can press each button on the remote control one by one to correspond to the transformation of the array, and you can know what behavior will cause which variable in the array to change its value.
Knowing the changes in the /joy topic data corresponding to the keystroke behavior, then in yahboom_joy.py, we only need to make judgments on these values. There are also two categories in yahboom_joy.py. The first step is to determine the name of the system (the first step is to determine whether the handle receiver is plugged into a jetson or a Raspberry Pi/PC (here it refers to a virtual machine)),
xxxxxxxxxxif self.user_name == "jetson": self.user_jetson(joy_data) else: self.user_pc(joy_data)Value judgment: Take the jetson processor to judge the buzzer data as an example. Analysis shows that we use the "START" button to control the buzzer, and it corresponds to buttons[11]. When it is pressed At this time, buttons[11] will become 1. At this time, we can send the buzzer data,
xxxxxxxxxxif joy_data.buttons[11] == 1:self.Buzzer_active=not self.Buzzer_active# print "self.Buzzer_active: ", self.Buzzer_activeself.pub_Buzzer.publish(self.Buzzer_active)Other remote control behaviors are analyzed by analogy.
Note: When judging the left and right of the left rocker, only the data of X3 (Mecanum wheel) and X3 Plus (Mecanum wheel + robotic arm) are valid, because of the characteristics of their wheels, they can move laterally. So there is speed on the Y axis.
xxxxxxxxxxylinear_speed = self.filter_data(joy_data.axes[0]) * self.yspeed_limit * self.linear_Gear
5.6. Precautions when using the handle
When connecting the USB handle receiver, it is recommended to connect it to the outermost USB-HUB expansion board instead of directly connecting to the motherboard or the middle USB-HUB expansion board (X3plus). If it is directly connected to the motherboard or the middle USB-HUB expansion board (X3plus), due to the aluminum alloy blocks on the top and bottom, it will seriously interfere with the handle signal reception.
After plugging and unplugging the handle receiver, you need to restart the handle program, otherwise you will not be able to control the car.
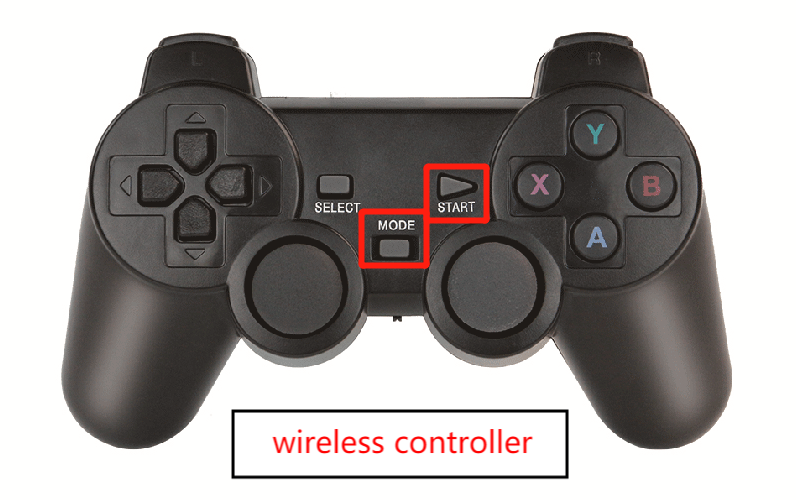
After starting the handle control program, if the handle cannot control the car, it may be caused by the wrong handle control mode. You can press and hold the handle mode button for about 15 seconds to switch modes. After the green indicator light stays on, press the start button again, such as If a buzzer sounds, the switch is successful. If there is no response, you can press and hold the mode button on the handle again for 15 seconds.
After re-plugging or unplugging the handle receiver or restarting the motherboard, the handle will be reset to factory mode. If it cannot be controlled, the mode will need to be switched again every time it is plugged in, unplugged or restarted.
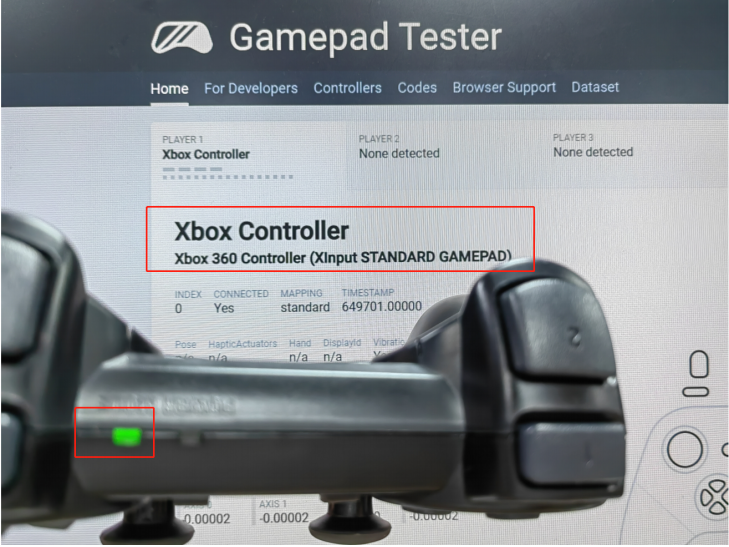
jetson series support mode: PC/PCS mode, the POWER MODE indicator light is red by default in PC mode. You can connect the handle receiver to the USB port of the computer to connect the wireless handle. Enter the URL in the browser: https://gamepad -tester.com/ . Pressing the button URL will display the change of the button value, as shown in the figure below:
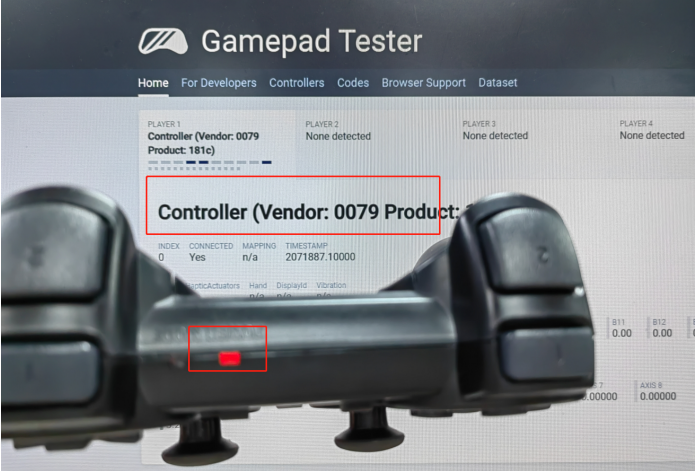
Raspberry Pi series supported modes: X-BOX mode. In X-BOX mode, the default POWER MODE indicator light is green. You can connect the handle receiver to the power
Connect the USB port of the computer to the wireless controller, and enter the URL in the browser: https://gamepad-tester.com/. Press the button URL will be displayed
Indicates the change of key value, as shown in the figure below: