yahboom
HomeLearn
Solution
Blog
Online Store
About Us
EN/中文
ROSMASTER X3 Plus📖
1.Preparation and First Trial
  • 1.1 Wiring Introduction
  • 1.2 Precautions for battery
  • 1.3 First Trial
  • 1.4 Precautions for DIY Robotic Arm
2. Assembly steps
  • Installation Video
3.Remote control course
  • 3.1 APP remote control
  • 3.2 Model aircraft remote control
  • 3.3 Handle remote control
4.Hardware course
  • 4.1 About expansion board_V3.0
  • 4.1 About expansion board_V1.0
  • 4.2 STM32 Development
  • 4.3 Button to control the buzzer
  • 4.4 FreeRTOS application
  • 4.5 Serial communication
  • 4.6 SBUS model aircraft remote control
  • 4.7 CAN bus communication
  • 4.8 RGB colorful light bar
  • 4.9 Timer interrupt to control
  • 4.10 Control serial port servos
  • 4.11 Nine-axis attitude sensor
  • 4.12 Control motor
  • 4.13 Timer captures the encoder data
  • 4.14 Kinematic Analysis
  • 4.15 PID control robot movement
5.Basic course
  • 5.1 Update the firmware
  • 5.2 Turn off the self-starting process
  • 5.3 Install the Rosmaster driver
  • 5.4 Buzzer whistle
  • 5.5 Control PWM servo
  • 5.6 RGB colorful light bar
  • 5.7 Control motor
  • 5.8 Control robot movement
  • 5.9 Control Serial Servo
6.Linux operating system
  • 6.1 Virtual machine installation
  • 6.2 Linux basics
  • 6.3 Remote control
  • 6.4 Multi-machine communication
  • 6.5 Static IP and hotspot mode
  • 6.6 Bind the device ID
  • 6.7 Web page real-time monitor
  • 6.8 Expansion tutorial
  • 6.9.1 Jetson Nano write sytem
  • 6.9.2 Jetson Xavier NX write system
  • 6.9.3 Jetson TX2 NX write system
  • 6.9.4 Raspberry Pi write system
7.Docker-Just for pi5
  • 7.1 Docker overview and docker installation
  • 7.2 Common commands for docker image containers
  • 7.3 Docker images deeply understand and publish images
  • 7.4 Docker hardware interaction and data processing
  • 7.5 Enter the bot's docker container
  • 7.6 Robot development environment construction in Docker
  • 7.7 How customers can update docker images in the future
8.ROS basic course
  • 8.1 ROS introduction
  • 8.2 ROS installation
  • 8.3 ROS common command tools
  • 8.4 ROS workspace
  • 8.5 ROS function package
  • 8.6 ROS node
  • 8.7 ROS topic publisher
  • 8.8 ROS topic subscribers
  • 8.9 ROS service client
  • 8.10 ROS service server
  • 8.11 ROS action client
  • 8.12 ROS action server
  • 8.13 ROS custom message reception
  • 8.14 ROS-launch file
  • 8.15 ROS-TF transformation
  • 8.16 ROS parameter service
  • 8.17 ROS-rviz use
  • 8.18 ROS-rqt tool usage
  • 8.19 Topic message recording and playback
  • 8.20 urdf model introduction
  • 8.21 gazebo introduction
  • 8.22 ROS distributed communication
9.OpenCV courses
  • 9.1 Getting started with Open Source CV
  • 9.2 Geometric transformation
  • 9.3 Image processing and draw
  • 9.4 Image beautification
  • 9.5 Opencv application
  • 9.6 AR vision
  • 9.7 AR QR code
  • 9.8 ROS+Opencv foundation
  • 9.9 ROS+Opencv application
  • 9.10 Data transformation
  • 9.11 MediaPipe development
10.Robot control course
  • 10.1 PID algorithm theory
  • 10.2 Robot PID debugging
  • 10.3 Robot information release
  • 10.4 Robot keyboard control
  • 10.5 Robot handle control
  • 10.6 Robot state estimation
  • 10.7 Robot calibration
  • 10.8 Robot URDF model
11.Depth camera course
  • 11.1 How to use the Astra camera
  • 11.2 Astra camera calibration
  • 11.3 Astra Color Tracking
  • 11.4 Astra Object Tracking
  • 11.5 Visual tracking autopilot
  • 11.6 Pure visual 2D mapping
  • 11.7 RTAB-Map 3D mapping
  • 11.8 ORB_SLAM2 basics
  • 11.9 ORB_SLAM2_Octomap
12.Lidar course
  • 12.1 Lidar basic-SLAM
  • 12.1 Lidar basic-EAI
  • 12.2 Lidar avoiding
  • 12.3 Lidar guard
  • 12.4 Lidar follow
  • 12.5 Patrol game
  • 12.6 gmapping mapping algoritm
  • 12.7 hector mapping algorithm
  • 12.8 karto mapping algorithm
  • 12.9 cartographer mapping
  • 12.10 rrt_exploration mapping
  • 12.11 AMCL
  • 12.12 Navigation and avoiding
  • 12.13 APP mapping and navigation
13.Multi-robot control course
  • 13.1 Multi-machine handle control
  • 13.2 Multi-machine navigation
  • 13.3 Multi-machine formation
  • 13.4 Multi-machine surround
14.Deep learning courses
  • 14.1 KNN recognizes handwritten
  • 14.2 Basic use of TensorFlow
  • 14.3 Basic use of PyTorch(jetson)
  • 14.4 yolov5 model training(jetson)
  • 14.5 yolov5+tensorrt acceleration
  • 14.6 yolov4-tiny
15.Voice control courses
  • 0. How to use old voice module in new image
  • 15.1 Introduction of voice control-new
  • 15.2 Voice control module port-new
  • 15.3.Introduction of voice module-old
  • 15.4.Voice control module port binding-old
  • 15.5 Voice control car movement
  • 15.6 Voice control Autopilot
  • 15.7 Voice control color recogzition
  • 15.8 Voice control color tracking
  • 15.9 Voice control multi-point nagavation
16.Robotic arm control course
  • 16.1 MoveIt configuration
  • 16.2 MoveIt control the real machine
  • 16.3 MoveIt moves randomly
  • 16.4 MoveIt kinematics design
  • 16.5 MoveIt cartesian path
  • 16.6 MoveIt avoiding
  • 16.7 MoveIt scene design
  • 16.8 MoveIt trajectory planning
  • 16.9 Mediapipe palm control car
  • 16.10 Mediapipe gesture control robotic arm
  • 16.11 Mediapipe gesture control car
  • 16.12 Mediapipe arm attitude control robotic arm
  • 16.13 Mediapipe recognizes and tracks palm control robotic arm
  • 16.14 Recognizes color block and handling
  • 16.15 Autopilot to clear obstacles
17.Voice control robotic arm course
  • 17.1 Voice control robotic arm movement
  • 17.2 Voice control robotic arm learning
  • 17.3 Voice control color block transport
  • 17.4 Voice control robotic arm grip objects
  • 17.5 Voice control robotic arm garbage sorting
18.Model training Autopilot
  • 18.0 ReadMe
  • 18.1 yolov5 to train traffic signs
  • 18.2 TensorRt acceleration identification mark
  • 18.3 Road sign indication function description
  • 18.4 Collect data
  • 18.5 Training model
  • 18.6 Model transformation and application
  • 18.7 AI Autopilot
19.For Orin-Remote control course
1. APP control
  • 1. APP control
  • 2. Model aircraft control
  • 3. Handle control
2. Model aircraft control
3. Handle control
20.Orin-Hardware course
  • 1. About expansion board_V1.0
  • 1. About expansion board_V2.0
  • 2. STM32 Development environment
  • 3. Button control
  • 4. FreeRTOS application
  • 5. Serial communication
  • 6. SBUS model aircraft remote control
  • 7. CAN bus communication
  • 8. RGB colorful light bar
  • 9. Timer interrupt to control PWM servo
  • 10. Control serial port servos
  • 11. Nine-axis attitude sensor to obtain data
  • 12. Control motor
  • 13. Timer captures the encoder data
  • 14. Robot kinematics analysis theory
  • 15. PID control robot movement
21.Orin-Basic course
  • 1. Update the firmware
  • 2. Turn off the self-starting process at startup
  • 3. Install the Rosmaster driver library
  • 4. Buzzer whistle
  • 5. Control PWM servo
  • 6. RGB colorful light bar special effects display
  • 7. Control motor
  • 8. Control robot movement
  • 9. Control Serial Servo
22.Orin-Linux operating systemnew
  • 1. Virtual machine installation and use
  • 2. Linux basics
  • 3. Remote control
  • 4. Multi-machine communication configuration
  • 5. Static IP and hotspot mode
  • 6. Bind the device ID
  • 7. Web page real-time monitoring
  • 8. Expansion tutorial
  • 9.1 Jetson Nano write sytem
  • 9.2 Jetson Xavier NX write system
  • 9.3 Jetson TX2 NX-Orin series write system
  • 9.4 Raspberry Pi write system
  • 10.Jetpack old system upgraded to SUPER system
23.Orin-Dockernew
SUPER image uses ros environment in docker
  • 1、Docker overview and docker installationnew
  • 2、Common commands for docker image containersnew
  • 3、Docker images deeply understand and publish imagesnew
  • 4、Docker hardware interaction and data processingnew
  • 5、Enter the bot's docker containernew
  • 6、Robot development environment construction in Dockernew
23.Orin-ROS basic course
  • 1.ROS introduction
  • 2.Project file structure
  • 3.Common commands and tools
  • 4.Publisher
  • 5.Subscribers
  • 6.Customize topic messages and use
  • 7.Client
  • 8.Server
  • 9.Custom service messages and usage
  • 10.TF release and monitoring
24.Orin-OpenCV courses
  • 1. Getting started with Open Source CV
  • 2. Open Source CV geometric transformation
  • 3. Open Source CV image processing and drawing text line segments
  • 4. Open Source CV image beautification
  • 5. Opencv application
  • 6. AR vision
  • 7. AR QR code
  • 8. ROS+Opencv foundation
  • 9. ROS+Opencv application
  • 10. Data transformation and point cloud
  • 11. MediaPipe development
25.Orin-Robot control course
  • 1.PID algorithm theory
  • 2.Robot PID debugging
  • 3.Robot information release
  • 4.Robot keyboard control
  • 5.Robot handle control
  • 6.Robot state estimation
  • 7.Robot calibration
  • 8.Robot URDF model
26.Orin-Depth camera course
  • 01.How to use the Astra camera
  • 02.Astra camera calibration
  • 03.Astra Color Tracking
  • 04.Astra Object Tracking
  • 05.Visual tracking autopilot
  • 06.Pure visual 2D mapping and navigation
  • 07.RTAB-Map 3D mapping navigation
  • 08.ORB_SLAM2 basics
  • 09.ORB_SLAM2_Octomap
27.Orin-Lidar course
  • 1.Lidar basic-4ROS-EAI
  • 1.Lidar basic-SLAM
  • 2.Lidar avoiding
  • 3.Lidar guard
  • 4.Lidar follow
  • 5.Patrol game
  • 6.gmapping mapping algorithm
  • 7.hector mapping algorithm
  • 8.karto mapping algorithm
  • 9.cartographer mapping algorithm
  • 10.rrt_exploration mapping algorithm
  • 11.AMCL
  • 12.Navigation and avoiding
  • 13.APP mapping and navigation
28.Orin-Multi-robot control course
  • 1.Multi-machine handle control
  • 2.Multi-machine navigation
  • 3.Multi-machine formation
  • 4.Multi-machine surround
29.Orin-Deep learning courses
  • 1.KNN recognizes handwritten digits
  • 2.Basic use of TensorFlow
  • 3.Basic use of PyTorch(jetson)
  • 4.YOLOv11Model conversion(SUPER)new
  • 5.YOLOv11Dataset annotation(SUPER)new
  • 6.YOLOv11Model conversion + tensorrt acceleration(SUPER)new
  • 7.YOLOv11Object recognition(SUPER)new
30.Orin-Voice control courses
  • 0. How to use old voice module in new image
  • 1.1 Introduction of voice module-new
  • 1.2 Introduction of voice module-old
  • 2.1 Voice control module port binding-new
  • 2.2 Voice control module port binding-old
  • 3. Voice control car movement
  • 4. Voice control Autopilot
  • 5. Voice control color recognition
  • 6. Voice control color tracking
  • 7. Voice control multi-point navigation
31.Orin-Robotic arm control course
  • 1.MoveIt configuration(VM)
  • 2.MoveIt control the real machine(VM)
  • 3.MoveIt moves randomly(VM)
  • 4.MoveIt kinematics design(VM)
  • 5.MoveIt cartesian path(VM)
  • 6.MoveIt avoiding(VM)
  • 7.MoveIt scene design(VM)
  • 8.MoveIt trajectory planning(VM)
  • 9.Mediapipe palm control car
  • 10.Mediapipe gesture control robotic arm
  • 11.Mediapipe gesture control car
  • 12.Mediapipe arm attitude control robotic arm
  • 13.Mediapipe recognizes and tracks palm control robotic arm
  • 14.Recognizes color block and handling
  • 15.Autopilot to clear obstacles
32.Orin-Voice control robotic arm course
  • 1.Voice control robotic arm movement
  • 2.Voice control robotic arm learning
  • 3.Voice control color block transport
  • 4.Voice control robotic arm grip objects
  • 5.Voice control robotic arm garbage sorting
LLM tutorial
1.Development environment
  • 0. Model usage instructions
  • 1.Environments deployment
  • 2.Dialogue platform installation
2.Jetson Nano B01
  • 1.Qwen2 model
  • 2.TinyLlama model
  • 3.Phi-3 model
  • 4.Gemma model
  • 5.Orca Mini model
  • 6.StarCoder2 model
  • 7.DeepSeek-R1 model
  • 8.Expand LLaVA-Phi3
3.Jetson Orin NXNANO
  • 1.Llama3 model
  • 2.Qwen2 model
  • 3.Phi-3 model
  • 4.Gemma model
  • 5.WizardLM2 model
  • 6.Codellama model
  • 7.DeepSeek-R1 model
  • 8.Orca Mini model
  • 9.StarCoder2 model
  • 10.TinyLlama model
  • 11.Expand LLaVA
  • 12.Expand LLaVA-Phi3
4.Raspberry Pi 5B
  • 1.Meta AI Llama3 model
  • 2.Qwen2 model
  • 3.Phi-3 model
  • 4.Gemma model
  • 5.WizardLM2 model
  • 6.Meta AI Codellama model
  • 7.DeepSeek-R1 model
  • 8.Expand LLaVA
FAQ
  • Using your own Jetson board, car cannot start normally
Download
  • RemoteCtrl_APP(iOS/Android)
  • Mapping_APP(iOS_Android)
  • SystemFile_OrinNANOSUPER
  • SystemFile_OrinNXSUPER
  • SystemFile_RPi_NANO
  • Instruction Manual
  • Code
  • Autopilot Annex
  • VM software
  • Jetson_Boot_USB.tar.gz
  • Other_Annex_File
Download ZIP
FAQ
  • 1、How to connect OLED?
  • 2、Precautions for DIY Robotic Arm

Welcome to ROSMASTER X3 Plus repository

11.1 How to use the Astra camera

1 How to use the Astra camera

1 How to use the Astra camera 1.1 SDK usage - Linux 1.1.1 dependent environment 1.1.2 Camera SDK&Samples 1.1.3 OpenNI camera test tool 1.2 AstraSDK-win 1.2.1 Install the driver 1.2.2 Download SDK 1.3 OrbbecViewer-win 1.4 Web monitoring

Official website link: http://www.orbbec.com.cn/

Developer Community: https://developer.orbbec.com.cn/

Astra Camera: https://github.com/orbbec/ros_astra_camera

Normal camera: https://github.com/bosch-ros-pkg/usb_cam.git

Astra SDK: https://developer.orbbec.com.cn/download.html?id=53

Basic use of Astra SDK for Windows: https://developer.orbbec.com.cn/course_details.html?id=53

Astra SDK environment setup: https://developer.orbbec.com.cn/course_details.html?id=16

  • Create astra udev rule

In the new environment, you need to execute the [create_udev_rules] file in the [scripts] folder of the [astra_camera] function package, enter the directory where the file is located, and execute the command

./create_udev_rules 

launch start command

Launch fileStart the camera model
astra.launchAstra, Astra S, Astra mini, Astra mini S
astraplus.launchmore
astrapro.launchAstra pro
embedded_s.launchDeeyea
dabai_u3.launchNature
gemini.launchGemini

Camera hardware structure diagram:

image-20220225120042278

1.1 SDK usage - Linux

Operating environment: virtual machine or dual system

Developer Community: https://developer.orbbec.com.cn/download.html?id=53

1.1.1 dependent environment

xxxxxxxxxx
sudo apt-get install ros-melodic-serial ros-melodic-bfl ros-melodic-mbf-msgs ros-melodic-pointcloud-to-laserscan ros-melodic-rgbd-launch ros-melodic-libuvc-* ros-melodic-uvc-camera ros-melodic-usb-cam ros-melodic-ar-track-alvar ros-melodic-camera-calibration build-essential freeglut3 freeglut3-dev libsfml-dev

Go to the developer community to download the SDK file, that is(Astra SDK and OpenNI2 SDK, the version and system architecture must match).

9102_en

Note: All searches on the Internet are for the latest version. The versions in our supporting materials include [v2.1.2], [v2.1.3], etc. The following takes [v2.1.2] as an example, other versions are similar.

1.1.2 Camera SDK&Samples

The folder name and file path may not be the same, change them according to your needs.

xxxxxxxxxx
tar -zxvf AstraSDK-v2.1.2-Ubuntu18.04-x86_64.tar.gz
cd AstraSDK-v2.1.2-Ubuntu18.04-x86_64/install  # Go to the install folder
sudo sh ./install.sh

The output contains the following two lines, pay attention to delete the install in the penultimate path:

xxxxxxxxxx
export ASTRA_SDK_INCLUDE=/home/yahboom/software/AstraSDK-v2.1.2-Ubuntu18.04-x86_64/install/include  
export ASTRA_SDK_LIB=/home/yahboom/software/AstraSDK-v2.1.2-Ubuntu18.04-x86_64/install/lib 

After deleting install:

xxxxxxxxxx
export ASTRA_SDK_INCLUDE=/home/yahboom/software/AstraSDK-v2.1.2-Ubuntu18.04-x86_64/include 
export ASTRA_SDK_LIB=/home/yahboom/software/AstraSDK-v2.1.2-Ubuntu18.04-x86_64/lib 

Copy the output to the end of ~/.bashrc

xxxxxxxxxx
gedit ~/.bashrc 
source ~/.bashrc 

The amples directory is the sample program, which needs to depend on the include and lib directories

  • SFML effect demo

The bin folder is as follows:
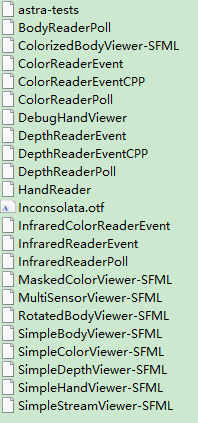
image-20211030110700979

Note: sudo ./ or ./ can be used to start the bin folder, and the files with the suffix -SFML will be displayed on the screen; the methods are similar, and other effects can be tested. If the virtual machine fails to start, please try several times, it is easier to start under the dual system.

xxxxxxxxxx
cd ~/AstraSDK-v2.1.2-Ubuntu18.04-x86_64/bin/
./SimpleBodyViewer-SFML    # Skeleton detection
./SimpleHandViewer-SFML    # finger following 
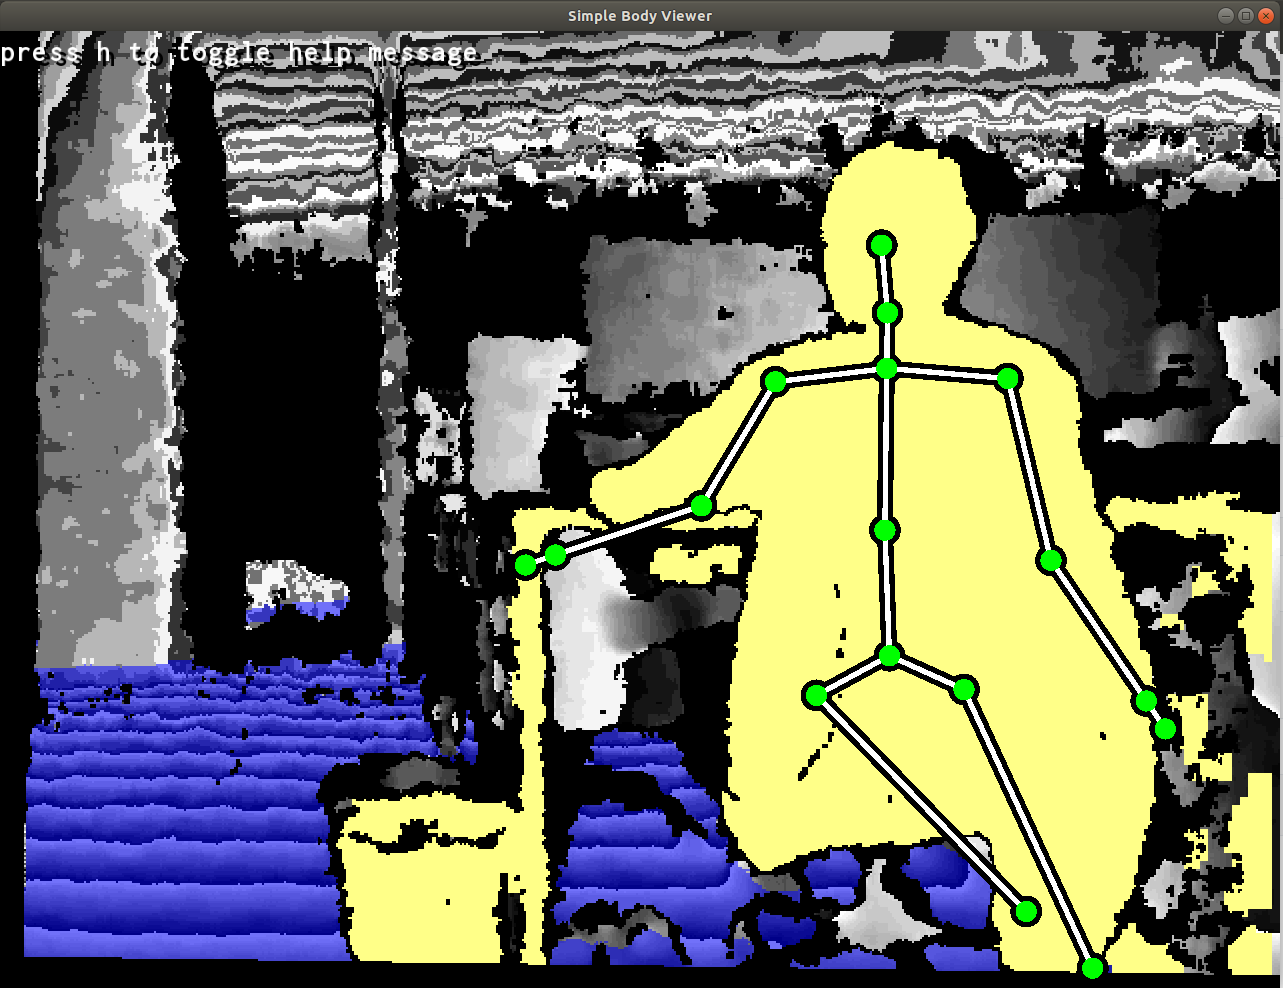
9104

1.1.3 OpenNI camera test tool

Install OpenNI

xxxxxxxxxx
unzip OpenNI_2.3.0.55.zip 
cd OpenNI_2.3.0.55/Linux/OpenNI-Linux-x64-2.3.0.55 
chmod +x install.sh 
sudo ./install.sh 

the device to initialize the OpenNI environment

xxxxxxxxxx
source OpenNIDevEnvironment 

compile and run

xxxxxxxxxx
cd Samples/SimpleViewer 
make 
cd Bin/x64-Release 
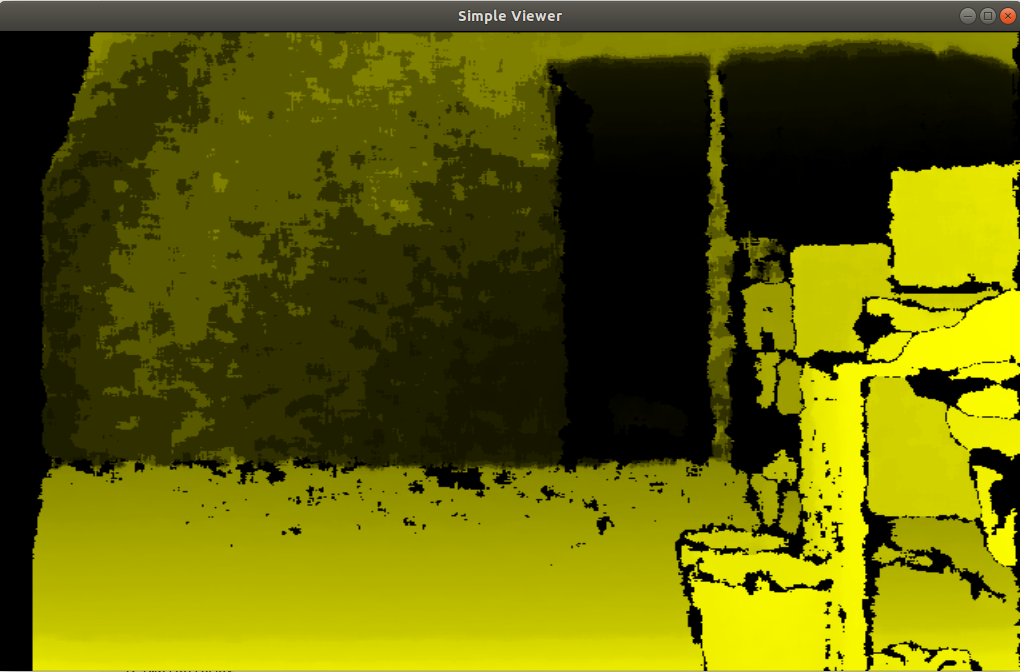
./SimpleViewer 

9103

1.2 AstraSDK-win

https://developer.orbbec.com.cn/download.html?id=32

1.2.1 Install the driver

image-20211101203302861

After the download is complete, double-click to install it. The signs of success are as follows

image-20211101203417860

1.2.2 Download SDK

image-20211030174512652

After the download is complete, unzip the folder,
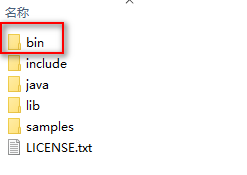
image-20211030174610362

Enter the bin folder and double-click any file with the suffix exe to test it.

image-20211030174643376

1.3 OrbbecViewer-win

https://developer.orbbec.com.cn/download.html?id=77

image-20211030173934641

Unzip, enter the OrbbecViewer_v1.1.1 folder, double-click image-20211030174024144That's it.

image-20211030174229917

1.4 Web monitoring

xxxxxxxxxx
#Raspberry Pi 5 master needs to enter docker first, please perform this step
#If running the script into docker fails, please refer to ROS2/07, Docker tutorial
~/run_docker.sh

Environment construction

xxxxxxxxxx
sudo apt-get install ros-melodic-async-web-server-cpp ros-melodic-web-video-server ros-melodic-usb-cam 

Start the camera

roslaunch astra_camera astraproplus.launch     # Astra 
roslaunch usb_cam usb_cam-test.launch      # USB 

<PI5 needs to open another terminal and enter the same docker container

image-20240408144126098

start web_video_server

xxxxxxxxxx
rosrun  web_video_server  web_video_server 

Check

xxxxxxxxxx
View in local web browser 
http://localhost:8080/ 
It must be under the same local area network, and other devices can view it 
http://192.168.2.103:8080/ 
(192.168.2.103 is the IP address of the master) 
Note: It is recommended to use Google Chrome or mobile QQ browser, other browsers may not be able to open the image 

Robot URDF model
Astra camera calibration

COMPANY

  • About us
  • Team Style
  • Blog

LEARNING & EXPLORATION

  • Tutorials
  • Edge AI hardware
  • Educational robots
  • Embedded intelligent hardware

WHERE TO BUY

  • Yahboom Online Store
  • Amazon
  • Alibaba
  • AliExpress
  • Mercado

TECHNOLOGY SUPPORT

  • Email: support@yahboom.com

BE A DISTRIBUTOR

  • Email: sales@yahboom.com
QR Code

Copyright © 2017-2026 Yahboom. All Rights Reserved.

EN/中文