yahboom
HomeLearn
Solution
Blog
Online Store
About Us
EN/中文
K230 Vision Module📖
1. Quick Start
  • 0.Get start
  • 1. K230 firmware download and burning
  • 2. Install the programming environment
  • 3. Debug and run routines
  • 4. Offline running routine
  • 5. Micropython Quick Start
  • 6. GUI Program Instructions
  • 7.K230 module bracket installation tutorial
  • 8.K230 module 2DOF PTZ installation tutorial
2. Basic Courses
  • 1.FPIOA pin assignment
  • 2.RGB lights
  • 3.Buzzer
  • 4.Buttons
  • 5.Serial communication
  • 6.I2C communication
  • 7.PWM
  • 8.WDT watchdog
  • 9.Timer
  • 10.Fourier Transform
  • 11.SHA256 encryption
  • 12.AES encryption
  • 13.Multithreading
  • 14.File reading and writing
  • 15.Image Display
  • 16.Touch Display
  • 17.Camera display
  • 18.Image Flip
  • 19.Camera
3. Draw the image
  • 1. Draw the lines
  • 2. Draw the circle
  • 3. Draw the rectangle
  • 4. Draw the ellipse
  • 5. Draw the arrow
  • 6. Draw the crosshairs
  • 7. Draw text
  • 8. Draw key points
4. Graphics detection
  • 1. Line segment detection
  • 2. Rectangle Detection
  • 3. Circle detection
  • 4. Object edge detection
  • 5. Line inspection basics:fast linear regression
5. Color recognition
  • 1. Color recognition
  • 2. Object Counting
  • 3. Multi-color recognition
  • 4. K230 Color Line Patrol
6.1 CV_lite Image Processing Special Topic
  • 1.Introduction to cv_litenew
  • 2.cv_lite API Reference Manualnew
  • 3.Color Block Recognition - Grayscale Imagenew
  • 4.Color Block Recognition - Color Imagenew
  • 5.Circle Recognition - Grayscale Imagenew
  • 6.Circle Recognition - Color Imagenew
  • 7.Corner Recognition - Grayscale Imagenew
  • 8.Corner Recognition - Color Imagenew
  • 9.Edge Recognition - Grayscale Imagenew
  • 10. Edge Recognition - Color Imagenew
  • 11. Rectangle Recognition - Grayscale Imagenew
  • 12.Rectangle Recognition - Color Imagenew
  • 13.Rectangle recognition combined with corner recognition - grayscale imagenew
  • 14.Rectangle recognition combined with corner recognition - color imagenew
  • 15.Image Binarization - Grayscalenew
  • 16.Image Binarization - Color Imagenew
  • 17.Exposure Adjustmentnew
  • 18.Image Black Hat Operationsnew
  • 19.Image Color Histogramnew
  • 20.Image Closingnew
  • 21.Image Expansionnew
  • 22.Image Corrosionnew
  • 23.Gaussian Blurnew
  • 24.Gradient Transformationnew
  • 25.Mean Fuzzynew
  • 26.Image Openingnew
  • 27.Image Top Hat Operationnew
  • 28.PnP rangingnew
  • 29.Find rectangles and measure distancesnew
  • 30.Image grayscale world white balancenew
6.2 OpenCV Image Processing Special Topicnew
  • 1. OpenCV Introduction
  • 2. OpenCV API Reference
  • 3. Image Basic Transforms
  • 4. Morphological Operations
  • 5. Color Segmentation and Shape Classification
  • 6. Corner and Centroid Detection
  • 7. Hough Circle Detection
  • 8. Hough Line Detection
  • 9. Contour Analysis
  • 10. Drawing Functions
  • 11. Template Matching
  • 12. Image Blur Filtering
  • 13. Edge Detection
  • 14. Thresholding
  • 15. Color Segmentation
  • 16. Histogram and Pixel Transformation
  • 17. Arithmetic and Bitwise Operations
  • 18. Channel Operation and Statistics
  • 19. Image File Read and Write
  • 20. Pixel Level Transformation
7. Code type recognition
  • 1.Barcode recognition
  • 2.QR code recognition
  • 3.AprilTag tag recognition
  • 4.DM code recognition
8. Face Recognition
  • 1.[Must-read] General code structure and prerequisite knowledge of AI vision routines
  • 2.Face Detection
  • 3.Facial key point recognition
  • 4.Face orientation detection
  • 5.Face 3D Network
  • 6.Gaze direction detection
  • 7.Register for face recognition
9. Human body characteristics
  • 1. Human body detection
  • 2. Human key point detection
  • 3. Human posture recognition
  • 4. Fall detection
  • 5. Palm detection
  • 6. Palm key point detection
  • 7. Palm key point classification
  • 8. Gesture Recognition
  • 9. Dynamic gesture recognition
  • 10. Rock, Paper, Scissors
10. Scenario Application
  • 1.OCR character detection
  • 2.OCR character recognition
  • 3.yolov8n target detection
  • 4.yolov8n segmentation
  • 5. Self-learning object recognition
  • 6. License plate detection
  • 7. License Plate Recognition
  • 8. Target Tracking
  • 9. Fruit classification
  • 10. Garbage classification
  • 11. Road sign recognition
11. Audio and video processing
  • 1. Audio Recording
  • 2. Play Audio
  • 3. Video Recording
  • 4. Play Video
  • 5. Keyword wake-up
12. Network Basics
  • 1. Wireless network connection
  • 2. AP hotspot mode
  • 3. TCP-Server Example
  • 4. TCP-Client Example
  • 5. UDP-Server Example
  • 6. UDP-Client Example
  • 7. HTTP-Server Example
  • 8. HTTP-Client Example
  • 9. MQTT Quick Start
  • 10. MQTT-Publisher
  • 11. MQTT-Subscriber
  • 12. RTSP real-time image transmission
  • 13. RTSP real-time image transmission combined with AIDemo
  • 14. Call OpenRouter large model aggregation service
  • 15. Open the Resource Monitoring Panel
13. LVGL Graphical Interface
  • 1. Introduction to LVGL
  • 2. Create a button
  • 3. Create a slider
  • 4. Create an Image
  • 5. Create a text box and keyboard
14. GUI Code Tutorial & Secondary Development
  • 01.GUI System Architecture
  • 02.Core Engine Initialization
  • 03.Application Discovery Mechanism in GUI
  • 04.Desktop Layout Algorithm
  • 05.Advanced UI Styling
  • 06.BaseApp Base Class Analysis
  • 07.Hello_World Practical
  • 08.GUI Application Lifecycle and Resource Management
15. Train your own model
  • 1. Local deployment of yolo training environment
  • 2. Use online platforms for training
16.Touch Course
  • 1.Touch point detectionnew
  • 2.Touch Paintingnew
  • 3.Touch to take a photonew
17. Multi-master communication (purchased separately)
ESP32-K230
  • 1.k230 color recognition
  • 2.k230 barcode recognition
  • 3.k230 QR code recognition
  • 4.k230Apriltag code recognition
  • 5.k230DM code recognition
  • 6.k230 face detection
  • 7.k230 gaze direction
  • 8.k230 face recognition
  • 9.k230 human body detection
  • 10.k230 fall detection
  • 11.k230 palm detection
  • 12.k230 gesture recognition
  • 13.k230OCR character recognition
  • 14.k230 object detection
  • 15.k230 target tracking
  • 16.k230 self-learning object recognition
  • 17.k230 license plate recognition
Jetson-K230
  • 1.k230 color recognition
  • 2.k230 barcode recognition
  • 3.k230 QR code recognition
  • 4.k230Apriltag code recognition
  • 5.k230DM code recognition
  • 6.k230 face detection
  • 7.k230 gaze direction
  • 8.k230 face recognition
  • 9.k230 human body detection
  • 10.k230 fall detection
  • 11.k230 palm detection
  • 12.k230 gesture recognition
  • 13.k230OCR character recognition
  • 14.k230 object detection
  • 15.k230 target tracking
  • 16.k230 self-learning object recognition
  • 17.k230 license plate recognition
MSPM0G3507-K230
  • 1.k230 color recognition
  • 2.k230 barcode recognition
  • 3.k230 QR code recognition
  • 4.k230Apriltag code recognition
  • 5.k230DM code recognition
  • 6.k230 face detection
  • 7.k230 gaze direction
  • 8.k230 face recognition
  • 9.k230 human body detection
  • 10.k230 fall detection
  • 11.k230 palm detection
  • 12.k230 gesture recognition
  • 13.k230OCR character recognition
  • 14.k230 object detection
  • 15.k230 target tracking
  • 16.k230 self-learning object recognition
  • 17.k230 license plate recognition
Pico-K230
  • 1.k230 color recognition
  • 2.k230 barcode recognition
  • 3.k230 QR code recognition
  • 4.k230Apriltag code recognition
  • 5.k230DM code recognition
  • 6.k230 face detection
  • 7.k230 gaze direction
  • 8.k230 face recognition
  • 9.k230 human body detection
  • 10.k230 fall detection
  • 11.k230 palm detection
  • 12.k230 gesture recognition
  • 13.k230OCR character recognition
  • 14.k230 object detection
  • 15.k230 target tracking
  • 16.k230 self-learning object recognition
  • 17.k230 license plate recognition
raspberrypi-K230
  • 1.k230 color recognition
  • 2.k230 barcode recognition
  • 3.k230 QR code recognition
  • 4.k230Apriltag code recognition
  • 5.k230DM code recognition
  • 6.k230 face detection
  • 7.k230 gaze direction
  • 8.k230 face recognition
  • 9.k230 human body detection
  • 10.k230 fall detection
  • 11.k230 palm detection
  • 12.k230 gesture recognition
  • 13.k230OCR character recognition
  • 14.k230 object detection
  • 15.k230 target tracking
  • 16.k230 self-learning object recognition
  • 17.k230 license plate recognition
RDK-K230
  • 1.k230 color recognition
  • 2.k230 barcode recognition
  • 3.k230 QR code recognition
  • 4.k230Apriltag code recognition
  • 5.k230DM code recognition
  • 6.k230 face detection
  • 7.k230 gaze direction
  • 8.k230 face recognition
  • 9.k230 human body detection
  • 10.k230 fall detection
  • 11.k230 palm detection
  • 12.k230 gesture recognition
  • 13.k230OCR character recognition
  • 14.k230 object detection
  • 15.k230 target tracking
  • 16.k230 self-learning object recognition
  • 17.k230 license plate recognition
STM32-K230
  • 1. stm32_k230 color recognition
  • 2. stm32_k230 barcode recognition
  • 3. stm32_k230 QR code recognition
  • 4. stm32_k230Apriltag code recognition
  • 5. stm32_k230DM code recognition
  • 6. stm32_k230 face detection
  • 7.stm32_k230 looking direction
  • 8. stm32_k230 face recognition
  • 9. stm32_k230 human body detection
  • 10. stm32_k230 fall detection
  • 11. stm32_k230 palm detection
  • 12. stm32_k230 gesture recognition
  • 13. stm32_k230OCR character recognition
  • 14. stm32_k230 object detection
  • 15. stm32_k230 target tracking
  • 16. stm32_k230 self-learning object recognition
  • 17.stm32_k230 license plate recognition
Arduino-K230
  • 1.arduino_k230 color recognition
  • 2.arduino_k230 barcode recognition
  • 3.arduino_k230 QR code recognition
  • 4.arduino_k230 Apriltag code recognition
  • 5.arduino_k230 DM code recognition
  • 6.arduino_k230 face detection
  • 7.arduino_k230 looking direction
  • 8.arduino_k230 face recognition
  • 9.arduino_k230 human body detection
  • 10.arduino_k230 fall detection
  • 11.arduino_k230 palm detection
  • 12.arduino_k230 gesture recognition
  • 13.arduino_k230 OCR character recognition
  • 14.arduino_k230 object detection
  • 15.arduino_k230 target tracking
  • 16.arduino_k230 self-learning object recognition
  • 17.arduino_k230 license plate recognition
Microbit-K230
  • 1.microbit_k230 color recognition
  • 2.microbit_k230 barcode recognition
  • 3.microbit_k230 QR code recognition
  • 4.microbit_k230 Apriltag code recognition
  • 5.microbit_k230 DM code recognition
  • 6.microbit_k230 face detection
  • 7.microbit_k230 looking direction
  • 8.microbit_k230 face recognition
  • 9.microbit_k230 human body detection
  • 10.microbit_k230 fall detection
  • 11.microbit_k230 palm detection
  • 12.microbit_k230 gesture recognition
  • 13.microbit_k230 OCR character recognition
  • 14.microbit_k230 object detection
  • 15.microbit_k230 target tracking
  • 16.microbit_k230 self-learning object recognition
  • 17.microbit_k230 license plate recognition
MSPM0G3519-K230
  • 1. K230 Color Recognitionnew
  • 2. K230 Barcode Recognitionnew
  • 3. K230 QR Code Recognitionnew
  • 4. K230 Apriltag Code Recognitionnew
  • 5. K230 DM Code Recognitionnew
  • 6. K230 Face Detectionnew
  • 7. K230 Gaze Directionnew
  • 8. K230 Face Recognitionnew
  • 9. K230 Human Body Detectionnew
  • 10. K230 Fall Detectionnew
  • 11. K230 Palm Detectionnew
  • 12. K230 Gesture Recognitionnew
  • 13. K230 OCR Character Recognitionnew
  • 14. K230 Object Detectionnew
  • 15. K230 Target Trackingnew
  • 16. K230 Self-learning Object Recognitionnew
  • 17. K230 License Plate Recognitionnew
18.Extension case (purchase separately)
For 2DOF Electric Platform
  • 1.Moving target control and automatic tracking system
  • 2.Human body recognition alarm
  • 3.Gesture Recognition
  • 4.Rock Paper Scissors
  • 5.Fruit sorting
  • 6.Color Tracking
  • 7.Face Tracking
MSPM0G3507 wheeled chassis V1/V2 combined with K230 application case
  • 1.Visual tracking
  • 2.Color tracking
  • 3.Color response
  • 4.Road sign recognition
  • 5.Machine code tracking
  • 6.QR code recognition action
  • 7.Autonomous avoid
  • 8.License plate tracking
  • 9.Face tracking
  • 10.Gaze direction tracking
  • 11.Palm tracking
  • 12.Target tracking
  • 13.Human body tracking
  • 14.OCR character recognition action
STM32 wheeled chassis V1/V2 combined with K230 application case
  • 1.Visual tracking
  • 2.Color tracking
  • 3.Color response
  • 4.Road sign recognition
  • 5.Machine code tracking
  • 6.QR code recognition action
  • 7.Autonomous avoid
  • 8.License plate tracking
  • 9.Face tracking
  • 10.Gaze direction tracking
  • 11.Palm tracking
  • 12.Target tracking
  • 13.Human body tracking
  • 14.OCR character recognition action
MSPM0G3519 wheeled chassis V1/V2 combined with K230 application case
  • 1.Visual trackingnew
  • 2.Color trackingnew
  • 3.Color responsenew
  • 4.Road sign recognitionnew
  • 5.Machine code trackingnew
  • 6.QR code recognition actionnew
  • 7.Autonomous avoidnew
  • 8.License plate trackingnew
  • 9.Face trackingnew
  • 10.Gaze direction trackingnew
  • 11.Palm trackingnew
  • 12.Target trackingnew
  • 13.Human body trackingnew
  • 14.OCR character recognition actionnew
19. Expansion case(purchase separately)new
  • 1.Motion target control and Auto track system
  • 2.Vehicle-mounted balance ball motion control system
Download
  • Manual
  • CanMV IDE
  • Software Tools
  • Firmware
  • Source Code
  • Appendix
Download ZIP

Welcome to K230 Vision Module repository

1. Line segment detection

Line segment detection

Line segment detectionIntroduction to the experimental results of the routineCode explanationComplete codeCode explanationDetect line segmentsfind_line_segmentsHough Transform

Introduction to the experimental results of the routine

The routine code in this section is located at: [Source code summary / 04.Detecting / 01.find_lines]

We use CanMV IDE to open the routine code and connect K230 to the computer via USB

Click the run button in the lower left corner of CanMV IDE,

Aim the camera of K230 at the line segment

You can see that the line segment in the picture will be marked on the screen (if there is no screen, look at the frame buffer)

Original image:
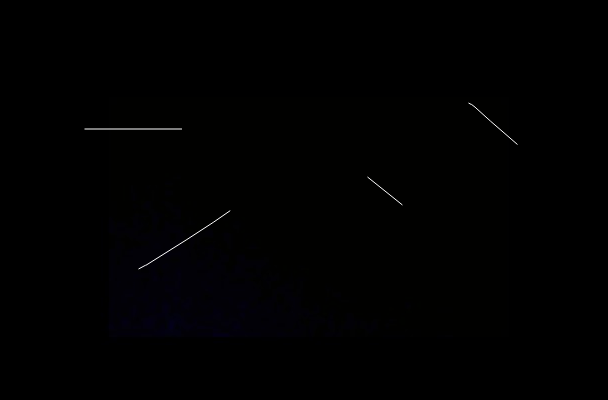
image-20250211100907523

K230 recognition result:

image-20250211101012471

Code explanation

The peripherals we will use in this section are mainly camera modules

Line segment detection is done by find_line_segments() in K230 Method implementation, this method belongs to the image module

The code used in the routine is as follows:

Complete code

*Subject to the content of the file [Source code summary / 04.Detecting / 01.find_lines.py]

xxxxxxxxxx
# 导入必要的模块:时间、操作系统、系统、垃圾回收
# (Import required modules: time, operating system, system, garbage collection)
import time, os, sys, gc
# 导入媒体相关模块:传感器、显示、媒体管理
# (Import media-related modules: sensor, display, media management)
from media.sensor import *
from media.display import *
from media.media import *
# 导入PipeLine库,用于图像处理Pipeline和性能计时
# (Import PipeLine library for image processing pipeline and performance timing)
from libs.PipeLine import PipeLine, ScopedTiming
​
# 设置图像处理分辨率常量
# (Set image processing resolution constants)
PICTURE_WIDTH = 160
PICTURE_HEIGHT = 120
​
# 初始化摄像头变量为空
# (Initialize camera variable as None)
sensor = None
​
# 设置显示分辨率常量
# (Set display resolution constants)
DISPLAY_WIDTH = 640
DISPLAY_HEIGHT = 480
​
​
def scale_coordinates(data_tuple, target_resolution="640x480"):
    # 声明全局变量
    # (Declare global variables)
    global PICTURE_WIDTH, PICTURE_HEIGHT
    """
    将160x120分辨率下的坐标元组等比例缩放到目标分辨率
    (Scale coordinate tuple from 160x120 resolution proportionally to target resolution)
    
    参数 (Parameters):
        data_tuple: 包含坐标信息的元组 (x1, y1, x2, y2)
                   (Tuple containing coordinate information (x1, y1, x2, y2))
        target_resolution: 目标分辨率,可选 "640x480" 或 "640x480"
                          (Target resolution, optional "640x480" or "640x480")
    
    返回 (Returns):
        包含缩放后坐标的新元组 (x1, y1, x2, y2, length)
        (New tuple containing scaled coordinates (x1, y1, x2, y2, length))
    """
    # 检查输入类型,确保是至少包含4个元素的元组
    # (Check input type, ensure it's a tuple with at least 4 elements)
    if not isinstance(data_tuple, tuple) or len(data_tuple) < 4:
        raise TypeError(f"期望输入至少包含4个元素的元组,但收到了 {type(data_tuple).__name__}")
        # (Expected a tuple with at least 4 elements, but received {type})
    
    # 从元组中解析坐标点
    # (Extract coordinates from the tuple)
    x1, y1, x2, y2 = data_tuple[:4]
    
    # 设置原始分辨率
    # (Set source resolution)
    src_width, src_height = PICTURE_WIDTH, PICTURE_HEIGHT
    
    # 根据目标分辨率参数设置目标宽高
    # (Set target width and height based on target resolution parameter)
    if target_resolution == "640x480":
        dst_width, dst_height = 640, 480
    elif target_resolution == "640x480":  # 注意:这里条件与上面相同,可能是代码错误
        # (Note: this condition is the same as above, might be a code error)
        dst_width, dst_height = 640, 480
    else:
        raise ValueError("不支持的分辨率,请使用 '640x480' 或 '640x480'")
        # (Unsupported resolution, please use '640x480' or '640x480')
    
    # 计算横向和纵向的缩放比例
    # (Calculate horizontal and vertical scaling ratios)
    scale_x = dst_width / src_width
    scale_y = dst_height / src_height
    
    # 对坐标进行缩放,并四舍五入保证是整数
    # (Scale coordinates and round to ensure integers)
    scaled_x1 = round(x1 * scale_x)
    scaled_y1 = round(y1 * scale_y)
    scaled_x2 = round(x2 * scale_x)
    scaled_y2 = round(y2 * scale_y)
    
    # 计算缩放后线段的长度(欧几里得距离)
    # (Calculate length of scaled line segment (Euclidean distance))
    dx = scaled_x2 - scaled_x1
    dy = scaled_y2 - scaled_y1
    length = round((dx**2 + dy**2)**0.5)
    
    # 返回缩放后的坐标元组
    # (Return tuple of scaled coordinates)
    return (scaled_x1, scaled_y1, scaled_x2, scaled_y2)
​
# 设置显示模式为LCD
# (Set display mode to LCD)
​
display_mode = "LCD"
​
# 创建图像处理Pipeline,设置RGB888格式尺寸和显示尺寸
# (Create image processing pipeline with RGB888 format size and display size)
pl = PipeLine(rgb888p_size=[640,360], display_size=[640,480], display_mode=display_mode)
# 创建Pipeline实例,设置通道1的帧大小
# (Create pipeline instance, set frame size for channel 1)
pl.create(ch1_frame_size=[PICTURE_WIDTH,PICTURE_HEIGHT])
​
# 主循环
# (Main loop)
while True:
    # 从通道1捕获图像
    # (Capture image from channel 1)
    img = pl.sensor.snapshot(chn=CAM_CHN_ID_1)
    
    # 在图像中查找线段,合并距离为20,最大theta差异为5度
    # (Find line segments in the image, merge distance 20, max theta difference 5 degrees)
    lines = img.find_line_segments(merge_distance=15, max_theta_diff=10)
    
    # 创建一个新的ARGB8888格式的图像用于显示
    # (Create a new ARGB8888 format image for display)
    img = image.Image(640, 480, image.ARGB8888)
    
    # 清空图像
    # (Clear the image)
    img.clear()
    
    # 遍历找到的所有线段
    # (Iterate through all found line segments)
    for i, line in enumerate(lines):
        # 获取线段坐标并缩放到显示分辨率
        # (Get line segment coordinates and scale to display resolution)
        line = scale_coordinates(line.line())
        
        # 在图像上绘制红色线段,线宽为6
        # (Draw red line on the image with thickness 6)
        img.draw_line(line, color=(255,0,0), thickness=6)
    
    # 在OSD3层显示图像
    # (Display the image on OSD3 layer)
    Display.show_image(img, 0, 0, Display.LAYER_OSD3)
    
    # 短暂休眠微秒级延时,避免CPU过度占用
    # (Brief microsecond sleep to avoid excessive CPU usage)
    time.sleep_us(1)

Code explanation

The basic structure of this section of the code is as follows

Import and initialization part:

  • Imported basic modules (time, os, sys, gc) for system operation and memory management

  • Imported media-related modules for processing image acquisition, display and other functions

  • Imported PipeLine library for image processing Pipeline and performance timing

  • Defined two sets of resolution constants:

    • Image processing resolution: 160x120
    • Display resolution: 640x480

scale_coordinates function:

  • Function: Convert coordinates at 160x120 resolution to 640x480 resolution

  • Input: Tuple containing coordinates (x1, y1, x2, y2)

  • Processing steps:

    • Input validation
    • Calculate the scaling ratio
    • Proportional conversion of coordinates
    • Calculate the length of the line segment
  • Return: the converted coordinate tuple

Image processing Pipeline settings:

  • Create a PipeLine instance and configure:

    • RGB888 format size: 640x360
    • Display size: 640x480
    • Display mode: LCD
  • Set the frame size of channel 1 to 160x120

Main loop processing:

  • Loop through the following steps:

    • Capture image from camera

    • Find line segments in image (merge distance 15, maximum angle difference 10 degrees)

    • Create a new display image (640x480, ARGB8888 format)

    • For each detected line segment:

      • Convert coordinates to display resolution
      • Draw line segment in red (thickness 6)
    • Display processed image in display layer OSD3

    • Sleep briefly to control CPU usage

In this section of code, we did not use a more conventional way to do line segment detection, but took advantage of the K230's feature of supporting multiple layers

Detect graphics at a lower resolution and then scale the result to a high-resolution background image

After doing this, the frame rate of the program will increase significantly

All subsequent codes in this chapter use the original detection method, the code will be simpler, but the frame rate will be much lower

Detect line segments

find_line_segments

xxxxxxxxxx
image.find_line_segments([roi[, merge_distance=0[, max_theta_difference=15]]])

Uses the Hough transform to find line segments in an image. Returns a list of image.line objects.

roi is the region of interest rectangle (x, y, w, h) to copy. If not specified, roi is the image rectangle. Only pixels within the roi are operated on.

merge_distance specifies the maximum number of pixels two line segments can be apart from each other without being merged.

max_theta_difference is the maximum angle difference between two line segments to be merged by merge_distance above.

This method uses the LSD library (also used by OpenCV) to find line segments in an image. It is a bit slow, but very accurate and line segments do not jump.

Not supported on compressed images or bayer images.


Hough Transform

Hough Transform is a mathematical method for detecting geometric shapes such as lines and circles from images.

For example, imagine that you have a drawing with many dots scattered in front of you.

If you want to find the straight line that these dots can form:

  1. The traditional method is to try to connect any two points to see if a straight line can be formed, which is very time-consuming
  2. The idea of Hough transform is the opposite - for each point, assume that it may be on countless straight lines, and find the straight line that multiple points fall on

Take an example in life: you stand on the side of the road and look at the telephone poles. Although the telephone poles are distributed in different positions, you can see at a glance that they are arranged in a straight line. This is similar to the principle of Hough transform.

Practical application

  • Lane detection: Identify road markings in autonomous driving
  • Document scanning: Find document boundaries
  • Building recognition: Detect edge lines of buildings

Algorithm steps

  • First perform edge detection on the image
  • Build an accumulator array in the parameter space
  • Vote for each edge point in the parameter space
  • Find the local maximum in the accumulator
  • Determine the straight lines in the original image based on these maximum values
Draw key points
Rectangle Detection

COMPANY

  • About us
  • Team Style
  • Blog

LEARNING & EXPLORATION

  • Tutorials
  • Edge AI hardware
  • Educational robots
  • Embedded intelligent hardware

WHERE TO BUY

  • Yahboom Online Store
  • Amazon
  • Alibaba
  • AliExpress
  • Mercado

TECHNOLOGY SUPPORT

  • Email: support@yahboom.com

BE A DISTRIBUTOR

  • Email: sales@yahboom.com
QR Code

Copyright © 2017-2026 Yahboom. All Rights Reserved.

EN/中文