Welcome to K230 Vision Module repository
4.yolov8n segmentation
yolov8n segmentation
yolov8n segmentationRoutine Experiment EffectCode ExplanationCode structurePart of the codeflow chart
Routine Experiment Effect
In this section, we will learn how to use K230 to implement object segmentation based on yolov8n.
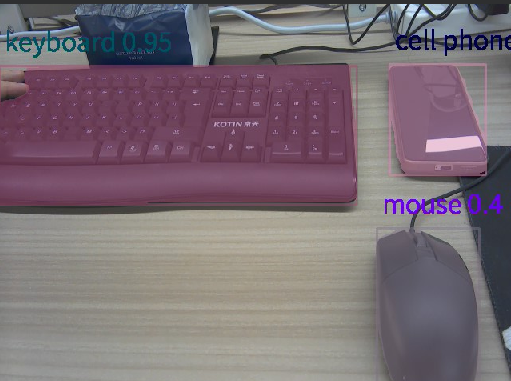
After connecting to the IDE, run the sample code in this section and use K230 to focus on the surroundings. You can see that based on the object detection, the detected object area will be rendered with different colors.
Code Explanation
Code structure
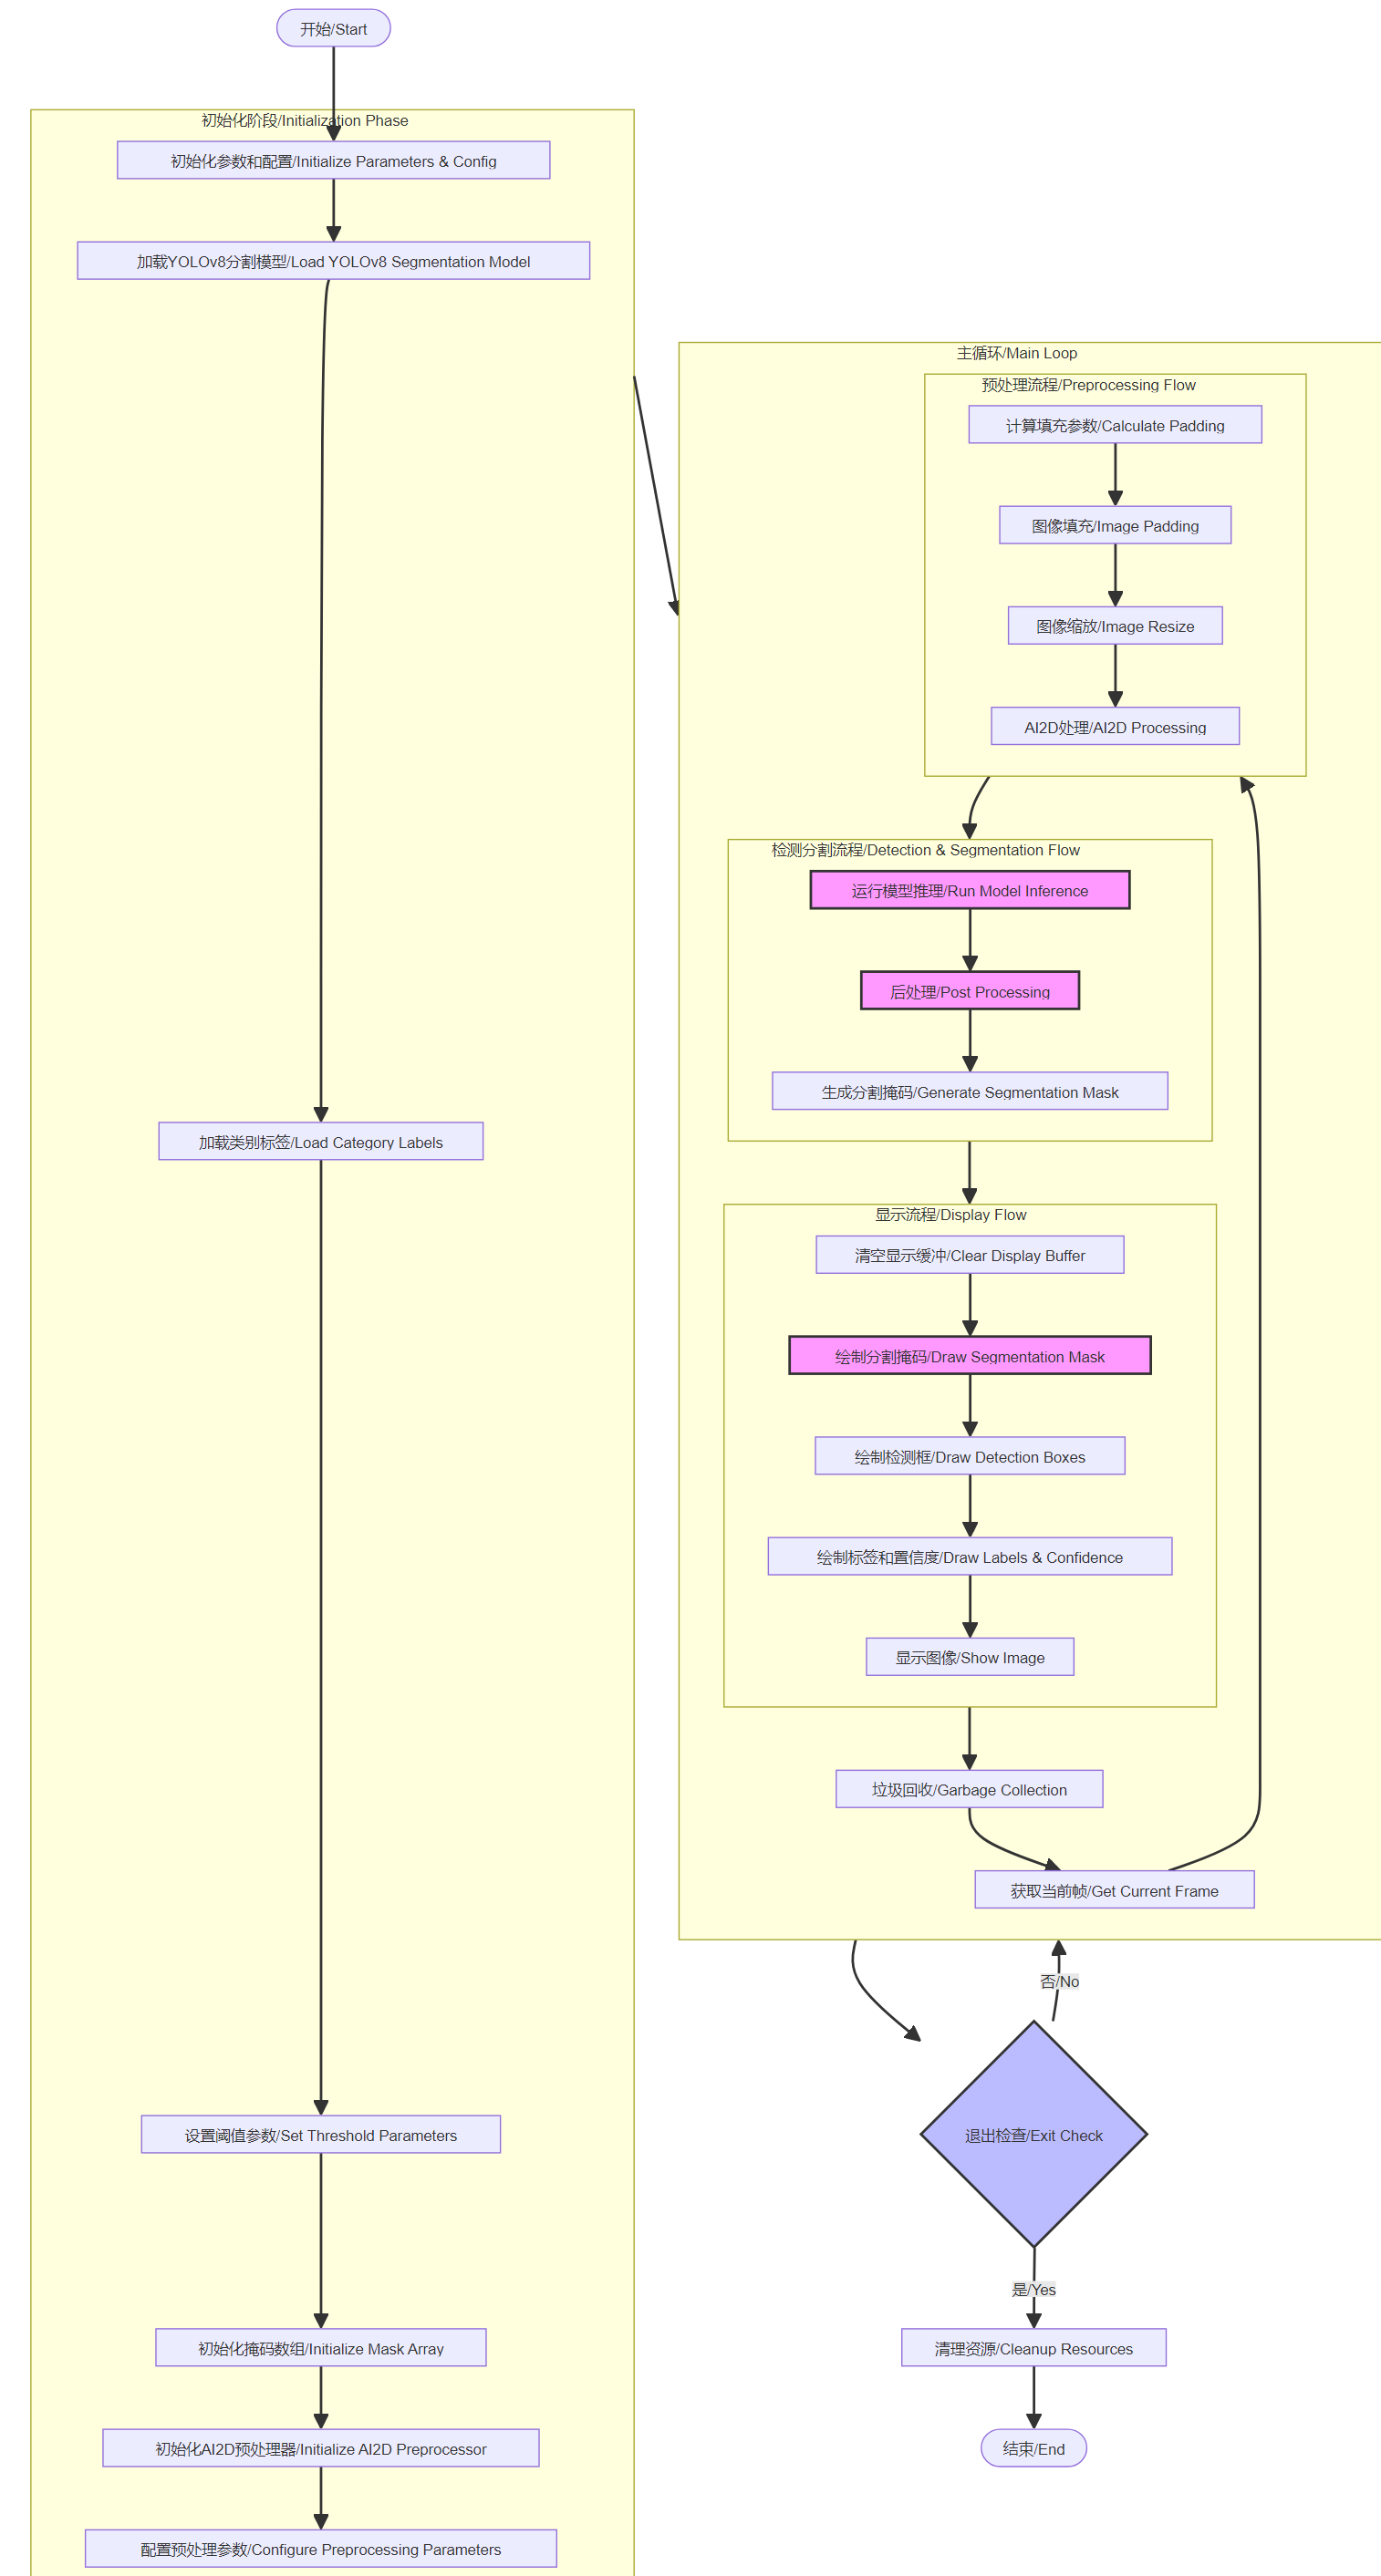
Since segmentation is based on detection, here we mainly list the differences in code structure from the detection in the previous section.
- Added segmentation model-specific initialization phase, including mask array initialization
- Modified the detection process to detection and segmentation process, added mask generation step
- Added segmentation mask drawing step to display pipeline
- Adjusted the order and relationship of each sub-process in the main loop
Part of the code
For the complete code, please refer to the file [Source Code/09.Scene/04.segment_yolov8n.py]
xxxxxxxxxx def postprocess(self, results): """ 自定义当前任务的后处理 Custom post-processing for the current task 参数: Parameters: results: 模型推理结果 / Model inference results 返回: Returns: seg_res: 分割结果 / Segmentation results """ with ScopedTiming("postprocess", self.debug_mode > 0): # 这里使用了aidemo的segment_postprocess接口进行后处理 # Using aidemo's segment_postprocess interface for post-processing seg_res = aidemo.segment_postprocess( results, [self.rgb888p_size[1], self.rgb888p_size[0]], self.model_input_size, [self.display_size[1], self.display_size[0]], self.confidence_threshold, self.nms_threshold, self.mask_threshold, self.masks ) return seg_res def draw_result(self, pl, seg_res): """ 绘制分割结果到显示层 Draw segmentation results to display layer 参数: Parameters: pl: Pipeline对象 / Pipeline object seg_res: 分割结果 / Segmentation results """ with ScopedTiming("display_draw", self.debug_mode > 0): if seg_res[0]: # 如果有检测到物体 / If objects are detected pl.osd_img.clear() # 清除OSD图层 / Clear OSD layer # 创建引用mask数据的图像对象 / Create image object referencing mask data mask_img = image.Image(self.display_size[0], self.display_size[1], image.ARGB8888, alloc=image.ALLOC_REF, data=self.masks) pl.osd_img.copy_from(mask_img) # 复制mask图像到OSD层 / Copy mask image to OSD layer # 提取检测结果 / Extract detection results dets, ids, scores = seg_res[0], seg_res[1], seg_res[2] for i, det in enumerate(dets): # 绘制标签和置信度 / Draw label and confidence x1, y1, w, h = map(lambda x: int(round(x, 0)), det) pl.osd_img.draw_string_advanced( x1, y1-50, 32, " " + self.labels[int(ids[i])] + " " + str(round(scores[i], 2)), color=self.get_color(int(ids[i])) ) else: pl.osd_img.clear() # 没有检测结果时清除OSD / Clear OSD when no detection
flow chart