yahboom
HomeLearn
Solution
Blog
Online Store
About Us
EN/中文
K230 Vision Module📖
1. Quick Start
  • 0.Get start
  • 1. K230 firmware download and burning
  • 2. Install the programming environment
  • 3. Debug and run routines
  • 4. Offline running routine
  • 5. Micropython Quick Start
  • 6. GUI Program Instructions
  • 7.K230 module bracket installation tutorial
  • 8.K230 module 2DOF PTZ installation tutorial
2. Basic Courses
  • 1.FPIOA pin assignment
  • 2.RGB lights
  • 3.Buzzer
  • 4.Buttons
  • 5.Serial communication
  • 6.I2C communication
  • 7.PWM
  • 8.WDT watchdog
  • 9.Timer
  • 10.Fourier Transform
  • 11.SHA256 encryption
  • 12.AES encryption
  • 13.Multithreading
  • 14.File reading and writing
  • 15.Image Display
  • 16.Touch Display
  • 17.Camera display
  • 18.Image Flip
  • 19.Camera
3. Draw the image
  • 1. Draw the lines
  • 2. Draw the circle
  • 3. Draw the rectangle
  • 4. Draw the ellipse
  • 5. Draw the arrow
  • 6. Draw the crosshairs
  • 7. Draw text
  • 8. Draw key points
4. Graphics detection
  • 1. Line segment detection
  • 2. Rectangle Detection
  • 3. Circle detection
  • 4. Object edge detection
  • 5. Line inspection basics:fast linear regression
5. Color recognition
  • 1. Color recognition
  • 2. Object Counting
  • 3. Multi-color recognition
  • 4. K230 Color Line Patrol
6.1 CV_lite Image Processing Special Topic
  • 1.Introduction to cv_litenew
  • 2.cv_lite API Reference Manualnew
  • 3.Color Block Recognition - Grayscale Imagenew
  • 4.Color Block Recognition - Color Imagenew
  • 5.Circle Recognition - Grayscale Imagenew
  • 6.Circle Recognition - Color Imagenew
  • 7.Corner Recognition - Grayscale Imagenew
  • 8.Corner Recognition - Color Imagenew
  • 9.Edge Recognition - Grayscale Imagenew
  • 10. Edge Recognition - Color Imagenew
  • 11. Rectangle Recognition - Grayscale Imagenew
  • 12.Rectangle Recognition - Color Imagenew
  • 13.Rectangle recognition combined with corner recognition - grayscale imagenew
  • 14.Rectangle recognition combined with corner recognition - color imagenew
  • 15.Image Binarization - Grayscalenew
  • 16.Image Binarization - Color Imagenew
  • 17.Exposure Adjustmentnew
  • 18.Image Black Hat Operationsnew
  • 19.Image Color Histogramnew
  • 20.Image Closingnew
  • 21.Image Expansionnew
  • 22.Image Corrosionnew
  • 23.Gaussian Blurnew
  • 24.Gradient Transformationnew
  • 25.Mean Fuzzynew
  • 26.Image Openingnew
  • 27.Image Top Hat Operationnew
  • 28.PnP rangingnew
  • 29.Find rectangles and measure distancesnew
  • 30.Image grayscale world white balancenew
6.2 OpenCV Image Processing Special Topicnew
  • 1. OpenCV Introduction
  • 2. OpenCV API Reference
  • 3. Image Basic Transforms
  • 4. Morphological Operations
  • 5. Color Segmentation and Shape Classification
  • 6. Corner and Centroid Detection
  • 7. Hough Circle Detection
  • 8. Hough Line Detection
  • 9. Contour Analysis
  • 10. Drawing Functions
  • 11. Template Matching
  • 12. Image Blur Filtering
  • 13. Edge Detection
  • 14. Thresholding
  • 15. Color Segmentation
  • 16. Histogram and Pixel Transformation
  • 17. Arithmetic and Bitwise Operations
  • 18. Channel Operation and Statistics
  • 19. Image File Read and Write
  • 20. Pixel Level Transformation
7. Code type recognition
  • 1.Barcode recognition
  • 2.QR code recognition
  • 3.AprilTag tag recognition
  • 4.DM code recognition
8. Face Recognition
  • 1.[Must-read] General code structure and prerequisite knowledge of AI vision routines
  • 2.Face Detection
  • 3.Facial key point recognition
  • 4.Face orientation detection
  • 5.Face 3D Network
  • 6.Gaze direction detection
  • 7.Register for face recognition
9. Human body characteristics
  • 1. Human body detection
  • 2. Human key point detection
  • 3. Human posture recognition
  • 4. Fall detection
  • 5. Palm detection
  • 6. Palm key point detection
  • 7. Palm key point classification
  • 8. Gesture Recognition
  • 9. Dynamic gesture recognition
  • 10. Rock, Paper, Scissors
10. Scenario Application
  • 1.OCR character detection
  • 2.OCR character recognition
  • 3.yolov8n target detection
  • 4.yolov8n segmentation
  • 5. Self-learning object recognition
  • 6. License plate detection
  • 7. License Plate Recognition
  • 8. Target Tracking
  • 9. Fruit classification
  • 10. Garbage classification
  • 11. Road sign recognition
11. Audio and video processing
  • 1. Audio Recording
  • 2. Play Audio
  • 3. Video Recording
  • 4. Play Video
  • 5. Keyword wake-up
12. Network Basics
  • 1. Wireless network connection
  • 2. AP hotspot mode
  • 3. TCP-Server Example
  • 4. TCP-Client Example
  • 5. UDP-Server Example
  • 6. UDP-Client Example
  • 7. HTTP-Server Example
  • 8. HTTP-Client Example
  • 9. MQTT Quick Start
  • 10. MQTT-Publisher
  • 11. MQTT-Subscriber
  • 12. RTSP real-time image transmission
  • 13. RTSP real-time image transmission combined with AIDemo
  • 14. Call OpenRouter large model aggregation service
  • 15. Open the Resource Monitoring Panel
13. LVGL Graphical Interface
  • 1. Introduction to LVGL
  • 2. Create a button
  • 3. Create a slider
  • 4. Create an Image
  • 5. Create a text box and keyboard
14. GUI Code Tutorial & Secondary Development
  • 01.GUI System Architecture
  • 02.Core Engine Initialization
  • 03.Application Discovery Mechanism in GUI
  • 04.Desktop Layout Algorithm
  • 05.Advanced UI Styling
  • 06.BaseApp Base Class Analysis
  • 07.Hello_World Practical
  • 08.GUI Application Lifecycle and Resource Management
15. Train your own model
  • 1. Local deployment of yolo training environment
  • 2. Use online platforms for training
16.Touch Course
  • 1.Touch point detectionnew
  • 2.Touch Paintingnew
  • 3.Touch to take a photonew
17. Multi-master communication (purchased separately)
ESP32-K230
  • 1.k230 color recognition
  • 2.k230 barcode recognition
  • 3.k230 QR code recognition
  • 4.k230Apriltag code recognition
  • 5.k230DM code recognition
  • 6.k230 face detection
  • 7.k230 gaze direction
  • 8.k230 face recognition
  • 9.k230 human body detection
  • 10.k230 fall detection
  • 11.k230 palm detection
  • 12.k230 gesture recognition
  • 13.k230OCR character recognition
  • 14.k230 object detection
  • 15.k230 target tracking
  • 16.k230 self-learning object recognition
  • 17.k230 license plate recognition
Jetson-K230
  • 1.k230 color recognition
  • 2.k230 barcode recognition
  • 3.k230 QR code recognition
  • 4.k230Apriltag code recognition
  • 5.k230DM code recognition
  • 6.k230 face detection
  • 7.k230 gaze direction
  • 8.k230 face recognition
  • 9.k230 human body detection
  • 10.k230 fall detection
  • 11.k230 palm detection
  • 12.k230 gesture recognition
  • 13.k230OCR character recognition
  • 14.k230 object detection
  • 15.k230 target tracking
  • 16.k230 self-learning object recognition
  • 17.k230 license plate recognition
MSPM0G3507-K230
  • 1.k230 color recognition
  • 2.k230 barcode recognition
  • 3.k230 QR code recognition
  • 4.k230Apriltag code recognition
  • 5.k230DM code recognition
  • 6.k230 face detection
  • 7.k230 gaze direction
  • 8.k230 face recognition
  • 9.k230 human body detection
  • 10.k230 fall detection
  • 11.k230 palm detection
  • 12.k230 gesture recognition
  • 13.k230OCR character recognition
  • 14.k230 object detection
  • 15.k230 target tracking
  • 16.k230 self-learning object recognition
  • 17.k230 license plate recognition
Pico-K230
  • 1.k230 color recognition
  • 2.k230 barcode recognition
  • 3.k230 QR code recognition
  • 4.k230Apriltag code recognition
  • 5.k230DM code recognition
  • 6.k230 face detection
  • 7.k230 gaze direction
  • 8.k230 face recognition
  • 9.k230 human body detection
  • 10.k230 fall detection
  • 11.k230 palm detection
  • 12.k230 gesture recognition
  • 13.k230OCR character recognition
  • 14.k230 object detection
  • 15.k230 target tracking
  • 16.k230 self-learning object recognition
  • 17.k230 license plate recognition
raspberrypi-K230
  • 1.k230 color recognition
  • 2.k230 barcode recognition
  • 3.k230 QR code recognition
  • 4.k230Apriltag code recognition
  • 5.k230DM code recognition
  • 6.k230 face detection
  • 7.k230 gaze direction
  • 8.k230 face recognition
  • 9.k230 human body detection
  • 10.k230 fall detection
  • 11.k230 palm detection
  • 12.k230 gesture recognition
  • 13.k230OCR character recognition
  • 14.k230 object detection
  • 15.k230 target tracking
  • 16.k230 self-learning object recognition
  • 17.k230 license plate recognition
RDK-K230
  • 1.k230 color recognition
  • 2.k230 barcode recognition
  • 3.k230 QR code recognition
  • 4.k230Apriltag code recognition
  • 5.k230DM code recognition
  • 6.k230 face detection
  • 7.k230 gaze direction
  • 8.k230 face recognition
  • 9.k230 human body detection
  • 10.k230 fall detection
  • 11.k230 palm detection
  • 12.k230 gesture recognition
  • 13.k230OCR character recognition
  • 14.k230 object detection
  • 15.k230 target tracking
  • 16.k230 self-learning object recognition
  • 17.k230 license plate recognition
STM32-K230
  • 1. stm32_k230 color recognition
  • 2. stm32_k230 barcode recognition
  • 3. stm32_k230 QR code recognition
  • 4. stm32_k230Apriltag code recognition
  • 5. stm32_k230DM code recognition
  • 6. stm32_k230 face detection
  • 7.stm32_k230 looking direction
  • 8. stm32_k230 face recognition
  • 9. stm32_k230 human body detection
  • 10. stm32_k230 fall detection
  • 11. stm32_k230 palm detection
  • 12. stm32_k230 gesture recognition
  • 13. stm32_k230OCR character recognition
  • 14. stm32_k230 object detection
  • 15. stm32_k230 target tracking
  • 16. stm32_k230 self-learning object recognition
  • 17.stm32_k230 license plate recognition
Arduino-K230
  • 1.arduino_k230 color recognition
  • 2.arduino_k230 barcode recognition
  • 3.arduino_k230 QR code recognition
  • 4.arduino_k230 Apriltag code recognition
  • 5.arduino_k230 DM code recognition
  • 6.arduino_k230 face detection
  • 7.arduino_k230 looking direction
  • 8.arduino_k230 face recognition
  • 9.arduino_k230 human body detection
  • 10.arduino_k230 fall detection
  • 11.arduino_k230 palm detection
  • 12.arduino_k230 gesture recognition
  • 13.arduino_k230 OCR character recognition
  • 14.arduino_k230 object detection
  • 15.arduino_k230 target tracking
  • 16.arduino_k230 self-learning object recognition
  • 17.arduino_k230 license plate recognition
Microbit-K230
  • 1.microbit_k230 color recognition
  • 2.microbit_k230 barcode recognition
  • 3.microbit_k230 QR code recognition
  • 4.microbit_k230 Apriltag code recognition
  • 5.microbit_k230 DM code recognition
  • 6.microbit_k230 face detection
  • 7.microbit_k230 looking direction
  • 8.microbit_k230 face recognition
  • 9.microbit_k230 human body detection
  • 10.microbit_k230 fall detection
  • 11.microbit_k230 palm detection
  • 12.microbit_k230 gesture recognition
  • 13.microbit_k230 OCR character recognition
  • 14.microbit_k230 object detection
  • 15.microbit_k230 target tracking
  • 16.microbit_k230 self-learning object recognition
  • 17.microbit_k230 license plate recognition
MSPM0G3519-K230
  • 1. K230 Color Recognitionnew
  • 2. K230 Barcode Recognitionnew
  • 3. K230 QR Code Recognitionnew
  • 4. K230 Apriltag Code Recognitionnew
  • 5. K230 DM Code Recognitionnew
  • 6. K230 Face Detectionnew
  • 7. K230 Gaze Directionnew
  • 8. K230 Face Recognitionnew
  • 9. K230 Human Body Detectionnew
  • 10. K230 Fall Detectionnew
  • 11. K230 Palm Detectionnew
  • 12. K230 Gesture Recognitionnew
  • 13. K230 OCR Character Recognitionnew
  • 14. K230 Object Detectionnew
  • 15. K230 Target Trackingnew
  • 16. K230 Self-learning Object Recognitionnew
  • 17. K230 License Plate Recognitionnew
18.Extension case (purchase separately)
For 2DOF Electric Platform
  • 1.Moving target control and automatic tracking system
  • 2.Human body recognition alarm
  • 3.Gesture Recognition
  • 4.Rock Paper Scissors
  • 5.Fruit sorting
  • 6.Color Tracking
  • 7.Face Tracking
MSPM0G3507 wheeled chassis V1/V2 combined with K230 application case
  • 1.Visual tracking
  • 2.Color tracking
  • 3.Color response
  • 4.Road sign recognition
  • 5.Machine code tracking
  • 6.QR code recognition action
  • 7.Autonomous avoid
  • 8.License plate tracking
  • 9.Face tracking
  • 10.Gaze direction tracking
  • 11.Palm tracking
  • 12.Target tracking
  • 13.Human body tracking
  • 14.OCR character recognition action
STM32 wheeled chassis V1/V2 combined with K230 application case
  • 1.Visual tracking
  • 2.Color tracking
  • 3.Color response
  • 4.Road sign recognition
  • 5.Machine code tracking
  • 6.QR code recognition action
  • 7.Autonomous avoid
  • 8.License plate tracking
  • 9.Face tracking
  • 10.Gaze direction tracking
  • 11.Palm tracking
  • 12.Target tracking
  • 13.Human body tracking
  • 14.OCR character recognition action
MSPM0G3519 wheeled chassis V1/V2 combined with K230 application case
  • 1.Visual trackingnew
  • 2.Color trackingnew
  • 3.Color responsenew
  • 4.Road sign recognitionnew
  • 5.Machine code trackingnew
  • 6.QR code recognition actionnew
  • 7.Autonomous avoidnew
  • 8.License plate trackingnew
  • 9.Face trackingnew
  • 10.Gaze direction trackingnew
  • 11.Palm trackingnew
  • 12.Target trackingnew
  • 13.Human body trackingnew
  • 14.OCR character recognition actionnew
19. Expansion case(purchase separately)new
  • 1.Motion target control and Auto track system
  • 2.Vehicle-mounted balance ball motion control system
Download
  • Manual
  • CanMV IDE
  • Software Tools
  • Firmware
  • Source Code
  • Appendix
Download ZIP

Welcome to K230 Vision Module repository

6.Circle Recognition - Color Image

Circle Recognition - Color Image

Circle Recognition - Color ImageExample ResultsCode OverviewImporting ModulesSetting the image sizeInitialize the camera (RGB888 format)Initialize the display moduleInitialize the media manager and start the cameraSetting Hough Circle Detection ParametersImage Processing and Hough Circle DetectionResource releaseParameter adjustment instructions

Example Results

Run this section's example code [Source Code/06.cv_lite/4.rgb888_find_circles.py]

In this section, we will use the cv_lite extension module to implement Hough circle detection in RGB888 format on an embedded device.
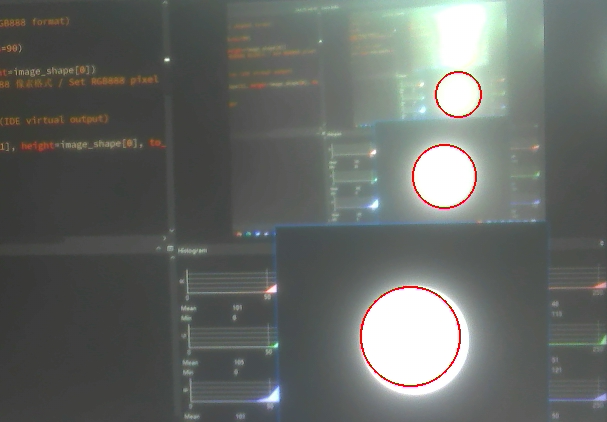
image-20250804210154029

Code Overview

Importing Modules

import time, os, sys, gc
from machine import Pin
from media.sensor import * # Import the camera interface
from media.display import * # Import the display interface
from media.media import * # Import the media manager
import _thread
import cv_lite # Import the cv_lite extension module
import ulab.numpy as np # MicroPython class NumPy library

Setting the image size

xxxxxxxxxx
image_shape = [480, 640] # Height x Width

Define the image resolution to 480x640 (height x width). The camera and display module will be initialized based on this size later.

Initialize the camera (RGB888 format)

xxxxxxxxxx
sensor = Sensor(id=2, width=1280, height=960, fps=90)
sensor.reset()
sensor.set_framesize(width=image_shape[1], height=image_shape[0])
sensor.set_pixformat(Sensor.RGB888) # Set RGB888 pixel format / Set RGB888 pixel format
  • Initialize the camera, set the resolution to 1280x960 and the frame rate to 90 FPS.

Note: Setting the camera resolution to 1280*960 can effectively suppress display distortion, but there is a chance of a purple screen when running this code.

  • Resize the output frame to 640x480 and set it to RGB888 format (three-channel color image, suitable for circle detection in color images).

Initialize the display module

xxxxxxxxxx
Display.init(Display.ST7701, width=image_shape[1], height=image_shape[0], to_ide=True, quality=100)

Initialize the display module, using the ST7701 driver chip, with a resolution consistent with the image size. to_ide=True indicates that the image will be simultaneously transmitted to the IDE for virtual display, and quality=100 sets the image transmission quality to a higher level.

Initialize the media manager and start the camera

xxxxxxxxxx
MediaManager.init()
sensor.run()

Initialize the media resource manager and start the camera to capture the image stream.

Setting Hough Circle Detection Parameters

xxxxxxxxxx
dp = 1 # Inverse ratio of accumulator resolution to image resolution
minDist = 30 # Minimum distance between detected centers
param1 = 80 # Higher threshold for Canny edge detection
param2 = 20 # Threshold for center detection in accumulator
minRadius = 10 # Minimum circle radius
maxRadius = 50 # Maximum circle radius
clock = time.clock() # Start FPS timer
  • dp: Accumulator resolution ratio. A value of 1 indicates the same resolution as the image. Larger values result in faster detection but potentially lower accuracy.
  • minDist: Minimum distance between detected circle centers, used to avoid repeated detection of the same circle.
  • param1: The high threshold for Canny edge detection, used to detect image edges. A higher value results in fewer edges being detected.
  • param2: The threshold for circle center detection in the Hough transform. A lower value results in more circles being detected (but may contain noise).
  • minRadius and maxRadius: Limit the radius of the detected circles, detecting only those that fall within this range.
  • clock: Used to calculate the frame rate.

Image Processing and Hough Circle Detection

​x
while True:
    clock.tick()
​
    #Capture a frame
    img = sensor.snapshot()
    img_np = img.to_numpy_ref()  # Get an RGB888 ndarray reference
​
    # Call the cv_lite extended Hough circle detection function, returning a list of circle parameters [x, y, r, ...]
    circles = cv_lite.rgb888_find_circles(
        image_shape, img_np, dp, minDist, param1, param2, minRadius, maxRadius
    )
​
    # Iterate over the detected circles and draw a circle frame
    for i in range(0, len(circles), 3):
        x = circles[i]
        y = circles[i + 1]
        r = circles[i + 2]
        img.draw_circle(x, y, r, color=(255, 0, 0), thickness=2)  # Red circle
​
    # Display image with drawn circles
    Display.show_image(img)
​
    # Garbage collection
    gc.collect()
​
    # Print FPS
    print("findcircles:", clock.fps())
  • Image capture: Acquire an image frame using sensor.snapshot() and convert it to a NumPy array reference using to_numpy_ref().
  • Hough circle detection: Call cv_lite.rgb888_find_circles() to detect circles and return a list of detected circle information (each circle occupies 3 elements: [x, y, r], i.e., the center coordinates and radius).
  • Draw a circle: Traverse each detected circle and draw a red circular outline (color=(255, 0, 0)) on the image to mark the target area.
  • Display image: Display the processed image to the screen or IDE virtual window.
  • Memory management and frame rate output: Call gc.collect() to clean up the memory and print the current frame rate through clock.fps().

Resource release

xxxxxxxxxx
sensor.stop()
Display.deinit()
os.exitpoint(os.EXITPOINT_ENABLE_SLEEP)
time.sleep_ms(100)
MediaManager.deinit()

Parameter adjustment instructions

  • dp: Adjust the accumulator resolution ratio. The larger the value, the faster the detection speed, but some circles may be missed. It is recommended to start the test from 1.
  • minDist: Adjust based on the size and distribution of circles. If circles are close together, reduce this value; if duplicate circles are detected, increase it.
  • param1: High threshold for Canny edge detection. A higher value detects fewer edges. If the environment is noisy, increase this value appropriately.
  • param2: Hough transform threshold. A lower value detects more circles but may include noise; a higher value makes detection stricter but may miss detections.
  • minRadius and maxRadius: Adjust the range based on the size of the target circle to ensure that only the expected circles are detected.
Circle Recognition - Grayscale Image
Corner Recognition - Grayscale Image

COMPANY

  • About us
  • Team Style
  • Blog

LEARNING & EXPLORATION

  • Tutorials
  • Edge AI hardware
  • Educational robots
  • Embedded intelligent hardware

WHERE TO BUY

  • Yahboom Online Store
  • Amazon
  • Alibaba
  • AliExpress
  • Mercado

TECHNOLOGY SUPPORT

  • Email: support@yahboom.com

BE A DISTRIBUTOR

  • Email: sales@yahboom.com
QR Code

Copyright © 2017-2026 Yahboom. All Rights Reserved.

EN/中文