Welcome to MicroROS V2 Robot Car repository
2. Write Firmware
Flashing the Factory Firmware
1. Objectives of This Section
Use the flash_download_tool utility to flash the factory firmware (MicroROS-V2.bin) to the MicroROS-V2 control board (ESP32-S3).
2. Hardware Requirements
| Hardware | Description |
|---|---|
| MicroROS-V2 control board | ESP32-S3 main controller |
| USB data cable | Connects the control board and the computer |
| Computer | With flash_download_tool installed |
3. Flashing Steps
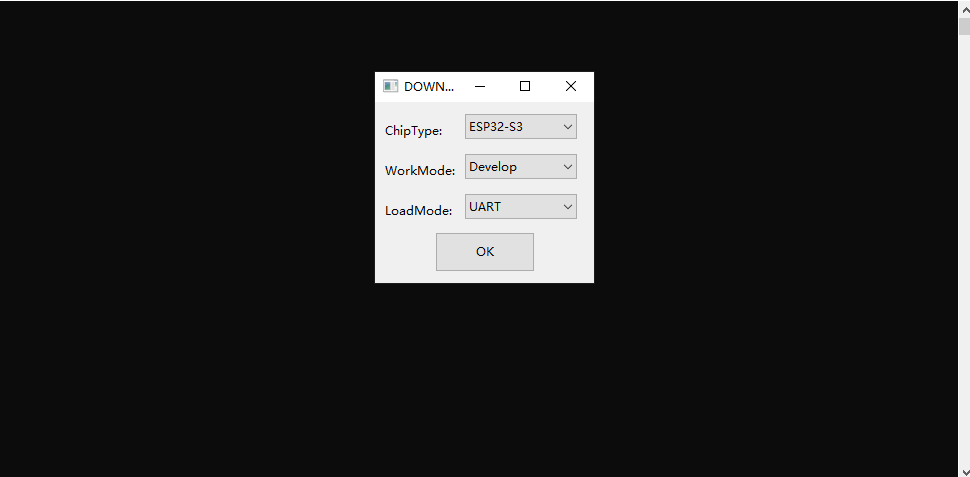
1. Select the Chip and Work Mode
Open flash_download_tool and make the following settings:
- Chip model: ESP32-S3
- WorkMode: Develop
- LoadMode: UART
2. Configure the Flashing Parameters
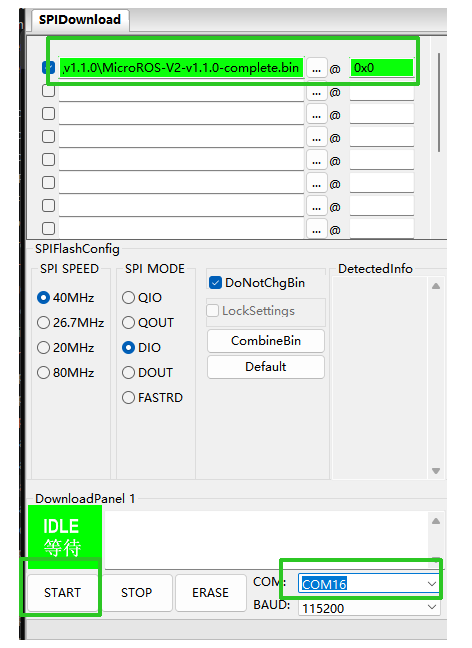
Load the firmware and configure the SPI parameters:
| Parameter | Setting Value | Description |
|---|---|---|
| bin file | MicroROS-V2.bin | Factory test firmware; the firmware name may differ by version number, but the flashing procedure is the same |
| Start address | 0x0 | The start address for flashing the firmware |
| SPI mode | QIO | DIO can be selected in compatibility mode |
| SPI SPEED | 40MHz | SPI communication speed |
| COM port | Corresponding serial port | Select according to the serial port actually connected |
After configuration, click START to begin flashing.
3. Wait for the Flashing to Complete
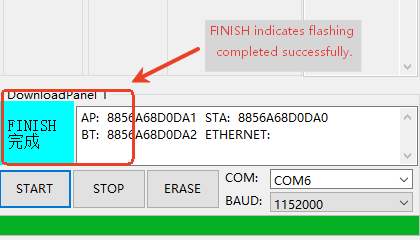
During flashing, wait for the progress bar to finish; the FINISH prompt indicates that flashing succeeded. You can then reset the main control board and the firmware will take effect.
4. Precautions
- Before flashing, make sure the control board is connected to the computer via a USB cable and the corresponding serial port is recognized
- If flashing fails, check that the USB cable supports data transfer (not a charge-only cable)
- Prefer the QIO SPI mode; switch to DIO if you encounter compatibility issues