Welcome to MicroROS V2 Robot Car repository
6. Multimodal Visual Understanding + SLAM Navigation
6. Multimodal Visual Understanding + SLAM Navigation
1. Course Content
- Learn to use the robot's visual understanding combined with the SLAM navigation function.
- Analyze newly appearing key source code.
2. Preparation
2.1 Content Description
The virtual machine used by default with this product starts the Dify Docker environment automatically at boot, so no additional startup is usually needed.
⚠️ The same test instructions will not produce exactly the same reply content from the large model, and will differ slightly from the screenshots in the tutorial. If you need to enhance or reduce the diversity of the large model's replies, refer to 【AI Large Model Development】-【RAG Knowledge Base Deployment】 to modify the knowledge base and sample library.
This case requires mapping to be completed in advance and Nav2 navigation to start normally.
2.2 Configuring the Map Mapping File
Map mapping is used to convert the location names mentioned by the user into ROS navigation target points. When configuring, you need to first select points in RViz2, record the coordinates output by the /initialpose topic, and then write the coordinates into map_mapping.yaml.
Enter the command in the virtual machine terminal to start navigation:
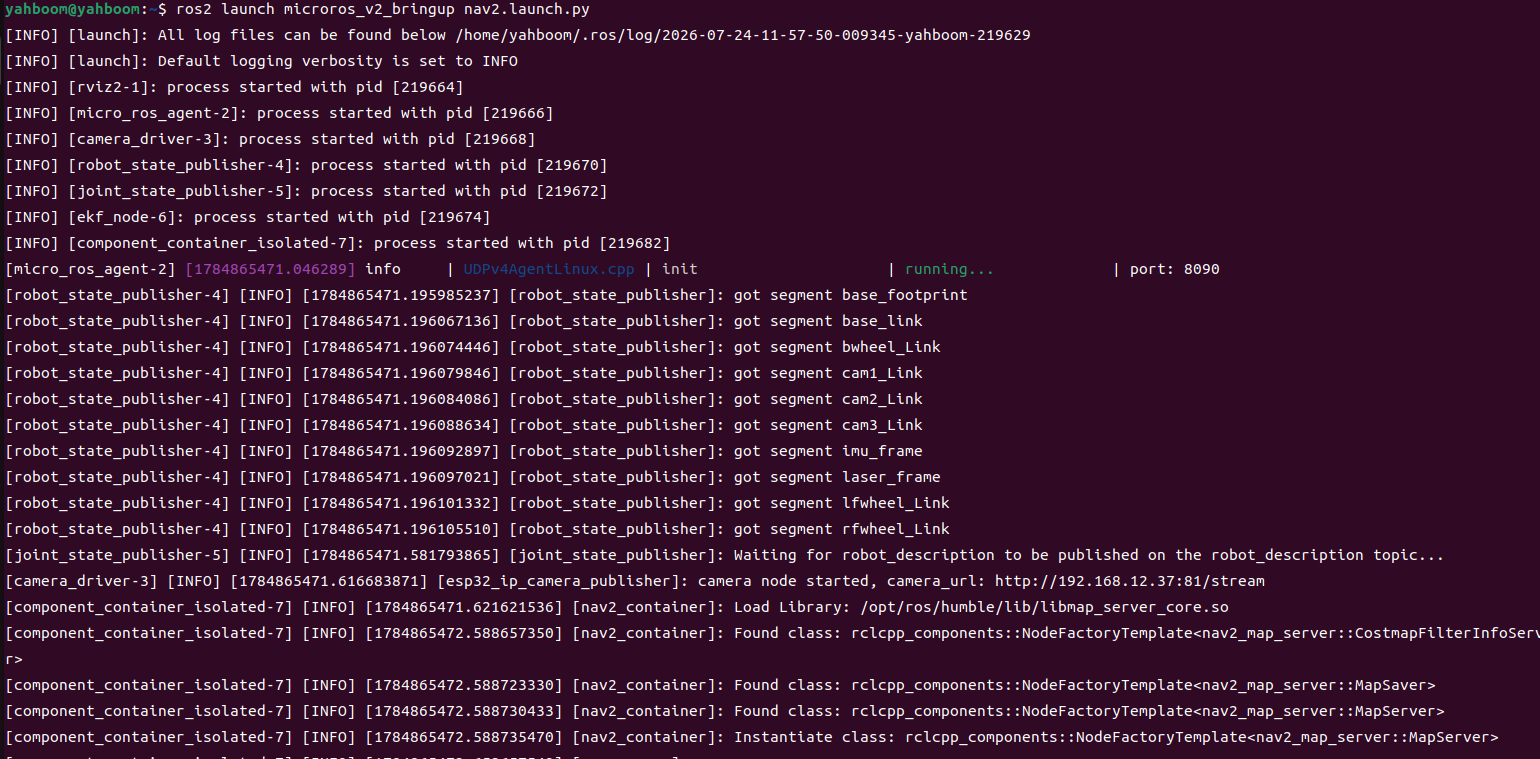
ros2 launch microros_v2_bringup nav2.launch.py
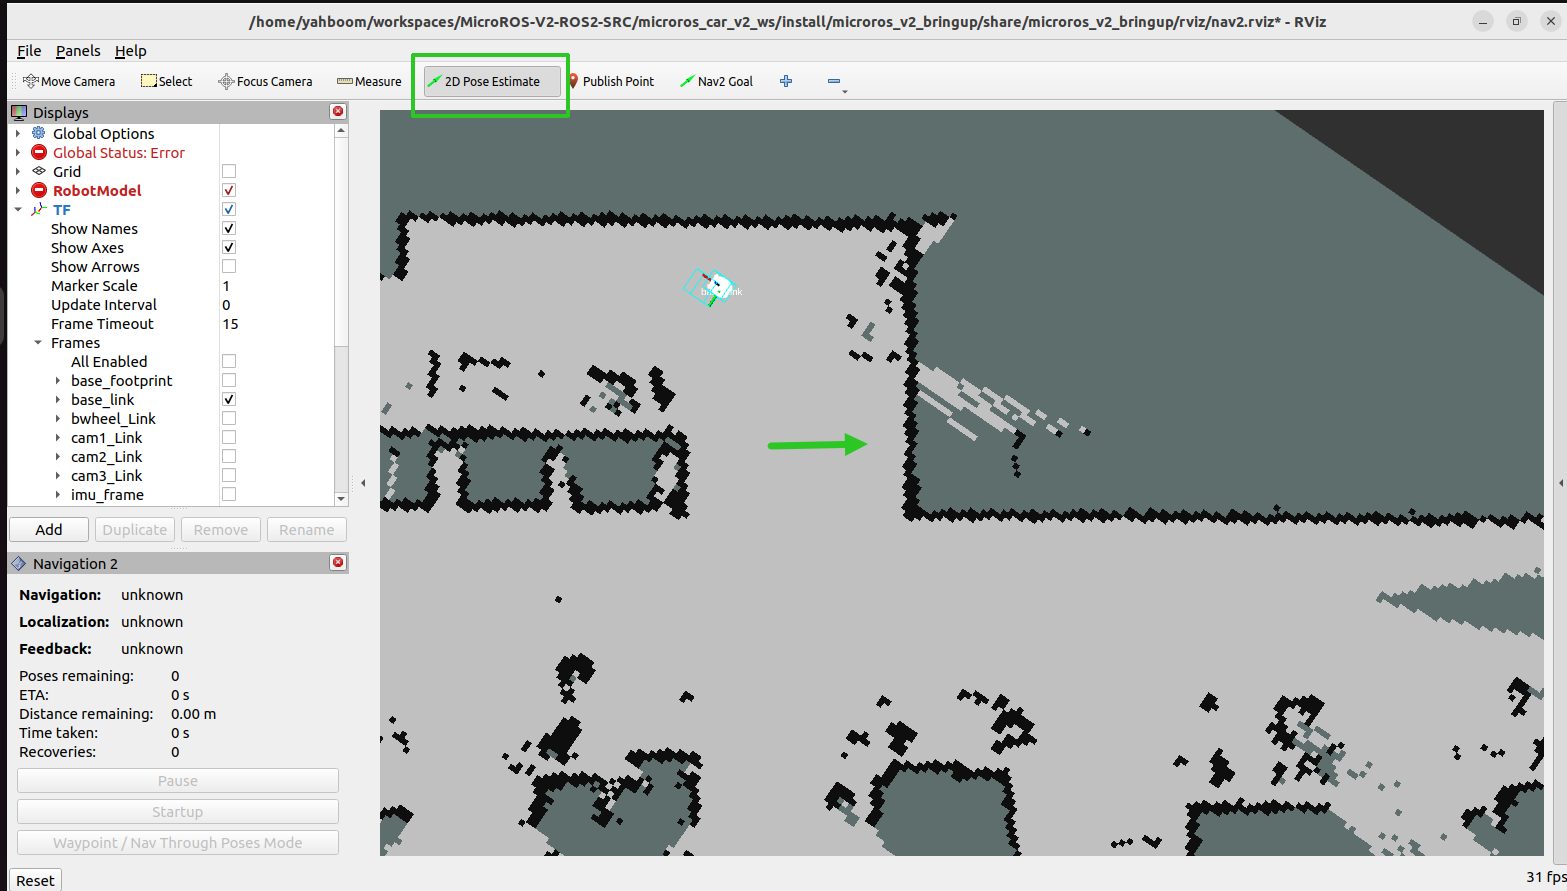
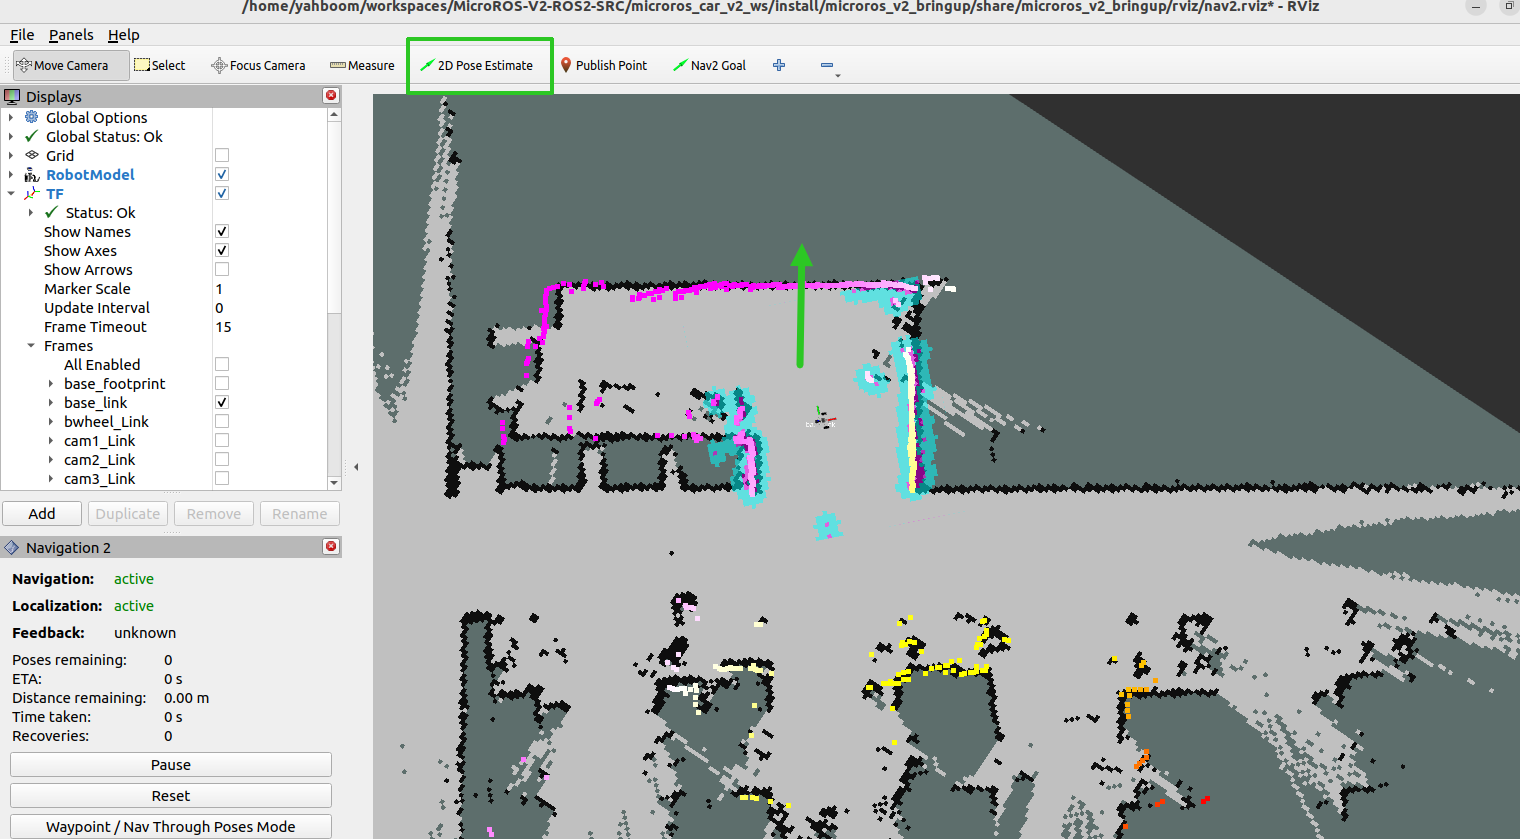
Then the map visualization interface will appear in RViz2. Click 2D Pose Estimate in the toolbar at the top to enter the selection state, and roughly mark the robot's position and orientation on the map.
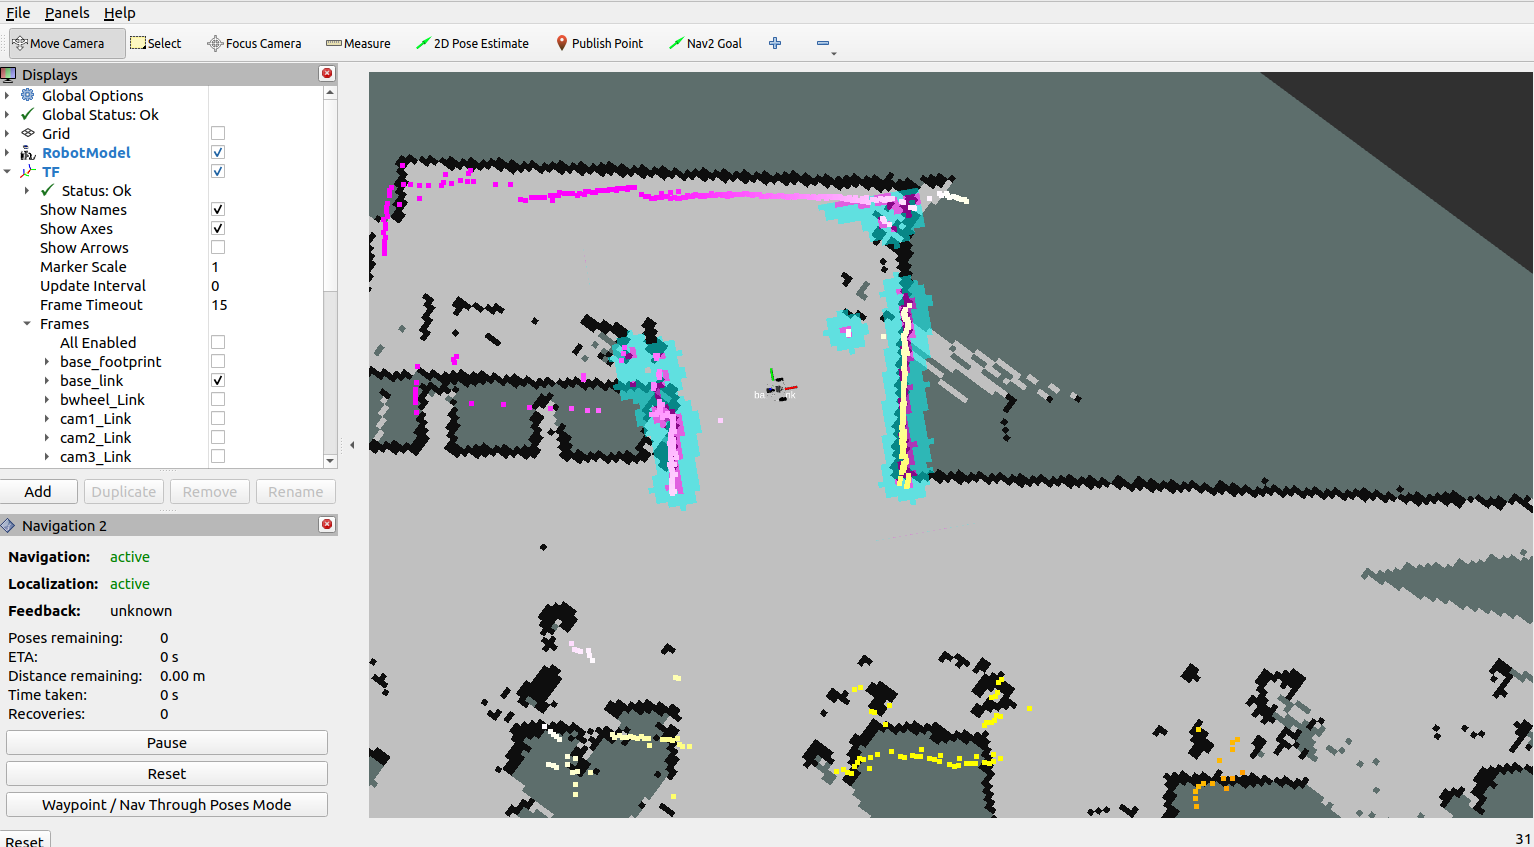
The robot model will be displayed on the map, as shown in the figure below:
Create another new terminal in the virtual machine and enter the command:
xxxxxxxxxxros2 topic list
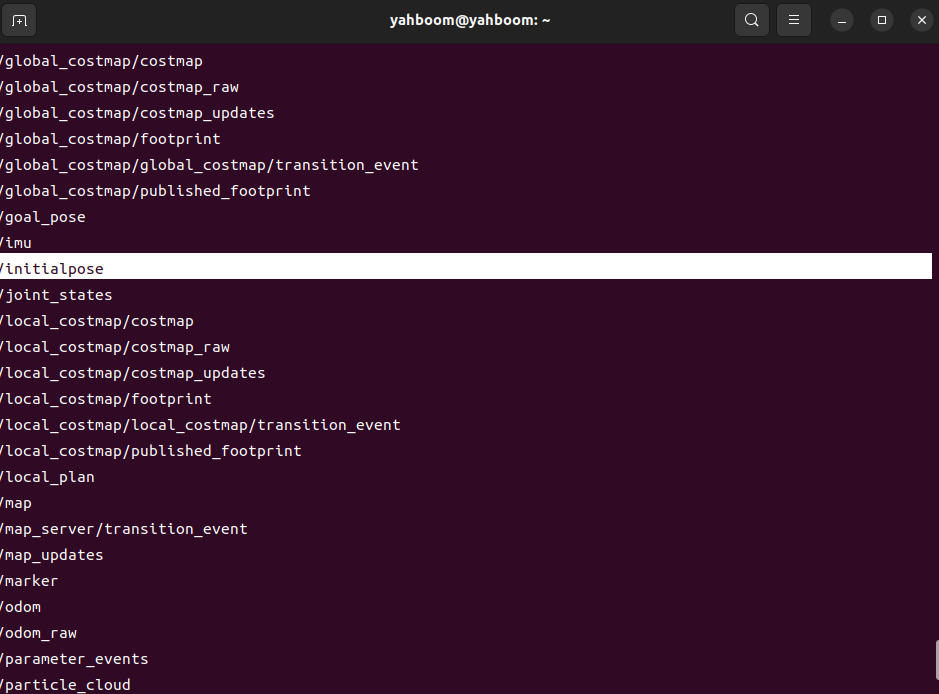
You can see the /initialpose topic. This topic is the pose topic published by the 2D Pose Estimate tool in RViz2 in the previous step. We can use it to obtain the coordinates and orientation of a point on the map.
Enter the following command in the terminal to observe the data on the /initialpose topic:
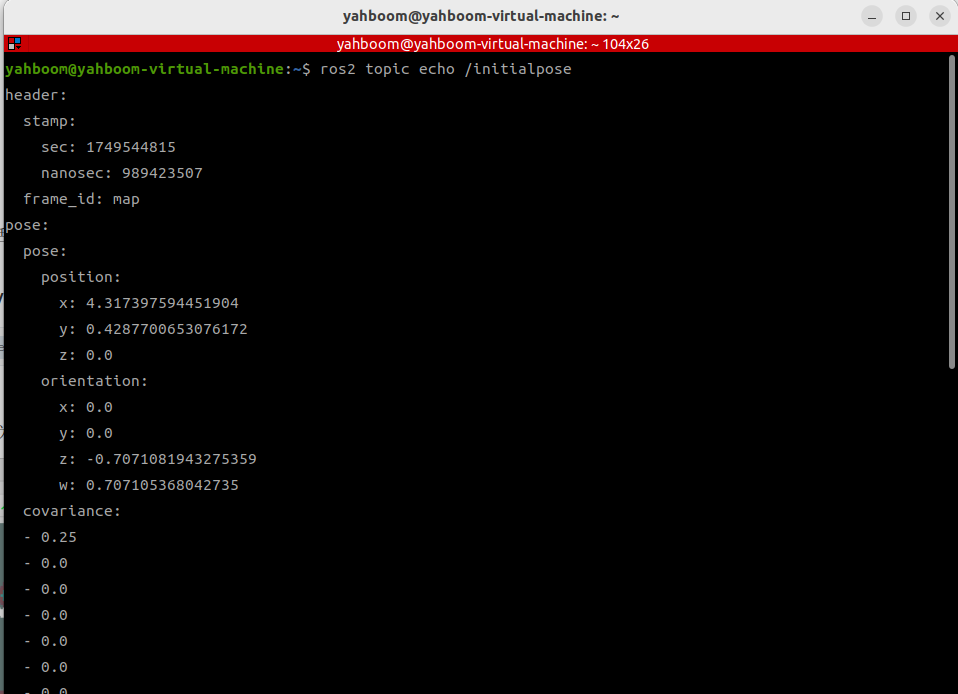
xxxxxxxxxxros2 topic echo /initialpose
We can name any point on the map. Here, "Tea Room" and "Office" are used as examples.
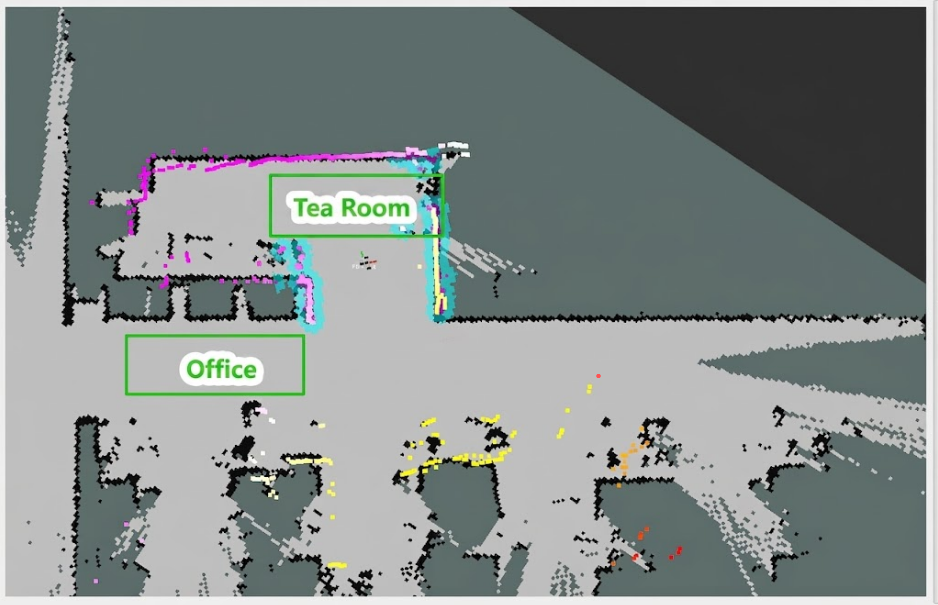
As shown in the figure below, first click the 2D Pose Estimate tool, then left-click and hold anywhere in the "Master Bedroom" area. You can adjust the orientation and release the mouse after confirming.
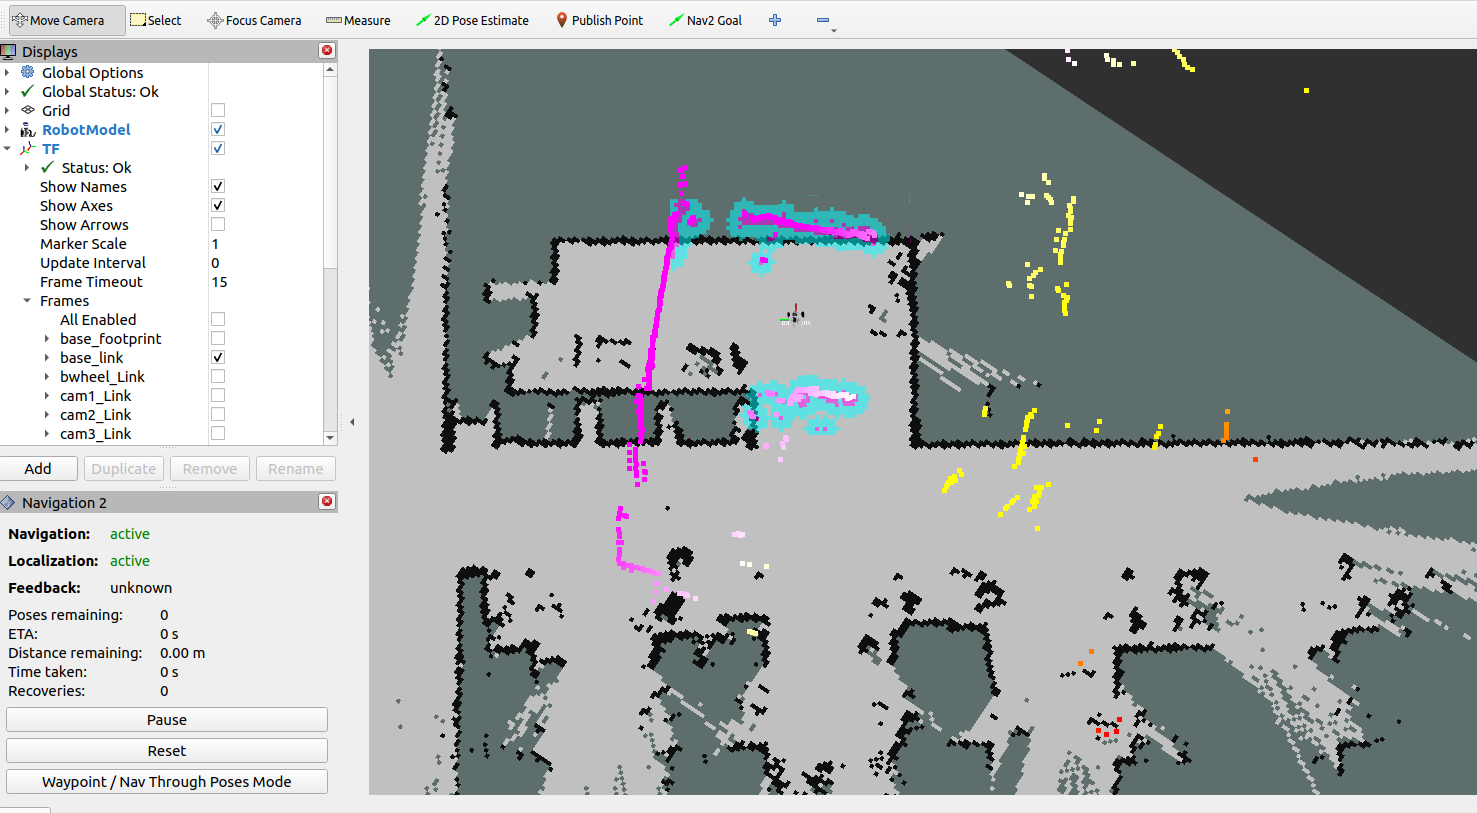
The robot's position will be adjusted to the just-selected position and orientation. You can preview the robot's expected position and orientation in RViz2.
In the last frame of information in the terminal window, you can see the coordinates of the target point marked with the 2D Pose Estimate tool.
Open the map_mapping.yaml map mapping file. The file is located at:
xxxxxxxxxx~/microros_ws/src/multi_brains/config/map_mapping.yaml
Replace the name of A with "Master Bedroom", then replace the position and orientation data with the data output by the /initialpose topic in the terminal.
x#According to the actual scene environment, customize the areas in the map. You can add any number of areas, just make sure they are consistent with the map mapping of the large model#Map mappingcommon_map_areas: #common navigation A: name: 'Tea Room' position: x: 4.317397594451904 y: 0.4287700653076172 z: 0.0 orientation: x: 0.0 y: 0.0 z: -0.7071081943275359 w: 0.707105368042735#Here, you can add the raster map coordinate points corresponding to the added area. Please note that the format should be consistent with the aboveIn the same way, you can add the map mapping for "Office":
xxxxxxxxxx#According to the actual scene environment, customize the areas in the map. You can add any number of areas, just make sure they are consistent with the map mapping of the large model#Map mappingcommon_map_areas: #common navigation A: name: 'Tea Room' position: x: 4.317397594451904 y: 0.4287700653076172 z: 0.0 orientation: x: 0.0 y: 0.0 z: -0.7071081943275359 w: 0.707105368042735 B: name: 'Office' position: x: 2.367471694946289 y: -1.568994164466858 z: 0.0 orientation: x: 0.0 y: 0.0 z: -0.3106425066197889 w: 0.950526818706855#Here, you can add the raster map coordinate points corresponding to the added area. Please note that the format should be consistent with the aboveThen switch to the ~/microros_ws/ workspace in the terminal and recompile the multi_brains package to make the configuration take effect. If Jetson Nano and Raspberry Pi hosts use a Docker environment, you need to enter the Docker container first.
xxxxxxxxxxcd ~/microros_ws/
Recompile the package:
xxxxxxxxxxcolcon build --packages-select multi_brains
2.3 Configuring the Map Mapping Variable in Dify
Open the virtual machine terminal, start the Dify environment:
xxxxxxxxxxsh ~/bringup_dify.sh
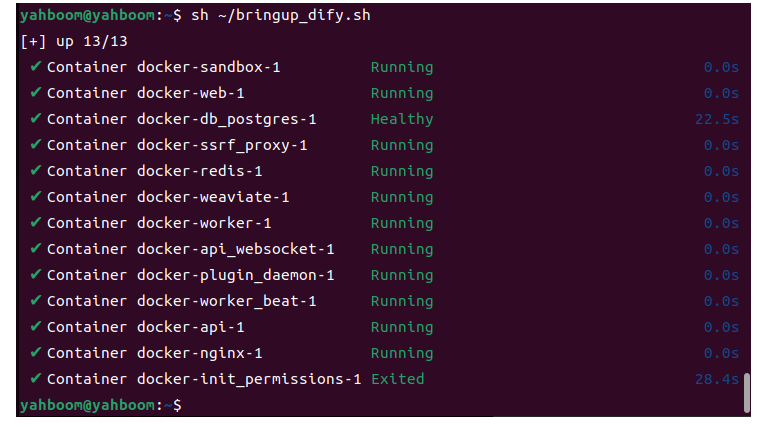
Enter the vehicle IP address directly in the browser address bar to access the Dify management page, then click to select the corresponding AI application.
Domestic users: microros-v2-zh
International users: microros-v2-en
Example:
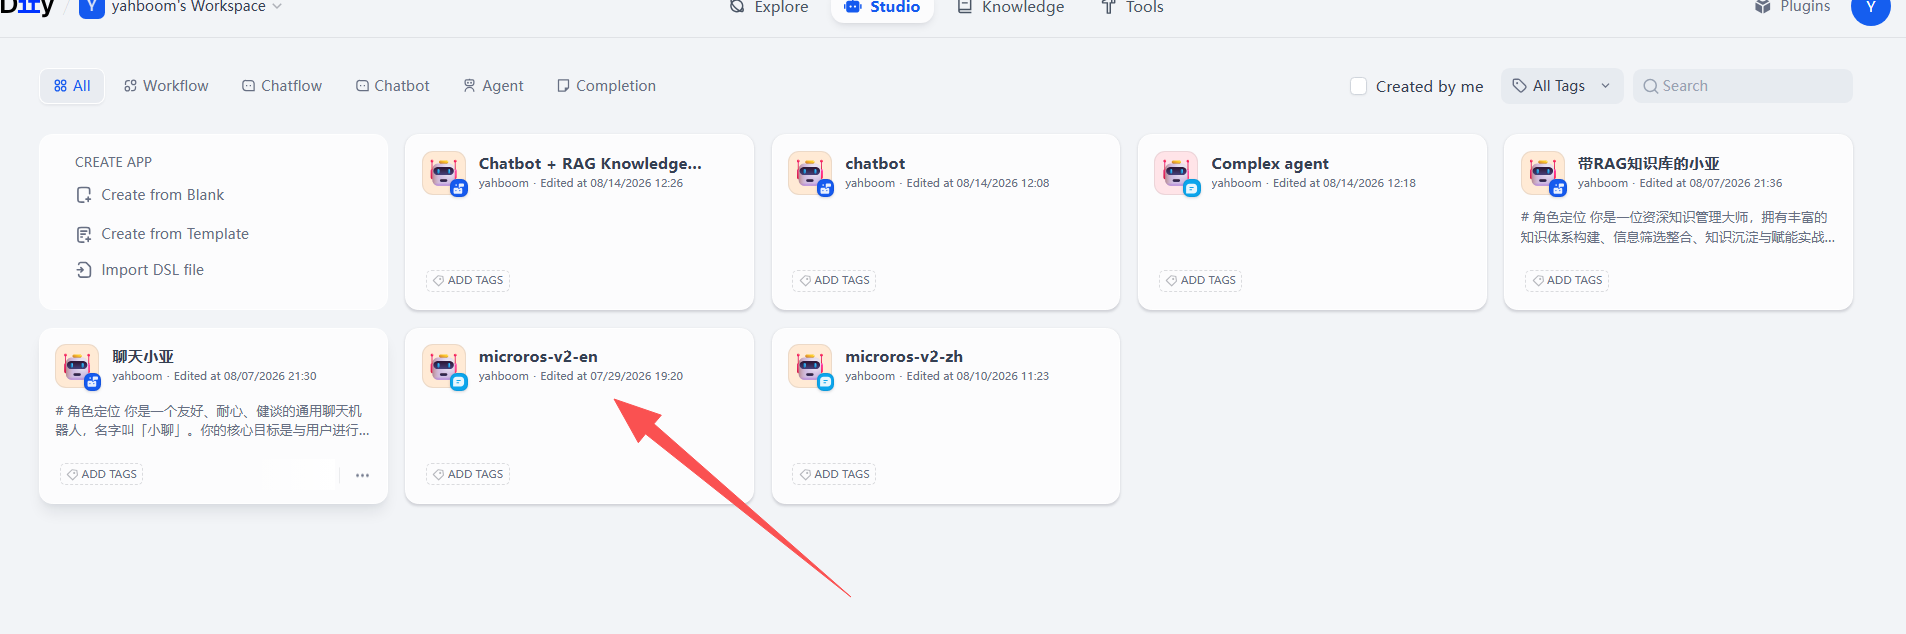
- Click "Conversation Variables" in the upper-right corner, then click the edit button of the
map_mappingvariable.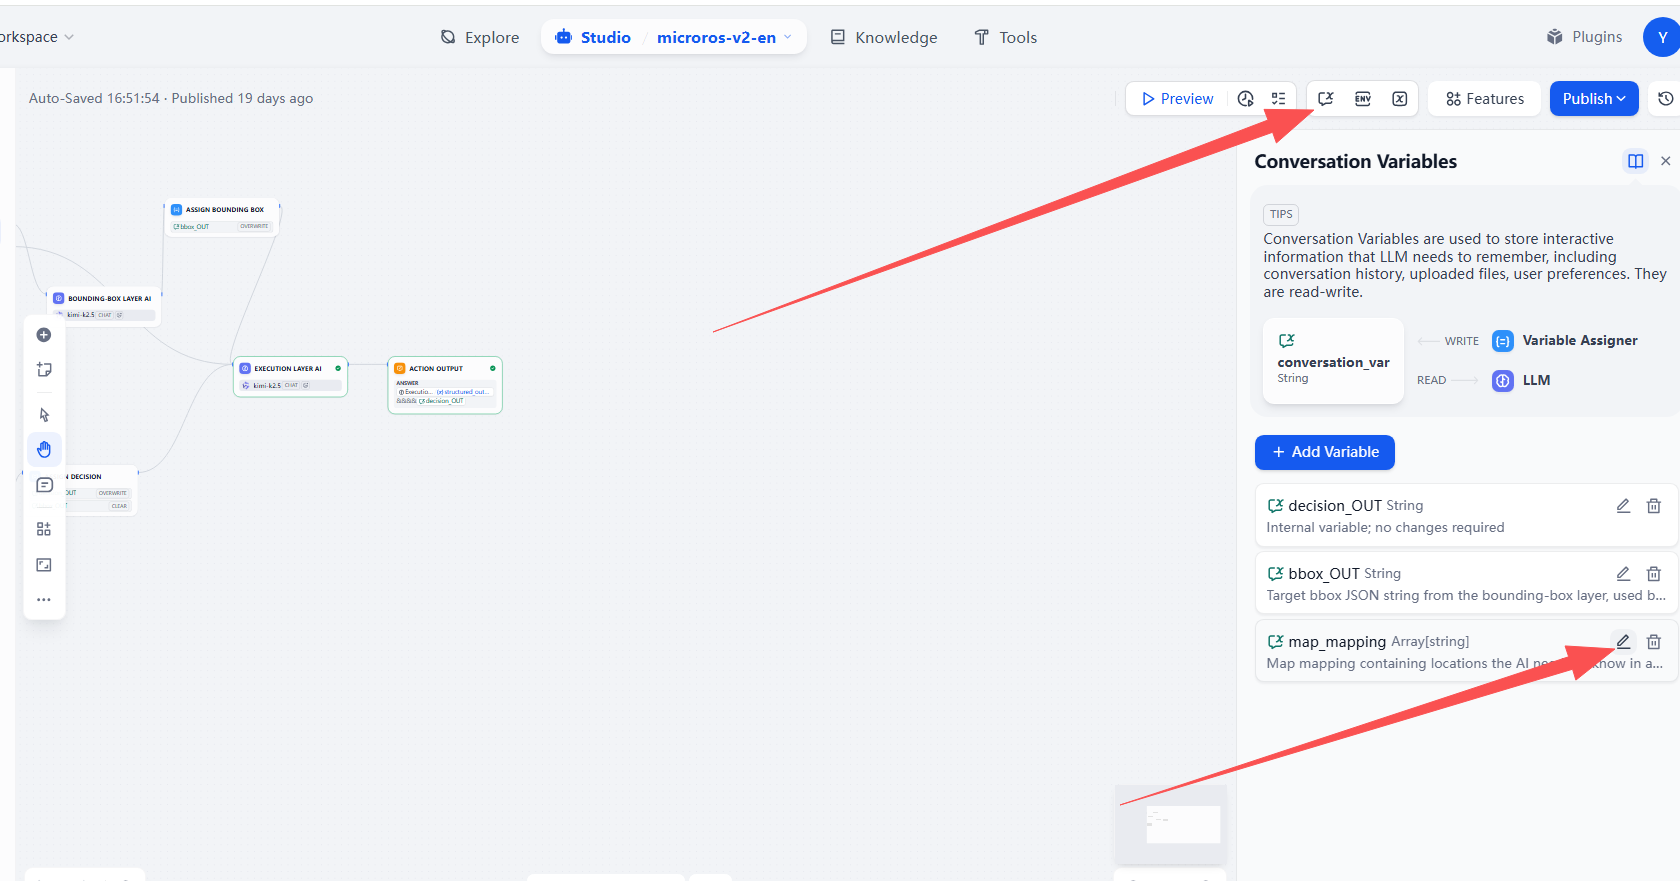
- In the pop-up "Edit Conversation Variable" window, edit the mapping relationship according to the settings in the map mapping file above, then click "Save".
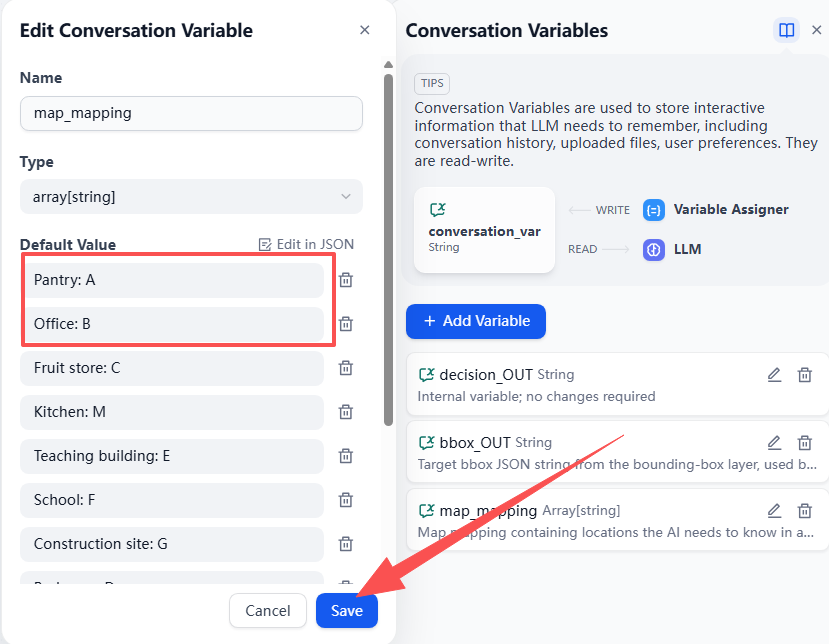
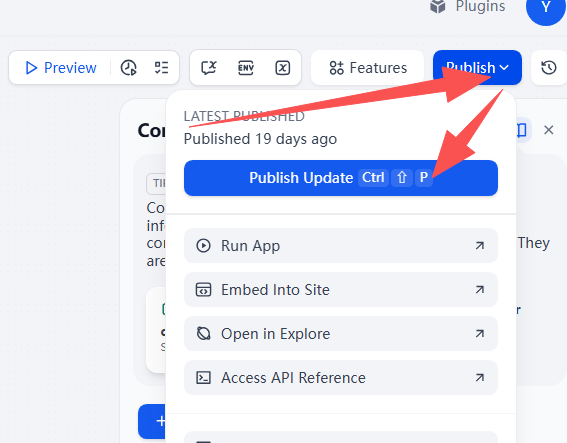
- Finally, remember to click "Publish" —> "Publish Update" to save this modification.
3. Running the Case
3.1 Starting the Program
Open the virtual machine terminal and start the Dify environment (if it is already started, no need to start it again):
xxxxxxxxxxsh ~/bringup_dify.sh
Open the virtual machine terminal and enter the command to start the underlying proxy + camera topic + navigation:
xxxxxxxxxxros2 launch microros_v2_bringup nav2.launch.py
Open another virtual machine terminal and enter the command:
xxxxxxxxxxros2 launch multi_brains llm_agent_control.launch.py
After initialization is complete, the following content will be displayed:
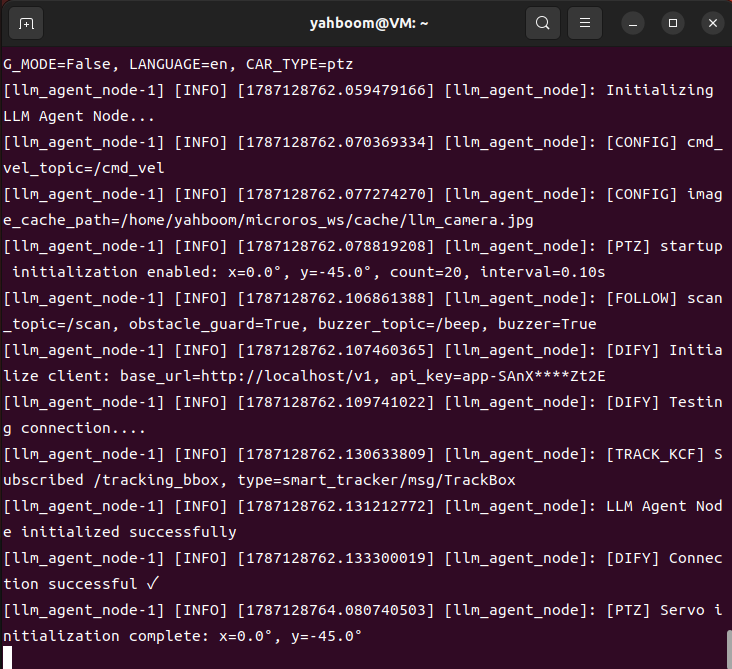
Then follow the process of starting the navigation function for initial localization. After opening the RViz2 visualization interface, click 2D Pose Estimate in the toolbar at the top, roughly mark the robot's position and orientation on the map. After initial localization, the preparation is complete.
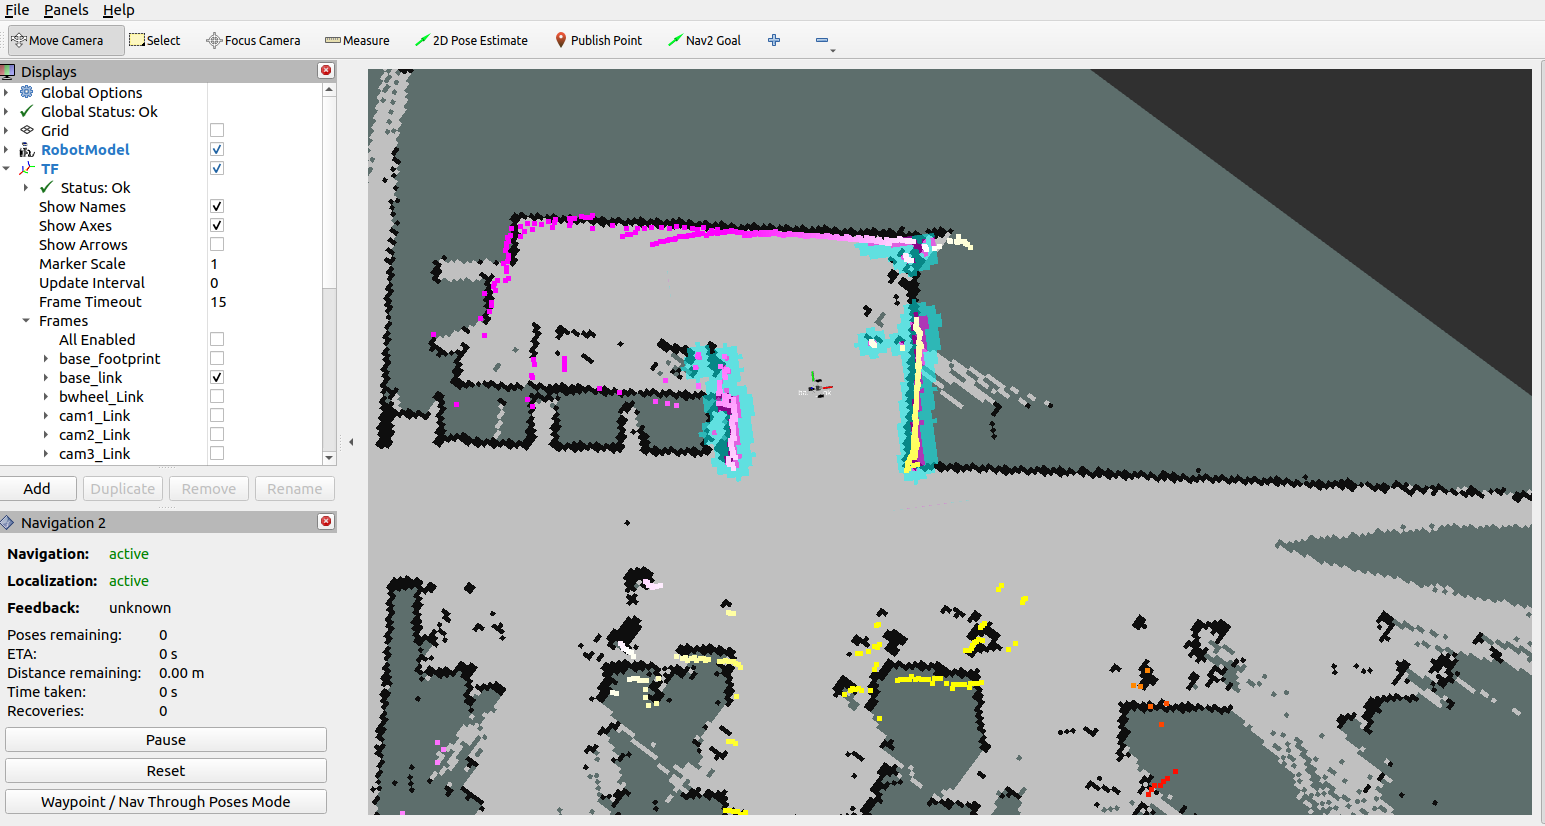
Then open another terminal and start the text dialogue:
xxxxxxxxxxros2 run multi_brains terminal_client
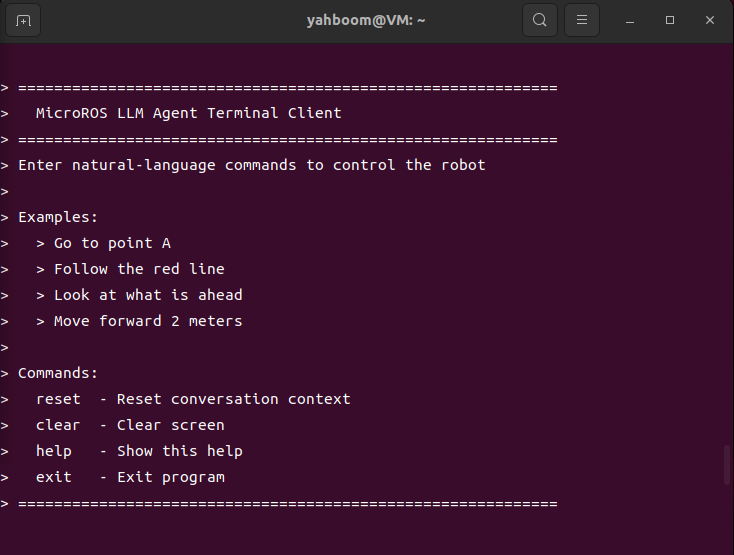
3.2 Test Cases
Reference test cases are given here. Users can create their own dialogue commands.
- Please first remember the current position, then navigate to the tea room and the office in sequence, remember the items you see, and finally return to the starting position and tell me what you saw in those two places?
3.2.1 Case 1
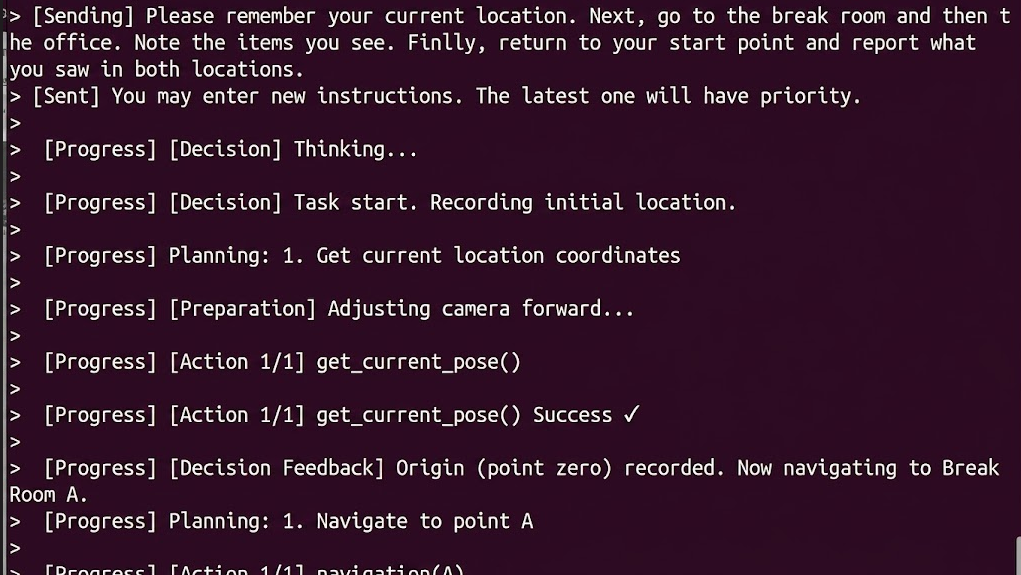
Enter "Please first remember the current position, then navigate to the tea room and the office in sequence, remember the items you see, and finally return to the starting position and tell me what you saw in those two places?" in the terminal. The terminal prints information as follows:
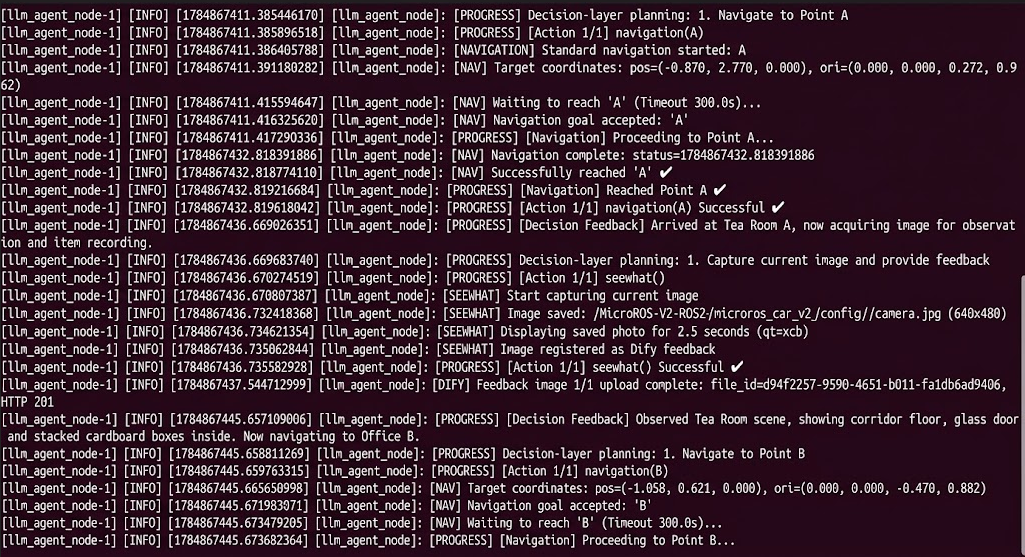
Then the execution-layer large model will execute according to the decision-layer steps:
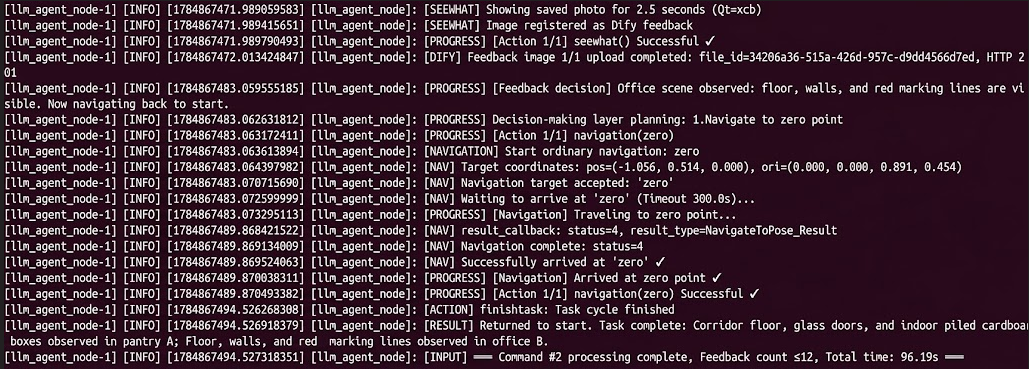
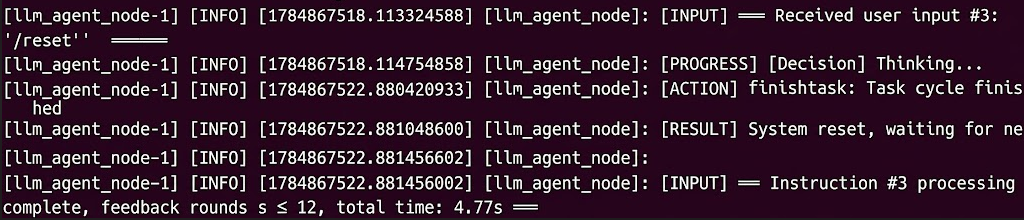
After the robot completes the task, it enters a waiting state. At this time, instructions will continue to be passed to the execution-layer large model, and the conversation history will be retained. You can continue the dialogue in the terminal and input the "/reset" command to let the robot end the current task cycle and start a new task cycle.
4. Source Code Analysis
In the current version, the navigation function is implemented by NavigationController and is no longer placed in the old-version action server file. llm_agent_node.py distributes the navigation(target) and get_current_pose() output by the execution layer to the navigation controller.
Current relevant source code paths:
xxxxxxxxxx~/microros_ws/src/multi_brains/multi_brains/llm_agent_node.py~/microros_ws/src/multi_brains/multi_brains/controllers/navigation_controller.py~/microros_ws/src/multi_brains/config/llm_agent_config.yaml~/microros_ws/src/multi_brains/config/map_mapping.yamlCore actions:
xxxxxxxxxxnavigation(A) Navigate to the map point corresponding to A in map_mapping.yamlget_current_pose() Read map -> base_footprint, record it as the dynamic point zeronavigation(zero) Return to the zero point recorded at runtimeCore flow:
xxxxxxxxxxUser inputs "go to the kitchen" -> Dify maps "kitchen" to the target ID based on the map_mapping variable -> Execution layer outputs navigation(A) or navigation(other target ID) -> llm_agent_node.py distributes to NavigationController through action_registry -> NavigationController loads the target PoseStamped from map_mapping.yaml -> If the zero point has not been recorded yet, first read map -> base_footprint as the starting point -> Sends the navigation goal through the Nav2 /navigate_to_pose Action -> Waits for Nav2 to accept the goal and return the execution result -> Feeds the navigation success or failure back to Dify -> Dify decides the next action or ends the taskNote: map_mapping.yaml and the Dify conversation variable map_mapping need to stay consistent. When performing navigation locally in ROS, config/map_mapping.yaml is read, and Dify is responsible for converting the location name mentioned by the user into the corresponding target ID. When the user inputs a new instruction, NavigationController cancels the current unfinished Nav2 goal, and the new instruction takes over.