yahboom
HomeLearn
Solution
Blog
Online Store
About Us
EN/中文
MicroROS V2 Robot Car📖
01.Introduction
  • 0.Unboxing Video
  • 1. Readme Learning Route
  • 2. Must Read Before Use
  • 3. Introduction to MicroROS V2 Control Board
  • 4. Introduction to LiDAR
  • 5. Introduction to ESP32 Camera Module
  • 6. FAQ
  • 7. About Charging
02.Assembly course
  • Assembly Video
03.Preparation
  • 1. Quickly Start
  • 2. Write Firmware
  • 3. Install VM and Start System
  • 4. Configure VM and Connect Robot
  • 5. Connect to MicroROS Agent
04.Quick start control course
  • 1. VM Keyboard Remote Control
  • 2. VM Handle Remote Control
  • 3. USB Handle Control
05.Robot control course
  • 1. Robot Information Release
  • 2. Robot Keyboard Control
  • 3. Robot Handle Control
  • 4. Robot State Estimation
  • 5. Linear Speed Calibration
  • 6. Angular Velocity Calibration
  • 7. Robot URDF Model
06.Lidar course
  • 1. Precautions for LiDAR Mapping and Navigation
  • 2. Lidar Avoid
  • 3. Lidar Following
  • 4. Lidar Guard
  • 5. Lidar Patrol
  • 6. Gmapping Mapping
  • 7. Cartographer Mapping
  • 8. Cartographer Quickly Repositioning Navigation
  • 9. Slam Toolx Mapping
  • 10. Navigation2 Single Point Navigation
  • 11. Navigation2 Multi Point Navigation
  • 12. Ros Robot App Mapping And Navigation
07.Road network planning
  • 1. Introduction to Road Network Planning and Quick Start
  • 2. Build a Pose Map
  • 3. Road Network Annotation
  • 4. Planning and Navigation Between Road Networks
  • 5. Road Network Navigation in Any Pose
  • 6. Path Replanning
08.Vision basic course
OpenCV Image Processing
  • 1. Introduction to OpenCV Source CV
  • 2. Open Source CV Geometric Transformation
  • 3. Open Source CV Image Processing and Drawing Text Line Segments
  • 4. Open Source CV Image Beautification
09.Visual General Course (For Standard&Superior version)
4. Yolov11&26 Visual Recognition
  • 1. YOLO Environment Setup
  • 2. CLI Usage
  • 3. Object Detection
  • 4. Instance Segmentation
  • 5. Pose Estimation
  • 6. Image Classification
  • 7. Oriented Bounding Boxes Object Detection
  • 8. Model Prediction
1. ESP32 Visual Recognition Module Configuration
  • 1. Serial Port Configuration WiFi Instructions
  • 2. Use ESP32 Camera Module in Robot Car
  • 3. Servo PTZ Calibration
2. OpenCV Visual Recognition
  • 1. Human Pose Estimation
  • 2. Object Detection
  • 3. AR Vision
  • 4. QR Code
  • 5. Color Recognition
  • 6. Facial Recognition
  • 7. AprilTag Machine Code Recognition
3. Mediapipe Visual Recognition
  • 1. Hand Detection
  • 2. Pose Detection
  • 3. Holistic Detection
  • 4. Facial Detection
  • 5. Facial Recognition
  • 6. Facial Special Effects
  • 7. 3D Object Recognition
  • 8. Brush
  • 9. Gesture Recognition
  • 10. Palm Target Localization
  • 11. Fingertip Trajectory Recognition
10.Visual Advanced Course (Just for Standard version)
1. Visual Control
  • 1. QR Code Recognition Control Action
  • 2. AprilTag Control Car Action Group
  • 3. Gesture Control Car Action Group
  • 4. Visual Line Tracking
2. Visual Tracking
  • 1. Color Tracking
  • 2. Facial Tracking
  • 3. QR Code Tracking
  • 4. Object Recognition And Tracking
  • 5. Mediapipe Palm Tracking
  • 6. Mediapipe Gesture Tracking
  • 7. Mediapipe Human Pose Tracking
  • 8. KCF Object Tracking
  • 9. AprilTag Machine Code Tracking
3. Visual Following
  • 1. Color Follow
  • 2. Face Follow
  • 3. QR Code Follow
  • 4. Mediapipe Palm Follow
  • 5. Mediapipe Gesture Follow
  • 6. Mediapipe Human Posture Follow
  • 7. AprilTag Machine Code Follow
  • 8. Object Follow
11.Visual Advanced Course (Just for Superior version)
1. Visual Control
  • 1. QR Code Recognition Control Action
  • 2. AprilTag Control Car Action Group
  • 3. Gesture Control Car Action Group
  • 4. Visual Line Tracking
2. Visual Tracking
  • 1. Color Tracking
  • 2. Facial Tracking
  • 3. QR Code Tracking
  • 4. YOLO Object Recognition and Tracking
  • 5. Mediapipe Palm Tracking
  • 6. Mediapipe Gesture Tracking
  • 7. Mediapipe Human Pose Tracking
  • 8. KCF Object Tracking
  • 9. AprilTag Machine Code Tracking
3. Visual Follow
  • 1. Color Follow
  • 2. Face Follow
  • 3. QR Code Follow
  • 4. Mediapipe Palm Follow
  • 5. Mediapipe Gesture Follow
  • 6. Mediapipe Human Pose Follow
  • 7. AprilTag Machine Code Follow
  • 8. Object Follow
12.AI Large Model Basic and Applications Course
1. AI Large Model Preparation
  • 1.AI Large Model Preparation
2. AI Large Model Basic Course
  • 1. AI Large Model Types and Principles
  • 2. RAG Retrieval Augmented and Training Samples
  • 3. Embodied Intelligent System Architecture
  • 4. Embodied Intelligence Core Source Code
3. AI Large Model Development
  • 1. Register Model Service Account
  • 2. Configure API KEY
  • 3. Dify Introduction
  • 4. Dify Basic Features
  • 5. RAG Knowledge Base Deployment
  • 6. AI Application Development Chatbot
  • 7. RAG Knowledge Base and Chatbot
  • 8. AI Agent Workflow
4. AI Large Model (Text Version)
  • 1. Semantic Understanding and Instruction Following
  • 2. Multimodal Visual Understanding
  • 3. Multimodal Visual Understanding + Basic Control
  • 4. Multimodal Visual Understanding + Object Following
  • 5. Multimodal Visual Understanding + Visual Line Following
  • 6. Multimodal Visual Understanding + SLAM Navigation
  • 7. Multimodal Visual Understanding + SLAM Navigation + Visual Line Following
  • 8. Multimodal Visual Understanding + SLAM Navigation + Object Following
  • 9. Intent Inference + Multimodal Visual Understanding + SLAM Navigation
13.Openclaw Basics Course
  • 1. Openclaw Introduction
  • 2. Openclaw Core Concepts
  • 3. Openclaw Api-Key Configuration
  • 4. Openclaw Switching Models
  • 5. Openclaw System Prompt
  • 6. Openclaw Common CLI Command
14. Openclaw Interaction Course
  • 1. Openclaw Webchat Interaction
  • 2. Openclaw Tui Interaction
  • 3. Openclaw Whatsapp Interaction
15.Openclaw Development Course
  • 1. Openclaw Robot Mcp Service Integration
  • 2. Robot CLI Command Tools
  • 3. Robot-Control Plugin Tools
  • 4. Openclaw Skills Development
  • 5. Openclaw Scheduled Tasks
  • 6. Openclaw Multi Agent System
  • 7. Openclaw Proactive Interaction
  • 8. Openclaw Vector Memory
16.Openclaw Embodied Intelligence Course
  • 1. OpenClaw Natural Interaction + Basic Control
  • 2. OpenClaw Natural Interaction + Slam Navigation
  • 3. OpenClaw Natural Interaction + Multimodal Visual Understand
  • 4. OpenClaw Natural Interaction + Multimodal Visual Understand + Slam Navigation + Visual Follow
  • 5. OpenClaw Natural Interaction + Multimodal Visual Understand + Slam Navigation + Visual Track
17.Multi-machine Course
  • 1. Multi Machine Handle Control
  • 2. Multi Machine Keyboard Control
  • 3. Multi Machine Navigation
18.MicroROS-V2 Control Board Development Environment
  • 1. Set Up the ESP32-IDF Development Environment
  • 2. ESP32-IDF Configuration Tool
  • 3. ESP Flash Tool Flashing Firmware
  • 4. Install ESP32 Microros Components
  • 5. Install And Start Microros Agent
19.MicroROS-V2 Control Board ESP32 Basic Course
  • 1. Led Light Up
  • 2. Button Function
  • 3. Drive Buzzer
  • 4. Oled
  • 5. Usb Host Function
  • 6. Serial Communication
  • 7. Battery Voltage Detection
  • 8. Drive Pwm Servo
  • 9. Drive Motors
  • 10. Read Motor Encoder Data
  • 11. Pid Motor Speed Control
  • 12. Robot Kinematics Analysis Theory
  • 13. Read Imu Data
  • 14. Read Lidar Data
  • 15. Flash Data Storage
  • 16. Custom Partition Table
  • 17. Bluetooth Communication
  • 18. Wifi Connection
  • 19. ESP32 Visual Recognition Module
20.MicroROS-V2 Control Board Micro_ros Basic Course
  • 1. Publish Topics
  • 2. Subscribe To Topics
  • 3. Multi Topic Subscription And Publishing
  • 4. Subscribe To Buzzer Topic
  • 5. Subscribe To Pwm Servo Topic
  • 6. Subscribe To Speed Control Topic
  • 7. Publish Odometry Topic
  • 8. Publish Imu Data Topic
  • 9. Publish Lidar Data Topic
21. Linux System Course
  • 1.Introduction to Linux system
  • 2.Ubuntu file system
  • 3.Ubuntu common commands
  • 4.Ubuntu common editors
  • 5.Ubuntu software operation commands
  • 6.Virtual machine installation
  • 7.SSH remote control
  • 8.VNC remote control
  • 9.Transfer files remotely
  • 10.Driver library and communication
  • 11.Static IP and hotspot mode
  • 12.Bind device ID
  • 13.Capacity expansion and resource allocation
  • 14.Update system software sources
  • 15.Set root user password
  • 16.sudo free password
  • 17.Connect to WiFi network
  • 18.View system version
  • 19.Customized service management
  • 20.Back up system image
22.Docker Course
  • 1.Docker overview and docker installation
  • 2.Common commands for docker image containers
  • 3.Docker images deeply understand and publish images
23.ROS Basic Course
  • 1.Introduction to ROS2
  • 2.ROS2 install Humble
  • 3.ROS2 development environment
  • 4.ROS2 workspace
  • 5.ROS2 function package
  • 6.ROS2 node
  • 7.ROS2 topic communication
  • 8.ROS2 service communication
  • 9.ROS2 action communication
  • 10.ROS2 custom interface message
  • 11.ROS2 parameter service case
  • 12.ROS2 meta-function package
  • 13.ROS2 distributed communication
  • 14.ROS2 DDS
  • 15.ROS2 time related API
  • 16.ROS2 common command tools
  • 17.ROS2 rviz2 use
  • 18.ROS2 rqt toolbox
  • 19.ROS2 Launch startup file configuration
  • 20.ROS2 recording and playback tool
  • 21.ROS2 URDF model
  • 22.ROS2 Gazebo simulation platform
  • 23.ROS2 TF2 coordinate transformation
Download
  • Mapping_APP(iOS_Android)
  • Code
  • Software_Tools
  • VM_System_File
  • 3D_Model_File
  • ESP32_Firmware
  • Dify LLM Base
  • Instruction_Manual
  • VMware
Download ZIP

Welcome to MicroROS V2 Robot Car repository

3.ROS2 development environment

3. ROS2 development environment

In theory, you can write basic ROS2 programs in Notepad, but to improve development efficiency, you can install the integrated development environment (VSCode).

1. Using the VSCode development environment

  • Search for "VSCode" in your browser, select the installation package for your platform, download and install it.
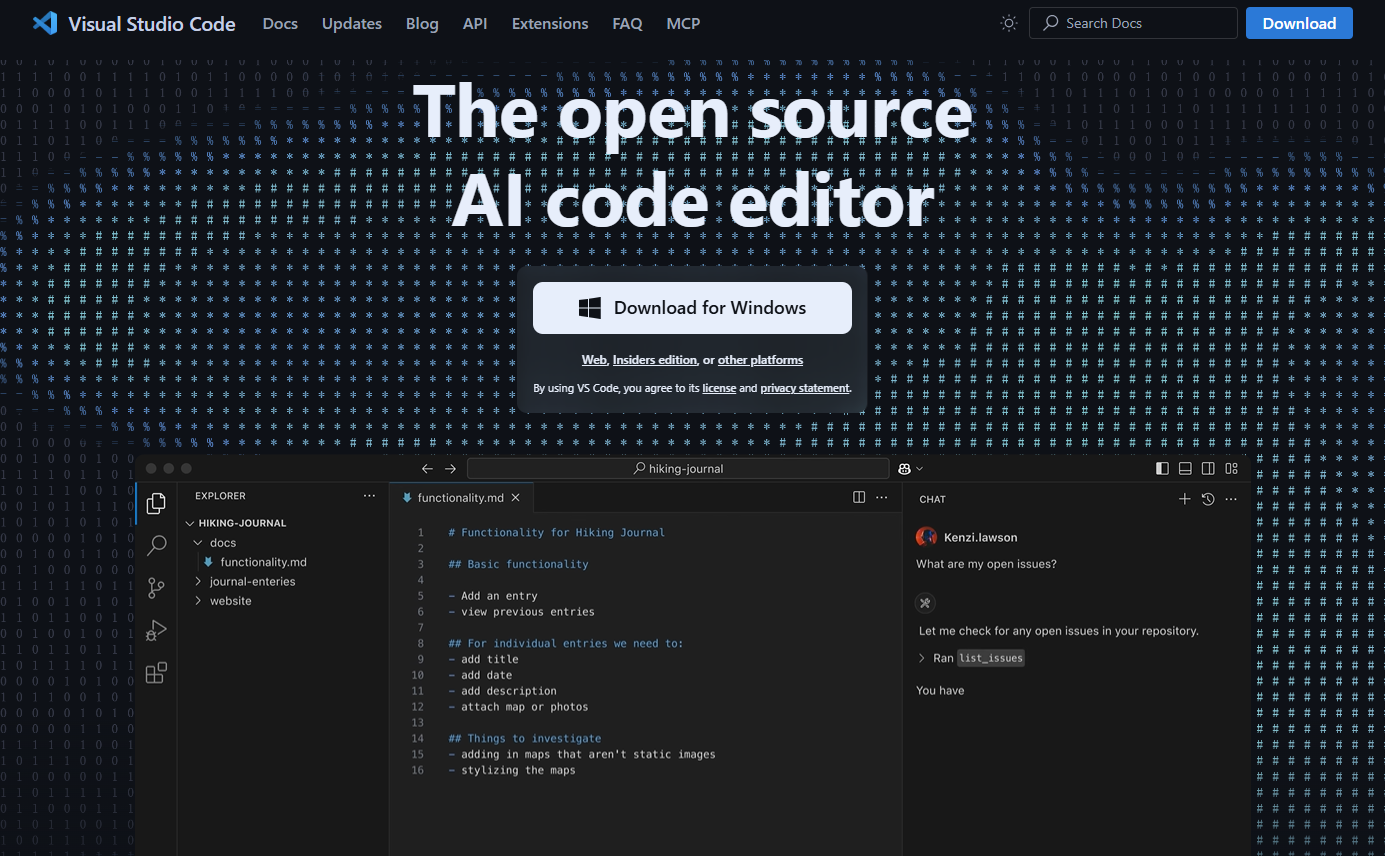
image-20250814155106188

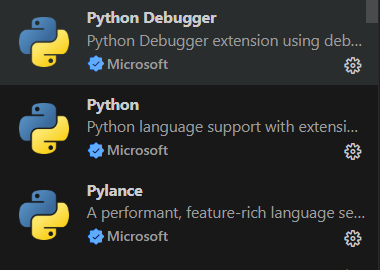
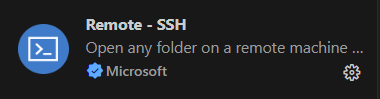
  • Install commonly used plug-ins to improve work efficiency.
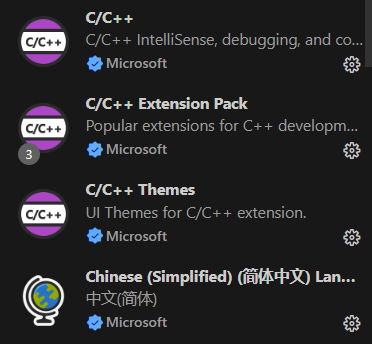
image-20250814155201019

image-20250814155255572

image-20250814155341084

2. Using the Terminal

In ROS2, you'll frequently use the terminal. We recommend a relatively easy-to-use terminal: Terminator. The results are as follows:
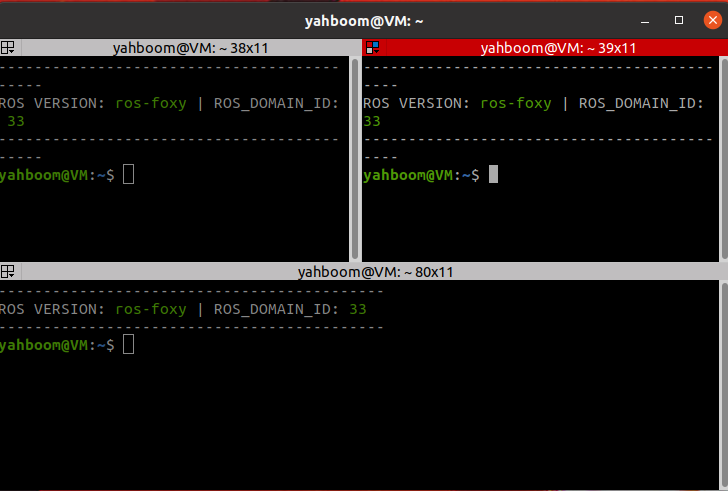
image-20231023123012987

2.1. Installation

xxxxxxxxxx
sudo apt install terminator

2.2. Launching

xxxxxxxxxx
Shortcut `Ctrl+Alt+T` to launch

2.3. Common Terminator Shortcuts

About operations within the same tab:

Alt+Up                          // Move to the upper terminal
Alt+Down                        // Move to the lower terminal
Alt+Left                        // Move to the left terminal
Alt+Right                       // Move to the right terminal
Ctrl+Shift+O                    // Split terminal horizontally
Ctrl+Shift+E                    // Split terminal vertically
Ctrl+Shift+Right                // Move the splitter bar to the right in a vertically split terminal
Ctrl+Shift+Left                 // Move the splitter bar to the left in a vertically split terminal
Ctrl+Shift+Up                   // Move the splitter bar up in a horizontally split terminal
Ctrl+Shift+Down                 // Move the splitter bar down in a horizontally split terminal
Ctrl+Shift+S                    // Hide/Show scroll bars
Ctrl+Shift+F                    //Search
Ctrl+Shift+C                    //Copy the selected content to the clipboard
Ctrl+Shift+V                    //Paste the clipboard content here
Ctrl+Shift+W                    //Close the current terminal
Ctrl+Shift+Q                    //Exit the current window, all terminals in the current window will be closed
Ctrl+Shift+X                    //Maximize the current terminal
Ctrl+Shift+Z                    //Maximize the current terminal and enlarge the font
Ctrl+Shift+N or Ctrl+Tab        //Move to the next terminal
Ctrl+Shift+P or Ctrl+Shift+Tab  //Crtl+Shift+Tab moves to the previous terminal

About operations between tabs:

F11                             //Full screen switch
Ctrl+Shift+T                    //Open a new tab
Ctrl+PageDown                   //Move to the next tab
Ctrl+PageUp                     //Move to the previous tab
Ctrl+Shift+PageDown             //Exchange the current tab with the tab after it
Ctrl+Shift+PageUp               //Exchange the current tab with the tab before it
Ctrl+Plus (+)                   //Increase the font
Ctrl+Minus (-)                  //Decrease the font
Ctrl+Zero (0)                   // Restore the font to its original size
Ctrl+Shift+R                    // Reset the terminal state
Ctrl+Shift+G                    // Reset the terminal state and clear the screen
Super+g                         // Bind all terminals so that input into one terminal is automatically input into all terminals
Super+Shift+G                   // Unbind
Super+t                         // Bind all terminals in the current tab so that input into one terminal is automatically input into the other terminals
Super+Shift+T                   // Unbind
Ctrl+Shift+I                    // Open a new window; the new window will use the same process as the original window
Super+i                         // Open a new window; the new window will use a different process than the original window

3. Using Git

3.1. Installation

Since daily work involves teamwork and version management, Git is an essential skill. Git is a free and open source distributed version control system. To install Git in Ubuntu:

xxxxxxxxxx
sudo apt install git

3.2. Basic Git Operations

Git's job is to create and save snapshots of your project and compare them with subsequent snapshots.

This chapter introduces commands for creating and committing your project snapshots.

Git uses the following six commands: git clone, git push, git add, git commit, git checkout, and git pull. We'll explain them in detail later.
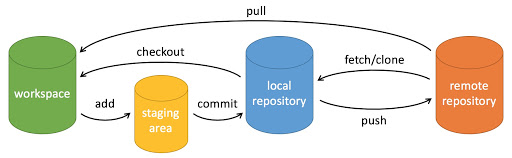
img

Description:

  • workspace: Workspace
  • staging area: Staging area
  • local repository: Repository or local repository
  • remote repository: Remote repository

A simple step-by-step guide:

xxxxxxxxxx
$ git init
$ git add .
$ git commit
  • git init - Initializes the repository.
  • git add . - Adds files to the staging area.
  • git commit - Adds the contents of the staging area to the repository.

3.2.1. Repository Creation Commands

The following table lists the Git commands for creating repositories:

CommandDescription
git initInitializes a repository
git cloneMakes a copy of a remote repository, essentially downloading a project.

3.2.2. Committing and Modifying

Git's job is to create and save snapshots of your project and compare them with subsequent snapshots.

The following table lists the commands for creating and committing snapshots of your project:

CommandDescription
git addAdds files to the staging area
git statusViews the current status of the repository, showing modified files.
git diffCompares file differences, that is, the differences between the staging area and the working directory.
git commitCommits the staging area to the local repository.
git resetRoll back a revision.
git rmRemove a file from the staging area and the working directory.
git mvMove or rename a file in the working directory.
git checkoutSwitch branches.
git switch (introduced in Git 2.23)Switch branches more cleanly.
git restore (introduced in Git 2.23)Revert or undo changes to a file.

3.2.3. Commit Log

CommandDescription
git logView historical commits
git blame <file>View the modification history of a specified file in list form

3.2.4. Remote Operations

CommandDescription
git remoteRemote repository operations
git fetchRetrieve code from a remote repository
git pullDownload and merge remote code
git pushUpload and merge remote code

For more information on using the Git tool, enter git --help in the terminal to view the help documentation.

ROS2 install Humble
ROS2 workspace

COMPANY

  • About us
  • Team Style
  • Blog

LEARNING & EXPLORATION

  • Tutorials
  • Edge AI hardware
  • Educational robots
  • Embedded intelligent hardware

WHERE TO BUY

  • Yahboom Online Store
  • Amazon
  • Alibaba
  • AliExpress
  • Mercado

TECHNOLOGY SUPPORT

  • Email: support@yahboom.com

BE A DISTRIBUTOR

  • Email: sales@yahboom.com
QR Code
QR Code

Copyright © 2017-2026 Yahboom. All Rights Reserved.

EN/中文