Welcome to MicroROS V2 Robot Car repository
5. Pose Estimation
Pose Estimation
1. Experiment Objective
Use YOLO for human pose estimation — detect 17 keypoints (joint positions) of the human body and draw skeleton connections. It supports simultaneous detection of multiple people, as well as three input sources: images, videos, and a real-time camera feed.
2. Experiment Principle
1. Glossary
| Term | Description |
|---|---|
| Pose Estimation | Inferring the spatial positions of human joints (keypoints) from an image, used for motion analysis and human-robot interaction |
| Keypoint | Key joint positions of the human skeleton; the COCO standard defines 17 keypoints (nose, shoulders, elbows, wrists, hips, knees, ankles, etc.) |
| Skeleton Connection | The line segments (Skeleton / Limb) connecting adjacent keypoints to form a schematic human skeleton structure |
| Ultralytics | The official Python library for YOLO models; pose estimation models are identified by the -pose suffix (e.g. yolo11n-pose.pt) |
| 17-keypoint | The standard COCO pose estimation output format: nose(0), eyes(1,2), ears(3,4), shoulders(5,6), elbows(7,8), wrists(9,10), hips(11,12), knees(13,14), ankles(15,16) |
| PCP / PCK | Percentage of Correct Keypoints, the accuracy evaluation metric for pose estimation |
2. Technical Architecture
YOLO pose estimation starts inference nodes through ROS2 launch files, supporting three input sources:
- Image/Video mode: The node reads local files for offline inference; it does not require micro_ros_agent or the state estimation layer.
- Real-time camera mode: The node subscribes to the
/camera/image_rawtopic to get real-time camera frames. It requires three processes to work together: micro_ros_agent → state estimation layer → YOLO pose estimation node.
Real-time mode data flow:
ESP32 camera → micro_ros_agent → /camera/image_raw → YOLO pose estimation node → /yolo_pose/annotated_image + /yolo_pose/status
YOLO inference depends on the ultralytics + PyTorch libraries installed in the current Python environment; the ROS2 and workspace environment must be sourced before starting.
3. Core Topic Quick Reference
ROS2 Internal Topics
| Topic | Message Type | QoS | Source | Description |
|---|---|---|---|---|
/camera/image_raw | sensor_msgs/Image | best_effort | State estimation layer | Raw camera image, subscribed by the YOLO pose estimation node |
/yolo_pose/annotated_image | sensor_msgs/Image | reliable | YOLO pose estimation node | Annotated pose estimation result image (with keypoints + skeleton) |
/yolo_pose/status | std_msgs/String | reliable | YOLO pose estimation node | Pose estimation status info (FPS, number of detected people, keypoint count) |
3. Experiment Steps
1. Hardware Requirements
| Hardware | Requirement |
|---|---|
| PTZ version | ✅ Supported |
| No-PTZ version | ✅ Supported |
| Required peripheral | ESP32 camera (realtime mode) |
2. Start the YOLO Environment
xxxxxxxxxxyolo_env3. Image Mode (Single Image Inference)
xxxxxxxxxxros2 launch microros_v2_yolo_pkg yolo_pose_image.launch.py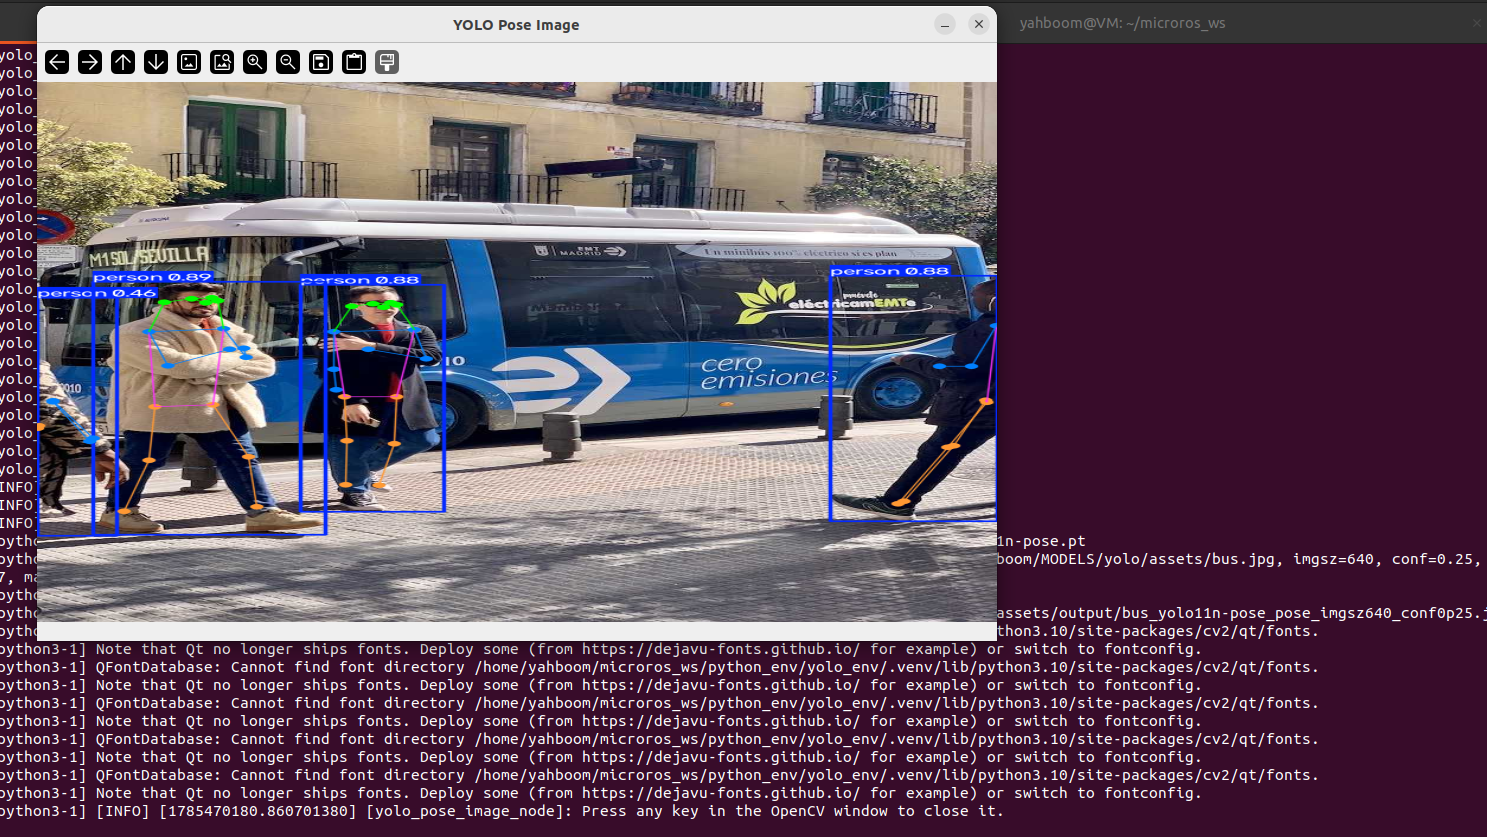
4. Video Mode (Frame-by-Frame Inference on a Video File)
xxxxxxxxxxros2 launch microros_v2_yolo_pkg yolo_pose_video.launch.py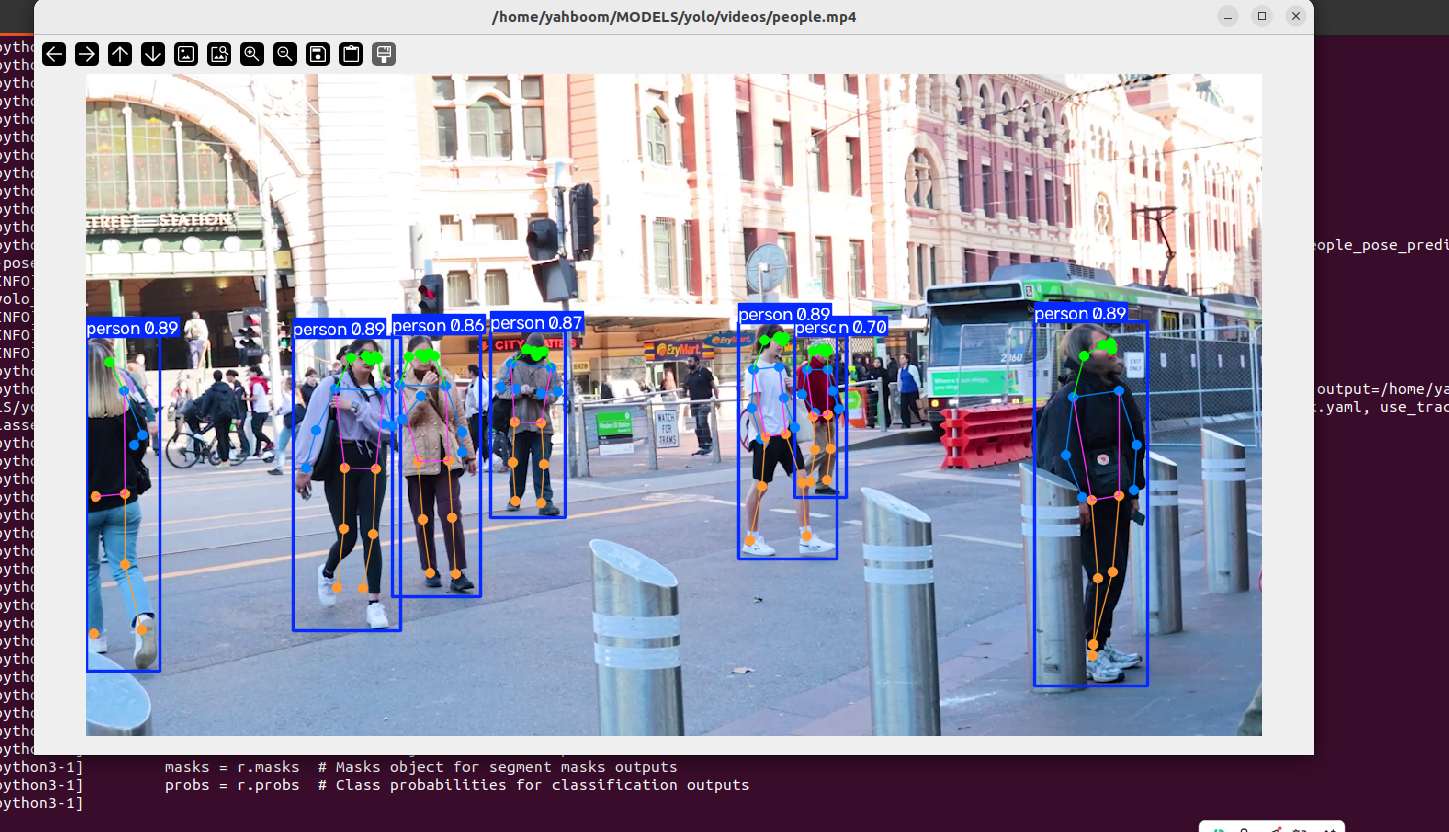
5. Real-time Camera Mode
Launch the proxy + camera + joint model (Terminal 1)
xxxxxxxxxxros2 launch microros_v2_bringup car_base.launch.py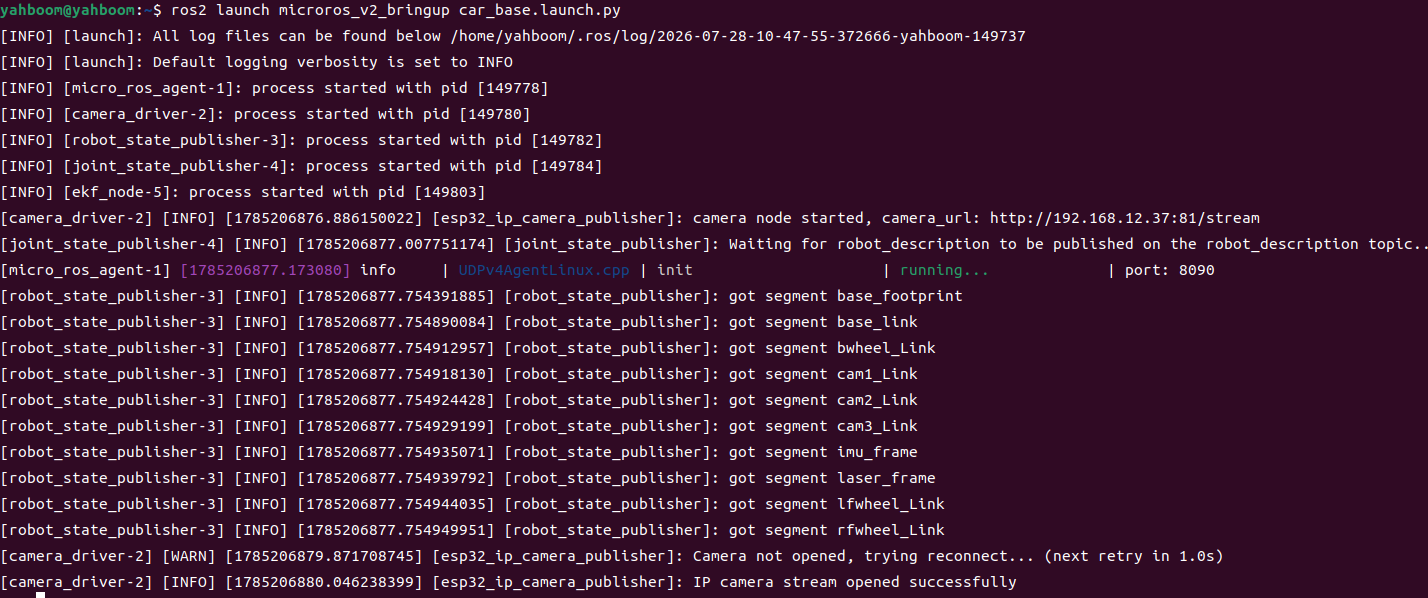
Terminal 2 — Launch YOLO real-time pose estimation:
xxxxxxxxxxros2 launch microros_v2_yolo_pkg yolo_pose_realtime.launch.py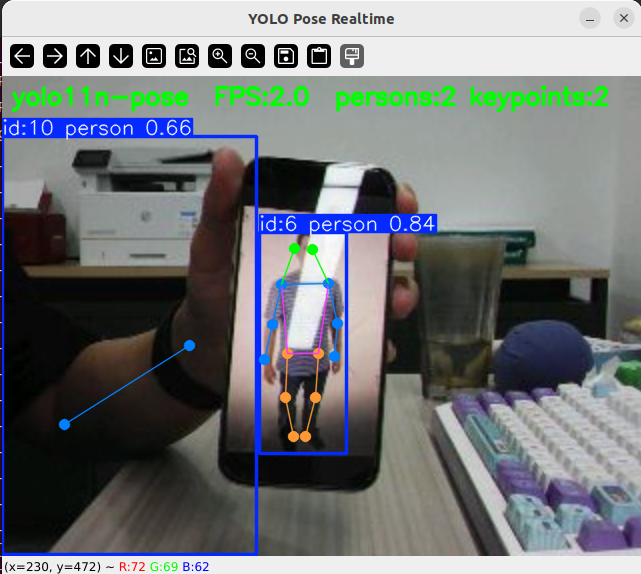
6. Operating Instructions
- Image mode: The program reads a single image, detects each person, and annotates 17 keypoints (red circles) and skeleton connections (orange line segments). Press
qorESCto close the window and exit. - Video mode: Frame-by-frame inference; each frame detects the people in the frame and draws the skeletons. Tracking is enabled by default (
use_track=true), keeping the ID of the same person stable across frames. The node has built-in IoU deduplication (dedup_iou=0.5) that removes duplicate boxes the tracker may produce for the same person. PressqorESCto stop playback and exit. - Real-time camera mode: The human skeletons in the live camera feed update instantly as people move. The top-left corner of the frame shows the model name, FPS, number of detected people, and keypoint count. Press
qorESCto exit.
7. How to Stop
Press Ctrl+C in each terminal, or press q or ESC to exit.
4. Experimental Phenomena
1. Image Mode
- Each person shows 17 keypoints (colored dots) and orange skeleton connections.
- The person's bounding box is annotated in green, with the tracking ID and confidence shown above the box.
- Multiple people are detected simultaneously, and each person is annotated independently.
2. Video Mode
- Human poses update in real time, and the skeleton changes naturally with body movement.
- In multi-person scenes, each individual is assigned an independent tracking ID that stays stable over time.
- The IoU deduplication mechanism removes duplicate skeletons caused by the tracker.
3. Real-time Camera Mode
- Human poses in the camera feed are displayed in real time; latency depends on CPU performance.
- The top of the frame shows the model name, FPS, number of detected people, and number of keypoint groups.
4. Edge Cases
- Keypoint accuracy drops for non-standard poses such as side views, back views, or partial occlusion.
- In dense multi-person scenes (e.g. crowds), some people may be missed.
- Non-human targets (animals, robots) do not trigger pose estimation.
5. Program Analysis
Source code paths:
- Launch (real-time):
~/microros_ws/src/microros_v2_yolo_pkg/launch/yolo_pose_realtime.launch.py- Launch (image):
~/microros_ws/src/microros_v2_yolo_pkg/launch/yolo_pose_image.launch.py- Launch (video):
~/microros_ws/src/microros_v2_yolo_pkg/launch/yolo_pose_video.launch.py- Node source:
~/microros_ws/src/microros_v2_yolo_pkg/microros_v2_yolo_pkg/yolo_pose_realtime_node.py
1. Core Node Analysis
The real-time pose estimation node yolo_pose_realtime_node subscribes to the raw image topic, calls the YOLO pose estimation model (-pose.pt), and publishes the image annotated with keypoints and skeleton connections along with JSON status.
Constructor (__init__): Declares the model, raw image input, output topics, ByteTrack, QoS, and display parameters. The node selects model.track() or model.predict() via use_track.
x# source file: ~/microros_ws/src/microros_v2_yolo_pkg/microros_v2_yolo_pkg/yolo_pose_realtime_node.py def __init__(self): super().__init__("yolo_pose_realtime_node") self.declare_parameter("model_dir", str(DEFAULT_MODEL_DIR)) self.declare_parameter("model_name", "yolo11n-pose.pt") self.declare_parameter("model_path", "") self.declare_parameter("image_topic", "/camera/image_raw") self.declare_parameter("annotated_topic", "/yolo_pose/annotated_image") self.declare_parameter("status_topic", "/yolo_pose/status") self.declare_parameter("output_dir", str(DEFAULT_OUTPUT_DIR)) self.declare_parameter("imgsz", 960) self.declare_parameter("conf", 0.25) self.declare_parameter("iou", 0.7) self.declare_parameter("max_det", 300) self.declare_parameter("device", "cpu") self.declare_parameter("classes", "") self.declare_parameter("tracker", "bytetrack.yaml") self.declare_parameter("show", True) self.declare_parameter("save_video", True) self.declare_parameter("output_fps", 20.0) self.declare_parameter("window_width", 1280) self.declare_parameter("window_height", 720) self.declare_parameter("qos_reliability", "best_effort") self.declare_parameter("qos_depth", 1) self.declare_parameter("process_every_n_frames", 1) self.declare_parameter("line_width", 2) self.declare_parameter("publish_status", True) self.declare_parameter("use_track", True)Image callback (image_callback): Converts the raw Image to BGR via CvBridge, calls the tracking or prediction interface according to use_track, then uses Ultralytics result.plot() to draw keypoints, skeleton, and bounding boxes, and publishes the annotated image and status.
xxxxxxxxxx# source file: ~/microros_ws/src/microros_v2_yolo_pkg/microros_v2_yolo_pkg/yolo_pose_realtime_node.py def image_callback(self, msg: Image) -> None: self.frame_index += 1 if self.frame_index % self.process_every_n_frames != 0 or self.processing: return self.processing = True try: frame = self.bridge.imgmsg_to_cv2(msg, desired_encoding="bgr8") kwargs = dict( source=frame, imgsz=self.imgsz, conf=self.conf, iou=self.iou, max_det=self.max_det, device=self.device, classes=self.classes, line_width=self.line_width, verbose=False, ) results = ( self.model.track(persist=True, tracker=self.tracker, **kwargs) if self.use_track else self.model.predict(**kwargs) ) annotated = results[0].plot(line_width=self.line_width) out_msg = self.bridge.cv2_to_imgmsg(annotated, encoding="bgr8") out_msg.header = msg.header self.annotated_pub.publish(out_msg) finally: self.processing = False2. Key Parameters
Parameter definition files:
- Launch:
~/microros_ws/src/microros_v2_yolo_pkg/launch/yolo_pose_realtime.launch.py- Node:
~/microros_ws/src/microros_v2_yolo_pkg/microros_v2_yolo_pkg/yolo_pose_realtime_node.py
| Parameter | Type | Default | Description |
|---|---|---|---|
model_name | string | yolo11n-pose.pt | YOLO pose model file; other options such as yolo11s-pose are available |
imgsz | int | 960 | Inference input image size (pixels) |
conf | float | 0.25 | Detection confidence threshold; keypoints below this value are filtered |
iou | float | 0.7 | IoU threshold for NMS |
max_det | int | 300 | Maximum number of detected people per frame |
device | string | cpu | Inference device; cpu or cuda:0 |
use_track | bool | true | Whether to enable ByteTrack object tracking |
tracker | string | bytetrack.yaml | Tracker configuration file |
line_width | int | 2 | Pixel width of skeleton connections and bounding boxes |
show | bool | true | Whether to show the OpenCV inference window |
window_width | int | 1280 | Display window width |
window_height | int | 720 | Display window height |
save_video | bool | true | Whether to save the output video |
output_fps | float | 20.0 | Frame rate of the saved video |
process_every_n_frames | int | 1 | Process every N frames (frame-skipping inference) |
publish_status | bool | true | Whether to publish the status topic /yolo_pose/status |
3. Node Description
| Node | Executable Name | Description |
|---|---|---|
yolo_pose_realtime_node | yolo_pose_realtime_node | Real-time pose estimation node; subscribes to /camera/image_raw and publishes /yolo_pose/annotated_image + /yolo_pose/status |
yolo_pose_image_node | yolo_pose_image_node | Image pose estimation node; reads a local image and outputs keypoint + skeleton annotations |
yolo_pose_video_node | yolo_pose_video_node | Video pose estimation node; reads a video frame by frame and outputs a pose-annotated video |
6. Common Problems
| Problem | Cause | Solution |
|---|---|---|
| Confused with MediaPipe Pose | Both features provide pose estimation | YOLO is faster but has fewer keypoints (17); MediaPipe is more accurate (more keypoints) |
| Keypoints jitter/unstable | Unstable CPU inference frame rate causes keypoint positions to jump between adjacent frames | Lower imgsz to raise the frame rate, or use tracking mode to stabilize IDs |
| IDs switch frequently in multi-person scenes | ByteTrack loses and re-acquires tracks during occlusion | Lower the dedup_iou deduplication threshold or raise conf to reduce false detections |
| Occluded people not detected | Limited occluded samples in the model training data | Adjust the camera angle so the occluded person is fully visible |
| Skeleton connections misplaced | Keypoint localization errors cause wrong connections | Raise imgsz for higher accuracy, or switch to a larger model such as yolo11m-pose |
ModuleNotFoundError: ultralytics | The current Python environment lacks the dependencies | Run python3 -m pip install ultralytics torch torchvision opencv-python, or activate an existing virtual environment first |