Welcome to MicroROS V2 Robot Car repository
3. Open Source CV Image Processing and Drawing Text Line Segments
Open Source CV Image Processing and Drawing Text Line Segments
1. Experiment Objective
Master the basic OpenCV image processing operations (grayscale conversion, binarization, edge detection) and drawing geometric annotations on images (lines, circles, rectangles, ellipses, polygons, text).
2. Experiment Principle
2.1 Keyword Explanation
| Keyword | Description |
|---|---|
| Grayscale conversion | Converts a BGR three-channel color image into a single-channel grayscale image, formula: Gray = 0.114B + 0.587G + 0.299R |
| Binarization | Splits the grayscale image into two classes of pixels, pure black (0) and pure white (255), based on a threshold, commonly used for target segmentation |
| Canny edge detection | Multi-stage algorithm: Gaussian blur noise reduction → gradient computation → non-maximum suppression → double threshold filtering, extracting object contours |
| Gaussian blur | Convolves the image with a Gaussian kernel; the larger the kernel, the stronger the blur, used as a noise reduction preprocessing step |
2.2 Technical Architecture
This experiment is a purely offline Python script, divided into two categories of operations:
- Image processing (grayscale / binarization / edge detection): Performs global operations on pixel values to generate a new image matrix
- Drawing annotations (line / circle / rectangle / ellipse / polygon / text): Modifies pixel values in place on the original image ndarray
Data flow: Local image → cv2.imread() → cv2.cvtColor() color space conversion → cv2.threshold() / cv2.Canny() image processing → cv2.line() / cv2.circle() and other drawing APIs → window display.
3. Experiment Steps
3.1 Hardware Preparation
| Hardware | Requirement |
|---|---|
| PTZ version | ✅ Supported |
| No-PTZ version | ✅ Supported |
| Required peripherals | None (local image processing, no need to start the car) |
3.2 Startup Method
Image processing category:
x# Grayscale conversionpython3 ~/microros_ws/src/microros_v2_opencv_base_pkg/scripts/opencv_image_processing_and_drawing/opencv_image_grayscale_conversion.py# Binarizationpython3 ~/microros_ws/src/microros_v2_opencv_base_pkg/scripts/opencv_image_processing_and_drawing/opencv_image_binarization_processing.py# Edge detectionpython3 ~/microros_ws/src/microros_v2_opencv_base_pkg/scripts/opencv_image_processing_and_drawing/opencv_image_edge_detection.pyDrawing annotation category:
xxxxxxxxxx# Linepython3 ~/microros_ws/src/microros_v2_opencv_base_pkg/scripts/opencv_image_processing_and_drawing/opencv_draw_line.py# Circlepython3 ~/microros_ws/src/microros_v2_opencv_base_pkg/scripts/opencv_image_processing_and_drawing/opencv_draw_circle.py# Rectanglepython3 ~/microros_ws/src/microros_v2_opencv_base_pkg/scripts/opencv_image_processing_and_drawing/opencv_draw_rectangle.py# Ellipsepython3 ~/microros_ws/src/microros_v2_opencv_base_pkg/scripts/opencv_image_processing_and_drawing/opencv_draw_ellipse.py# Polygonpython3 ~/microros_ws/src/microros_v2_opencv_base_pkg/scripts/opencv_image_processing_and_drawing/opencv_draw_polygon.py# Textpython3 ~/microros_ws/src/microros_v2_opencv_base_pkg/scripts/opencv_image_processing_and_drawing/opencv_draw_text.py3.3 Operation Instructions
The image processing scripts display the processed result side by side next to the original image; the drawing scripts overlay annotations on the original image and display a single window. Press the q key to close all windows.
3.4 Stop Method
Press the q key to close all OpenCV windows and exit the program.
4. Experiment Phenomena
- Master image processing functions such as
cv2.cvtColor(),cv2.threshold(),cv2.Canny() - Master drawing functions such as
cv2.line(),cv2.circle(),cv2.rectangle(),cv2.ellipse(),cv2.polylines(),cv2.putText()
Original image: The input image for image processing and drawing; all effects are operated on and overlaid based on this image.

Grayscale image: Uses cv2.cvtColor() to convert the BGR color image into a single-channel grayscale image, where each pixel retains only luminance information.
Binary image: Uses cv2.threshold() to split the grayscale image into pure black (0) and pure white (255) pixels based on a threshold.

Edge detection image: Before Canny edge detection, Gaussian blur is applied for noise reduction, then pixels with sharp luminance changes are extracted to form object contour lines.
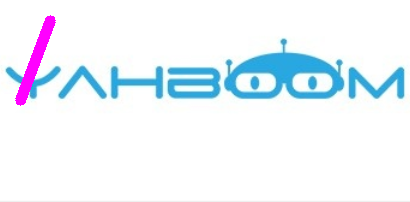
Drawing a line: Uses cv2.line() to draw a line segment with a specified start and end point on the image; color and line width can be customized.
Drawing a circle: Uses cv2.circle() to draw a circle outline with a specified center and radius on the image.

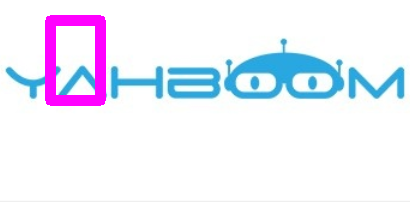
Drawing a rectangle: Uses cv2.rectangle() to draw a rectangle border with specified top-left and bottom-right corner coordinates on the image.
Drawing an ellipse: Uses cv2.ellipse() to draw an ellipse arc with a specified center, axis lengths, and rotation angle on the image.
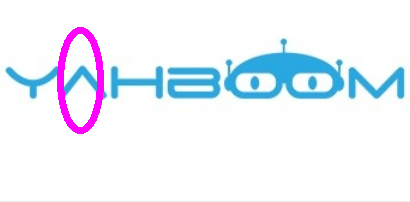
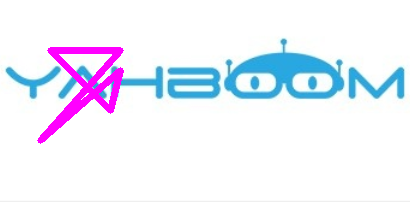
Drawing a polygon: Uses cv2.polylines() to draw a closed polygon formed by sequentially connecting multiple vertex coordinates on the image.
Drawing text: Uses cv2.putText() to overlay text annotations on the image; position, font, size, and color can be customized.

5. Program Analysis
Source code paths:
- Script directory:
~/microros_ws/src/microros_v2_opencv_base_pkg/scripts/opencv_image_processing_and_drawing/- Test image:
~/microros_ws/src/microros_v2_opencv_base_pkg/scripts/images/yahboom.png
5.1 Core Logic Analysis
All scripts share a unified load-process-display framework. The core code for image processing and drawing annotations is shown below respectively.
Grayscale + binarization (opencv_image_binarization_processing.py)
xxxxxxxxxx# Source file: ~/microros_ws/src/microros_v2_opencv_base_pkg/scripts/opencv_image_processing_and_drawing/opencv_image_binarization_processing.pyimport cv2if __name__ == '__main__': img = cv2.imread('~/microros_ws/src/microros_v2_opencv_base_pkg/scripts/images/yahboom.png', cv2.IMREAD_UNCHANGED) if img is None: print("Failed to read the image. Please check whether the images/yahboom.png path is correct") exit() gray = cv2.cvtColor(img, cv2.COLOR_BGR2GRAY) ret, thresh1 = cv2.threshold(gray, 180, 255, cv2.THRESH_BINARY_INV) while True: cv2.imshow("yahboom", img) cv2.imshow('yahboom_gray', gray) cv2.imshow("yahboom_binary", thresh1) action = cv2.waitKey(10) & 0xFF if action == ord('q') or action == 113: break cv2.destroyAllWindows()Key logic explanation:
cv2.cvtColor(img, cv2.COLOR_BGR2GRAY): Converts BGR three channels into a single-channel grayscale, invoking the internal weighted formulacv2.threshold(src, thresh, maxval, type): Pixels with a value >thresh(180) are set tomaxval(255), otherwise set to 0THRESH_BINARY_INVindicates inverted binarization (above the threshold becomes 0), making the dark logo the white foregroundretreturns the threshold actually used (equal to the passedthresh; it differs only in OTSU adaptive mode)
Canny edge detection (opencv_image_edge_detection.py)
xxxxxxxxxx# Source file: ~/microros_ws/src/microros_v2_opencv_base_pkg/scripts/opencv_image_processing_and_drawing/opencv_image_edge_detection.pyimport cv2if __name__ == '__main__': img = cv2.imread('~/microros_ws/src/microros_v2_opencv_base_pkg/scripts/images/yahboom.png', cv2.IMREAD_UNCHANGED) if img is None: print("Failed to read the image. Please check whether the images/yahboom.png path is correct") exit() gray = cv2.cvtColor(img, cv2.COLOR_BGR2GRAY) imgG = cv2.GaussianBlur(gray, (3, 3), 0) dst = cv2.Canny(imgG, 50, 50) while True: cv2.imshow("yahboom", img) cv2.imshow('yahbeeom_gray', gray) cv2.imshow("yahboom_canny", dst) action = cv2.waitKey(10) & 0xFF if action == ord('q') or action == 113: break cv2.destroyAllWindows()Key logic explanation:
- The image must be converted to grayscale before edge detection (Canny requires single-channel input)
cv2.GaussianBlur(gray, (3,3), 0): 3×3 Gaussian kernel convolution for noise reduction, suppressing high-frequency noise to avoid false detectionscv2.Canny(img, 50, 50): threshold1=50 (low threshold; below this value is definitely not an edge), threshold2=50 (high threshold; above this value is definitely an edge). Values in between are judged based on connectivity to strong edges- Note: Setting both thresholds to the same value 50 limits the algorithm's effectiveness; in practice the low threshold is usually set to 1/2~1/3 of the high threshold
Drawing API summary (opencv_draw_line.py / opencv_draw_circle.py / opencv_draw_rectangle.py / opencv_draw_text.py)
The following shows how each drawing function is called; all of them modify the original image ndarray in place:
xxxxxxxxxx# Source file: ~/microros_ws/src/microros_v2_opencv_base_pkg/scripts/opencv_image_processing_and_drawing/# See the comments on each function for the specific source file# Line: start (50,20) → end (20,100), color (255,0,255)=magenta, line width 10cv2.line(img, (50, 20), (20, 100), (255, 0, 255), 10)# Circle: center (80,80), radius 50, color magenta, line width 10 (negative value fills it solid)cv2.circle(img, (80, 80), 50, (255, 0, 255), 10)# Rectangle: top-left (50,20) → bottom-right (100,100), color magenta, line width 10cv2.rectangle(img, (50, 20), (100, 100), (255, 0, 255), 10)# Ellipse: center (80,80), axes (20,50), angle 0, start angle 0°, end angle 360°, color magenta, line width 5cv2.ellipse(img, (80, 80), (20, 50), 0, 0, 360, (255, 0, 255), 5)# Polygon: vertex array (5 points), isClosed=True, color magenta, line width 5points = np.array([[120, 50], [40, 140], [120, 70], [110, 110], [50, 50]], np.int32)cv2.polylines(img, [points], True, (255, 0, 255), 5)# Text: content 'This is Yahboom!', bottom-left coordinate (50,50), font, scale 1.0, color (0,200,0), line width 2cv2.putText(img, 'This is Yahboom!', (50, 50), cv2.FONT_HERSHEY_SIMPLEX, 1, (0, 200, 0), 2)Common rules for shape drawing:
- The color parameter is a BGR triplet;
(255, 0, 255)is magenta - The
thicknessparameter: a positive value is the line width (in pixels); a negative value (such as -1) fills the shape solid - The coordinate origin is the top-left corner of the image, with the
xaxis pointing right and theyaxis pointing down - All drawing functions return the drawn ndarray (i.e., the same object modified in place)
5.2 Key Parameters
| Parameter | Type | Default value | Description |
|---|---|---|---|
cv2.threshold thresh | int | 180 | Binarization threshold; pixels greater than this value are mapped to maxval |
cv2.threshold maxval | int | 255 | The target value for pixels exceeding the threshold |
cv2.Canny threshold1 | int | 50 | Low threshold (below this value is definitely not an edge) |
cv2.Canny threshold2 | int | 50 | High threshold (above this value is definitely an edge) |
cv2.GaussianBlur ksize | tuple | (3,3) | Gaussian kernel size; must be odd, the larger it is the stronger the blur |
| Drawing thickness | int | 5~10 | Line width; a negative value means fill solid |
5.3 Node Explanation
This experiment is a pure Python script and does not use any ROS2 nodes.
6. Common Issues
| Issue | Cause | Solution |
|---|---|---|
| Garbled Chinese characters | OpenCV does not support Chinese rendering by default | Use PIL or freetype to support Chinese |
| Text does not display | Text color is the same as the background | Choose a text color with high contrast |
| Canny edge detection result is all black | Both thresholds are set too high, suppressing all gradients | Lower threshold1 and threshold2 |
| Binarization result is all white or all black | Threshold is set improperly | First view the grayscale image with cv2.imshow, then adjust the threshold based on the pixel distribution |