yahboom
HomeLearn
Solution
Blog
Online Store
About Us
EN/中文
MicroROS V2 Robot Car📖
01.Introduction
  • 0.Unboxing Video
  • 1. Readme Learning Route
  • 2. Must Read Before Use
  • 3. Introduction to MicroROS V2 Control Board
  • 4. Introduction to LiDAR
  • 5. Introduction to ESP32 Camera Module
  • 6. FAQ
  • 7. About Charging
02.Assembly course
  • Assembly Video
03.Preparation
  • 1. Quickly Start
  • 2. Write Firmware
  • 3. Install VM and Start System
  • 4. Configure VM and Connect Robot
  • 5. Connect to MicroROS Agent
04.Quick start control course
  • 1. VM Keyboard Remote Control
  • 2. VM Handle Remote Control
  • 3. USB Handle Control
05.Robot control course
  • 1. Robot Information Release
  • 2. Robot Keyboard Control
  • 3. Robot Handle Control
  • 4. Robot State Estimation
  • 5. Linear Speed Calibration
  • 6. Angular Velocity Calibration
  • 7. Robot URDF Model
06.Lidar course
  • 1. Precautions for LiDAR Mapping and Navigation
  • 2. Lidar Avoid
  • 3. Lidar Following
  • 4. Lidar Guard
  • 5. Lidar Patrol
  • 6. Gmapping Mapping
  • 7. Cartographer Mapping
  • 8. Cartographer Quickly Repositioning Navigation
  • 9. Slam Toolx Mapping
  • 10. Navigation2 Single Point Navigation
  • 11. Navigation2 Multi Point Navigation
  • 12. Ros Robot App Mapping And Navigation
07.Road network planning
  • 1. Introduction to Road Network Planning and Quick Start
  • 2. Build a Pose Map
  • 3. Road Network Annotation
  • 4. Planning and Navigation Between Road Networks
  • 5. Road Network Navigation in Any Pose
  • 6. Path Replanning
08.Vision basic course
OpenCV Image Processing
  • 1. Introduction to OpenCV Source CV
  • 2. Open Source CV Geometric Transformation
  • 3. Open Source CV Image Processing and Drawing Text Line Segments
  • 4. Open Source CV Image Beautification
09.Visual General Course (For Standard&Superior version)
4. Yolov11&26 Visual Recognition
  • 1. YOLO Environment Setup
  • 2. CLI Usage
  • 3. Object Detection
  • 4. Instance Segmentation
  • 5. Pose Estimation
  • 6. Image Classification
  • 7. Oriented Bounding Boxes Object Detection
  • 8. Model Prediction
1. ESP32 Visual Recognition Module Configuration
  • 1. Serial Port Configuration WiFi Instructions
  • 2. Use ESP32 Camera Module in Robot Car
  • 3. Servo PTZ Calibration
2. OpenCV Visual Recognition
  • 1. Human Pose Estimation
  • 2. Object Detection
  • 3. AR Vision
  • 4. QR Code
  • 5. Color Recognition
  • 6. Facial Recognition
  • 7. AprilTag Machine Code Recognition
3. Mediapipe Visual Recognition
  • 1. Hand Detection
  • 2. Pose Detection
  • 3. Holistic Detection
  • 4. Facial Detection
  • 5. Facial Recognition
  • 6. Facial Special Effects
  • 7. 3D Object Recognition
  • 8. Brush
  • 9. Gesture Recognition
  • 10. Palm Target Localization
  • 11. Fingertip Trajectory Recognition
10.Visual Advanced Course (Just for Standard version)
1. Visual Control
  • 1. QR Code Recognition Control Action
  • 2. AprilTag Control Car Action Group
  • 3. Gesture Control Car Action Group
  • 4. Visual Line Tracking
2. Visual Tracking
  • 1. Color Tracking
  • 2. Facial Tracking
  • 3. QR Code Tracking
  • 4. Object Recognition And Tracking
  • 5. Mediapipe Palm Tracking
  • 6. Mediapipe Gesture Tracking
  • 7. Mediapipe Human Pose Tracking
  • 8. KCF Object Tracking
  • 9. AprilTag Machine Code Tracking
3. Visual Following
  • 1. Color Follow
  • 2. Face Follow
  • 3. QR Code Follow
  • 4. Mediapipe Palm Follow
  • 5. Mediapipe Gesture Follow
  • 6. Mediapipe Human Posture Follow
  • 7. AprilTag Machine Code Follow
  • 8. Object Follow
11.Visual Advanced Course (Just for Superior version)
1. Visual Control
  • 1. QR Code Recognition Control Action
  • 2. AprilTag Control Car Action Group
  • 3. Gesture Control Car Action Group
  • 4. Visual Line Tracking
2. Visual Tracking
  • 1. Color Tracking
  • 2. Facial Tracking
  • 3. QR Code Tracking
  • 4. YOLO Object Recognition and Tracking
  • 5. Mediapipe Palm Tracking
  • 6. Mediapipe Gesture Tracking
  • 7. Mediapipe Human Pose Tracking
  • 8. KCF Object Tracking
  • 9. AprilTag Machine Code Tracking
3. Visual Follow
  • 1. Color Follow
  • 2. Face Follow
  • 3. QR Code Follow
  • 4. Mediapipe Palm Follow
  • 5. Mediapipe Gesture Follow
  • 6. Mediapipe Human Pose Follow
  • 7. AprilTag Machine Code Follow
  • 8. Object Follow
12.AI Large Model Basic and Applications Course
1. AI Large Model Preparation
  • 1.AI Large Model Preparation
2. AI Large Model Basic Course
  • 1. AI Large Model Types and Principles
  • 2. RAG Retrieval Augmented and Training Samples
  • 3. Embodied Intelligent System Architecture
  • 4. Embodied Intelligence Core Source Code
3. AI Large Model Development
  • 1. Register Model Service Account
  • 2. Configure API KEY
  • 3. Dify Introduction
  • 4. Dify Basic Features
  • 5. RAG Knowledge Base Deployment
  • 6. AI Application Development Chatbot
  • 7. RAG Knowledge Base and Chatbot
  • 8. AI Agent Workflow
4. AI Large Model (Text Version)
  • 1. Semantic Understanding and Instruction Following
  • 2. Multimodal Visual Understanding
  • 3. Multimodal Visual Understanding + Basic Control
  • 4. Multimodal Visual Understanding + Object Following
  • 5. Multimodal Visual Understanding + Visual Line Following
  • 6. Multimodal Visual Understanding + SLAM Navigation
  • 7. Multimodal Visual Understanding + SLAM Navigation + Visual Line Following
  • 8. Multimodal Visual Understanding + SLAM Navigation + Object Following
  • 9. Intent Inference + Multimodal Visual Understanding + SLAM Navigation
13.Openclaw Basics Course
  • 1. Openclaw Introduction
  • 2. Openclaw Core Concepts
  • 3. Openclaw Api-Key Configuration
  • 4. Openclaw Switching Models
  • 5. Openclaw System Prompt
  • 6. Openclaw Common CLI Command
14. Openclaw Interaction Course
  • 1. Openclaw Webchat Interaction
  • 2. Openclaw Tui Interaction
  • 3. Openclaw Whatsapp Interaction
15.Openclaw Development Course
  • 1. Openclaw Robot Mcp Service Integration
  • 2. Robot CLI Command Tools
  • 3. Robot-Control Plugin Tools
  • 4. Openclaw Skills Development
  • 5. Openclaw Scheduled Tasks
  • 6. Openclaw Multi Agent System
  • 7. Openclaw Proactive Interaction
  • 8. Openclaw Vector Memory
16.Openclaw Embodied Intelligence Course
  • 1. OpenClaw Natural Interaction + Basic Control
  • 2. OpenClaw Natural Interaction + Slam Navigation
  • 3. OpenClaw Natural Interaction + Multimodal Visual Understand
  • 4. OpenClaw Natural Interaction + Multimodal Visual Understand + Slam Navigation + Visual Follow
  • 5. OpenClaw Natural Interaction + Multimodal Visual Understand + Slam Navigation + Visual Track
17.Multi-machine Course
  • 1. Multi Machine Handle Control
  • 2. Multi Machine Keyboard Control
  • 3. Multi Machine Navigation
18.MicroROS-V2 Control Board Development Environment
  • 1. Set Up the ESP32-IDF Development Environment
  • 2. ESP32-IDF Configuration Tool
  • 3. ESP Flash Tool Flashing Firmware
  • 4. Install ESP32 Microros Components
  • 5. Install And Start Microros Agent
19.MicroROS-V2 Control Board ESP32 Basic Course
  • 1. Led Light Up
  • 2. Button Function
  • 3. Drive Buzzer
  • 4. Oled
  • 5. Usb Host Function
  • 6. Serial Communication
  • 7. Battery Voltage Detection
  • 8. Drive Pwm Servo
  • 9. Drive Motors
  • 10. Read Motor Encoder Data
  • 11. Pid Motor Speed Control
  • 12. Robot Kinematics Analysis Theory
  • 13. Read Imu Data
  • 14. Read Lidar Data
  • 15. Flash Data Storage
  • 16. Custom Partition Table
  • 17. Bluetooth Communication
  • 18. Wifi Connection
  • 19. ESP32 Visual Recognition Module
20.MicroROS-V2 Control Board Micro_ros Basic Course
  • 1. Publish Topics
  • 2. Subscribe To Topics
  • 3. Multi Topic Subscription And Publishing
  • 4. Subscribe To Buzzer Topic
  • 5. Subscribe To Pwm Servo Topic
  • 6. Subscribe To Speed Control Topic
  • 7. Publish Odometry Topic
  • 8. Publish Imu Data Topic
  • 9. Publish Lidar Data Topic
21. Linux System Course
  • 1.Introduction to Linux system
  • 2.Ubuntu file system
  • 3.Ubuntu common commands
  • 4.Ubuntu common editors
  • 5.Ubuntu software operation commands
  • 6.Virtual machine installation
  • 7.SSH remote control
  • 8.VNC remote control
  • 9.Transfer files remotely
  • 10.Driver library and communication
  • 11.Static IP and hotspot mode
  • 12.Bind device ID
  • 13.Capacity expansion and resource allocation
  • 14.Update system software sources
  • 15.Set root user password
  • 16.sudo free password
  • 17.Connect to WiFi network
  • 18.View system version
  • 19.Customized service management
  • 20.Back up system image
22.Docker Course
  • 1.Docker overview and docker installation
  • 2.Common commands for docker image containers
  • 3.Docker images deeply understand and publish images
23.ROS Basic Course
  • 1.Introduction to ROS2
  • 2.ROS2 install Humble
  • 3.ROS2 development environment
  • 4.ROS2 workspace
  • 5.ROS2 function package
  • 6.ROS2 node
  • 7.ROS2 topic communication
  • 8.ROS2 service communication
  • 9.ROS2 action communication
  • 10.ROS2 custom interface message
  • 11.ROS2 parameter service case
  • 12.ROS2 meta-function package
  • 13.ROS2 distributed communication
  • 14.ROS2 DDS
  • 15.ROS2 time related API
  • 16.ROS2 common command tools
  • 17.ROS2 rviz2 use
  • 18.ROS2 rqt toolbox
  • 19.ROS2 Launch startup file configuration
  • 20.ROS2 recording and playback tool
  • 21.ROS2 URDF model
  • 22.ROS2 Gazebo simulation platform
  • 23.ROS2 TF2 coordinate transformation
Download
  • Mapping_APP(iOS_Android)
  • Code
  • Software_Tools
  • VM_System_File
  • 3D_Model_File
  • ESP32_Firmware
  • Dify LLM Base
  • Instruction_Manual
  • VMware
Download ZIP

Welcome to MicroROS V2 Robot Car repository

4. Multimodal Visual Understanding + Object Following

3. Multimodal Visual Understanding + Object Tracking and Following

1. Course Content

  1. Learn to use the robot's visual understanding combined with the car's pan-tilt object tracking and following function.
  2. Analyze newly appearing key source code.

2. Preparation

2.1 Content Description

The virtual machine used by default with this product starts the Dify docker environment automatically at boot, so no additional startup is needed.

⚠️ The same test instructions will not produce exactly the same reply content from the large model, and will differ slightly from the screenshots in the tutorial. If you need to enhance or reduce the diversity of the large model's replies, refer to 【AI Large Model Development】-【RAG Knowledge Base Deployment】 to modify the knowledge base and sample library.

Virtual machine terminal, start the Dify environment:

sh ~/bringup_dify.sh
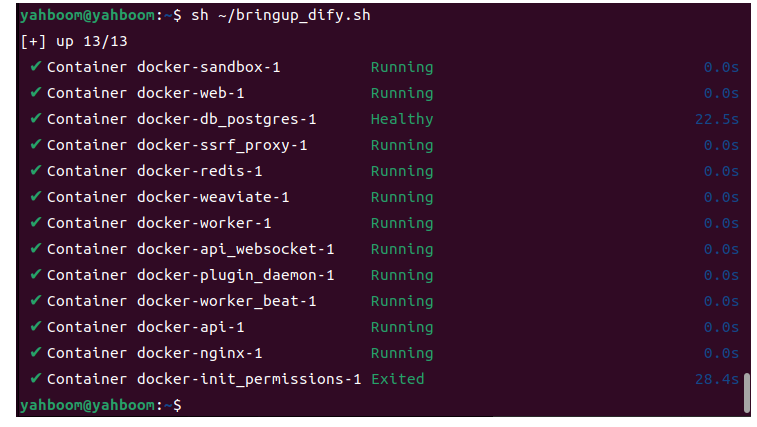
image-20260723212839520

3. Running the Case

3.1 Starting the Program

Open the virtual machine terminal and enter the command to start the underlying proxy + camera topic:

xxxxxxxxxx
ros2 launch microros_v2_bringup car_base.launch.py
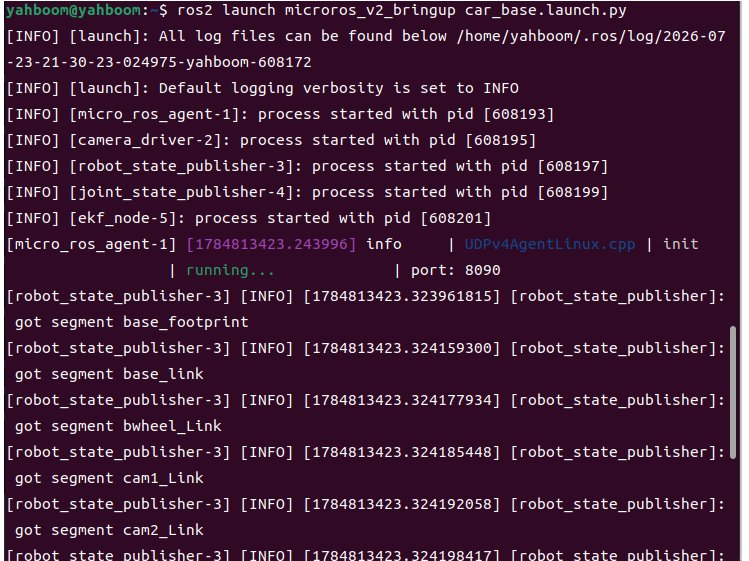
image-20260723213206846

Open another virtual machine terminal and enter the command:

xxxxxxxxxx
ros2 launch multi_brains llm_agent_control.launch.py

After initialization is complete, the following content will be displayed: image-20260723212853619
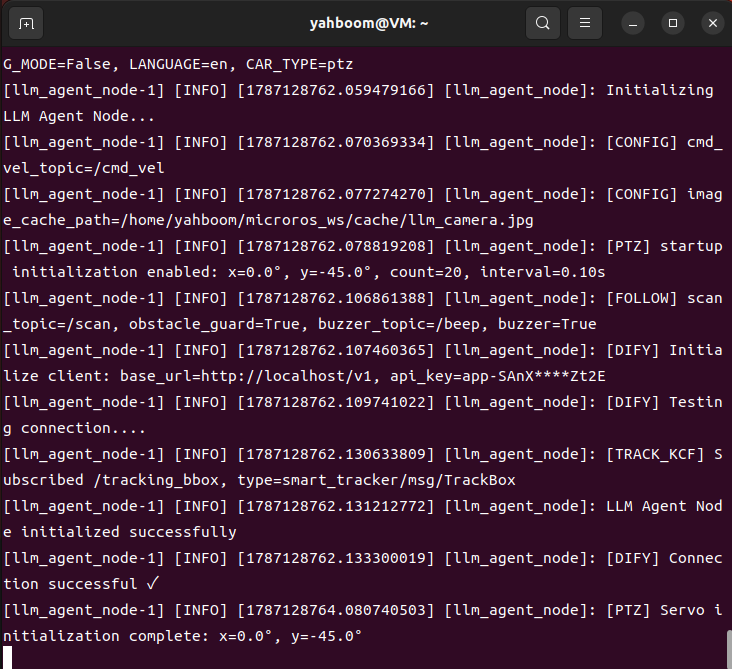
Then open another terminal and run the object tracking box program. This program will show a visual window following the object while the large model is following it:

xxxxxxxxxx
ros2 launch microros_v2_bringup super_tracker.launch.py
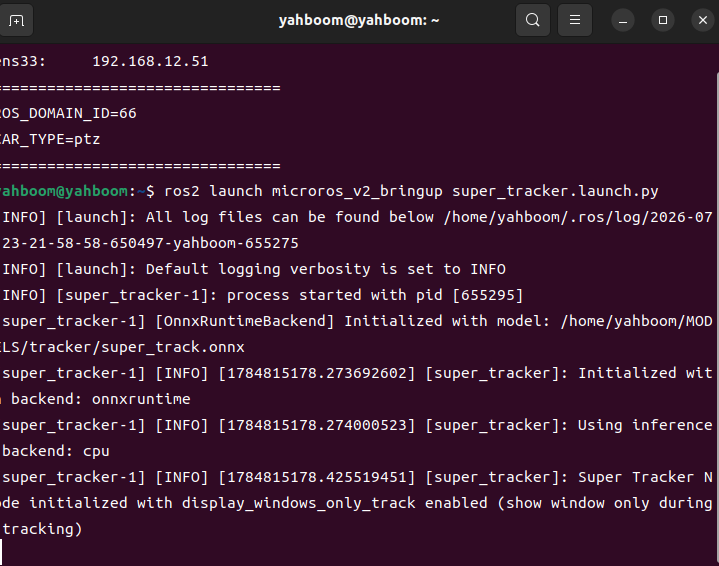
image-20260723220010627

Then open another terminal and start the text dialogue:

xxxxxxxxxx
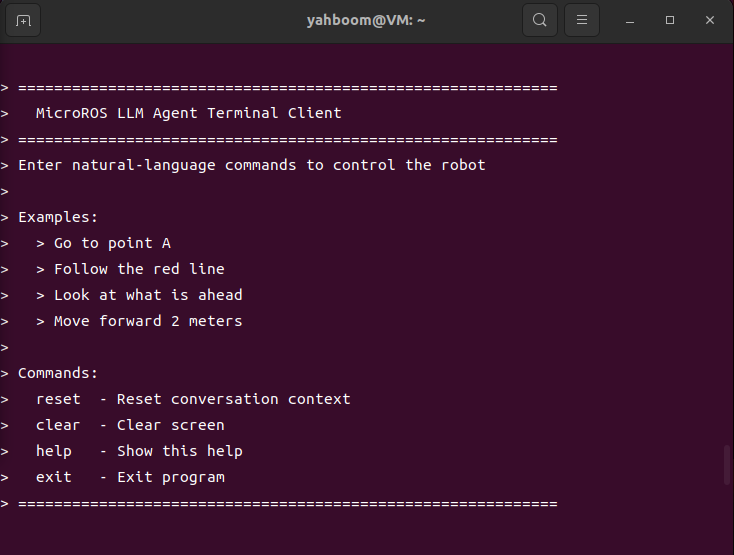
ros2 run multi_brains terminal_client

image-20260723212902940

3.2 Test Cases

Reference test cases are given here. Users can create their own dialogue commands.

  • Start xx tracking, object tracking.

3.2.1 Case 1: "Start tracking the green block"

Enter "Start tracking the green block" in the text dialogue terminal. The terminal prints information as follows: image-20260723215746483
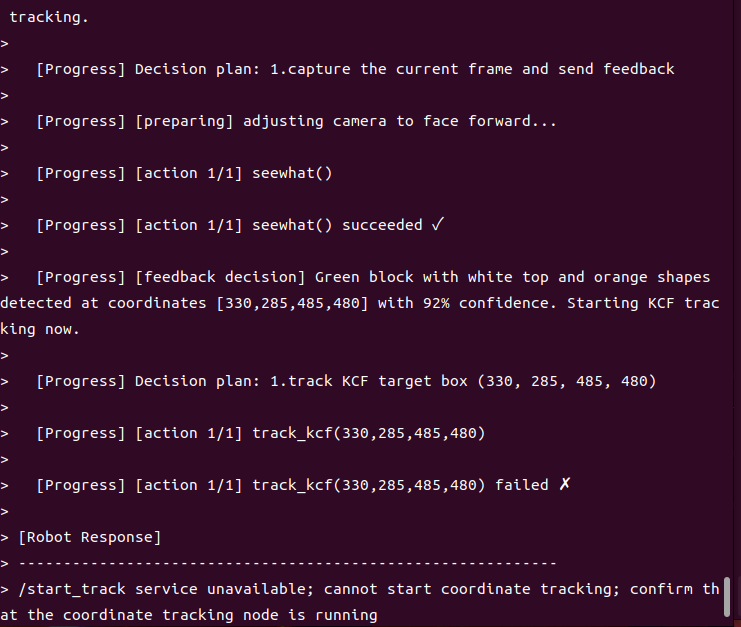
A window titled frame will open for 3 seconds showing the robot's current view image, then close automatically: image-20260723215736033
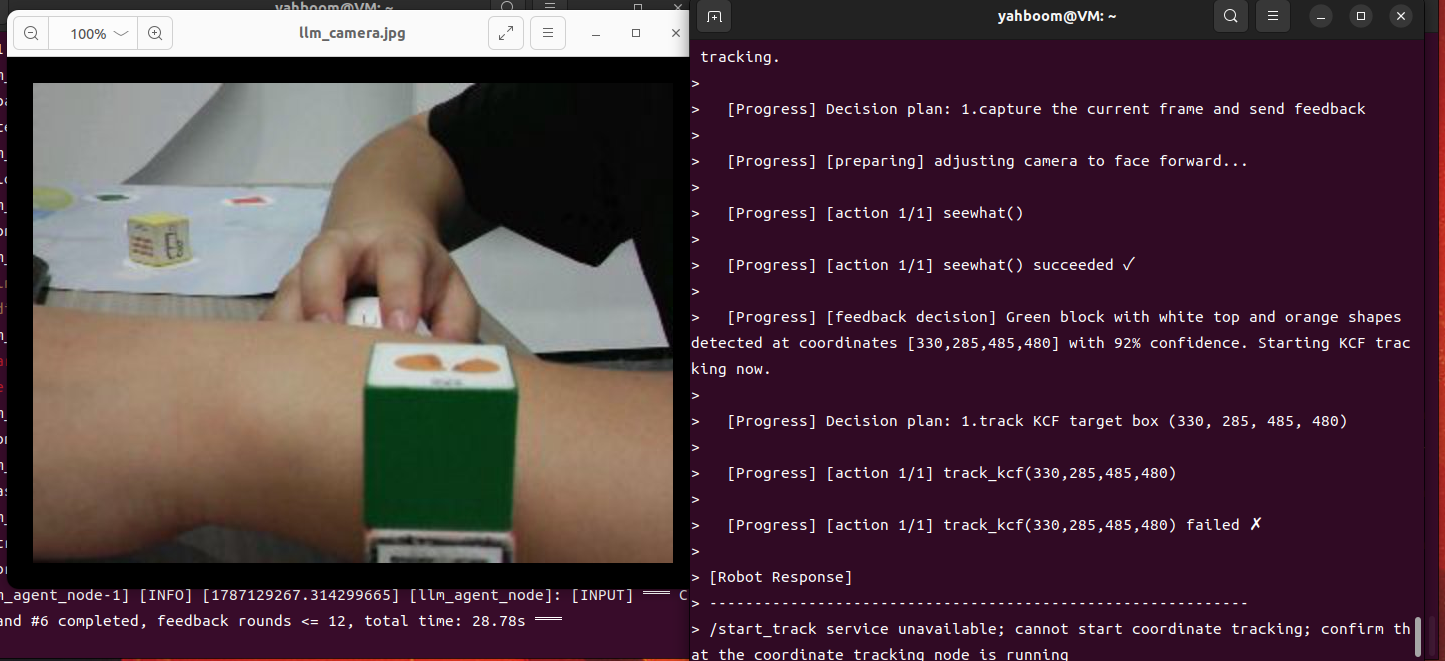
Slowly move the object, and the pan-tilt servo will follow. Move the object forward and backward, and the car will follow based on near-large-far-small (size-based) tracking. Because it is size-based tracking, it will not be particularly sensitive.
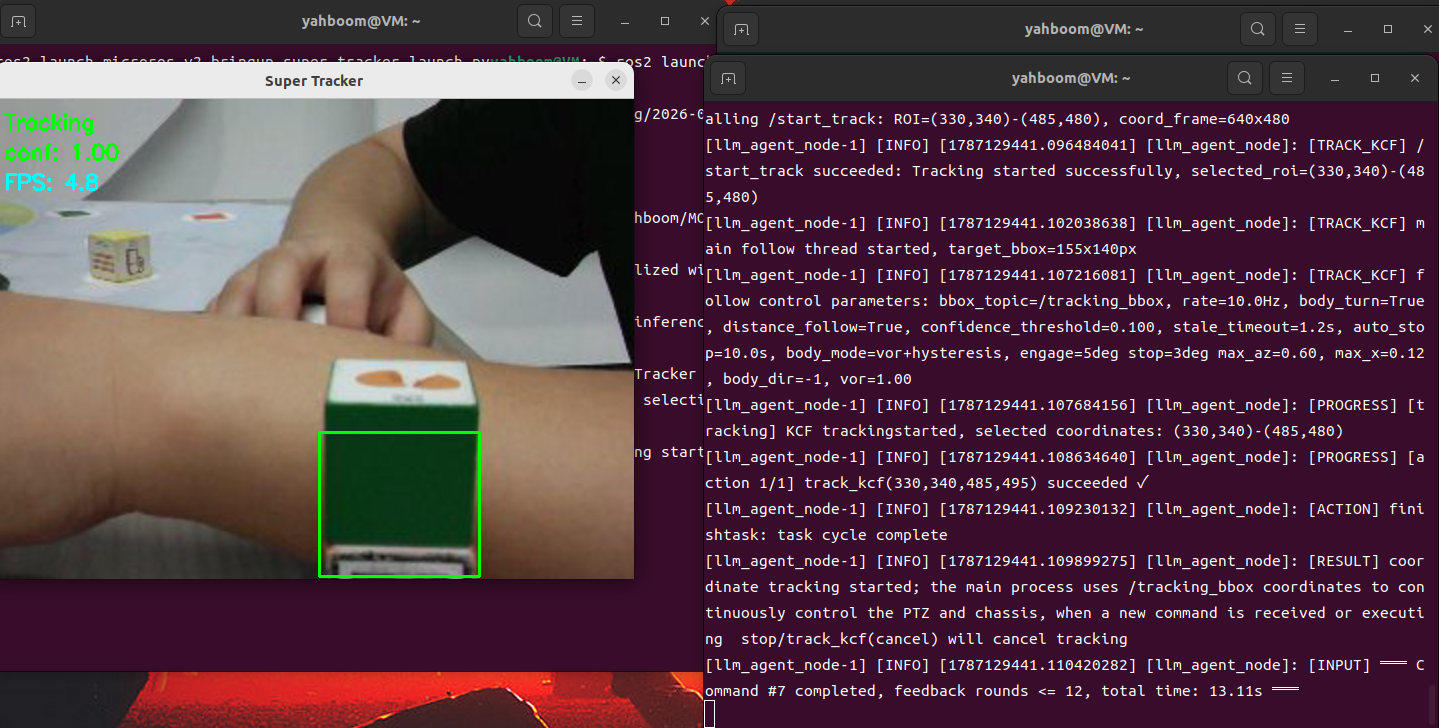
image-20260723220111367

If there is no target to track in the image or the confidence is low, the program will count down for 10 seconds and the process will automatically end, treating the task as completed: image-20260723220225100

image-20260723220240130

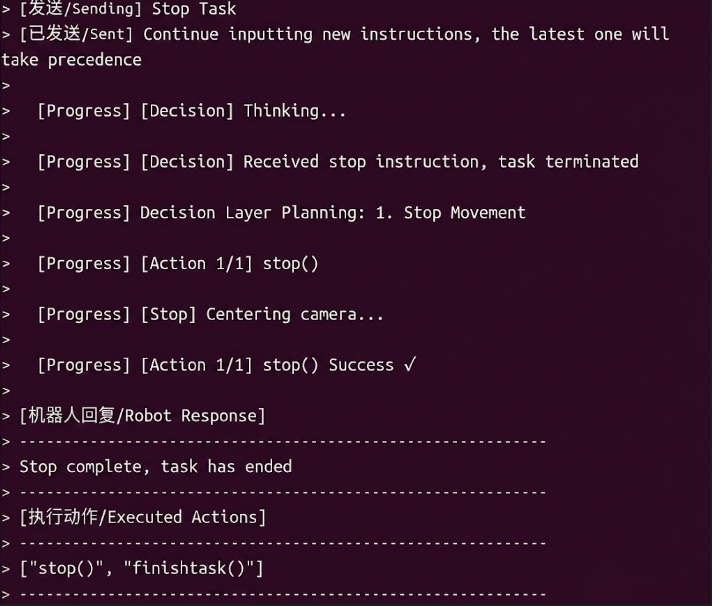
To end the task manually, press the ENTER key in the terminal to continue the dialogue input, and enter 【Stop Task】 or 【End Tracking】: image-20260723220329654

🔧 In the current version, stopping tracking will use stop() to cancel object tracking and stop the chassis. If you see logs related to the external tracking node exiting in the terminal, it usually means the tracking task has been ended normally.

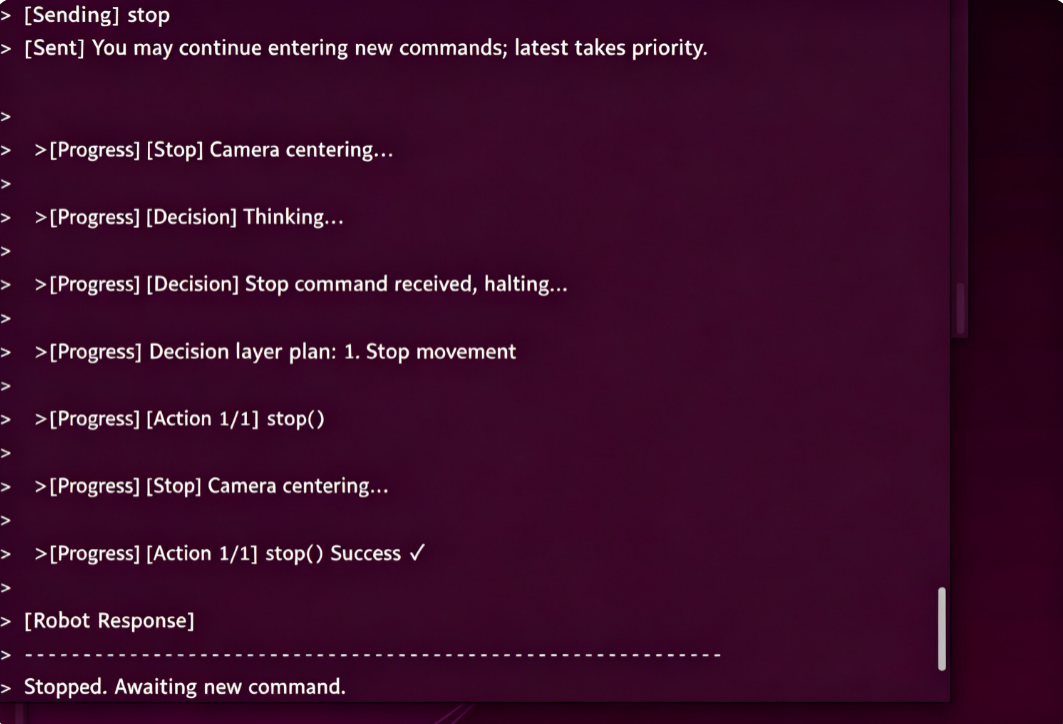
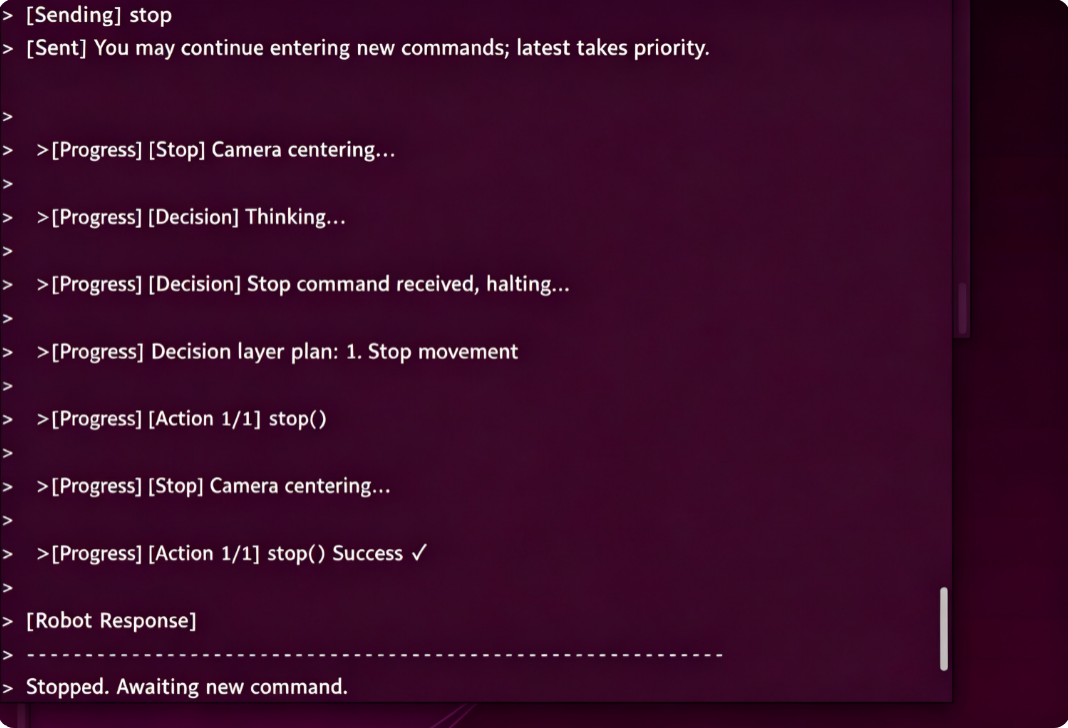
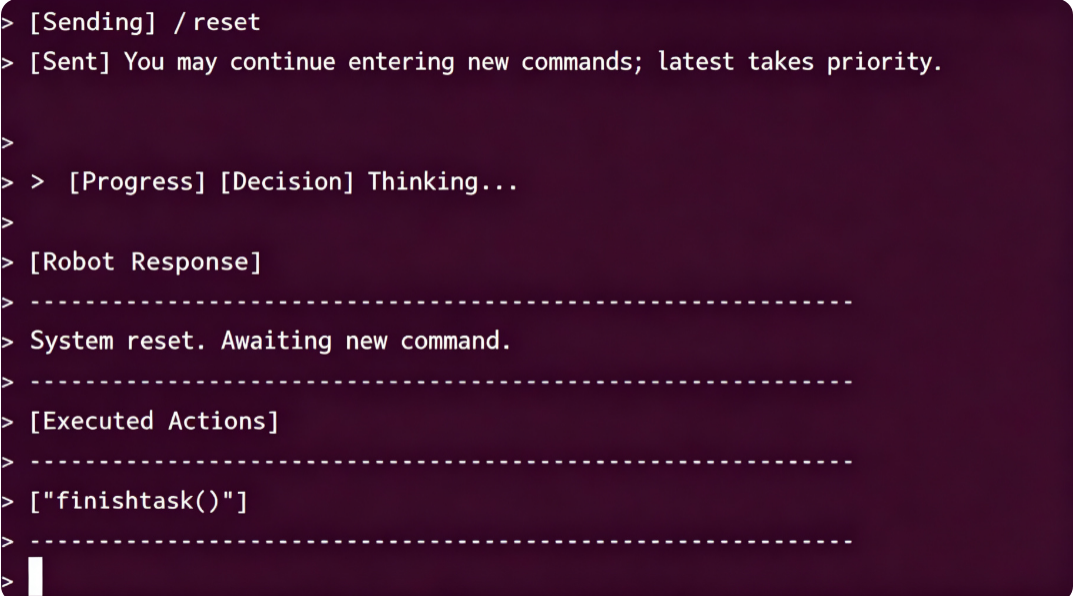
After the robot completes the task, it enters a waiting state. At this time, instructions are directly passed to the execution-layer large model, and all conversation history is always retained. We can input the "/reset" command again to let the robot end the current task cycle and start a new task cycle. image-20260723220408927

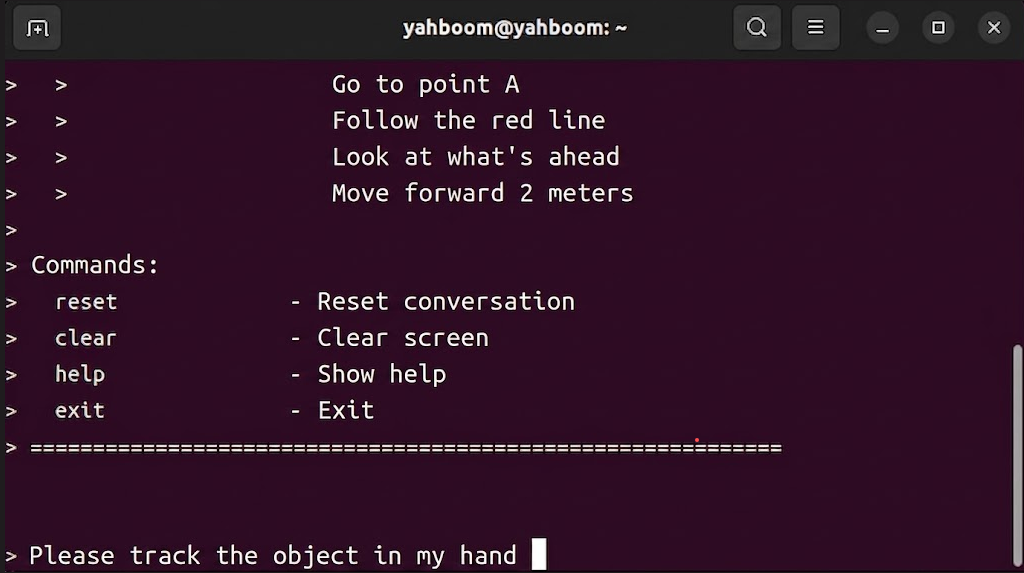
3.2.2 Case 2: "Please track the object in my hand"

⚠️ The coordinates of the tracked object obtained in this case are entirely inferred by the AI large model, so it is recommended to use a newer model for better results!

Enter "Please track the object in my hand" in the terminal. The terminal prints information as follows: image-20260724102240390

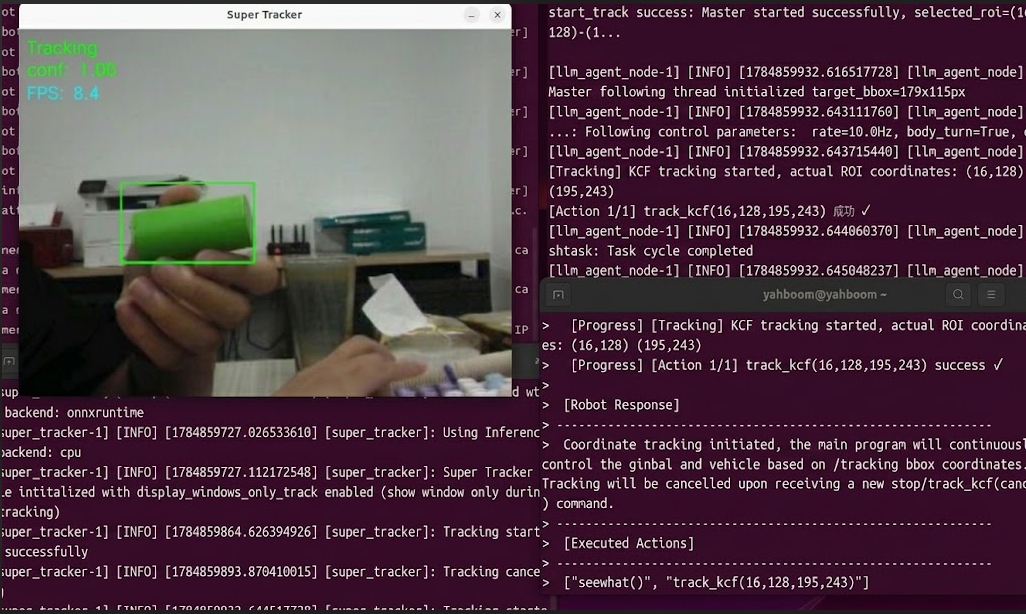
Please hold any object in your hand and put it in view, and keep it there until a tracking box appears. You can see the image captured by the car for 3 seconds in the process: image-20260724102534413

After the tracking box appears, slowly move the object, and the pan-tilt servo will follow. Move the object forward and backward, and the car will follow based on size-based tracking. Because it is size-based tracking, it will not be particularly sensitive.

image-20260724102608579

If there is no target to track in the image, the program will count down for 10 seconds, print a 5-second countdown in the terminal, and the process will automatically end, treating the task as completed: image-20260723220225100
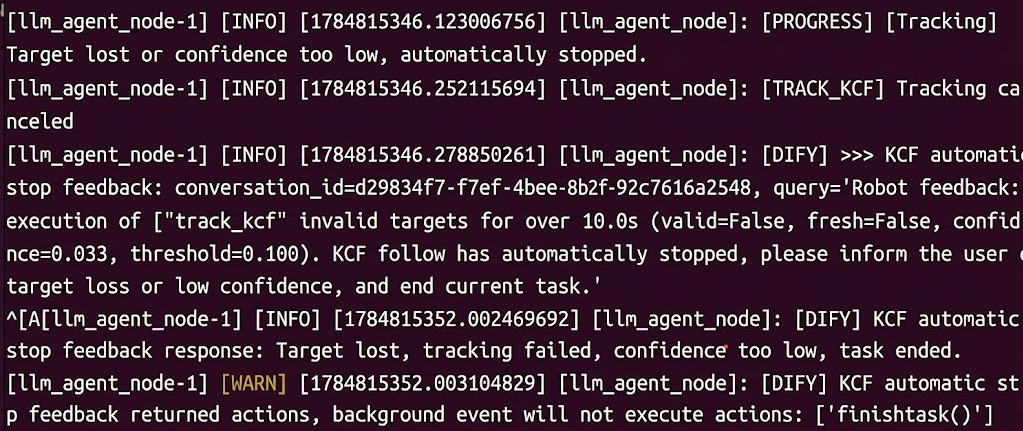
To end the task manually, you can input "stop" in the terminal, press the ENTER key to continue the dialogue input, and enter 【Stop】 or 【End Tracking】: image-20260724102725381

After the robot completes the task, it enters a waiting state. At this time, instructions are directly passed to the execution-layer large model, and all conversation history is always retained. We can input the "end current task" command again to let the robot end the current task cycle and start a new task cycle. image-20260724102751048
4. Source Code Analysis

In the current version, the "track target in frame" pipeline is a Dify three-layer workflow: the decision layer plans the tracking steps, the execution layer first outputs seewhat() to obtain the image, the box-selection layer outputs bbox based on the image, and the execution layer then outputs track_kcf(x1,y1,x2,y2).

Current relevant source code paths:

xxxxxxxxxx
~/microros_ws/src/multi_brains/multi_brains/llm_agent_node.py
~/microros_ws/src/multi_brains/multi_brains/controllers/kcf_tracker.py

Core flow:

xxxxxxxxxx
Start tracking the target
  -> seewhat() obtains the current frame
  -> Box-selection layer outputs bbox_OUT
  -> Execution layer outputs track_kcf(x1,y1,x2,y2)
  -> KcfTracker calls /start_track
  -> External tracking node publishes /tracking_bbox
  -> llm_agent_node controls the pan-tilt and chassis to follow

To stop tracking, input "stop tracking" or "park" in the terminal, and the execution layer will output stop(), which cancels KCF tracking and stops the chassis.

Multimodal Visual Understanding + Basic Control
Multimodal Visual Understanding + Visual Line Following

COMPANY

  • About us
  • Team Style
  • Blog

LEARNING & EXPLORATION

  • Tutorials
  • Edge AI hardware
  • Educational robots
  • Embedded intelligent hardware

WHERE TO BUY

  • Yahboom Online Store
  • Amazon
  • Alibaba
  • AliExpress
  • Mercado

TECHNOLOGY SUPPORT

  • Email: support@yahboom.com

BE A DISTRIBUTOR

  • Email: sales@yahboom.com
QR Code

Copyright © 2017-2026 Yahboom. All Rights Reserved.

EN/中文