Welcome to MicroROS V2 Robot Car repository
3. Openclaw Api-Key Configuration
OpenClaw API-KEY Configuration
OpenClaw API-KEY Configuration1. Course Content2. Applying for an API-KEY2.1 Recommended Model Service Providers3. Configuring the OpenClaw API-KEY3.1 Configuration Methods3.2 Quick Configuration3.2.1 Configuring the Base URL3.2.2 Filling in the apiKey4. Viewing Connected Model Status4.1 View the List of Configured Models4.2 Verify Whether the Configuration Was Successful5. Other Ways to Connect5.1 CLI Command Configuration (Suitable for Beginners)5.2 Modifying the Configuration File (Recommended Method)Configuration File LocationEditing the Configuration File6. Common Problems and Solutions
1. Course Content
This course details how to configure the API-KEY for AI models in OpenClaw, including the API-KEY application process, two configuration methods (CLI command configuration and configuration file modification), and how to verify whether the configuration was successful. After completing this course, you will be able to successfully connect to and use various AI large model service providers.
Course Objectives
- Understand the types of model service providers supported by OpenClaw
- Master the method for applying for an API-KEY
- Learn to view and verify the status of connected models
2. Applying for an API-KEY
2.1 Recommended Model Service Providers
For the API-KEY application, refer to the companion tutorial [AI Large Model Development] — [Register Model Service Account]
OpenClaw supports many model service providers, for example:
- OpenAI
- Alibaba Cloud - Qwen (Tongyi Qianwen)
- DeepSeek
- Zhipu AI
- Moonshot AI
You can freely choose a model service provider according to the network policies of your country/region, and register on the corresponding official website to apply for an API-KEY
3. Configuring the OpenClaw API-KEY
3.1 Configuration Methods
OpenClaw provides two ways to configure the API-KEY:
- CLI command configuration (suitable for beginners)
- Directly modifying the configuration file (suitable for developers)
- Configuration file path:
$HOME/.openclaw/openclaw.json
3.2 Quick Configuration
[!NOTE]
- The factory-default openclaw.json configuration file comes with the baseurl and commonly used models of the Alibaba Cloud Bailian platform built in, for quick configuration and use.
- Suitable for a quick first-time experience: first register an Alibaba Cloud Bailian large model account and create an API-KEY (refer to the companion tutorial [AI Large Model Development] — [Register Model Service Account])
- The factory-default configuration file already has the Bailian model parameters configured; just fill in the API-KEY and you can use it directly
- Open the OpenClaw configuration file:
nano $HOME/.openclaw/openclaw.json
3.2.1 Configuring the Base URL
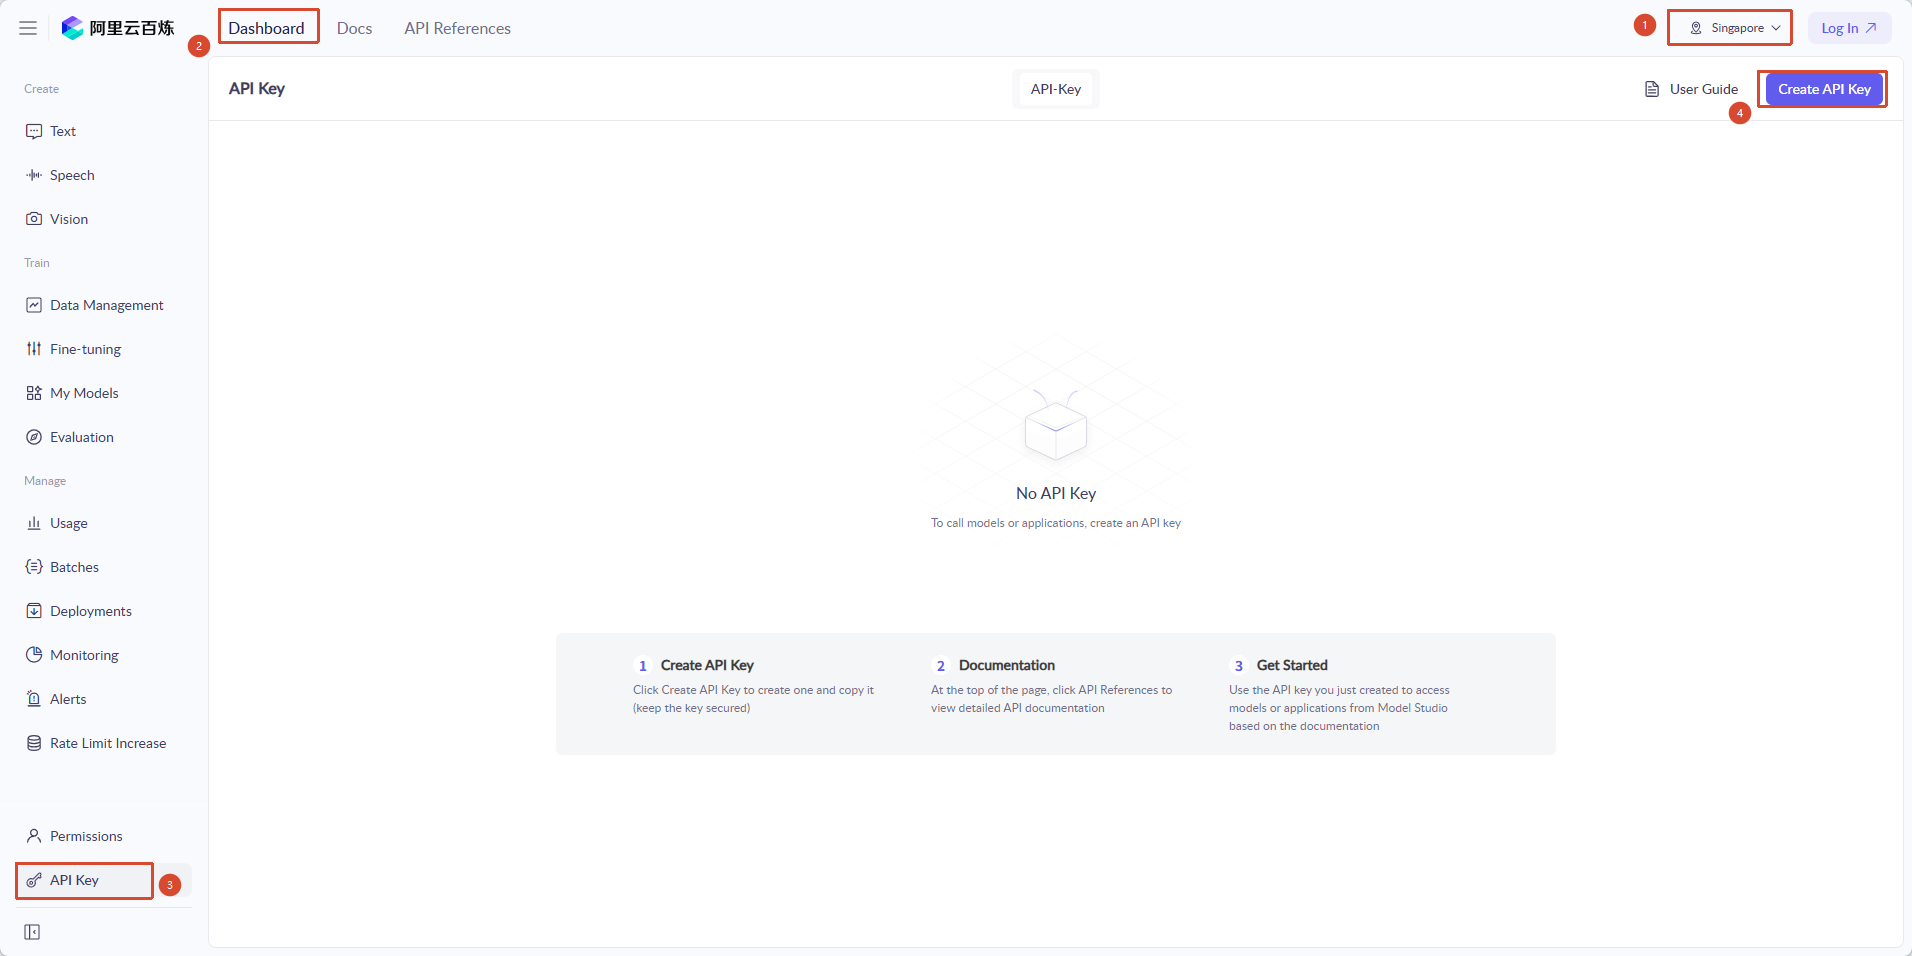
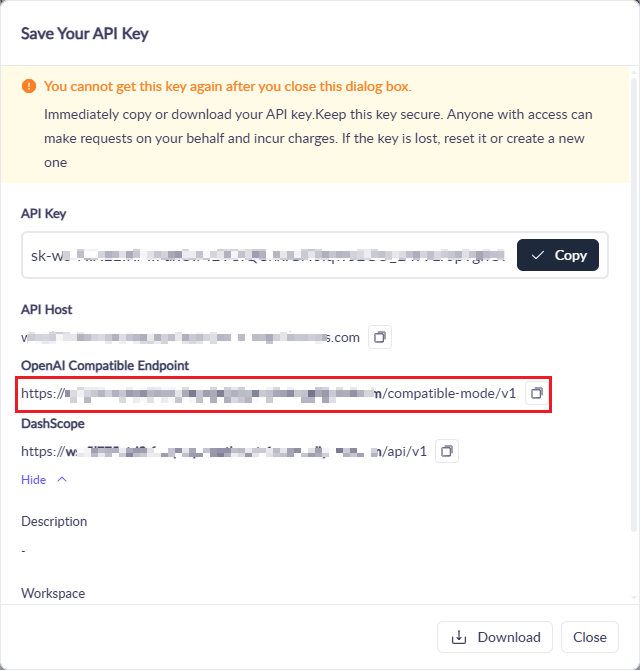
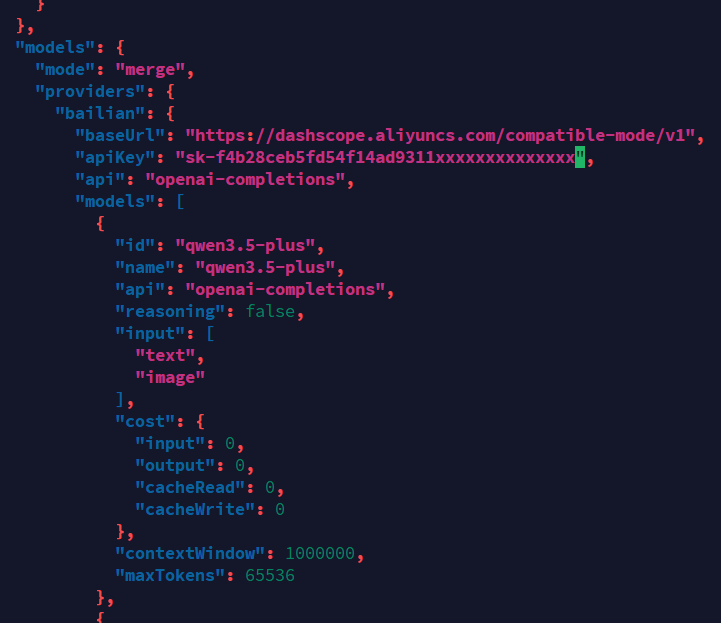
- Users overseas: choose the corresponding baseurl according to the service region you use (go to the Alibaba Cloud Bailian Console homepage, switch to the target region in the upper-right corner of the page, such as Singapore, then select API Key in the left navigation bar to enter the management page and create an API Key)
3.2.2 Filling in the apiKey
- Find the corresponding field and replace the baseurl and apiKey fields
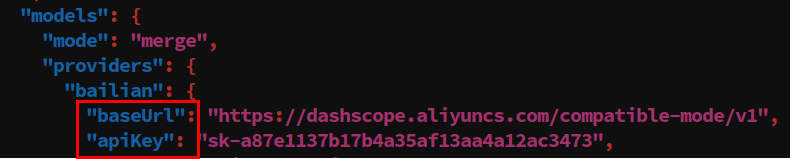
- After filling in, press
Ctrl+X, then pressYto confirm saving, and finally press Enter to exit
4. Viewing Connected Model Status
4.1 View the List of Configured Models
After the configuration is complete, you can use the following command to view the connected models:
xxxxxxxxxxopenclaw models list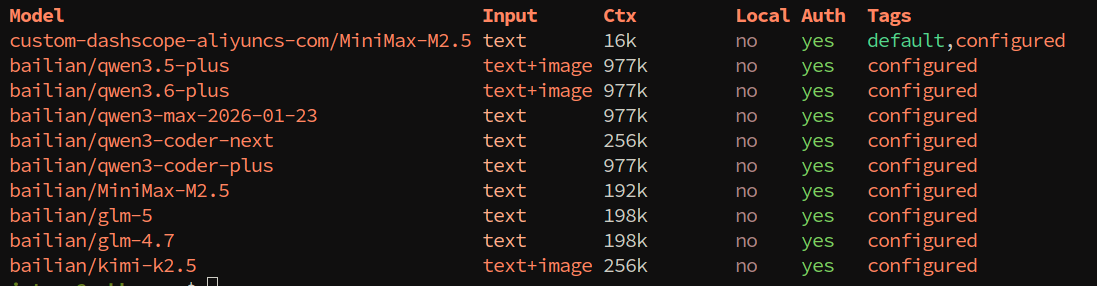
4.2 Verify Whether the Configuration Was Successful
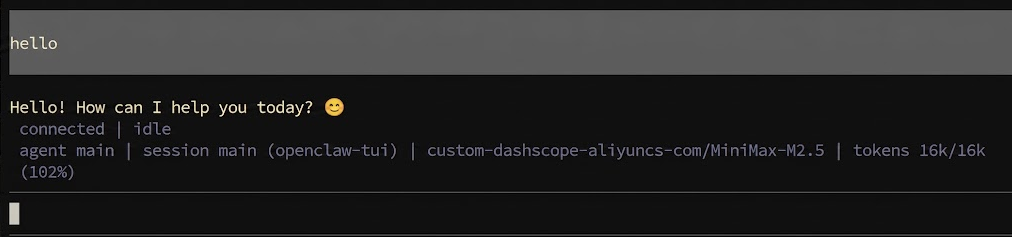
Test conversation
xxxxxxxxxxopenclaw tuiLaunch the TUI interface, send a test message (such as "Hello"), and confirm that the model responds normally.
5. Other Ways to Connect
- If you have your own model provider or need to connect other model providers later, refer to the following tutorials
5.1 CLI Command Configuration (Suitable for Beginners)
Start the configuration wizard
xxxxxxxxxxopenclaw onboard
- Select 【Yes】 and press Enter
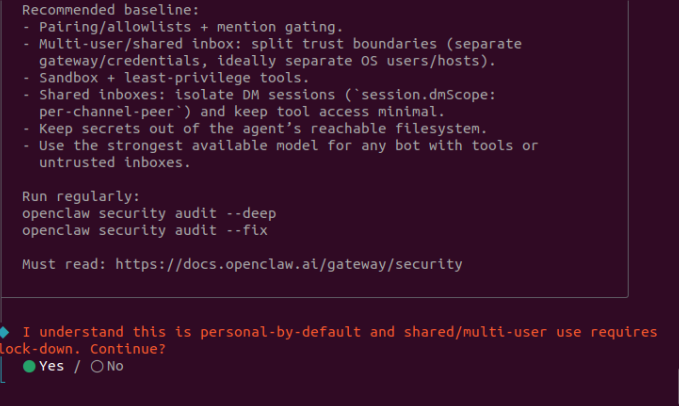
- Select QuickStart as the configuration mode and press Enter

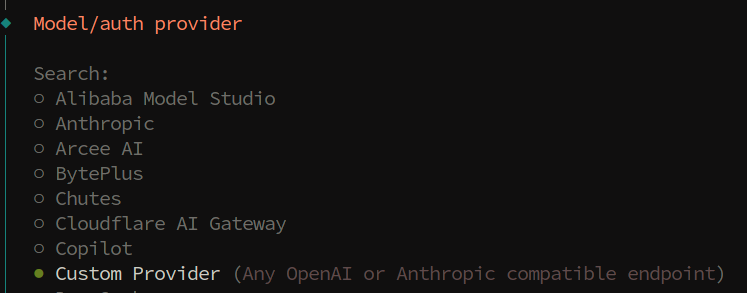
Select the model service provider
- Use the up/down arrow keys to select the provider for which you have applied for an API-KEY, and press Enter to confirm. Here, the Alibaba Cloud Bailian model provider is used as an example; the configuration process is the same for other model providers.
- Here, select the custom provider 【Custom Provider】
- Fill in the model provider's base_url

- Enter the API-KEY
- After selecting the provider, the system will prompt you to enter the corresponding API-KEY

- Paste or enter the API-KEY you applied for, then press Enter to confirm

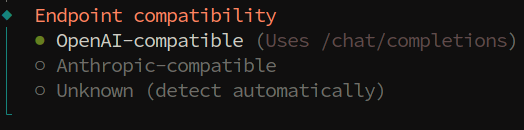
- Select OpenAI-compatible as the API protocol
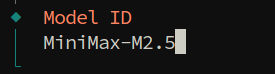
- Fill in the model name; here, MiniMax is used as an example
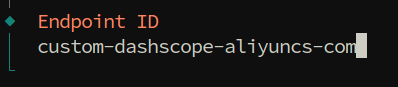
- Endpoint ID is an identifier for the model provider and can be filled in freely
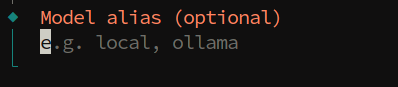
- Leave Model alias (optional) blank directly
- Other configurations
- Select skip for all other configuration items as shown in the figures below; they do not need to be configured
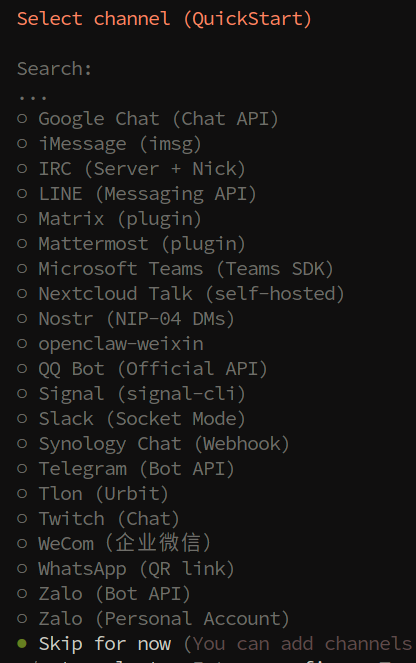
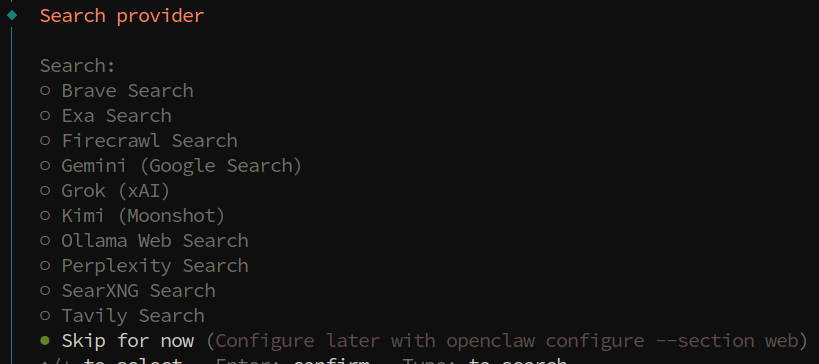
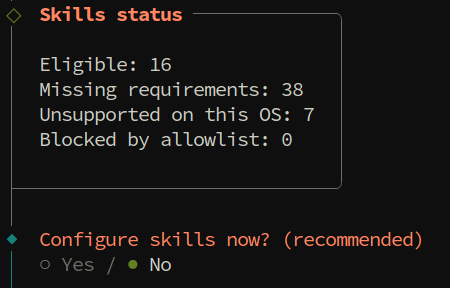
- For Enable Hooks, press Space to select Skip for now
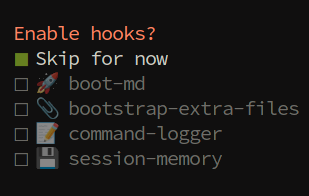
- Select Restart to restart the gateway and apply the configuration
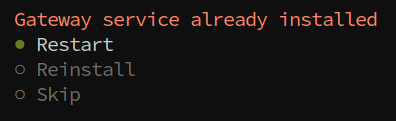
5.2 Modifying the Configuration File (Recommended Method)
Configuration File Location
- The configuration file is located at:
$HOME/.openclaw/openclaw.json
Editing the Configuration File
xxxxxxxxxxnano $HOME/.openclaw/openclaw.json# Or use your preferred editor, such as vim, code, etc. It is recommended to edit with an IDE like VS Code for more convenienceAdd the model provider configuration
Add or modify the
models.providerssection in the configuration file. Refer to the format below; you can also refer to the configuration format of the factory-default bailian provider:xxxxxxxxxx{"models": {"providers": {"openai": {"apiKey": "OPENAI_API_KEY"},"anthropic": {"apiKey": "ANTHROPIC_API_KEY"},"google": {"apiKey": "GOOGLE_API_KEY"}}},"agents": {"defaults": {"model": {"primary": "openai/gpt-4"}}}}
Save and exit
- Press
Ctrl+Oto save andCtrl+Xto exit (nano editor)
- Press
Factory-default Bailian configuration (you can modify it directly or use it as a reference)
xxxxxxxxxx "bailian": { "baseUrl": "https://dashscope.aliyuncs.com/compatible-mode/v1", "apiKey": "sk-a87e1137b17b4a35af13aaxxxxxxx", "api": "openai-completions", "models": [ { "id": "qwen3.5-plus", "name": "qwen3.5-plus", "api": "openai-completions", "reasoning": false, "input": [ "text", "image" ], "cost": { "input": 0, "output": 0, "cacheRead": 0, "cacheWrite": 0 }, "contextWindow": 1000000, "maxTokens": 65536 }, { "id": "qwen3.6-plus", "name": "qwen3.6-plus", "api": "openai-completions", "reasoning": false, "input": [ "text", "image" ], "cost": { "input": 0, "output": 0, "cacheRead": 0, "cacheWrite": 0 }, "contextWindow": 1000000, "maxTokens": 65536 }, { "id": "qwen3-coder-next", "name": "qwen3-coder-next", "api": "openai-completions", "reasoning": false, "input": [ "text" ], "cost": { "input": 0, "output": 0, "cacheRead": 0, "cacheWrite": 0 }, "contextWindow": 262144, "maxTokens": 65536 }, { "id": "MiniMax-M2.5", "name": "MiniMax-M2.5", "api": "openai-completions", "reasoning": false, "input": [ "text" ], "cost": { "input": 0, "output": 0, "cacheRead": 0, "cacheWrite": 0 }, "contextWindow": 196608, "maxTokens": 32768 }, { "id": "glm-5", "name": "glm-5", "api": "openai-completions", "reasoning": false, "input": [ "text" ], "cost": { "input": 0, "output": 0, "cacheRead": 0, "cacheWrite": 0 }, "contextWindow": 202752, "maxTokens": 16384, "compat": { "thinkingFormat": "qwen" } }, { "id": "glm-4.7", "name": "glm-4.7", "api": "openai-completions", "reasoning": false, "input": [ "text" ], "cost": { "input": 0, "output": 0, "cacheRead": 0, "cacheWrite": 0 }, "contextWindow": 202752, "maxTokens": 16384, "compat": { "thinkingFormat": "qwen" } }, { "id": "kimi-k2.5", "name": "kimi-k2.5", "api": "openai-completions", "reasoning": false, "input": [ "text", "image" ], "cost": { "input": 0, "output": 0, "cacheRead": 0, "cacheWrite": 0 }, "contextWindow": 262144, "maxTokens": 32768, "compat": { "thinkingFormat": "qwen" } } ] }
6. Common Problems and Solutions
Problem: After configuration, a prompt indicates that the API-KEY is invalid or authentication failed
- Confirm that the API-KEY is correct (be careful not to have extra spaces)
- Check whether the API-KEY has expired or been disabled
- Confirm that the account balance is sufficient (some providers require prepayment)
Problem: The configuration is correct but the model service cannot be connected
- Check whether the network connection is normal
- Confirm whether the network in your country/region can access the service
- Try switching to another model service provider for testing