Welcome to MicroROS V2 Robot Car repository
6. Change Ubuntu System Language to English
How to Change the Ubuntu System Language to English
This tutorial applies to Ubuntu with the GNOME desktop environment and shows how to switch the system interface language from Chinese to English.
Step 1: Open the Settings Menu
Click the system status area in the top-right corner of the desktop (where the time, volume, and power icons are shown). In the pop-up menu, click “Settings” (the gear icon).
Alternatively, click “Show Applications” in the bottom-left corner and search for “Settings”.
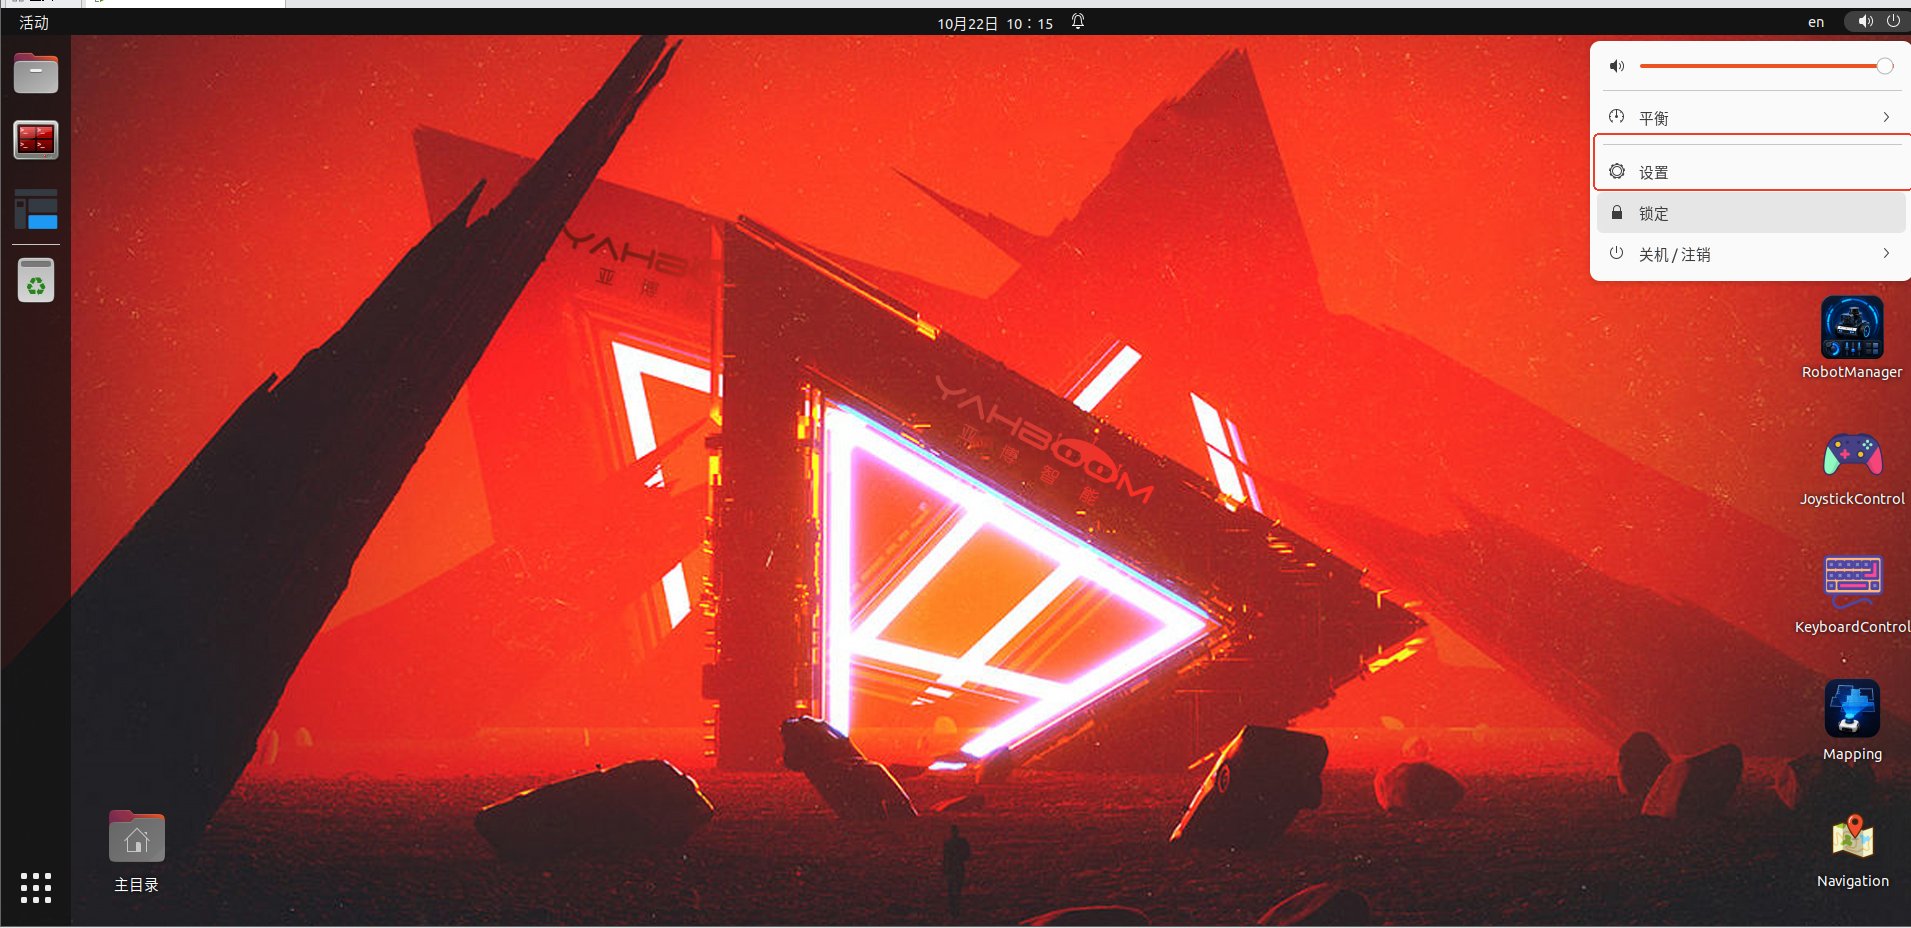
Step 2: Go to “Region & Language”
In the Settings window, find and click “Region & Language” (区域与语言) in the left sidebar.
On the right panel you will see:
Language: the language used by windows and web pages (currently “汉语” / Chinese)
Formats: the format used for numbers, dates, and currencies (currently “美国” / US)
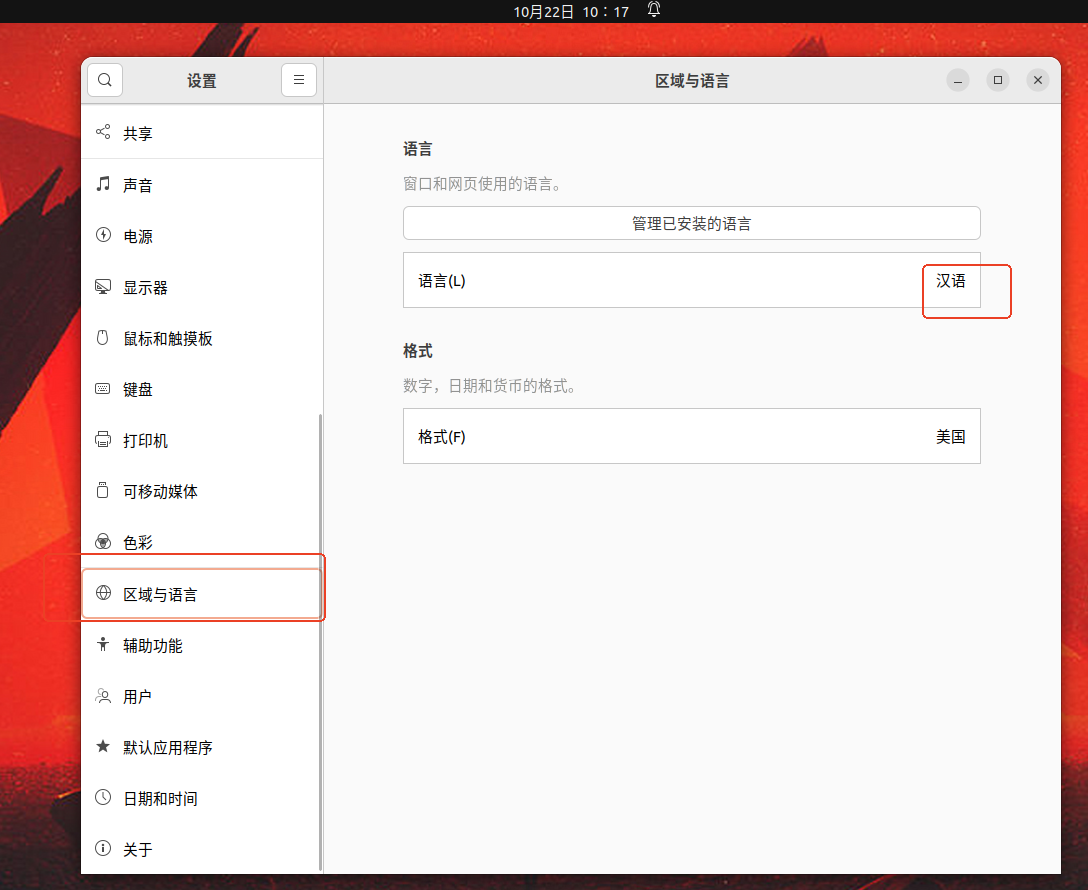
Step 3: Select English (United States)
Click the “Language” row (currently showing “汉语”).
In the pop-up “Select a Language” list, choose “英语 — 美国” (English — United States). American English is recommended, but you may also choose English (Canada), English (Australia), or English (United Kingdom) depending on your needs.
Click the green “Select” button in the top-right corner of the dialog to confirm.
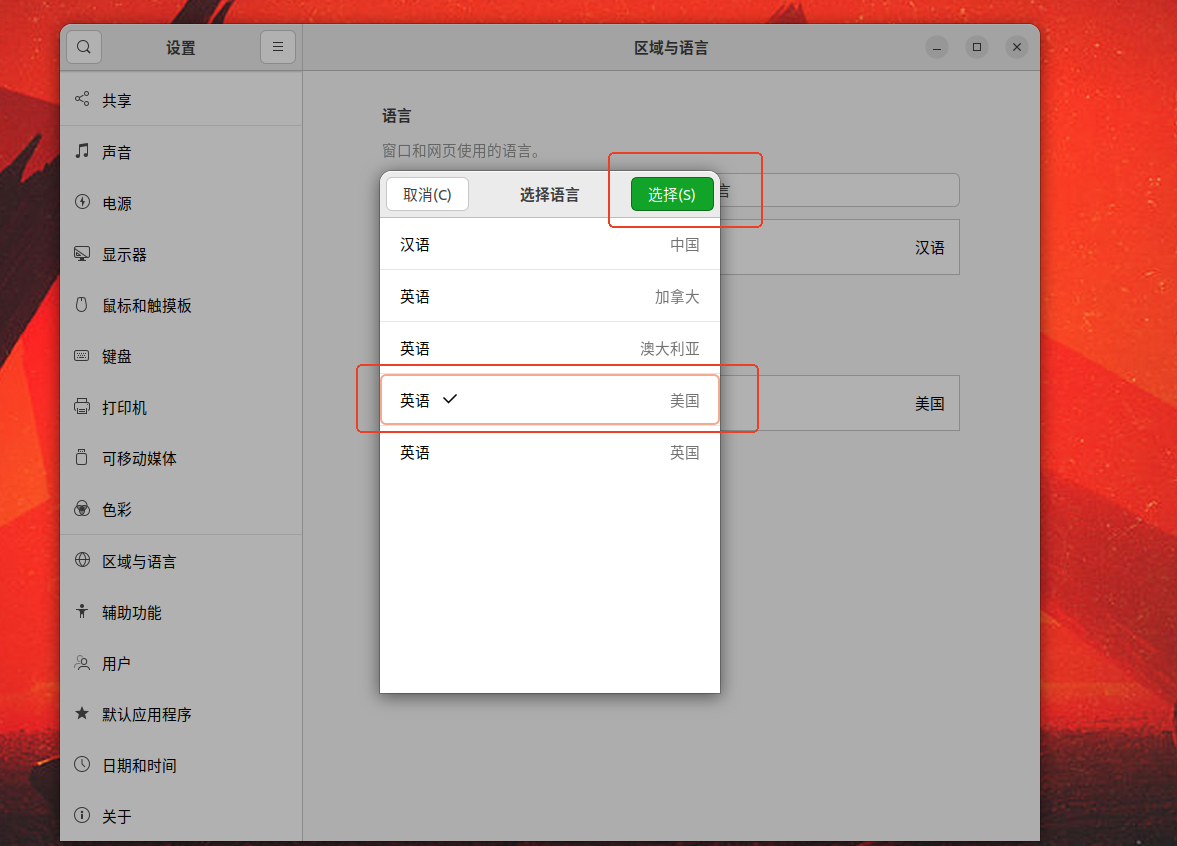
Step 4: Restart the Session to Apply Changes
After selecting the language, the Language row shows the message “Restart the session for changes to take effect” with a green “Restart…” button on the right. Click this button.
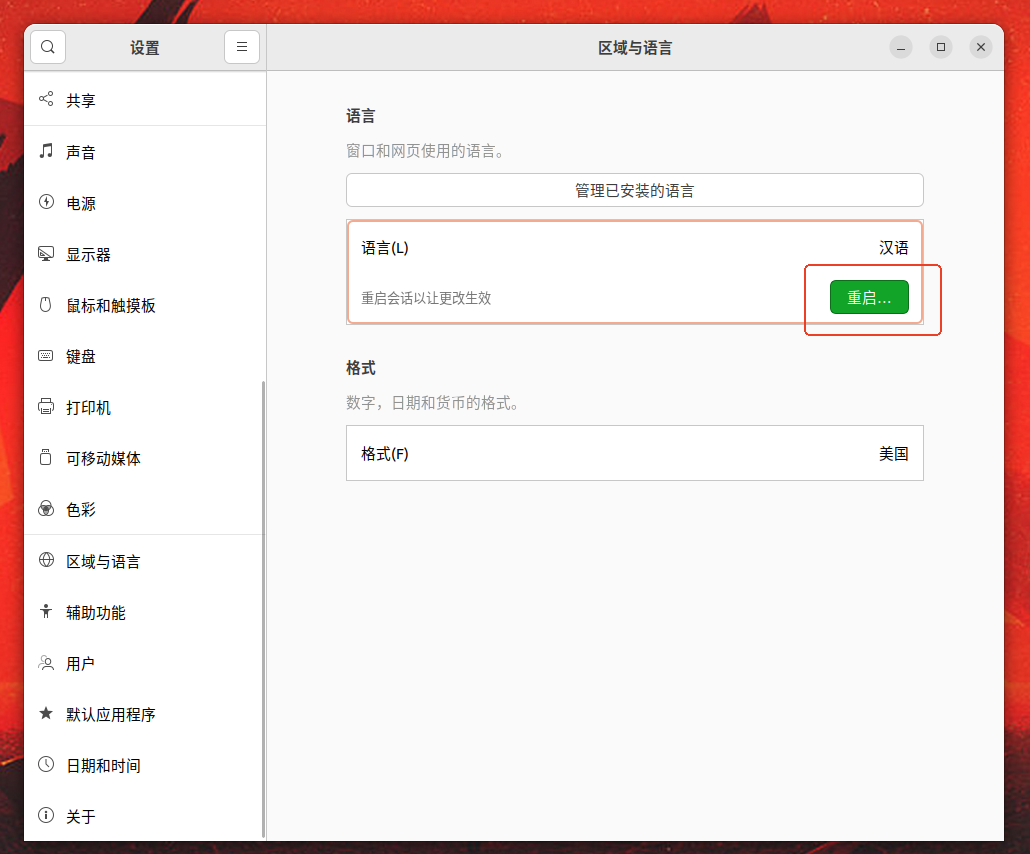
Step 5: Log Out and Log Back In
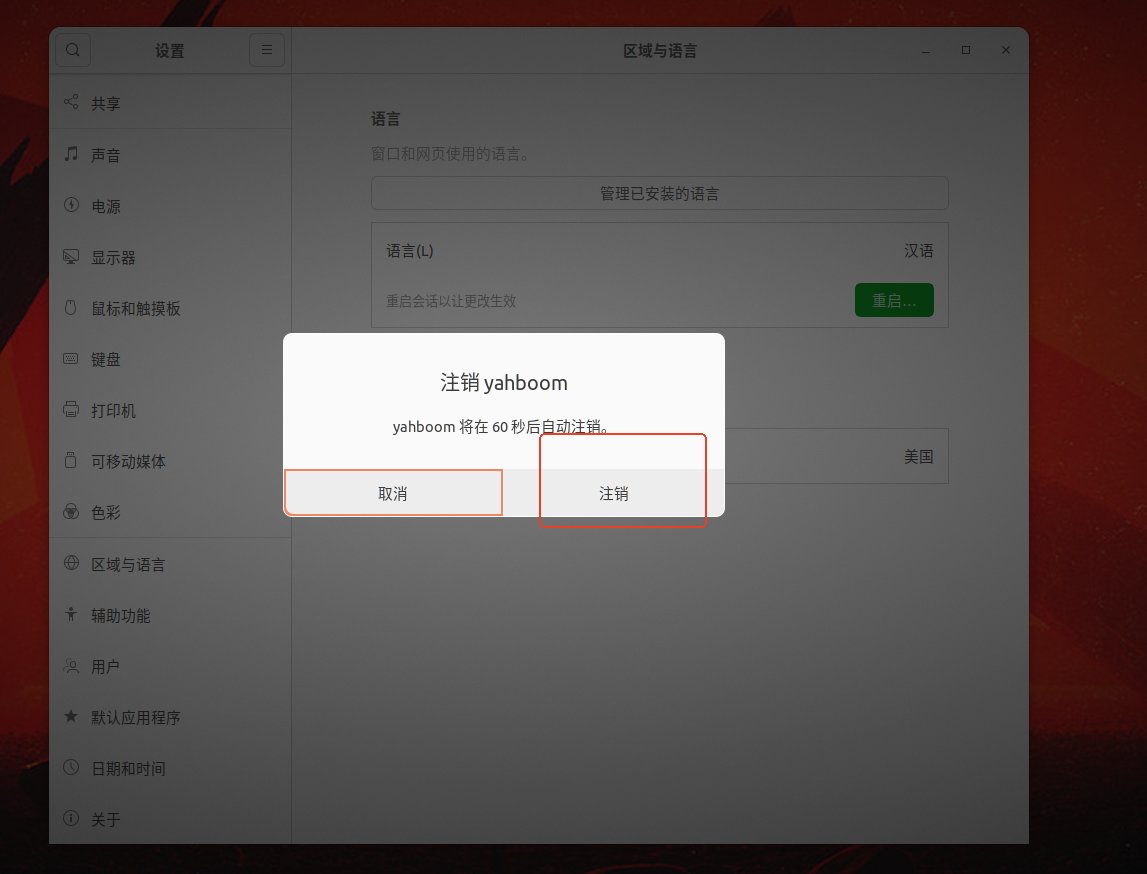
A confirmation dialog appears:
“yahboom will automatically log out in 60 seconds.”
Click “Log Out” (注销) to log out immediately, or click “Cancel” and log out manually later.
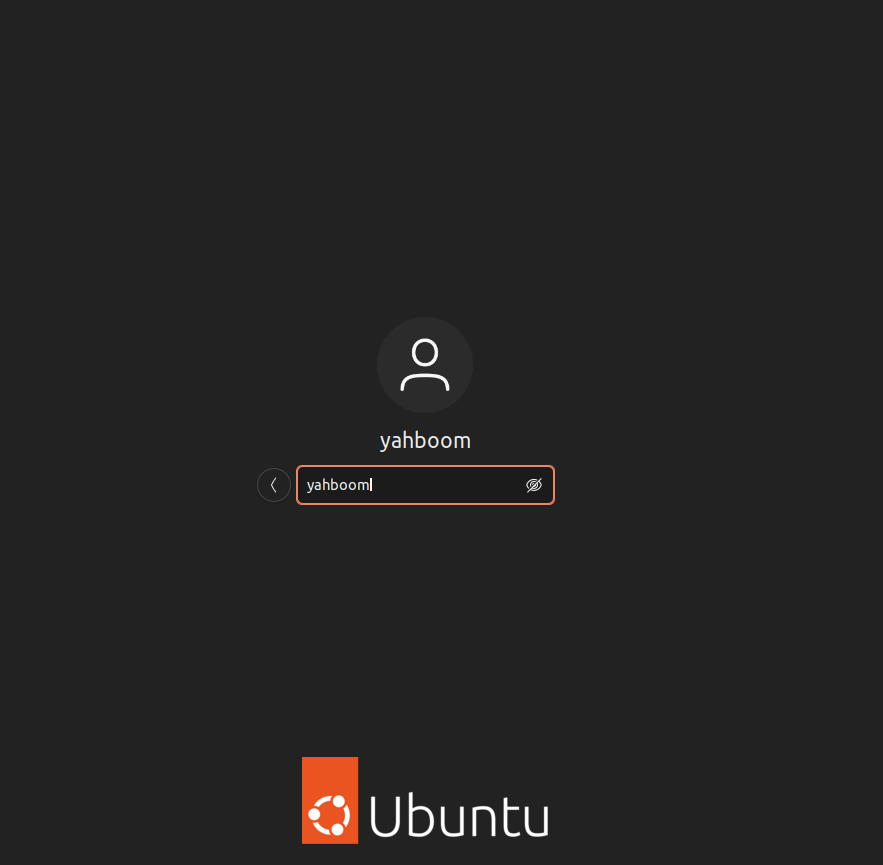
At the login screen, enter your user password and log back in.
Step 6: Done
After logging back in, the entire system interface (menus, Settings, Files, etc.) will be displayed in English.