Welcome to Jetson Orin NANO Developer Kit repository
01.YOLO environment construction
YOLO Environment Setup
YOLO Environment Setup1. System Information2. Preparation3. Installing Ultralytics4. Configuring GPU Acceleration4.1. PyTorch GPU Environment4.2. Torchvision Missing the nvJPEG Runtime Library5. Verifying the InstallationCommon ErrorsCannot uninstall sympySymptomSolutionCSI Camera Cannot Be AccessedVerifying the EnvironmentReferences
pip Installation Note: Ubuntu 24.04 marks the system Python as "externally managed" per PEP 668, so installing directly with pip may raise
externally-managed-environment. This tutorial installs to the current user directory using--user --break-system-packages. Virtual environments generally do not need these flags.
1. System Information
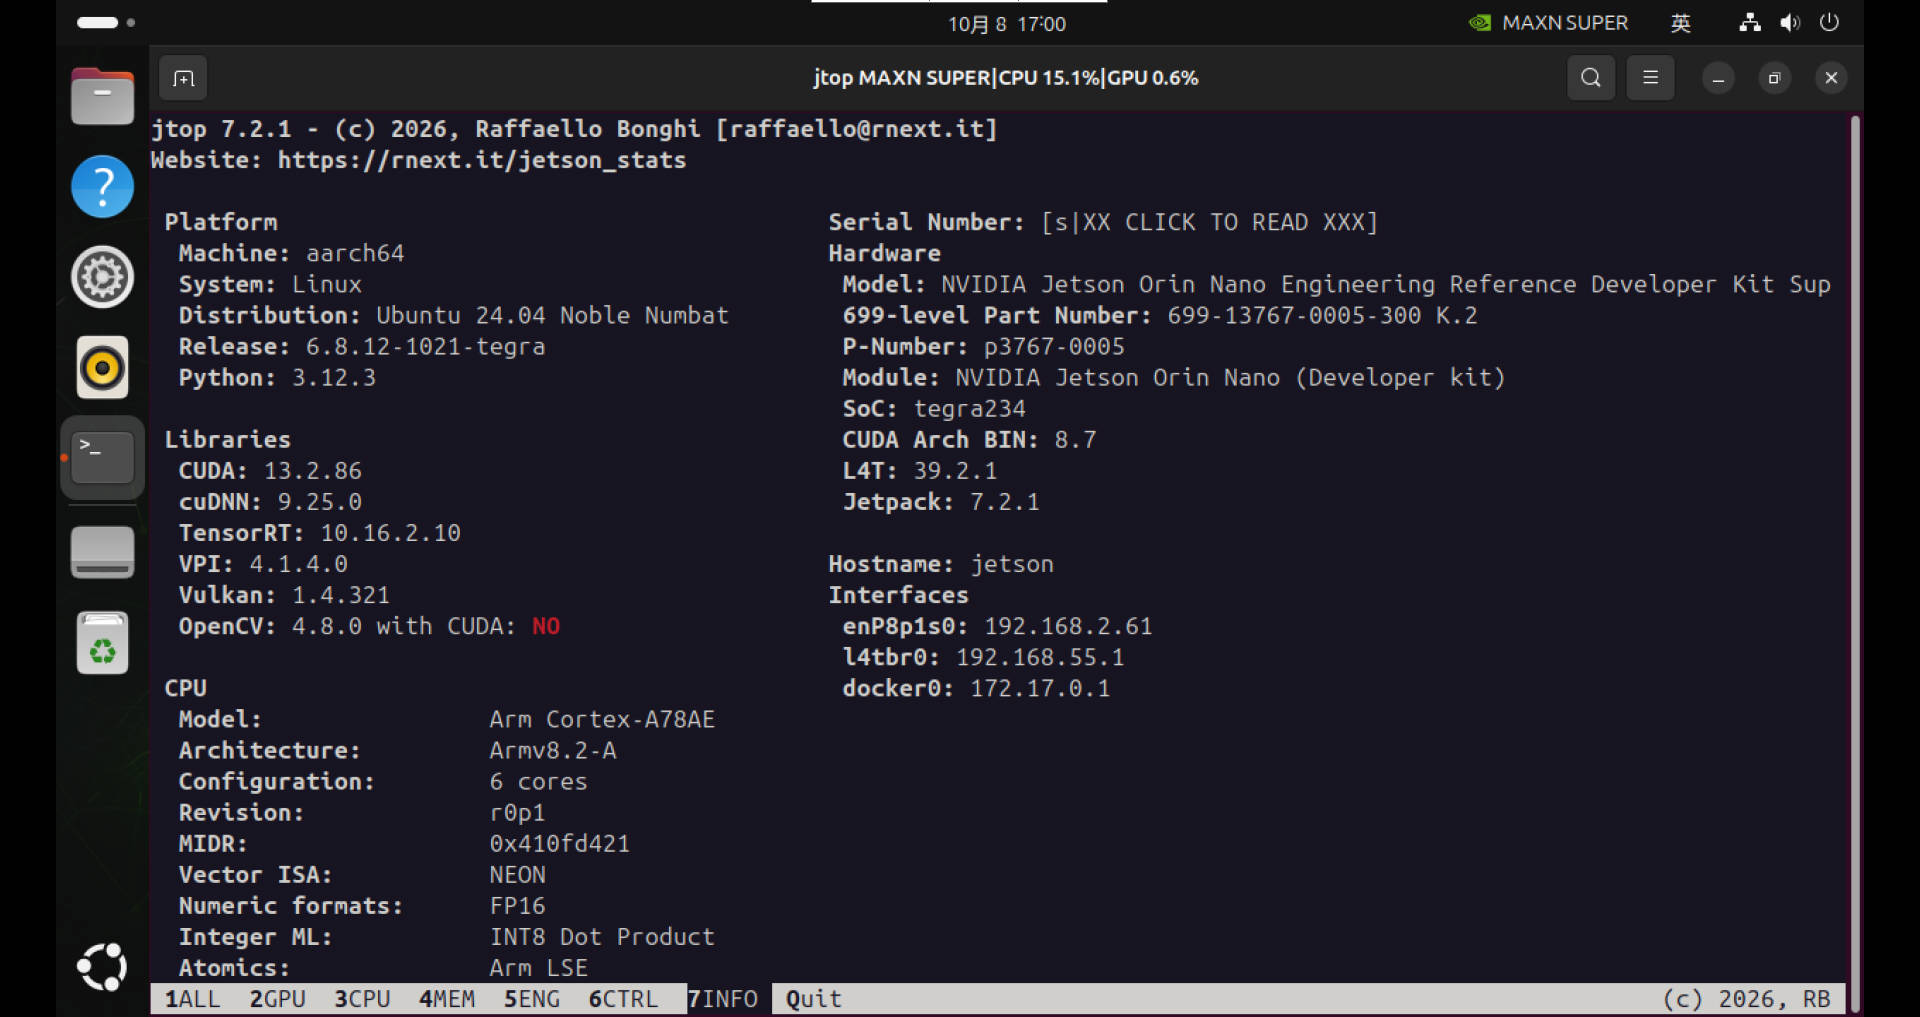
Applicable environment: Jetson Orin Nano Super, JetPack 7.2.1 / L4T R39.2.1, Ubuntu 24.04, Python 3.12.
This tutorial uses the bundled Ultralytics 8.3.55 source code and reuses PyTorch 2.8.0, Torchvision 0.23.0, and the system OpenCV already configured in earlier tutorials. The system's default CUDA toolkit is 13.2, while the current PyTorch build uses CUDA 12.9; the two do not need to share the same version number.
2. Preparation
Note: If the factory image already includes the environment for this tutorial, you only need to perform the verification in Section 5. When setting up the system yourself, first complete the earlier PyTorch and Torchvision environment setup, then perform the installation steps. The commands below are run in the Jetson terminal.
Check the existing frameworks:
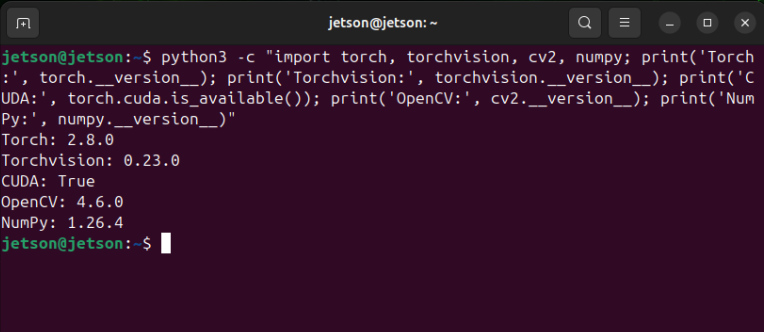
python3 -c "import torch, torchvision, cv2, numpy; print('Torch:', torch.__version__); print('Torchvision:', torchvision.__version__); print('CUDA:', torch.cuda.is_available()); print('OpenCV:', cv2.__version__); print('NumPy:', numpy.__version__)"The expected results are PyTorch 2.8.0, Torchvision 0.23.0, CUDA True, and NumPy 1.26.4. OpenCV uses the version provided by the current system; the GStreamer support required by CSI cameras is covered under Common Errors. If an import fails or CUDA is False, fix the framework environment first instead of trying to fix it by installing YOLO dependencies.
Install pip:
xxxxxxxxxxsudo apt updatesudo apt install -y python3-pipThis tutorial reuses existing basic dependencies such as matplotlib, pillow, pyyaml, requests, scipy, psutil, and pandas. You can check them first:
xxxxxxxxxxpython3 -c "import matplotlib, PIL, yaml, requests, scipy, psutil, pandas; print('Basic dependencies importable')"If a module is reported missing, install that dependency first. The --no-deps installation method used in this tutorial does not automatically install missing dependencies, so it is not suitable for a clean system whose basic frameworks are not yet prepared.
3. Installing Ultralytics
Copy ultralytics.zip from the bundled materials to the Jetson and extract it to the current user's home directory. After extraction, confirm that ~/ultralytics/pyproject.toml exists; the directory should also contain the ultralytics/ source subdirectory.
If ~/ultralytics already contains source code or training data, do not overwrite it directly; first check the current version and the purpose of the directory. The bundled source code is version 8.3.55.
Enter the source directory, install the basic dependencies, and install the package:
xcd ~/ultralytics
python3 -m pip install --user --break-system-packages --no-deps \ tqdm py-cpuinfo seaborn ultralytics-thop
python3 -m pip install --user --break-system-packages --no-deps -e .
export PATH="$HOME/.local/bin:$PATH"--no-deps prevents pip from automatically replacing the currently verified PyTorch, Torchvision, and system OpenCV; -e . means the local source code is used directly, so later source modifications take effect.
The export only applies to the current terminal. If a new terminal reports that yolo cannot be found, run that command again, or use ~/.local/bin/yolo directly.
Do not use sudo pip3 install ultralytics[export] as a substitute for the steps above. For 8.3.55, the [export] extra dependencies require installing the old NumPy 1.23.5 on ARM64 and pull in other export frameworks, which does not match the current Python 3.12 environment. After installation as a normal user, no system reboot is needed.
4. Configuring GPU Acceleration
4.1. PyTorch GPU Environment
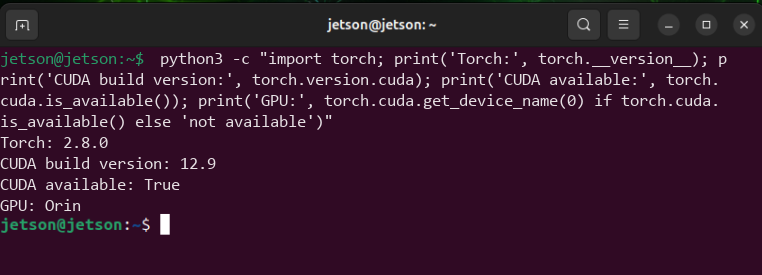
PyTorch 2.8.0 and Torchvision 0.23.0 were already installed and verified earlier.
xxxxxxxxxxpython3 -c "import torch; print('Torch:', torch.__version__); print('CUDA used for build:', torch.version.cuda); print('CUDA available:', torch.cuda.is_available()); print('GPU:', torch.cuda.get_device_name(0) if torch.cuda.is_available() else 'Unavailable')"On Python 3.12, you cannot install PyTorch, Torchvision, or ONNX Runtime wheels whose filenames contain cp310. Whether cuSPARSELt is needed should be determined by the actual PyTorch build dependencies and the current system repositories; it is not included as a standard installation step in this section.
4.2. Torchvision Missing the nvJPEG Runtime Library
If importing Torchvision reports libnvjpeg.so.12: cannot open shared object file, the fix for the current CUDA 12.9 build is:
xxxxxxxxxxsudo apt-get install -y libnvjpeg-12-9sudo ldconfig
ldconfig -p | grep libnvjpegpython3 -c "import torchvision; print(torchvision.__version__)"
If you do not see that error, there is no need to install it again. This step installs the nvJPEG runtime library for CUDA 12.9 and does not require switching the system's default CUDA toolkit.
5. Verifying the Installation
Verify Torch, Torchvision, and NumPy
xxxxxxxxxxpython3 -c "import ultralytics; print(ultralytics.__version__)"python3 -c "import torch; print(torch.__version__); print(torch.cuda.is_available())"python3 -c "import torchvision; print(torchvision.__version__)"python3 -c "import numpy; print(numpy.__version__)"The expected result should match the figure below:

Verify Actual GPU Inference
Run the following, assuming the bundled source includes the yolo11n.pt weights and the bus.jpg image:
xxxxxxxxxxcd ~/ultralyticsls -l yolo11n.pt ultralytics/assets/bus.jpgyolo predict model=yolo11n.pt source=ultralytics/assets/bus.jpg device=0If the weights are missing, restore them from the bundled materials first. The inference log should show CUDA:0 (Orin) and output detection results normally. Results are saved to runs/detect/predict by default, and repeated runs are numbered automatically. This verification generates result images; after use, you can delete the result directory for that run.
Showing only torch.cuda.is_available() = True does not mean actual YOLO inference has passed, nor does it prove that ONNX Runtime is using the GPU.
Common Errors
Cannot uninstall sympy
Symptom
When installing or upgrading frameworks, a message says sympy cannot be uninstalled.
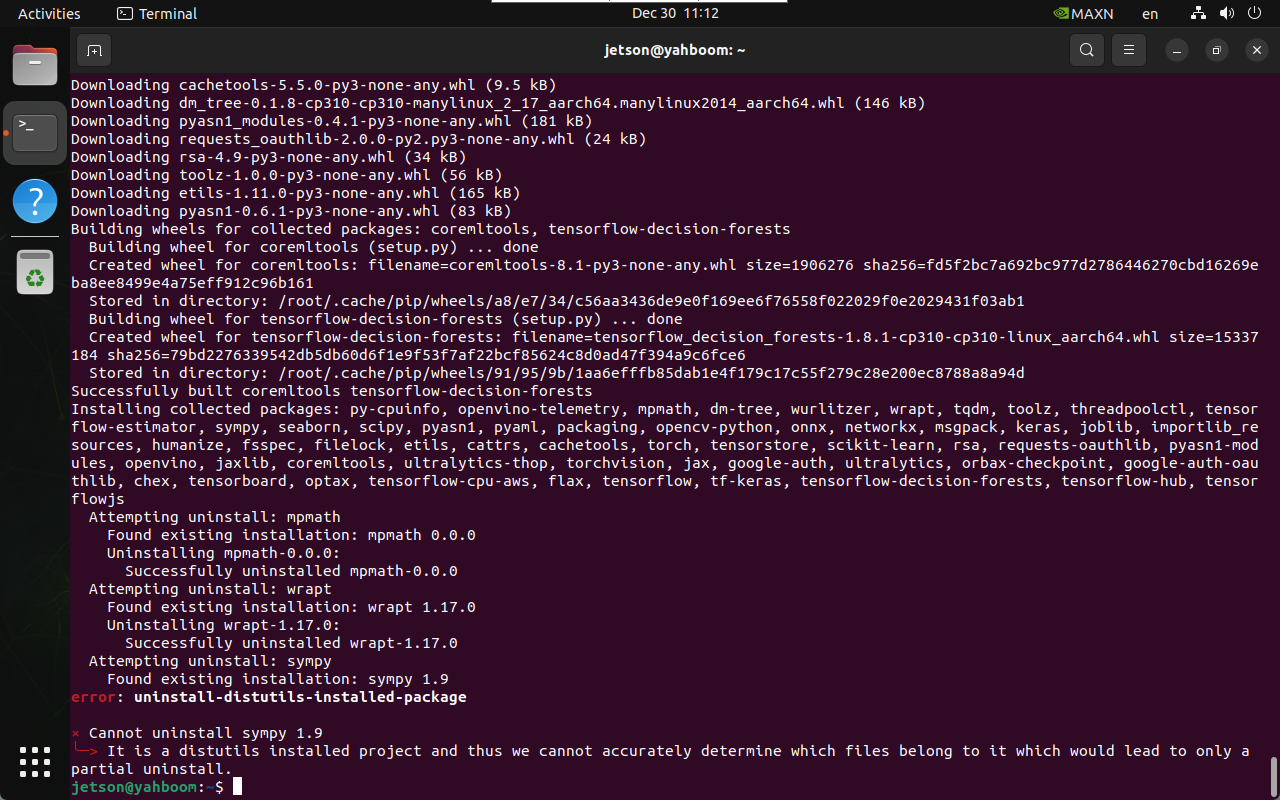
The figure above shows an example of this error in an older environment.
Solution
First confirm whether the command being executed is attempting to reinstall PyTorch or another framework. This tutorial uses a user-level --no-deps installation that reuses existing dependencies and does not require uninstalling the system python3-sympy.
xxxxxxxxxxpython3 -m pip show sympypython3 -c "import sympy; print(sympy.__version__); print(sympy.__file__)"If there is indeed a version conflict, determine the required version and installation location from the error before resolving it; do not uninstall the system sympy directly, as this may remove other APT packages along with it.
CSI Camera Cannot Be Accessed
First check whether OpenCV supports GStreamer, whether the camera device exists, and whether it is occupied by another program:
xxxxxxxxxxpython3 -c "import cv2; print(cv2.__version__); print(cv2.__file__); print(cv2.getBuildInformation())" | grep -E 'GStreamer|GUI|site-packages|dist-packages'ls -l /dev/video*sudo fuser -v /dev/video0systemctl status nvargus-daemon --no-pager/dev/video0 is only a common example; the actual number should be chosen based on the device check results. If GStreamer: YES is shown, there is no need to recompile OpenCV just for YOLO.
Programs such as the ROS 2 camera_csi may be occupying the CSI camera. After confirming the occupying program, exit the corresponding camera application normally before testing YOLO; do not kill unknown processes directly. When connected via SSH without a graphical display environment, the inability to show a window does not by itself indicate a camera driver failure.
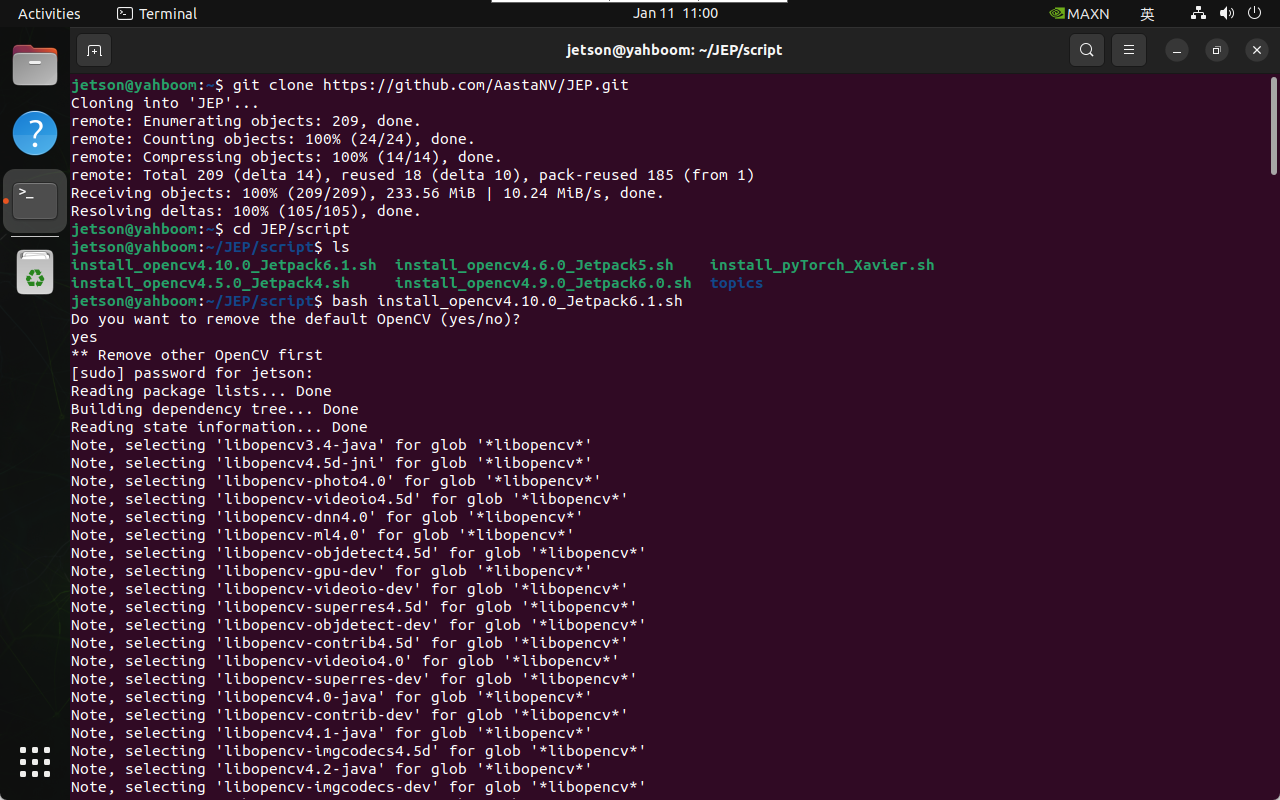
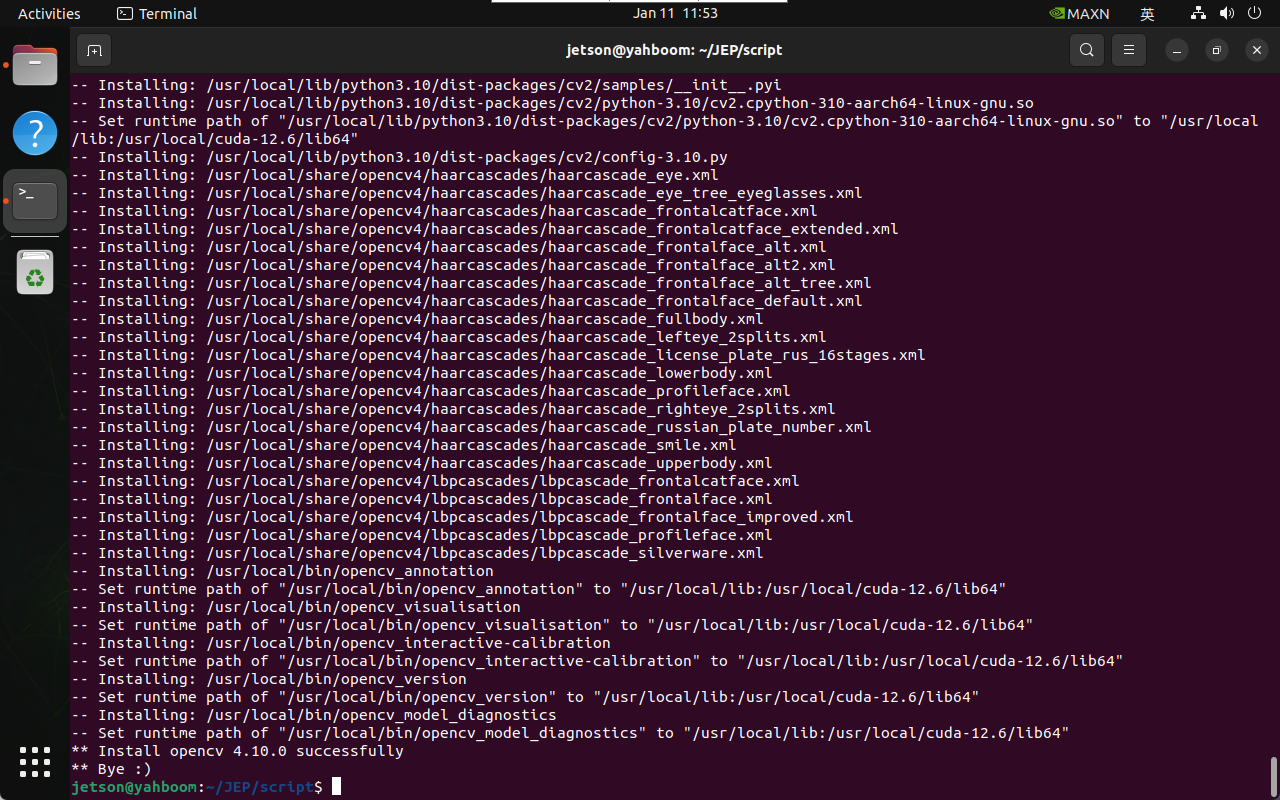
The following images are references for an older OpenCV compilation process and environment verification, and are not installation steps for the current JetPack 7.2.1. Do not run install_opencv4.10.0_Jetpack6.1.sh in this environment; only after confirming that GStreamer functionality is missing do you need to prepare a compilation plan matching the current JetPack, CUDA, and Python.
Verifying the Environment
xxxxxxxxxxpython3 -c "import cv2; print(cv2.getBuildInformation())" | grep GStreamerpython3 -c "import ultralytics; print(ultralytics.__version__)"python3 -c "import torch; print(torch.__version__); print(torch.cuda.is_available())"python3 -c "import torchvision; print(torchvision.__version__)"python3 -c "import numpy; print(numpy.__version__)"jtop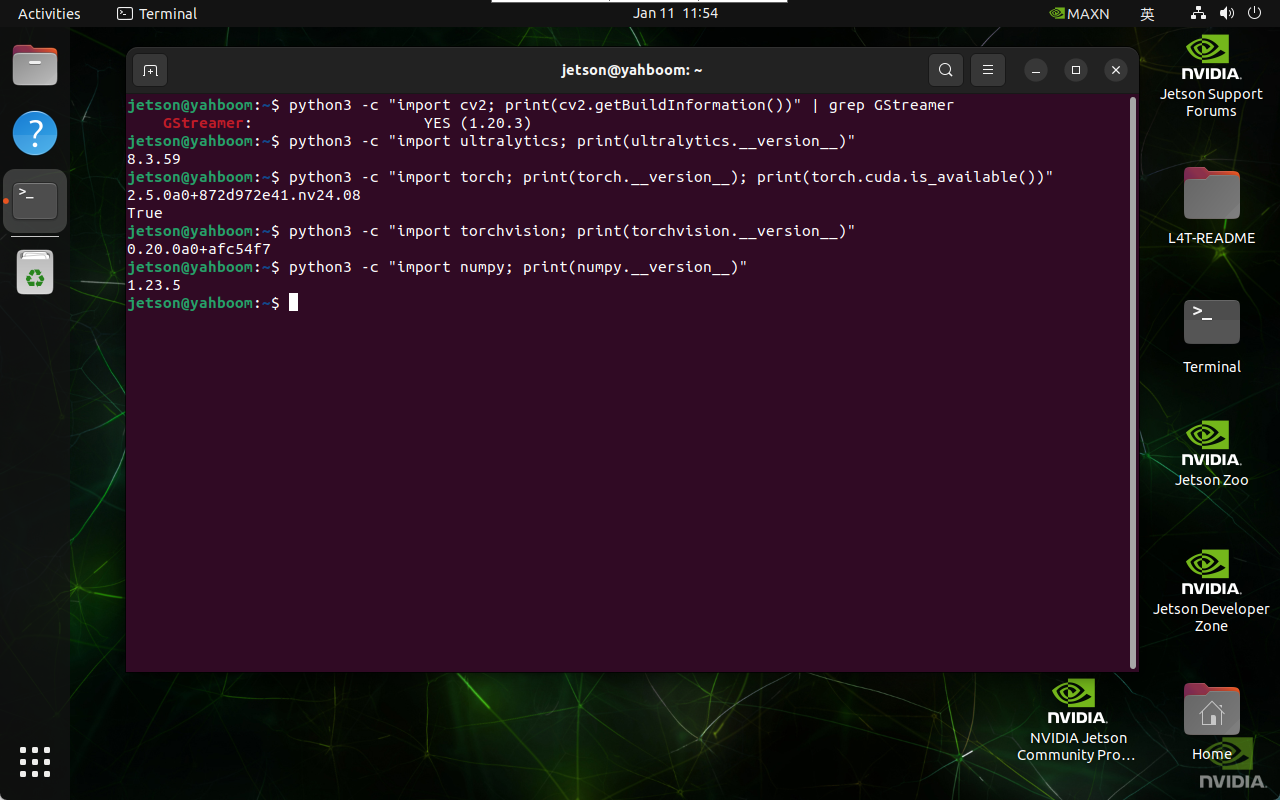
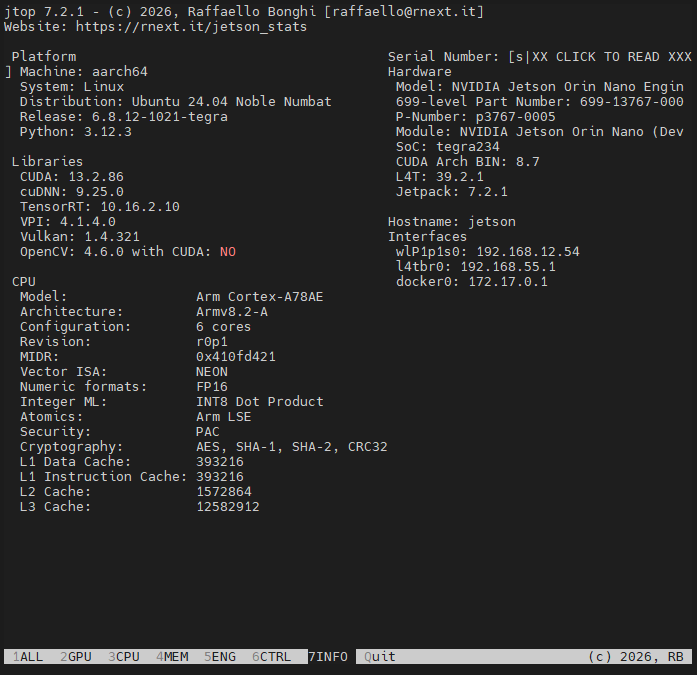
Note: To change opencv_cuda from no to yes, you need to enter the virtual environment and run the following commands:
xxxxxxxxxxsource ~/opencv_cuda/venv/bin/activatejtop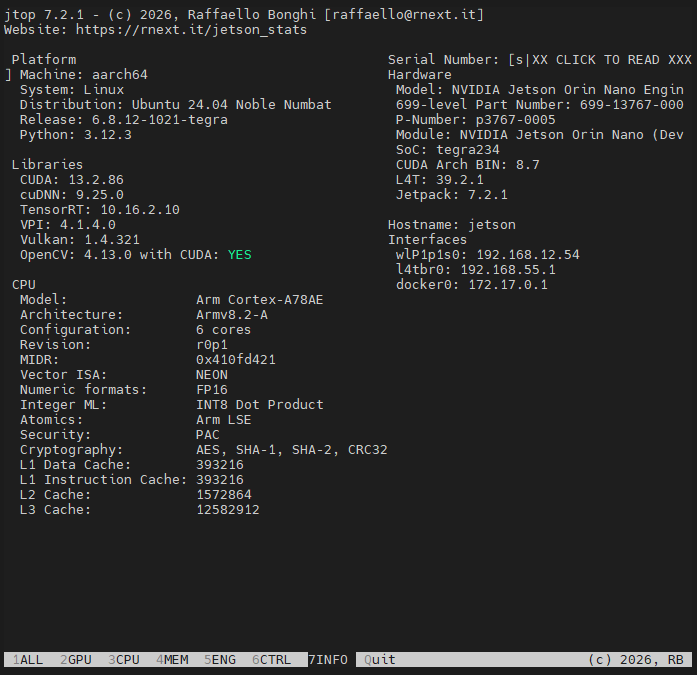
To exit the virtual environment, type the command deactivate in the terminal.